 welcome to flash back thursday! A short series of most popular cards I have posted on my blog! This one is actually more popular than the previuos flash back card, because it was made a couple of years later, and has had the same amount of views and pins etc..It’s all punching and embossing folders ( are we seeing a theme here?)The embossing folder is a stampin up folder, but a lot of the newer folders I have seen would give the same effect,and the lacy cardigan bits are made with my martha stewart lace doily punch.the card base was made with a pale pink cardstock to give the illusion of skin when the green cardstock was folded back.Til tomorrow….
Category: Birthday
Cuttlebug card with some stamping…
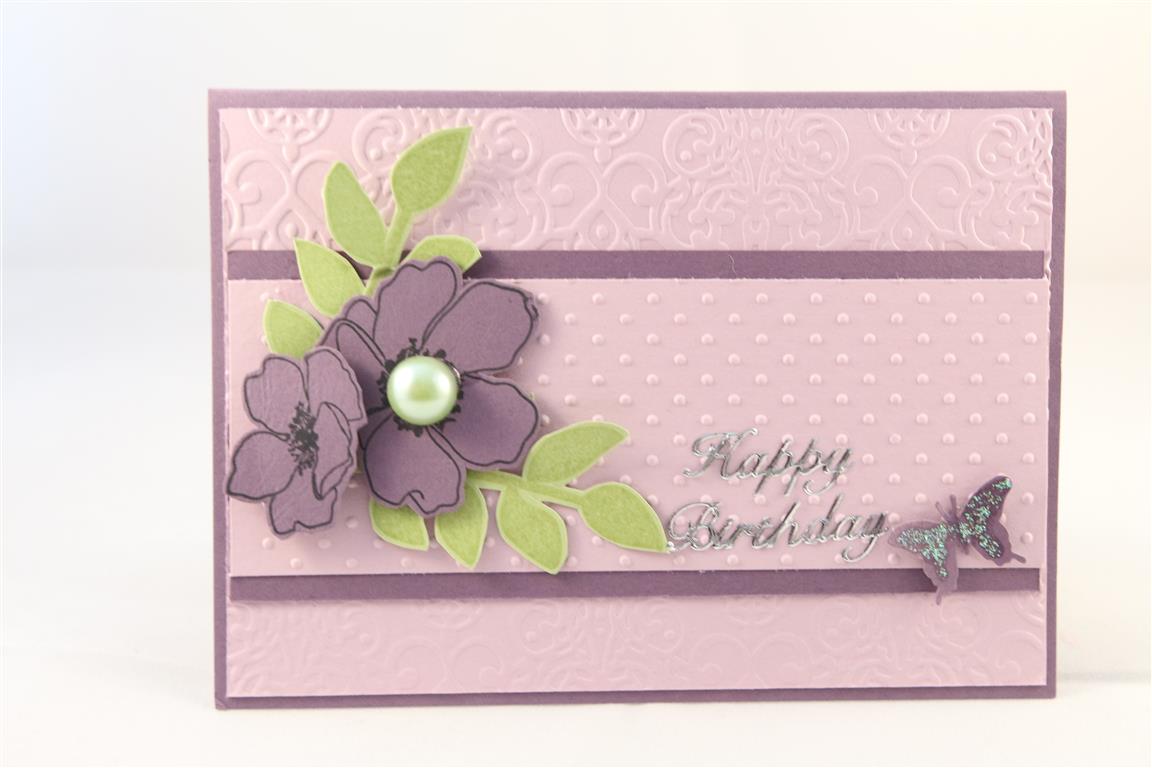 Todays card is a really good basic design that leaves lots of room for improvising. I have layered two shades of purple cardstock, embossing the layers with two different embossing folders and stamped flowers from stampin up fabulous florets stamp set onto more cardstock – no colouring. The leaves are stamped onto green cardstock ( they are stamped using stampin up secret garden stamp) and then all the stamping is fussy cut. if you don’t want to use stamps it would look just as effective with flowers fussy cut from patterned paper or shop bought flowers instead. I used a big green flat backed pearl in the middle of my flower. The butterfly is punched with a martha stewart punch. Til tomorrow…..
Very quick layered card
 Todays card is a very quick and simple layered card, and one which I did for a retirement village lesson. All the papers and cardstock used here are from stampin up but any paper collection would work with this design.So we have the base card and then 4 layers alternating pattern and plain.I die cut a beautiful butterfly and added a strip of rhinestones down its body to finish.I hope you have all had a lovely crafty weekend..til tomorrow…..
Most viewed card…
 Today we are having a flashback thursday! I thought it would be interesting to check out which card has been my most viewed/shared card and it is this one from June of 2011! It was made with stampin up cardstock, and the stampin up blossom party die die set ( still a favourite die of mine)The leaves were done with a stampin up sizzix leaf die, and I used assorted brads to hold the flowers together. very busy day off today , what with shopping and a trip to the dentist, the day is running away from me and not too much time left for the craft room. At least the weekend is in sight! til tomorrow….
happy 1st of spring day!!
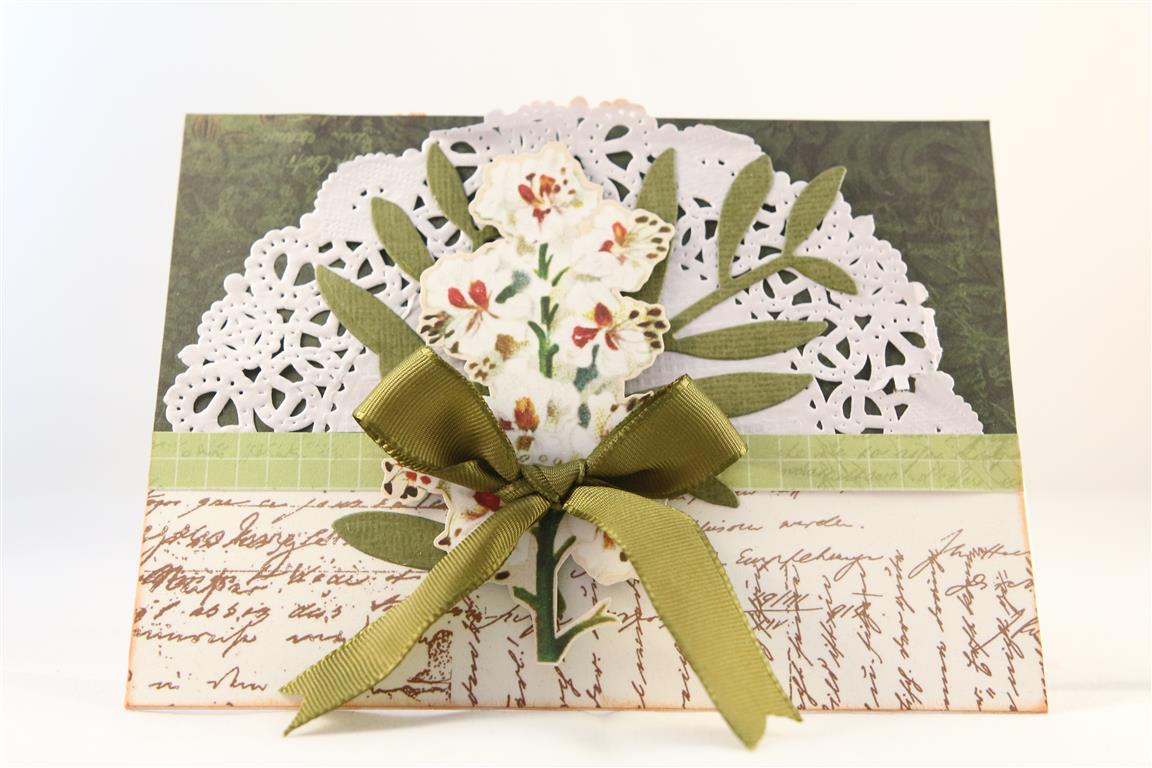 Happy 1st of spring day ( or Autumn day if you are a visitor from the northern hemisphere). the weather here is glorious… my kind of weather, not too hot, sun shining, I can feel my bones thawing out! todays card is made with Kaisercraft botanica collection – the 12 x 12 papers, and I fussy cut the flower stem from some of the paper. Added a doily, ribbon bow and inked all the edges with tea dye ink. This one was a class card,as were the previous two shown. well, time for work, til tomorrow….
Kaisercraft Botanica number 2…
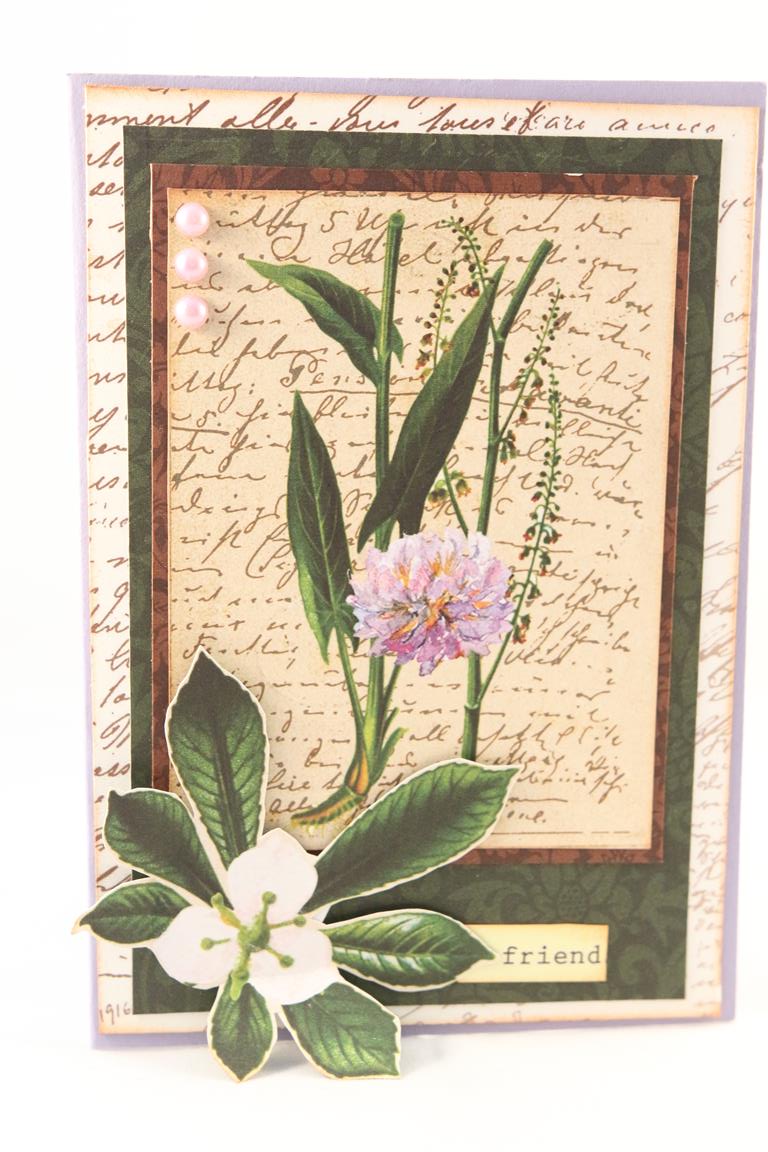 For my second Kaisercraft Botanica card I used a lilac card blank,and did some layering and fussy cutting to finish. the word Friend came from another piece of the same collection. I have spent a little time in the craft room today and I have been making a few more cards with this collection,it is lovely. I have moved on now to some graphic 45 gilded lily cards because I havent made any with all the paper I bought in that collection and thought I had better get started! all in all a great crafty day! Til tomorrow….
Kaisercraft Botanica number 1…
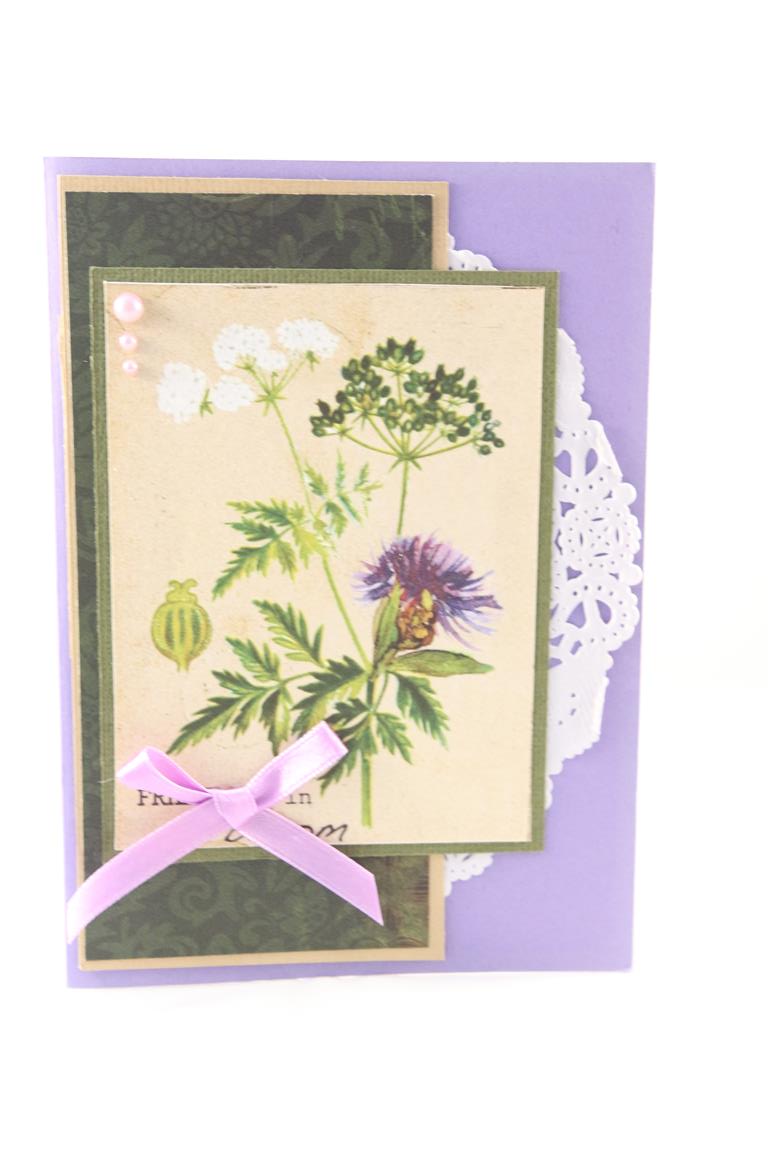 Kaisercraft botanica collection is another collection that I invested in, but have had very little time to play with. I have got a few to show you,based on lessons I did with this paper a couple of months ago, but again, can’t wait to get back to this collection and really get creative. this card… Lilac cardstock for the base card, and some layering with patterned paper and plain cardstock. A doily and ribbon bow to decorate. while I have a minute, I would like to thank all of you that leave comments for me – it is much appreciated! Blogging is a solitary pursuit, and it does mean a lot to me to know that there are a few of you out there reading my efforts! til tomorrow….
Graphic 45 time to celebrate double easel card
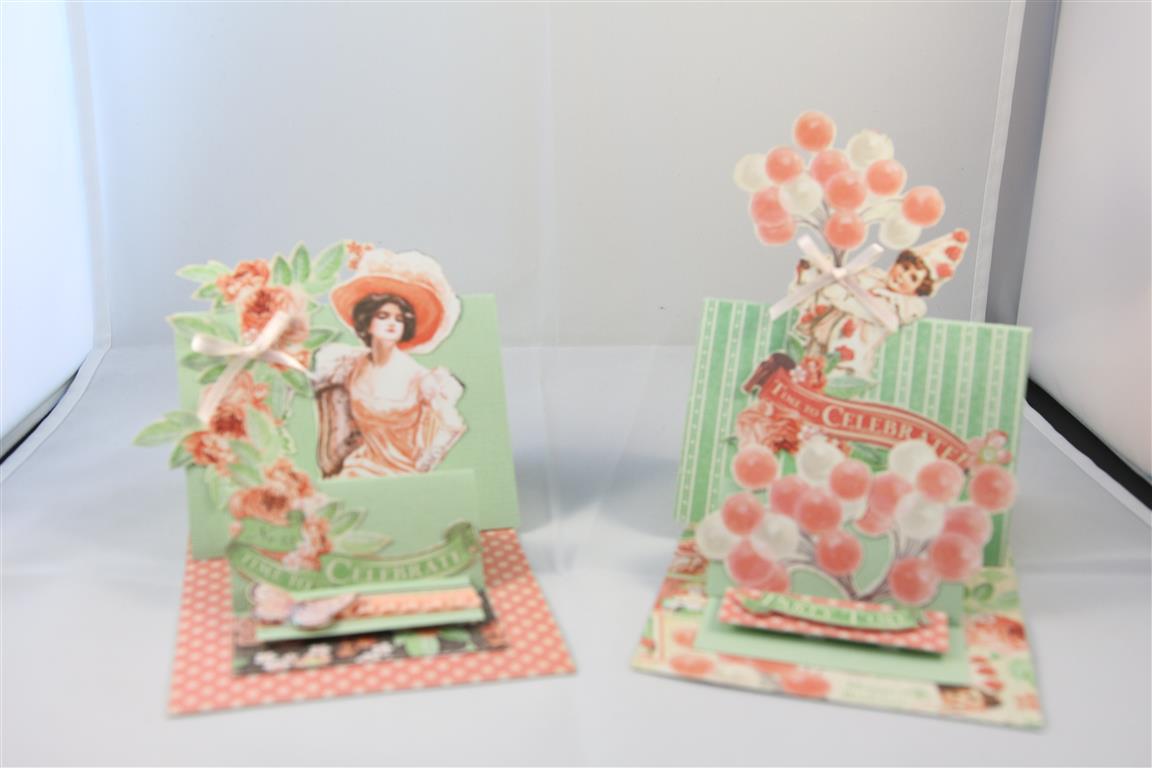 What lovely weather we had for a short time today! It was lovely to feel the sun on my face, although it has grown rather overcast now, I am glad to have had the opportunity to get all my washing dried! I taught a full class of 18 this morning with 5 new cardmakers as well, so I was very busy, but so enjoyable! Talking of classes , todays cards are actually a couple of cards we did in a previous class of mine. Paper is graphic 45 Time to celebrate, and they are double easel cards. No other embellishing necessary, just the papers, a fair bit of fussy cutting, and a couple of ribbon bows.Looking forward to this weekend, when I will be making a start on Octobers lessons. Time is flying – it will be Christmas before we know it, and that will be the theme for October! Til tomorrow….
More fathers day card ideas
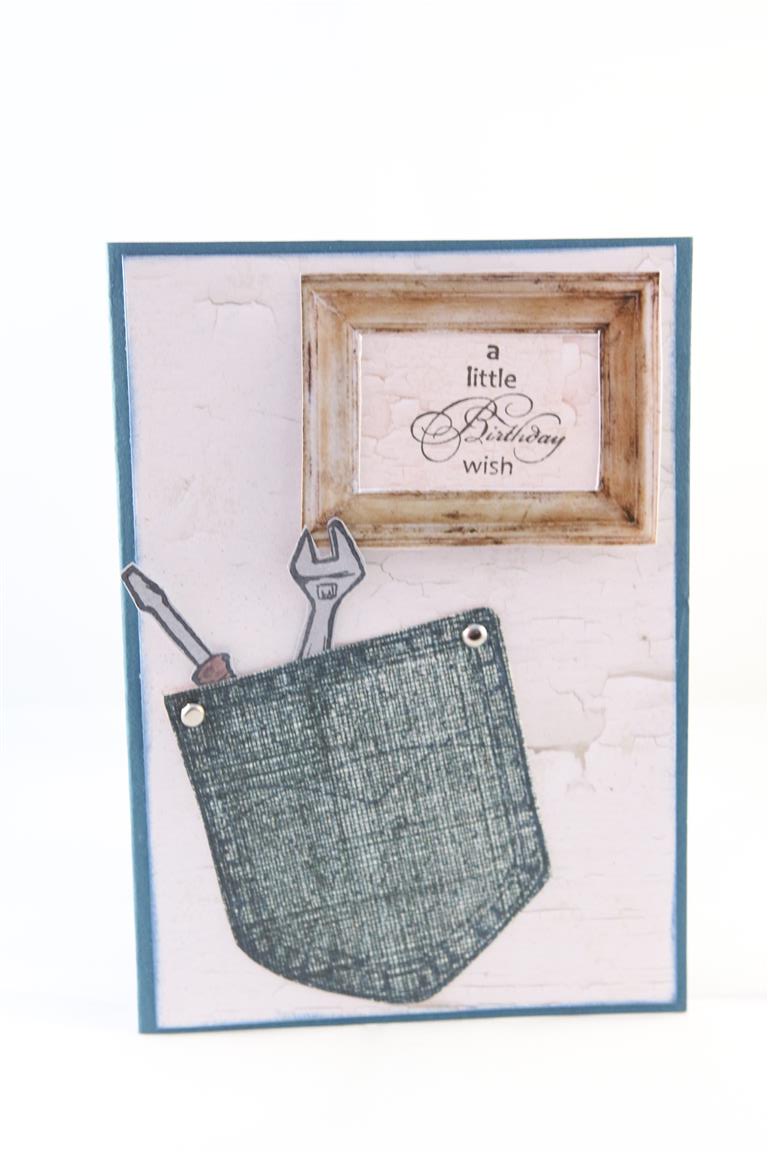
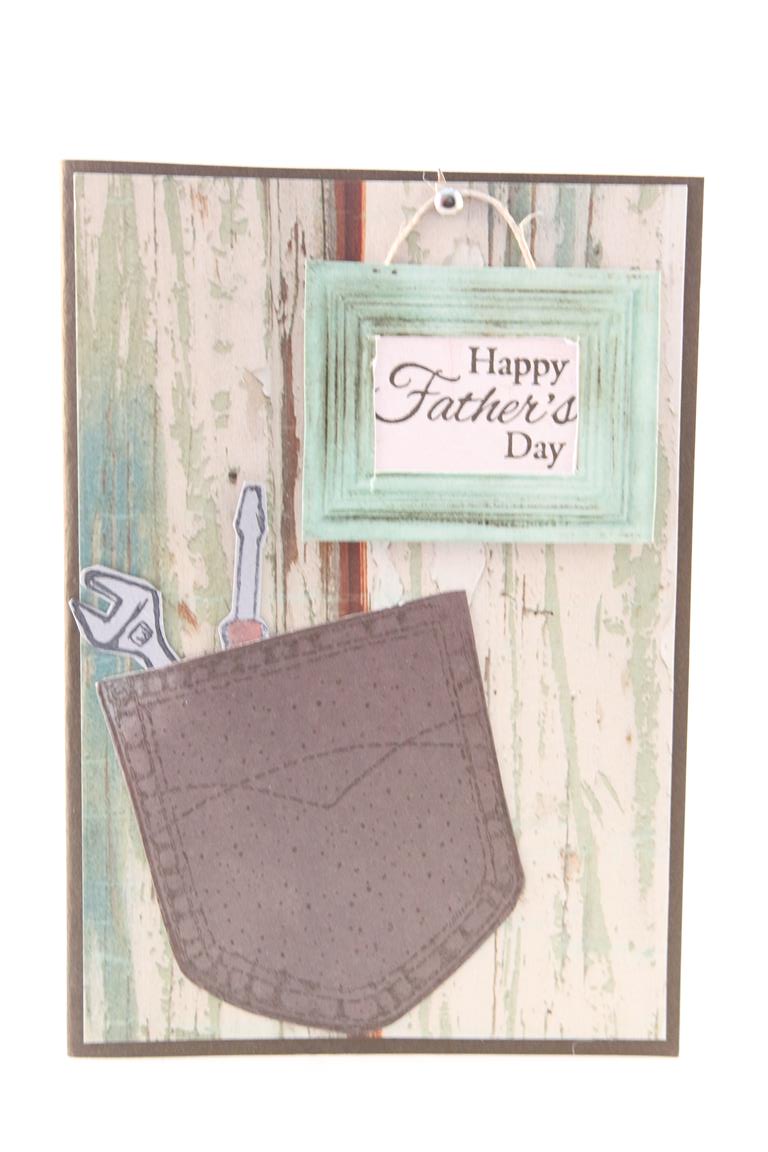 Todays two cards are made with a few different items from my craft room – Kaisercraft blue Bay paper collection ( and I fussy cut the frames from the same collection) a stampin up tool set stamp set, kaszazz pocket stamp stamped onto denim paper by October Afternoon, and a couple of silver brads on the pocket corners.the greetings were stamps pulled from my shelf. Early start today, so early finish and now I am off to catch up on a little sleep – nanna nap time! til tomorrow…
recycled floppy discs….
 The other day Nathan brought me some old floppy discs and asked if I could recycle them. Why, yes.Yes I can. Inside the plastic cover ( which I prised open with a pair of scissors) was this floppy ( the floppy in the name floppy disc) which looked to me just like a miniature record, and so this card idea was born. The papers I used were Crate paper toy box, and I made the record player needle and arm from some silver and black cardstock. there is a silver brad in the middle of the “record” and I punched a silver circle for a volume button. The letter stickers are from the same paper collection. Hopefully Nathan finds more discs, because I really enjoyed making these cards! Til tomorrow…..
