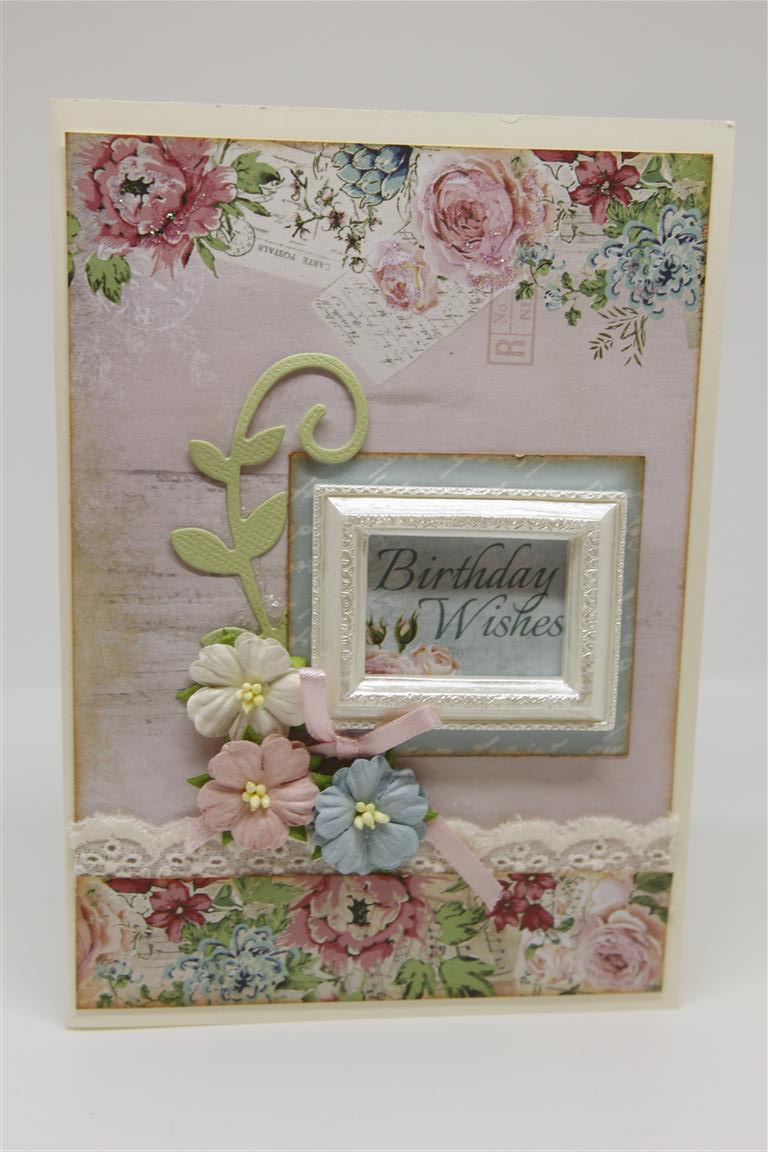
 I used a piece of patterned paper from the 6″ pad for the first layer of todays’ card, and a strip of paper left on my desk from yesterdays card ( also from the 6″ pad) for a border across the bottom, with a strip of old fashioned lace peeking out from the top of it. The sentiment is from a piece of the Rose Avenue 12 x 12 sheets and this time I trimmed it a little bigger than the frame, and inked around everything with tea dye distress ink. A die cut flourish, flowers and ribbon were the finishing touches.I am spending the morning at the craft desk putting finishing touches to januarys lessons, and I am so happy to report that all the cruise cards are cut,die cut embossed and ready to pack!! I am teaching tonight and looking forward to catching up with my ladies! til tomorrow….
Category: Birthday
chipboard foiling..
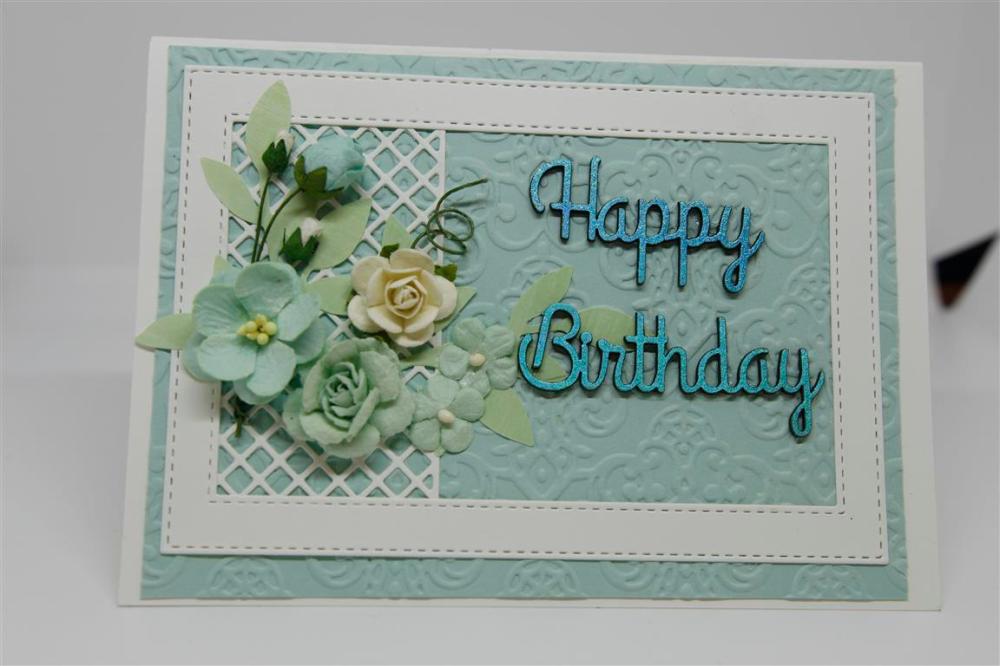
This is the card I made that inspired the whole theme of the class I taught this week at Paper Flourish. I loved the mix of white and soft sea green. I have used a Stampin Up embossing folder, Paper Rose nested stitched dies,and the sentiment is a Dusty Attic chipboard piece which I foiled in the Go Press and Foil machine. The green foilage is a Memory box die, and all the flowers are from I am Roses. I must fly now as we are off to a garden wedding, hope the weather stays dry! Til tomorrow…..
Graphic 45 Natures Sketchbook
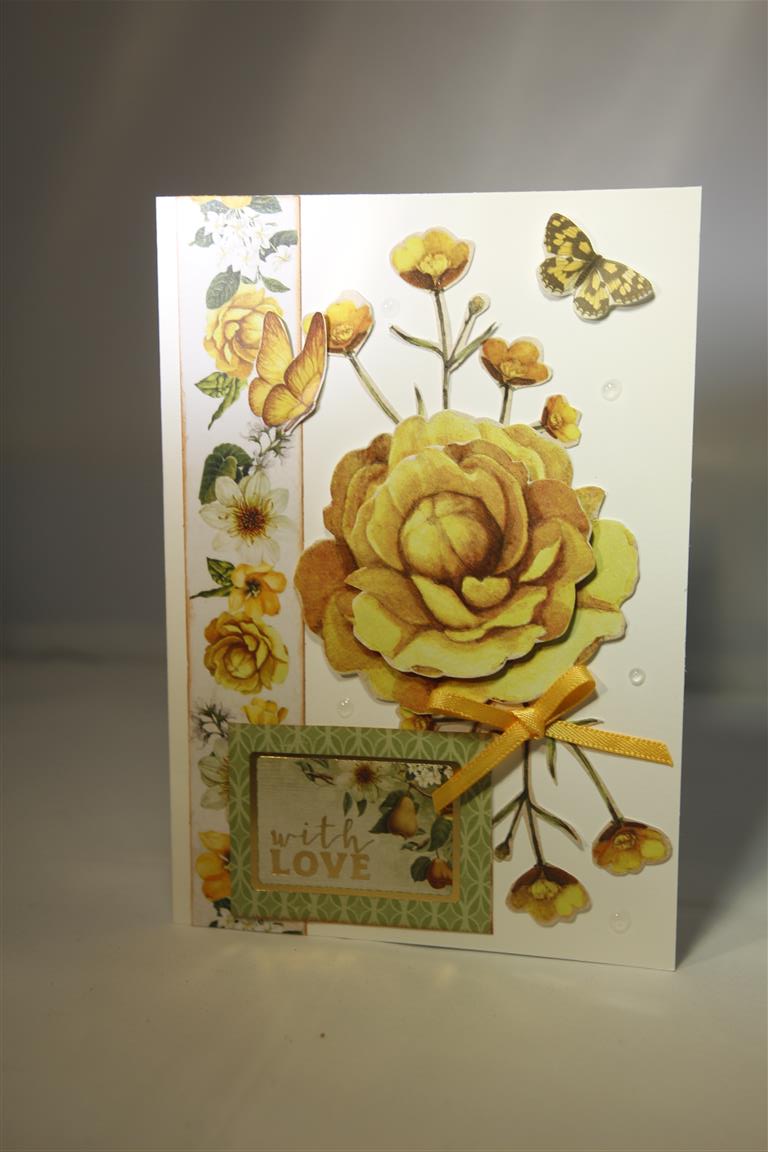
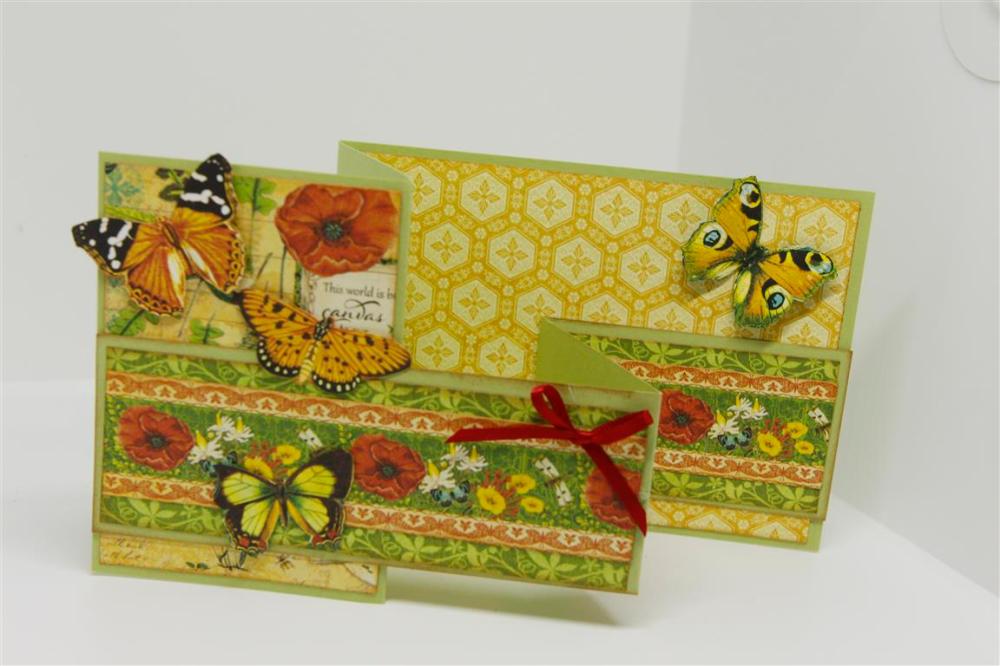 I have had this paper collection for a little while but haven’t had time to create with it because I have been busy with Cjristmas cards, but I had to do a spring challenge and thought this collection…(graphic 45 Natures Sketchbook) was perfect. The papers used are from the 12 x 12 range and I fussy cut some butterflies,added a ribon bow and inked around all my edges with distress tea dye ink. This afternoon is all about clearing my desk to make some room and to start thinking about December lessons! Til tomorrow…
Spring flowers!
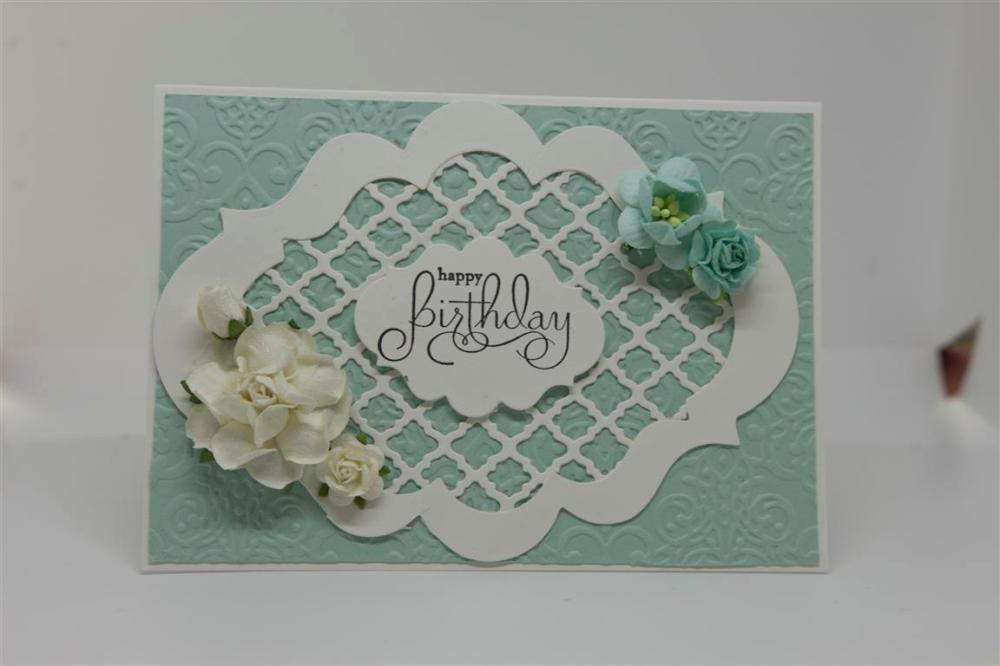
 I have posted two cards today because Nathan and I did some photo’ing today and I have a lot of Christmas cards coming up so we will get started on them next post. Meantime, todays cards…the white/aqua card uses the same spellbinders labels dieas the card on the previous post but I also added a spellbinders lattice die to the back of the die cut frame,embossed some aqua cardstock, and added some flowers.The second card uses a Paper Rose die ..3 dies in this set which I die cut all at once and then just layered onto a mauve piece of bazzill cardstock. added a die cut butterfly and flourish,and flowers to finish. The greeting is a kaisercraft occasions die , die cut from foil cardstock. I am teaching a class tonight over at paper Flourish, so this morning I have been finishing a couple of projects left half way through on my craft table, and thinking about November lessons! Til tomorrow….
Pretty in Pink!
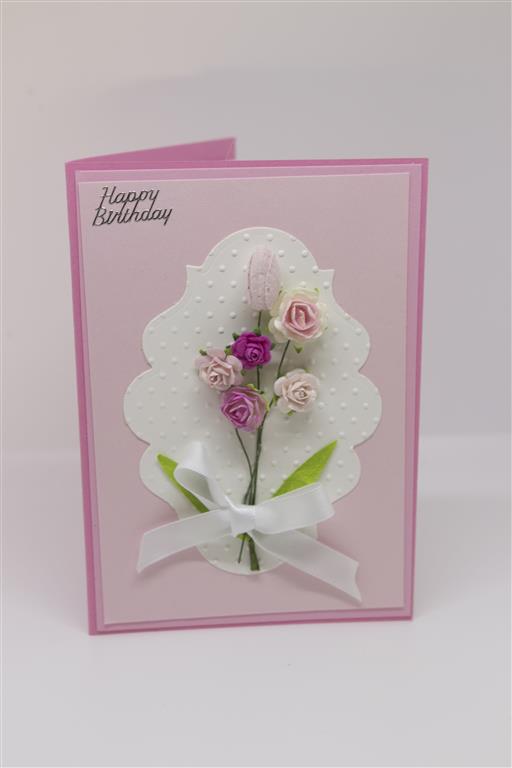 Todays card is a card i made with the retirement village ladies. I love layering up shades of colours and pink always looks gorgeous. The die is a spellbinders label die, and after die cutting in white cardstock I ran it through my swiss dots embossing folder..and oldie but goodie…never grows old! Then it was just a matter of gluing on some roses ( from Iam roses) and a ribbon. To glue on the roses I used 450 glue which is a clear fast drying glue perfect for this job! A rainy day here, and I have just got home from work so i am off to have some lunch! til tomorrow…..
Decorated folding box cards…
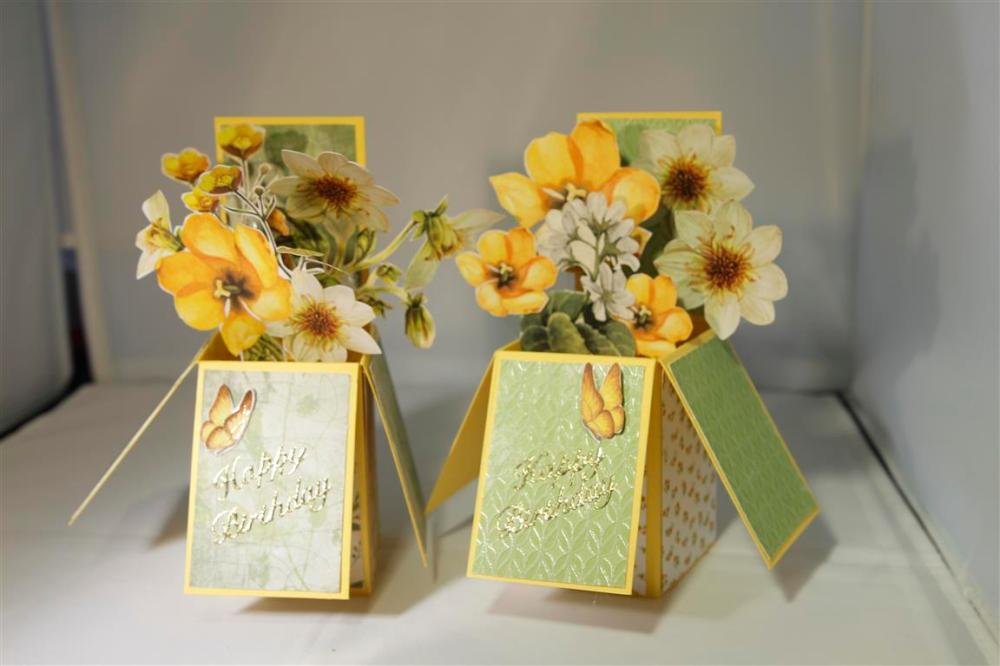 Today here the sun is shining, and the spring bulbs Nathan planted are starting to flower so these two cards were my first choice to post today. There is a link to my you-tube video here on my blog down on the right hand side to show you how simple these cards are to construct and once done decorate the panels…Here I used Kaisercraft Golden Grove papers from the 6″ pad. For the flowers I fussy cut them from a piece of Kaisercraft Golden Grove specialty 12 x 12 paper and attached each flower to a strip of acetate with 450 glue, which is a clear strong quick drying glue. This afternoon I am off to visit Mum and Dad, where Mum and I will enjoy a crafty afternoon while Dad will hide in his own craft room, away from the chatter and laughing…venturing out when he hears the kettle boiling to enjoy afternoon tea with us and exclaim over our wonderful crafty makes! Til tomorrow…..
Kaisercraft Golden Grove double Zig-Zag cards
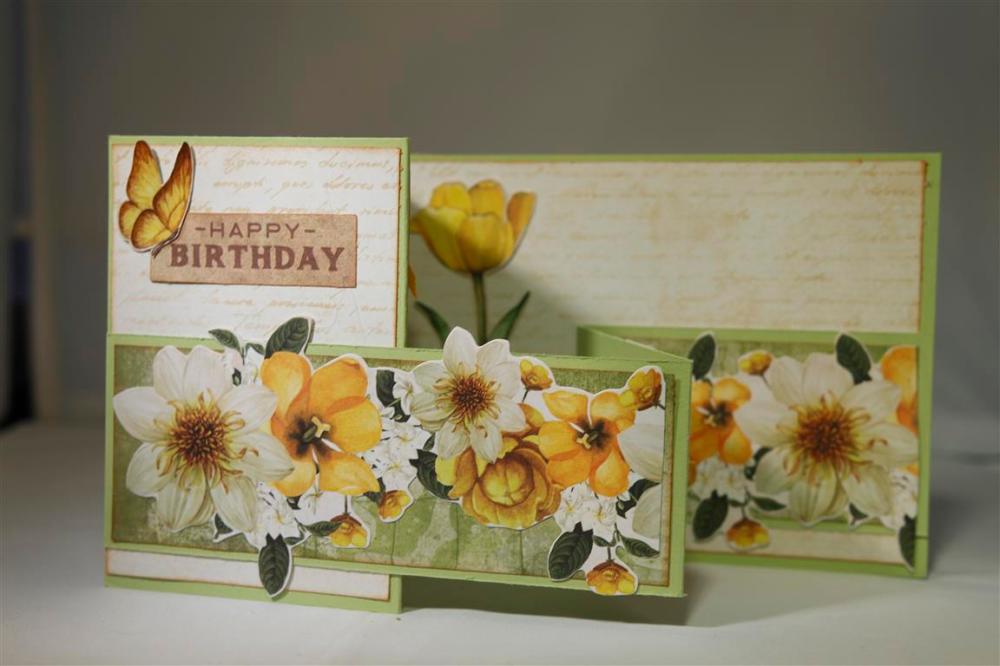 Today is a double Zig Zag fold card, which is really popular just now, and I have fiddled with the measurements so that it fits into a normal C6 envelope. I have taught a couple of classes using this design and it is next on my list to do a youtube video on how to do it when Nathan and I both have a free minute at the same time! Meanwhile I decorated these ones with Kaisercraft Golden Grove papers, and the matching sticker sheet. The kaisercraft sticker sheets that they release with their collections are perfect for this design because the sticker strips are exactly the right size for the slimmer zig zag strip on the front of the card. I have put up 2 cards today because I may not get back here til the end of the week.. working full days most of the week, so I will see you all when I get to the end of the week! …
")
")
Kaisercraft golden Grove 4 and 5

 Two cards today because I have been missing for a few days, very busy at work putting out lots of new stock, and buying quite a bit of it! We are back to Kaisercraft golden Grove which was one of the ranges they released last month, and is full of lovely rich autumn colours. IThe top card is a card I made for my uncles Birthday, he is a gardener and I thought he would enjoy the imagery and colours reflected in his garden. It’s all 12 x 12 sheets from the range as well as the matching collectables. The lower card also uses pieces from a 12 x 12 sheet, with a flower and butterflies fussy cut from one of the sheets as well. If you look closely you can see some little rain drops ( or dew drops) which I made using some clear Nuvo. I have been experimenting with Nuvo, it comes in a huge range of colours and is very much like Liquid pearls, but better value, larger colour range and holds the perfect dome shape better…can you tell I am a fan? It comes in metallic ,glitter ( much better than stickles), pearl and clear . I have also been trying to clean up the craft room, but that is not going so well, too many distractions! Til tomorrow….
go press and foil idea..
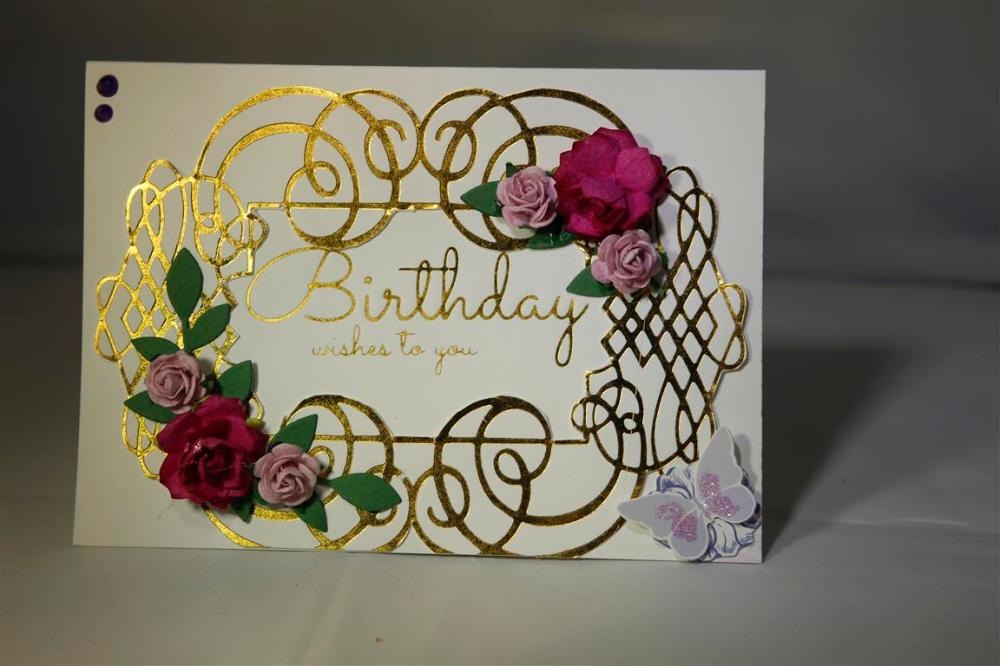 Hi! Todays card relies totally on the Go Press and Foil! I had done so much experimenting with my new machine I had a table covered with lots of foiled bits and pieces and had no choice but to sit down and use some of them up on cards!! The framed background is and Anna Griffin foil stamp die by couture creations,and the Birthday wishes sentiment is an Ultimate Crafts hotfoil stamp.I added die cut leaves, and flowers and the butterfly in the corner was from Kaisercraft lilac whisper collectables which must have been on my craft desk at the time! I finished work early today and have taken some crafty things into the dining room to sit at for a while because finally the sun is out and streaming in the window. I have spent a lovely half hour sitting outside warming up and eating my lunch! til tomorrow…..
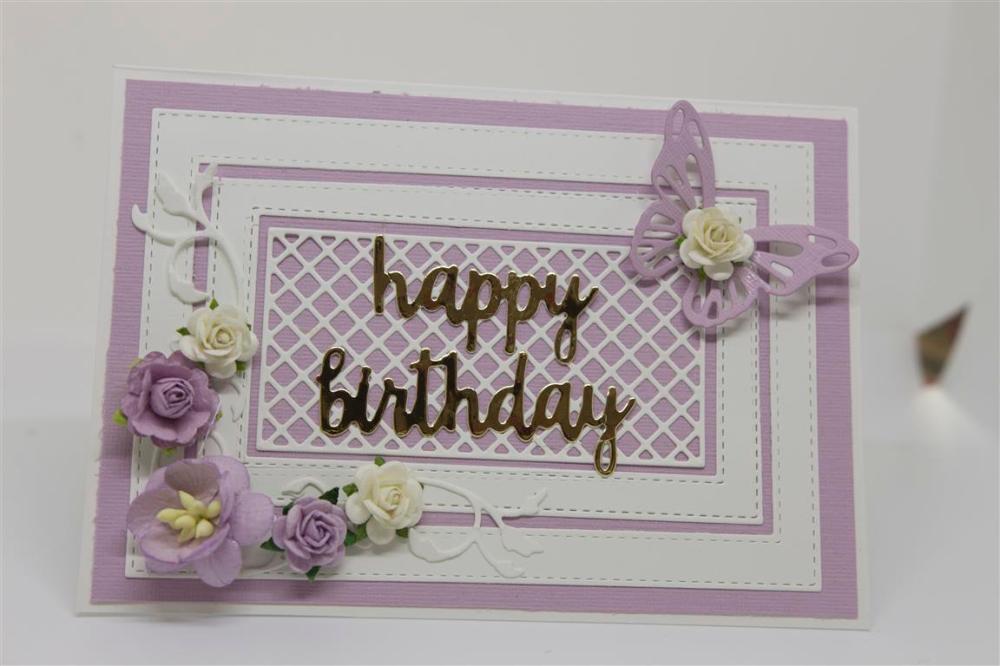
Go Press and Foil Card
 I have another couple of Go Press and Foil cards to show, so this one today.. I used a kaisercraft embossing folder for the frame ( I have since mastered foiling with my embossing folders so that will be coming soon!) and foiled a todo sentiment stamp made especially for the foiling machine, trimmed it to fit into the frame, and added Green tara flowers,and a foiled chipboard butterfly. the greenery were die cuts on my desk, I have got into the habit when I am diecutting greenery and flourishes to cut a few extra so that I don’t have to stop and dig out dies when I am on a making streak. I have started on my Christmas cards at last, with some lovely new Kaisercraft christmas paper called Christmas Jewel. It has amazing shades of purple and lilac, and silver and I wasn’t going to purchase, but these cards are making themselves,easy paper to work with! til tomorrow….
