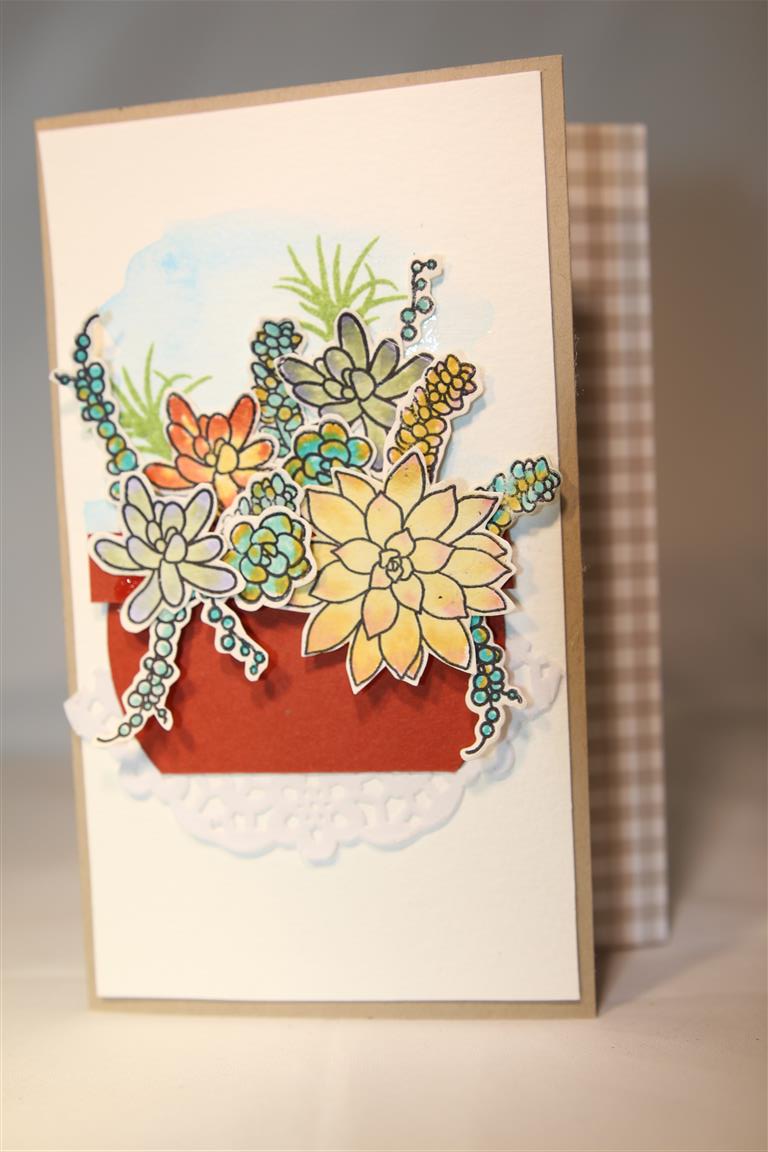
 For this card I used the Stampin Up Oh so succulent stamp set, stampin onto watercolour card and colouring with inks. Although I have the matching die set i found it quicker and easier to fussy cut the images myself. On another piece of white card I did a watercolour wash in blue, stuck down half a doily, die cut a circle and trimmed it to a pot shape, and then arranged my plants! I trimmed some of the front of the card off, and added a strip of patterned paper on the back part of the card. I truly enjoyed making this card even if I did spend a little bit of time on it! I have been busy this week making orders, 12 at last count, but everything is caught up with now and I am hoping to cut into my new papers ( 2 lots now.. Kaisercraft High tea and sage and grace) in the coming days. til tomorrow….
Category: Birthday
Side stepper card
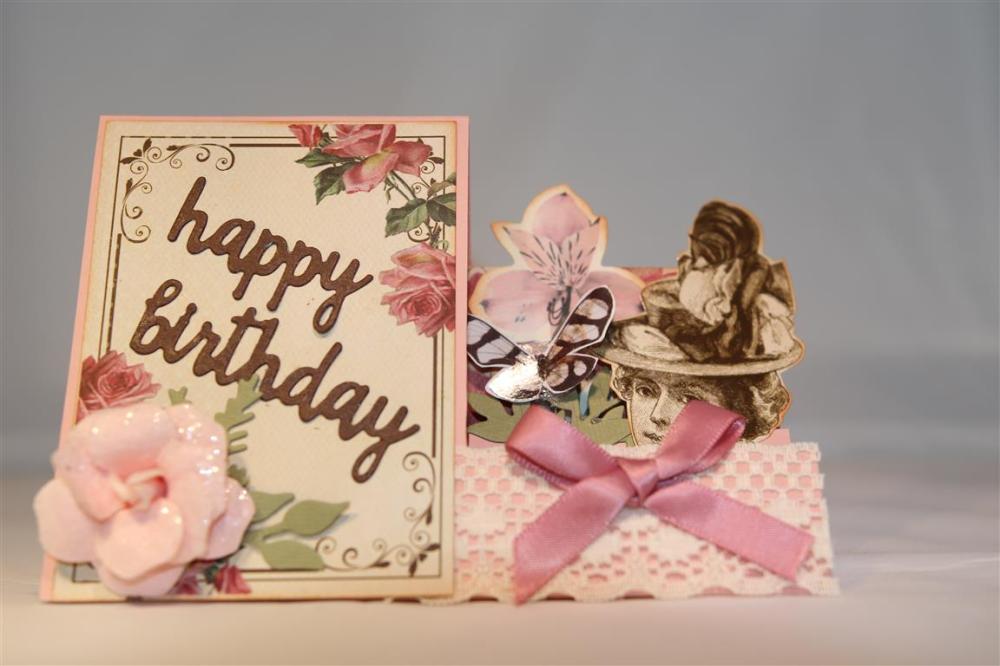 Today’s card is a side stepper card made with Kaisercraft Madamoiselle paper collection. I used a cut out from a 12 x 12 piece of paper from the collection, and all the other little bits are from the collectables pack. The sentiment is die cut with akaisercraft die (Occasions) as is the foilage, and I added a Prima flower, and some lace and a ribbon bow. I have instructions on how to make the side stepper card on my You Tube channel..Helens card designs. I picked up a few pices of new paper today from the Kaisercraft new release called Sage and Grace, lovely soft colours, so now just have to find some time to sit down with it! Til tomorrow….
A little bit vintage….
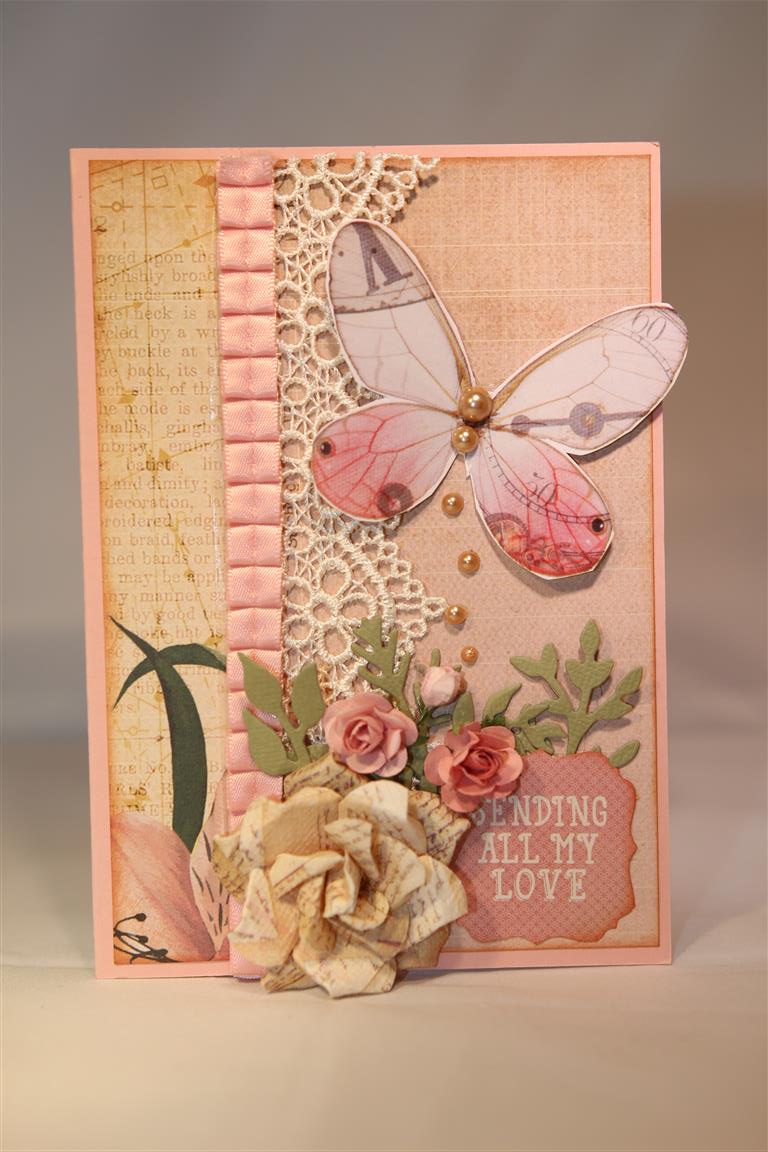
 There is quite a bit happening on todays card so we will get right into it! Everything has the edges sponged with Tea Dye distress ink pad. The background layer, bracket shape, and sentiments are from Kaisercraft Madamoiselle 6″ pad, and the layer on top is from the cut apart 12 x 12 paper from the same range. On this piece I used a stampin up fancy corner punch . The foilage is a kaisercraft die, the flowers are from Prima and Green tara,and I also added flat backed pearls, a ribbon bow, fussy cut butterfly ( from the same paper range) and kindyglitz. Til tomorrow…..
Kaisercraft Mademoiselle 7..
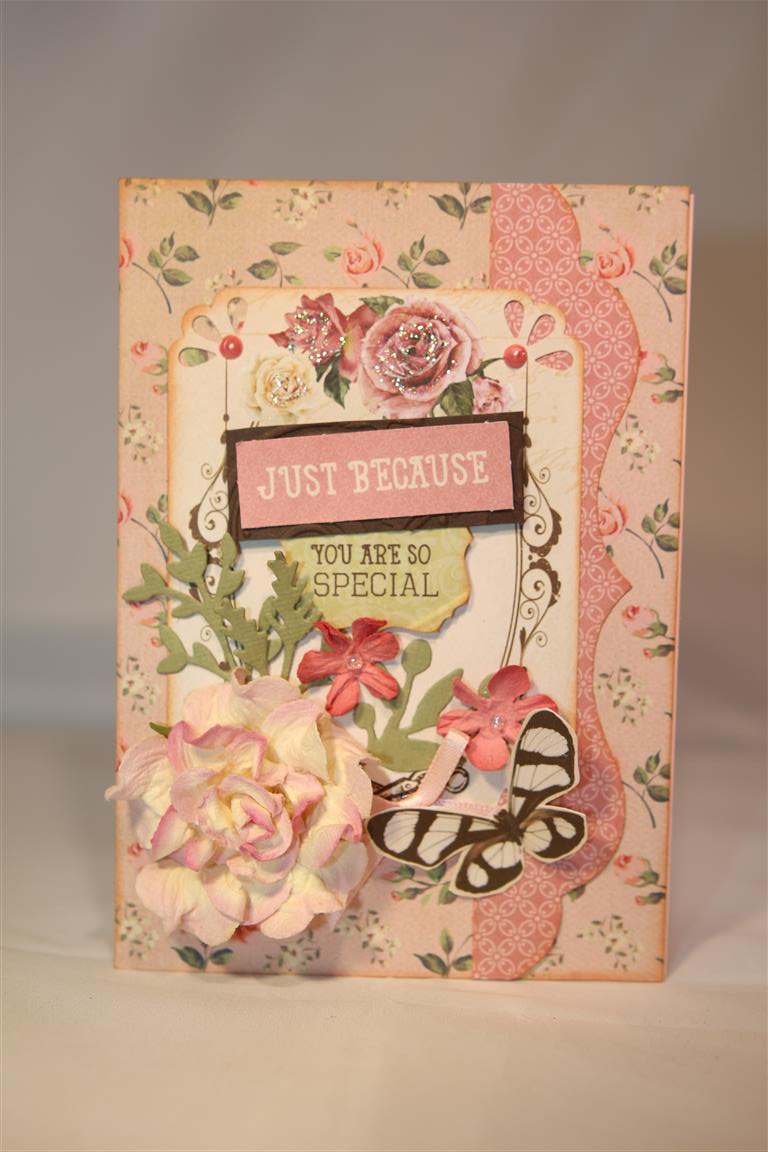
 This one is a favourite because it has everything on it that I love…Lace, pleated ribbon ( stampin up), gorgeous prima flowers,flat backed pearls and mini foilage ( kaisercraft Die). The papers are from the Madamoiselle collection ( 6″ pad) and the butterfly is fussy cut from a piece of 12 x 12 paper from the same range. We had a very busy day at work yesterday with the huge clearance sale, so today is all about catching up with some work around here, visiting Mum for her birthday, and then into the craft room to make some card orders! Til tomorrow…..
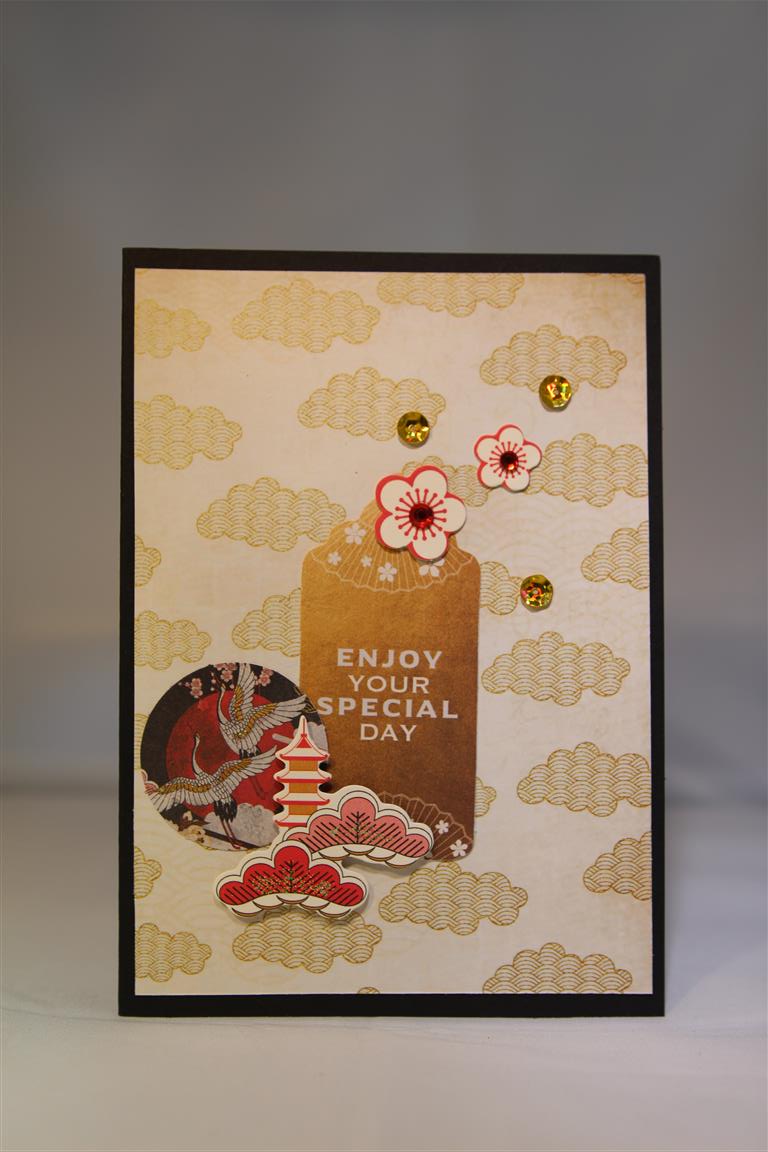
Last 2 Kaisercraft Hanami Gardens cards..
 I should add for now, because I will revisit this paper collection! Both cards are made with the 6″ pad papers, and the fronts decorated with some of the collecables of the same range. I printed up a special insert for the bottom card that says “wishing you a FANtastic day”…I couldn’t resist the play on words…Very busy at work this week, and I haven’t spent any time in the craft room, but we have a long weekend off for Easter this weekend so I will spend some time in there then! Til tomorrow…
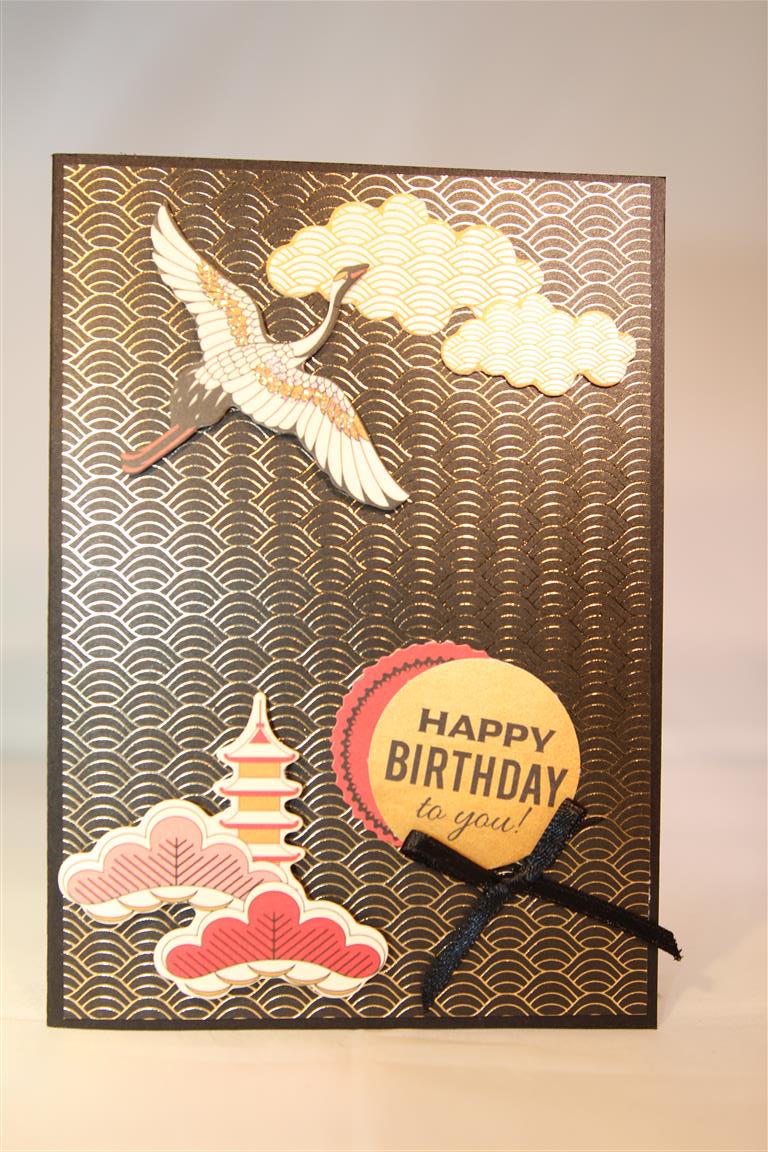
Kaisercraft Hanami Garden number 4…
 I concentrated on the gold element of the Kaisercraft hanami garden collection for this card,although I still used a black card base to tie in the black elements on the card .The paper is from the 6″ pad, as are the sentiment tag and circle. The flowers and pagoda are from the collectables pack. I just had to add some gold sequins and a little kindyglitz to finish this one. I have been over to the chemist this morning to have my Flu injection,so glad that’s done, and this afternoon I will catch up with Mum and my sister. I have also booked my stall at the June long weekend Salisbury Craft Fair, so from now until then it will be all about preparing my stock and having a bit of a clear out to sell some unwanted items. Til tomorrow….
Hanami Garden number 3…
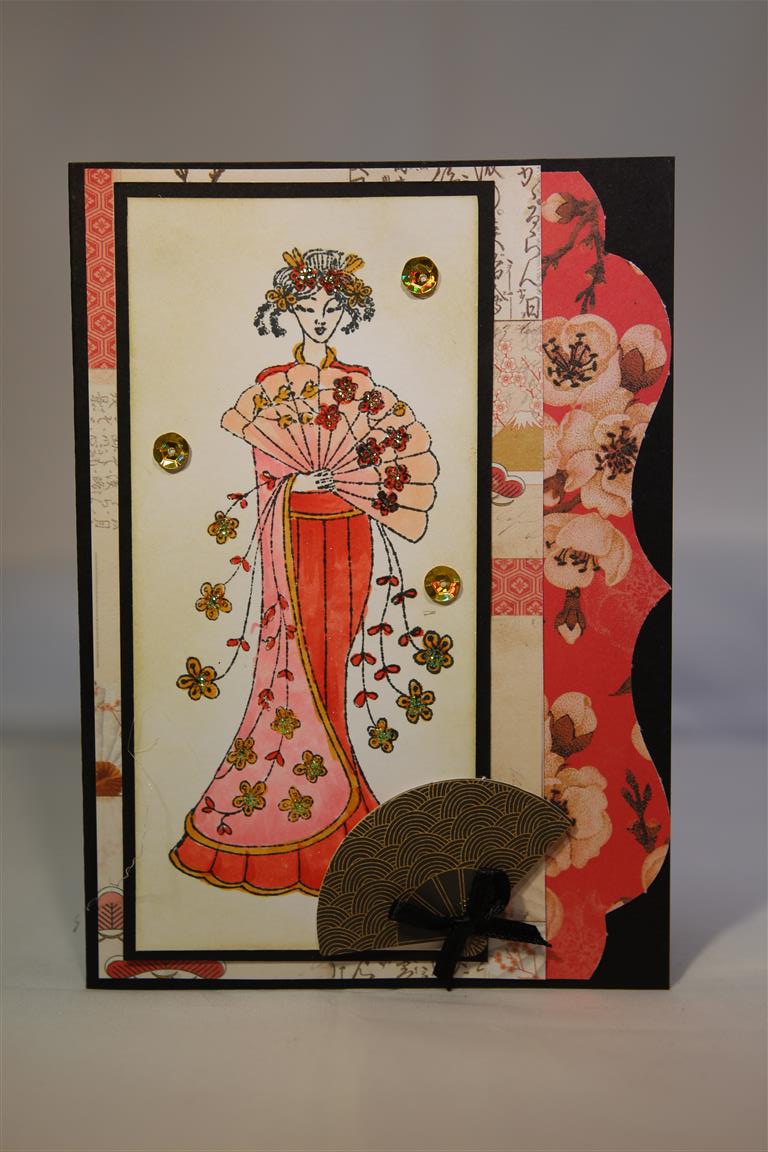 for todays Kaisercraft Hanami garden I used some papers from the 6″ pad, and a collectable ( fan)on which i stuck a black ribbon, but the main thing here is the stamped image which I coloured. The stamp came as a freebie on a magazine, and came at just the right time for these papers! I coloured it with Copics, and decorated with a couple of gold sequins. I have been to work, and I am home again now, I have a pot of casserole on the stove which is destined for the freezer,and tonights tea is all prepared, so a bit of free time this afternoon to maybe tidy up the craft room! Til tomorrow…..
Kaisercraft Hanami garden
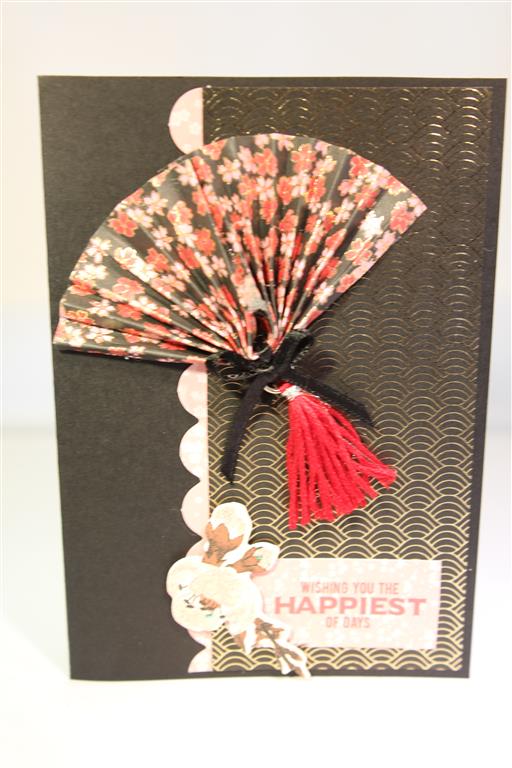 And now for something completely different!I love the rich colours of this paper collection, and it is completely different from what i usually work with. I started off simple with this card, I made a paper fan – something I wanted to do as soon as I saw the paper, and as luck would have it , on my desk was a red tassel, something my sister had given me attached to a present! The rest of the card was just paper and sentiment from the 6 ” pad, and a flower collectable. I used Black cardstock for the base card.It’s cooking and cleaning afternoon here so i had best get on! Til tomorrow….
A die cut card..
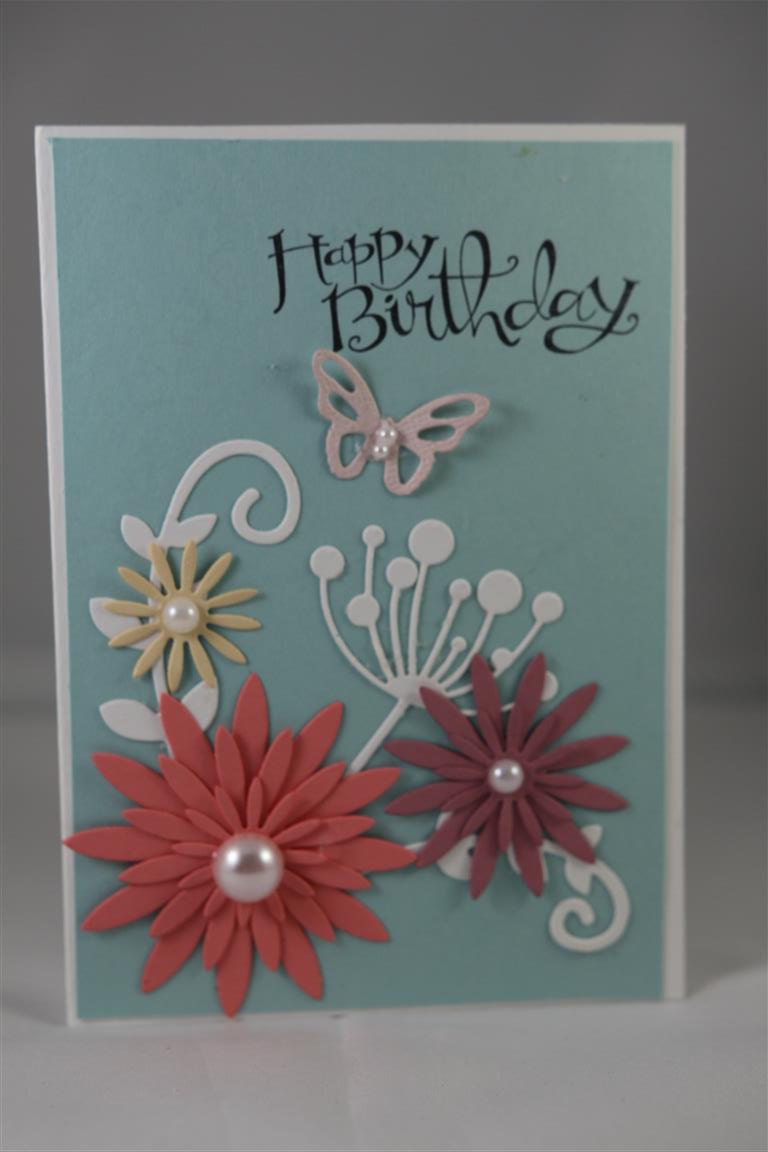 I have playing around with my dies and mixing them up a bit – normally I like to keep the different companies separated…but I am going to bite the bullet and experiment! The simplest way for me to start now that I can finally use my die cutting machine is with different dies, so on this card have mixed Paper Rose flower and flourish dies with a memory keepers die and a kaisercraft ( butterfly) die. Pearls for a bit of bling and a stampin up sentiment.This one is going to be adapted to a class in the near future. Roast is in the oven, leek and potato soup on the oven, and now it’s craft time! til tomorrow….
simple male card idea
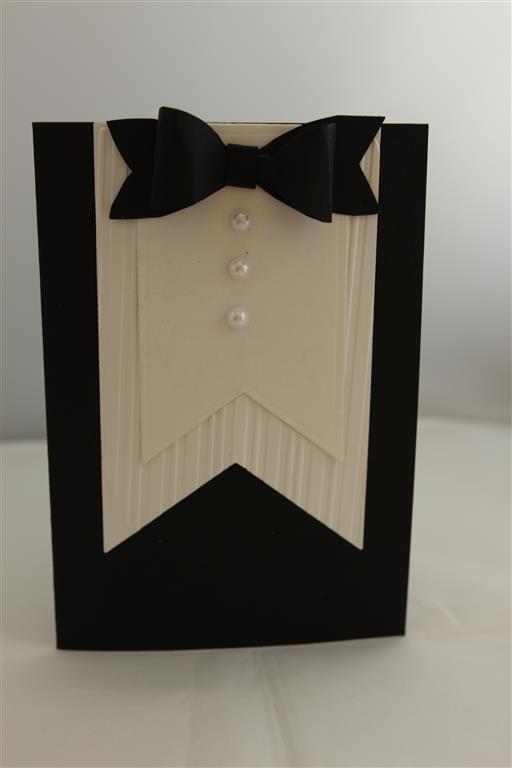 Todays card is one I taught yesterday in my class at Paper Flourish.It is a very simple one that doesn’t require a lot of product. I used two different sized fish tail dies ( kaisercraft) to make the shirt, and ran the larger piece through a Couture Creations pinstripe embossing folder.The bow tie was made with a template, but I do have a Stampin up punch that would have done the trick and you can also get dies ( I saw a paper rose one) that would also work.I just had to add three pearls to finish this quick and easy design.Quick post today as I can smell my cake baking in the oven – might be time to take it out! til tomorrow….
