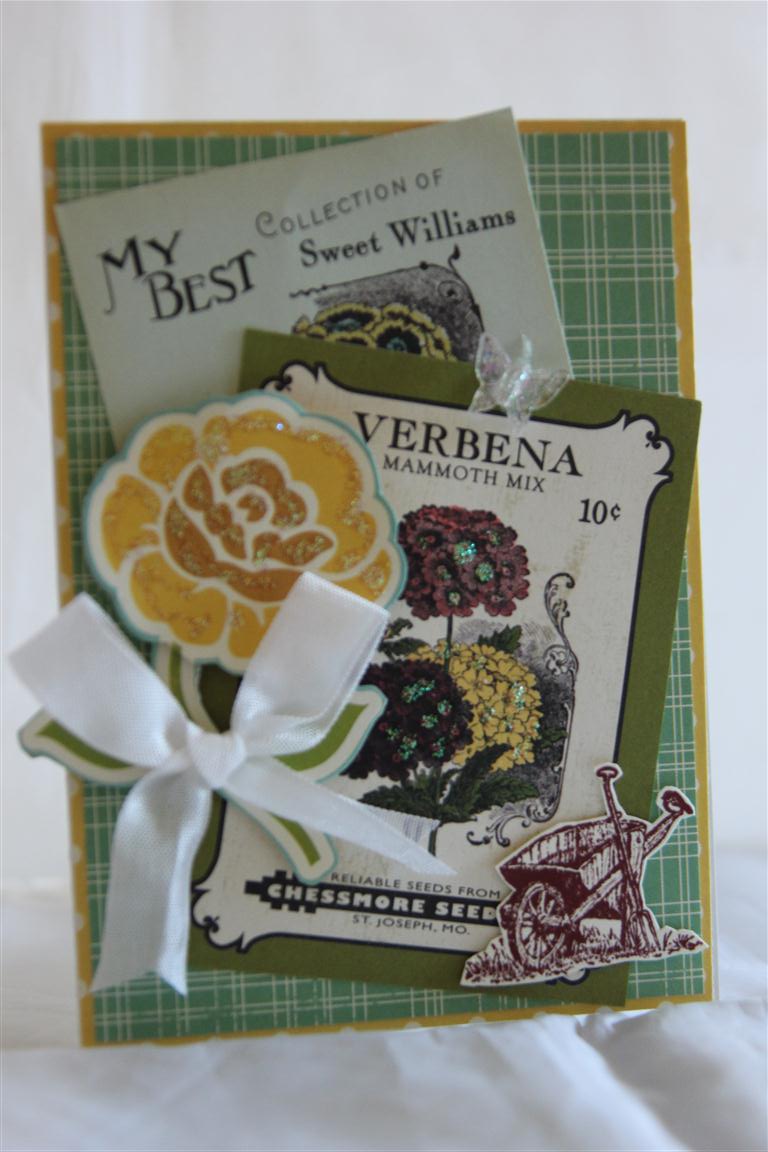
 This is the second to last October Afternoon farm Girl card. I layered a couple of papers, fussy cut one of the flowers from another sheet, and added two of the seed packet images. I finished with seam binding, and a wheelbarrow stamped from my Stampin Up Countryside stamp set. quick post tonight as its shopping night, til tomorrow…..
Category: Mothers day
Graphic 45 a place in time number 5
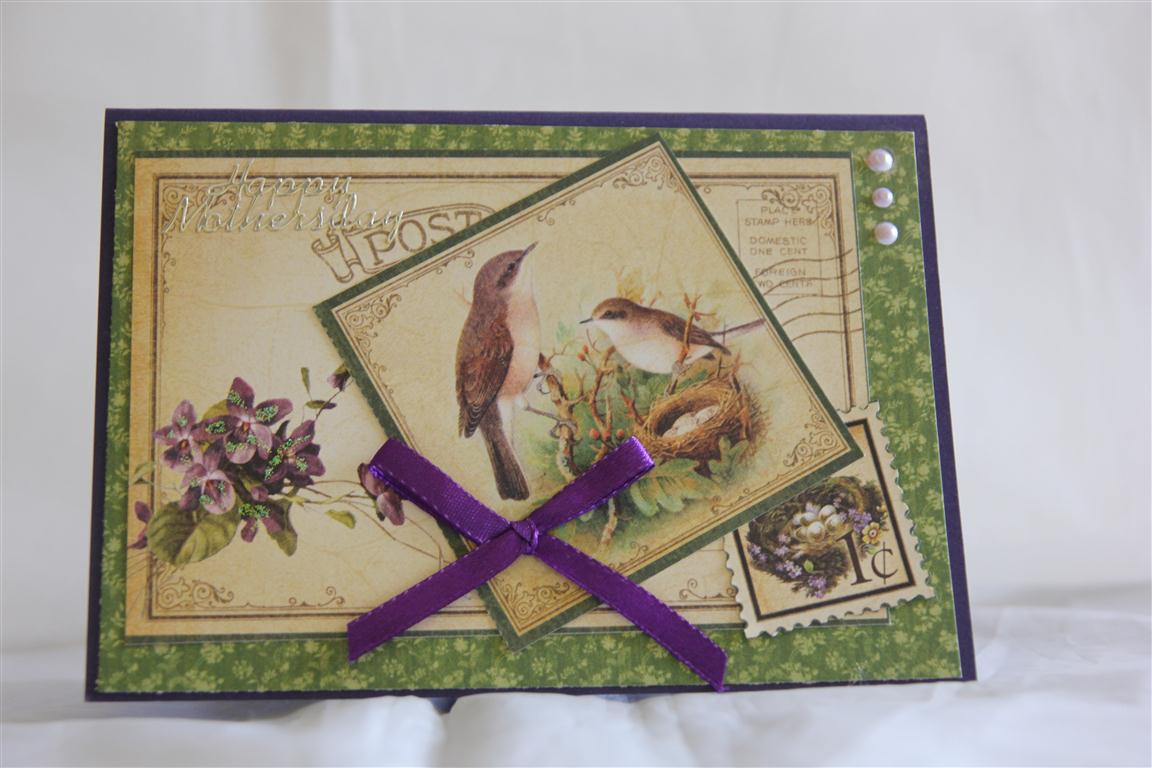 Not much product on this one – graphic 45 A place in time March cut outs , some kaisercraft pearls, a little ribbon and Stampin Up Crushed Concorde card stock – a very quick and easy Mothers day card.Love the bird image on this one. It’s a few degrees cooler here today ( and not for long I am told) so I will be in the craft room tonight finishing off my orders before the temperature rises again! Til tomorrow….
Graphic 45 a place in Time 1 and 2
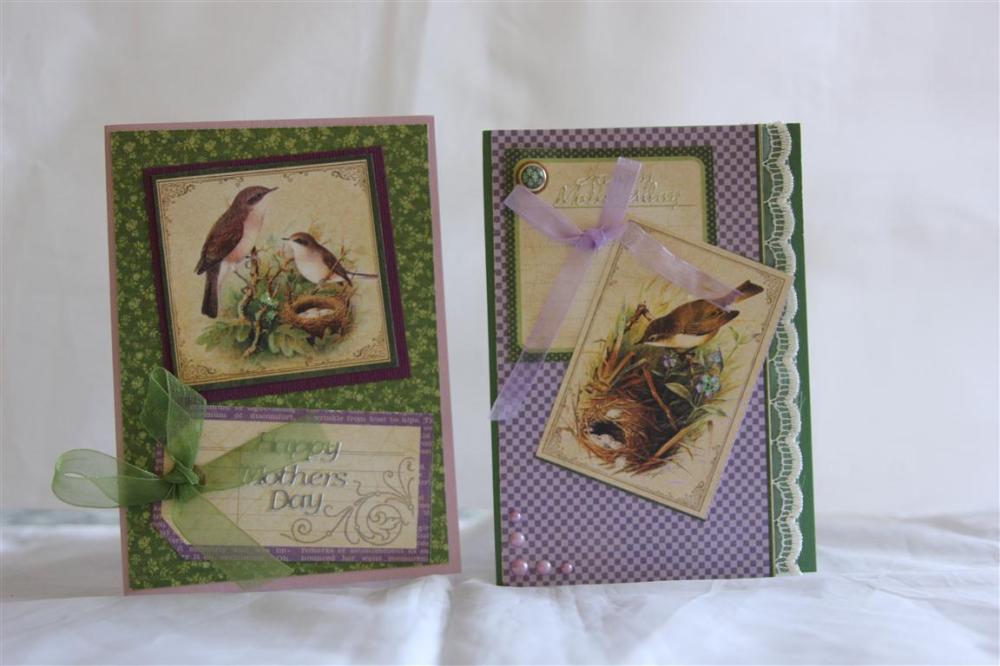 happy new year to all my followers and visitors. Today is the day that wordpress sends out my statistics for the year past, and I want to thank all 55,879 visitors for stopping by over the past year.Everyone who is a regular visitor will know that my favourite paper is Graphic 45 and so for the next few posts you will be seeing what I did with 2 sheets of Graphic 45 A place in time – march cut outs. I bought 2 because I loved the back as much as the front, and by the time I was finished I had used every scrap of both sheets! Todays cards are Mothers day cards – early I know, but the images are perfect for Mothers Day I think!The cardstock is Stampin Up Perfect plum and garden green, and I also used a little ribbon,lace, pearls and a kaisercraft brad.Til tomorrow….
The Lake house number 6
 Firstly, welcome to my new subscribers, and thank you to all who keep visiting me ! Tonight we are up to kaisercraft The Lake House number 6 – one more to go before we move on – here I have used the 6″ pad, and fussy cut the patterned piece of paper that is in the centre of the card. I used some pink bazil cardstock and the card base is stampin Up early Espresso. i just added a few flowers to finish. the greeting in the centre of the card was in the 6′ pad.very early start for work this morning ( 4 am) so early to bed for me tonight but I am on 4 days off now so plan to do lots of cardmaking! Til tomorrow….
Magnolia grove 3
 Still with kaisercraft Magnolia Grove papers, this time the 6″ pad,a flourish die cut from my memory box fauntleroy crest and another of my homemade crocheted doilies, prima stick pin lovely silk ribbon and a flower which has a story…. One day at the market the lady on the next stall had antique bits and pieces including a stool with a straw hat on it . someone bought the stool but didn’t want the straw hat – but it was covered in these roses so I offered to buy it and such a nice lady – she gave it to me! I am now the pround owner of 50 of these roses, so you will see them pop up now and again! Til tomorrow….
Magnolia grove 2
 Kaisercraft Magnolia grove number 2… Again I have used the 12 x 12 papers, and the matching collectables. The sentiment is Stampin Up perfectly penned ( love that stamp) and in the top corner I have done a little arrangement with one of my hand crocheted doilies ( still learning – don’t look too closely) , ribbon, and prima flower and prima petals pin – these were new in my local craft shop the other day and I couldn’t resist them…. Til tomorrow….
Magnolia grove
 Straight off I want to say that I found this paper a challenge – it is very pretty, but the muted colours are not what I usually choose, but learning is all about stretching yourself, so I will share my creations with you! I did make an initial 4 cards with this paper which sold before I could photo them, so some people do like this colourway. The paper is Kaisercraft Magnolia Grove, and I have also used the matching collectables, some kaisercraft pearls, lace, ribbon and websters pages clear rhine sparkler. The papers used on this one are all cut from 12 x 12 sheets. Til tomorrow….
Victoria gardens revisited
 I liked this paper when I first bought it, and I still like it using it for the second time around!It is Echo park Victoria gardens and I have lost count of the ammount of cards I have made with it. For this one I cut a cameo with my cricut machine and the heritage cartridge, made my flower using sizzix 3d flower die, tried out my new die from Die-namics – fancy flourish, and finished it by punching a border with martha stewart punch – lace doily and adding a little lace and liquid pearls. Til tomorrow….
English rose stamp number 3
 here is my final card in my Kaisercraft English Rose stamp series. This time I have teamed it with Kaisercraft Madame Boutique paper for a totally different look. I coloured it with tim holtz distress inks and my aquabrush, and used the Cheery Lyn Polynesian sails oval die. I also used Memory box moonlight butterfly and kaliedascope butterfly dies, and the For You sentiment was stamped using a stamp from Stampin Up elements of Style set and fussy cut. It’s been very cold here today, and I am thinking of dragging the heater into the card room before I go through there later! Til tomorrow….
English rose stamp number 2
 Yesterday i showed you 3 cards simply stamped and coloured with my Kaisercraft English Rose stamp. Today I am showing you what happened next with the same stamp – I stepped it up a little and did some “what ifs” so – the papers I used were Bo Bunny Weekend market, and I stamped a script stamp ( Stamp It Butterfly script but any would do) across the whole of the beige coloured patterned paper. I stamped Post Card across the top ( Prima stamp) and stamped a stamp ( My minds eye Rosy Everything set) onto cardstock, cut it out and stuck it on the corner. You will also notice that I mix and match my stamp sets – just cos they come in the same packet doesn’t mean you can only use them together!Now I stamped my English Rose on the centre of the card and coloured it with my little pots of perfect pearls powder. For those of you following closely ( and I know there are a few of you because I have had e-mails asking about colouring my images, and so I am putting together a short video stepping out the methods I use)the way I did this – I hand coloured my image with a Versamark pen, and then used a paintbrush to paint the powder on. The beauty with this technique is you don’t have to be perfect – the powder only sticks to where the versamark pen has been.And the flowers have a glorious shine to them!Today I have made great inroads on the male card front and have lots to photo for future blogs! Til tomorrow…..
