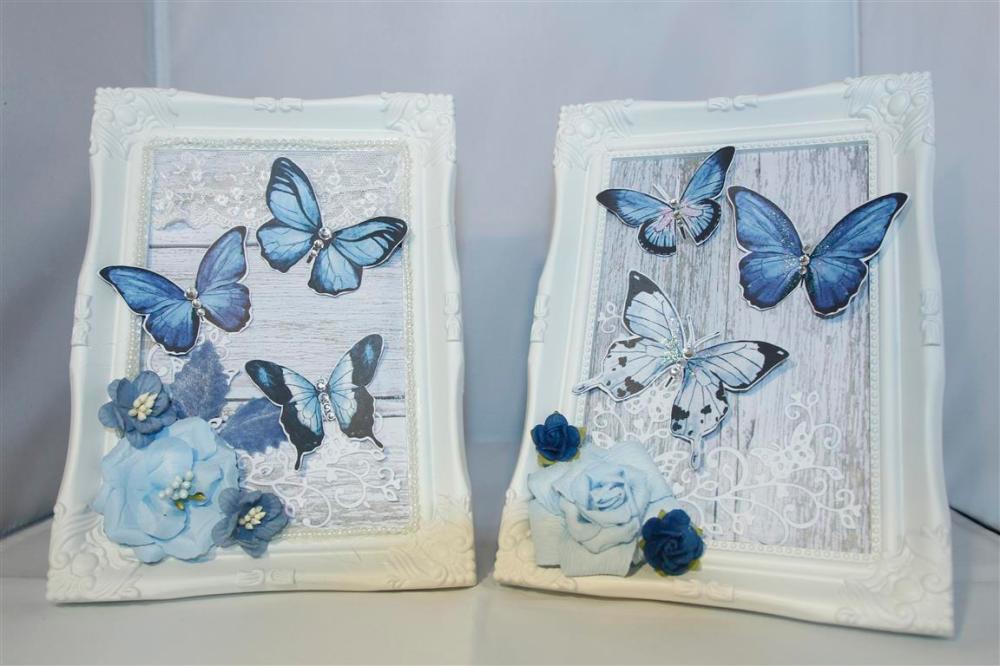
 I had some photo frames in my cupboard, just waiting for the right papers, and as soon as I saw this collection ( Kaisercraft Indigo skies) I knew this was the time to get them out of the cupboard. I used a piece of the 12 x 12 paper for the background and fussy cut a few butterflies to put in the frame. I only glued them by the centres, so that I could fold their wings up.On the left hand frame I added some lace, and leaves, but the one on the right was left a little simpler. There is a die cut flourish on both of them die cut with a Paper Roses die. I hope you enjoy looking at something a bit different from my usual cards! Til tomorrow….
Category: Uncategorized
3 Sheets of Kaisercraft Indigo Skies continued….
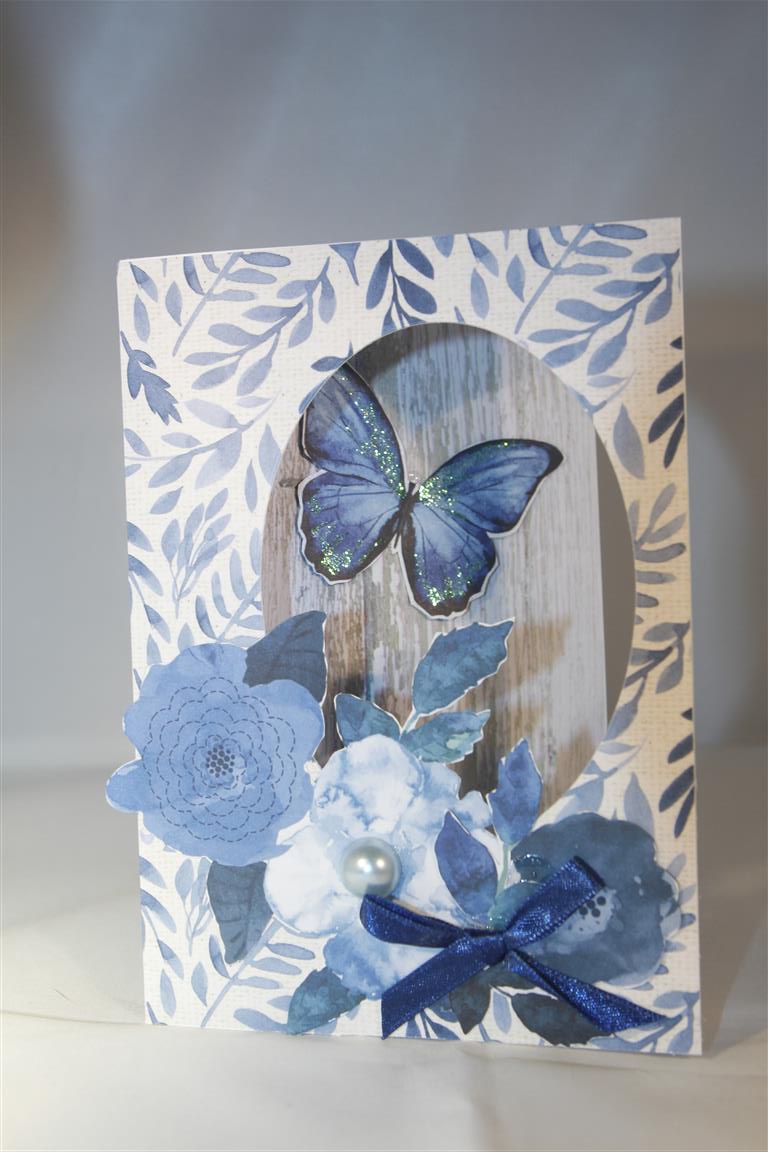
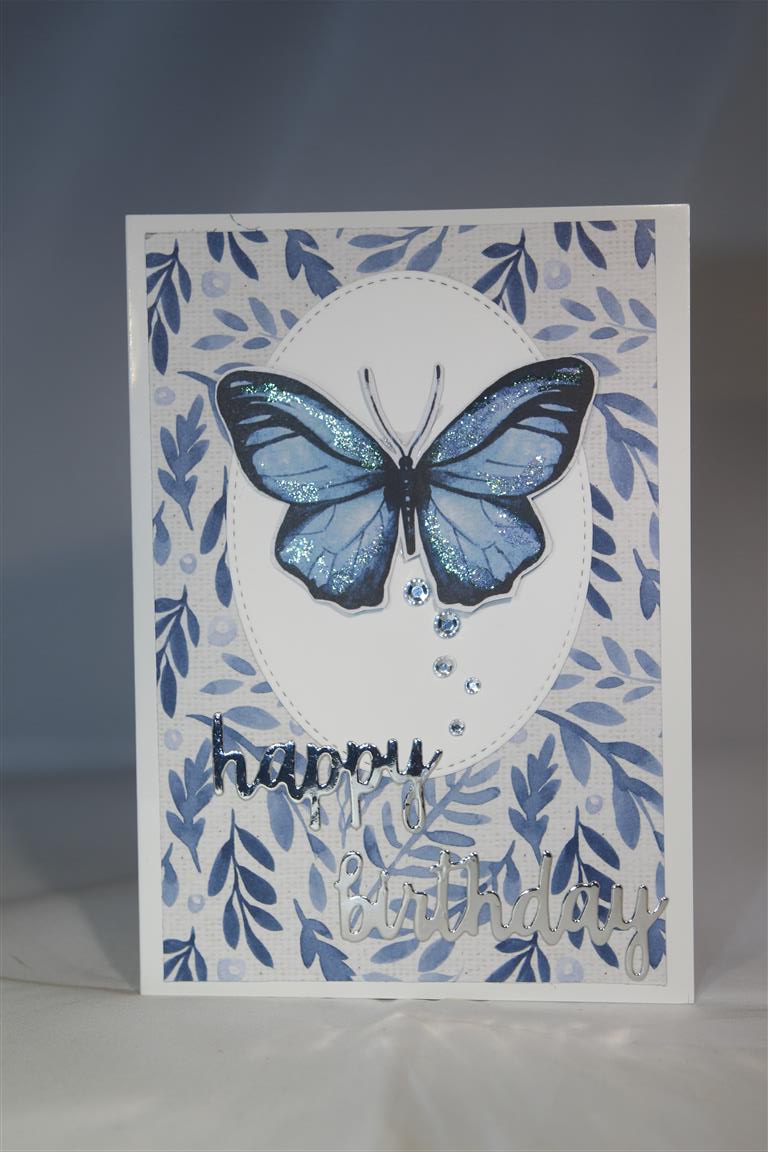 For these next two cards, I used a Paper Roses stitched oval die to cut an aperture in the front of a card base, ( it’s easiest to do this with the patterned paper already attached). I put the resulting oval die cuts ( 1 plain card and 1 patterned paper) aside for another card. Decorated the inside panel with the wood panel patterned paper and a fussy cut butterfly, and the front with some fussy cut flowers and a pearl and ribbon. The second card made use of the plain die cut oval, a fussy cut butterfly , die cut birthday greeting ( in silver foil card) and bling! I had a hugely busy week working, so this weekend will be spent catching up around the house, but I don’t doubt that I will find some time to craft. Til tomorrow…..
Kaisercraft Indigo Skies
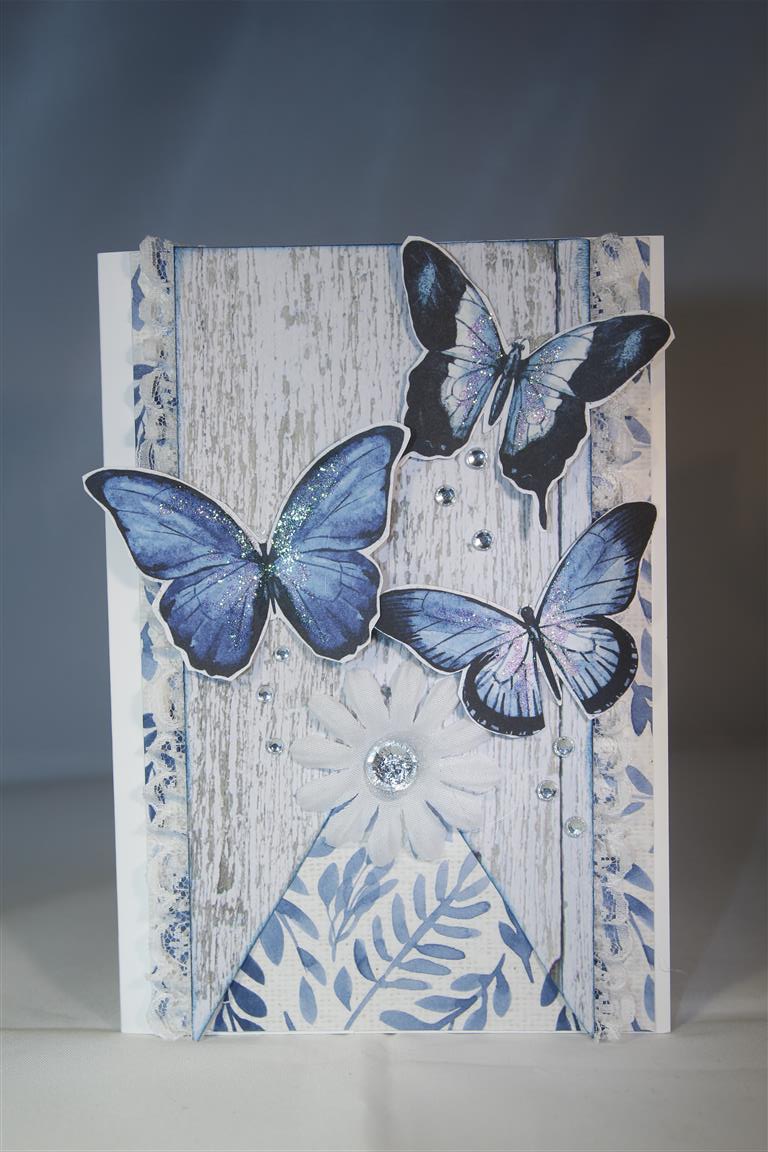
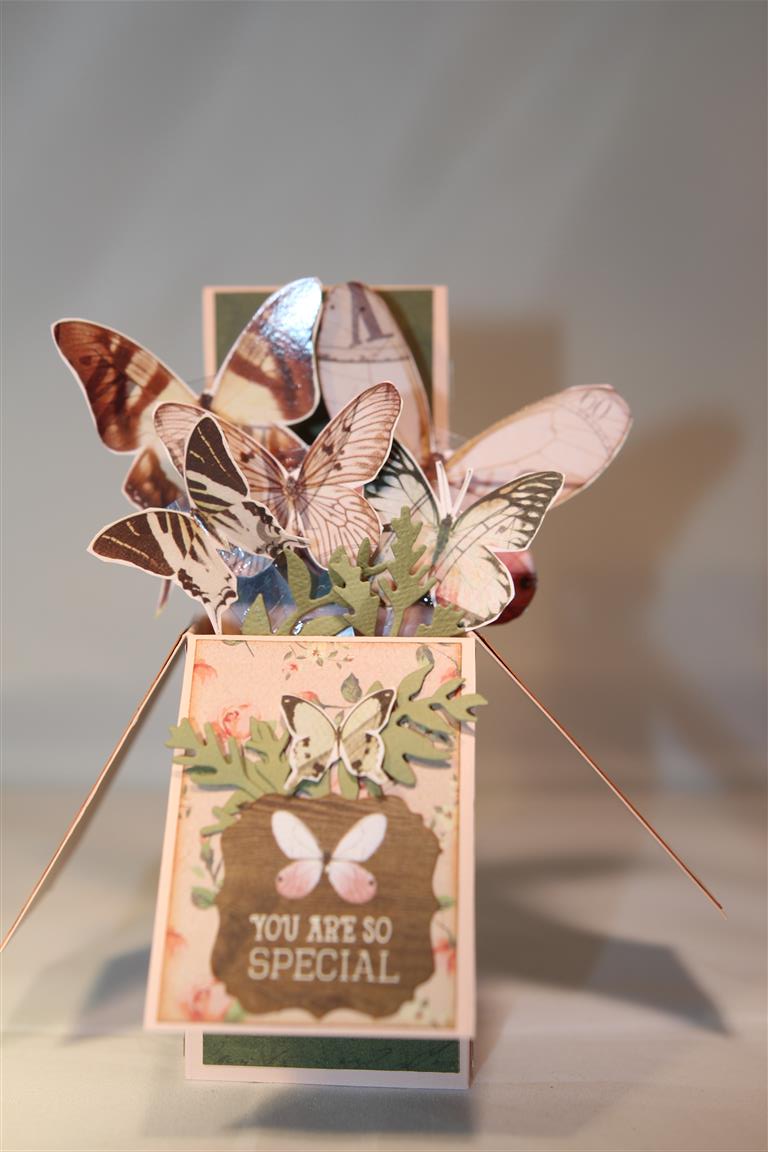
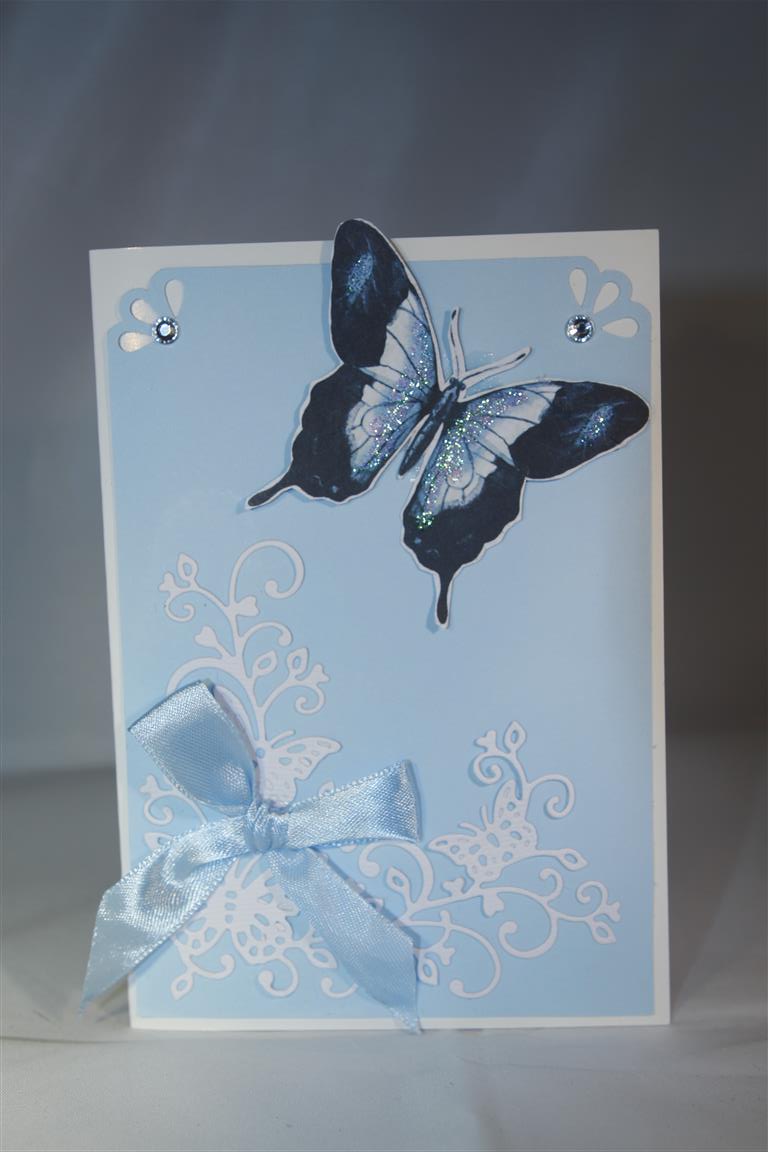 I only purchased 3 sheets of this collection, and one of the sheets was covered with gorgeous blue butterflies, so immediately I fussy cut those(!)I managed to make a lot of different crafty items with my small purchase,and we will start with the standard cards today. The top card relies heavily on the papers, and I added lace down both sides of the banner and sprinkled rhinestones all over for some shiny bling. The bottom card only has a fussy cut butterfly from the collection, the rest is plain cardstock, with punched corners and a die cut corner butterfly flourish ( Paper Rose brand). Some glitter a ribbon bow and bling to finish. I am teaching tonight so heading in to work later this afternoon so for now I am going to head into the craft room, there is some new graphic 45 in there that is calling my name! This week has been full time hours at work, so I probably won’t get back here until Saturday, so I won’t say til tommorrow, I will say Stay safe until the weekend!
die cutting fun!

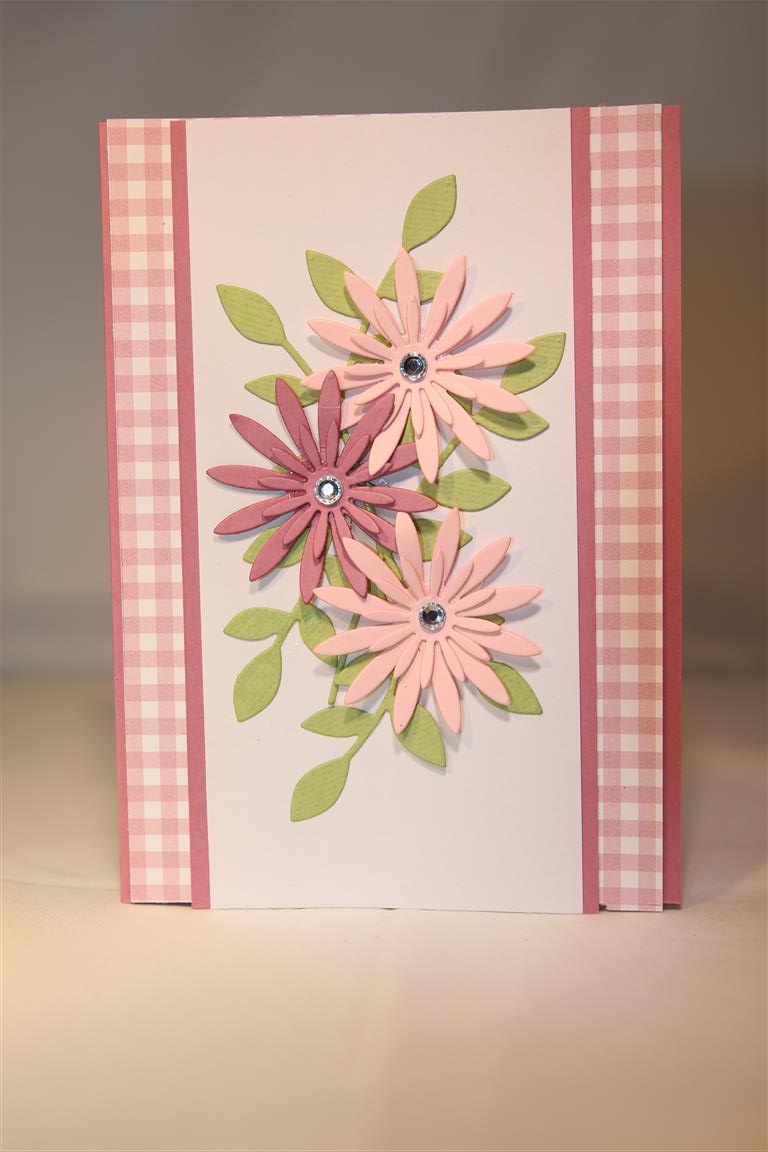
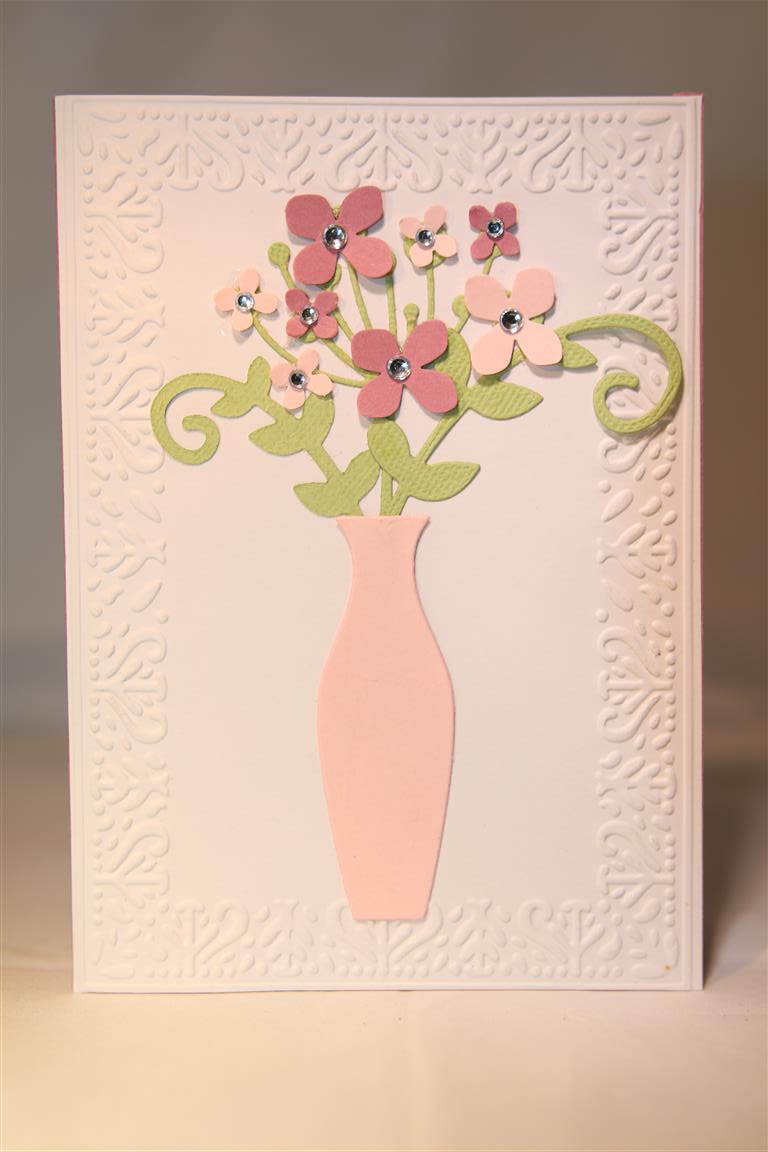 Hi! So sorry I have been missing for a few days, but this week has been amazingly busy at work, with lots of new products coming in and it was all hands on deck to get them all out on the shelves. I don’t think there was one day when I didn’t come home without purchasing something! Today I have posted 3 cards to make up for it, and these cards are very similar to the cards I am teaching next week. I have used what looks like a lot of dies, but really the list is quite short! here goes… Memory box lorelai leaf, Paper Rose Vases and stems,Flower set one and Leaf scrolls. The embossing folders on two of the cards are Kaisercraft decorative frames embossing folders ( you may recognise these from the last post…I do like them!) The flowers on the bottom card are martha stewart punches. Some of you may also have noticed that I embossed the top part of the vase on the top card with one of the embossing folders. These cards have lots of potential as a favourite design because they can been done in lots of different colourways and I think they have made it onto the short list for my cruise cards. Today is Roast day so thats in the oven, and I am really looking forward to sitting in the craft room, new stuff will have to wait though as I am going to start working on my July class cards …all in all a great day ! til tomorrow….
Vertical Greetings
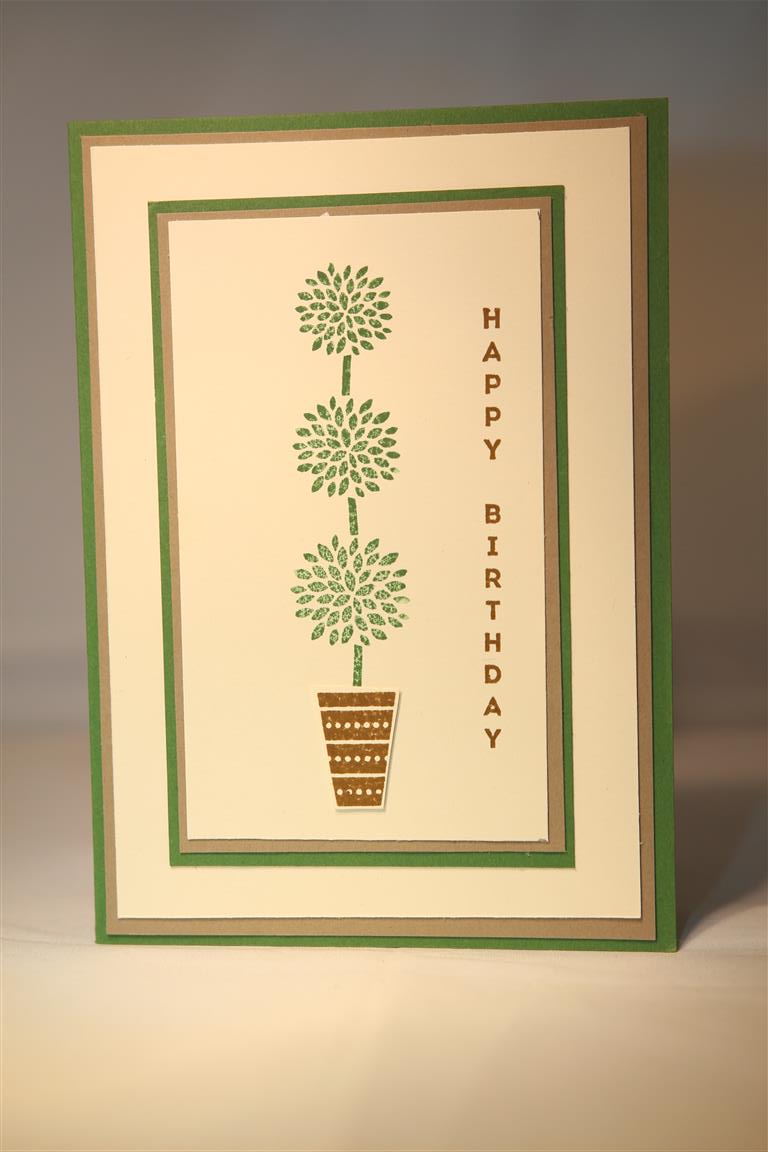 Today’s card was a quick and easy card of layering and stamping. I used a stamp set from Stampin Up called Vertical garden, and stamped the greeting and topiary tree straight onto the cardstock. I stamped the pot again on a scrap of paper, fussy cut and popped it over the top of the green stamped pot with 3d foam squares. I am thinking of doing a similar design for one of my cruise cards…I spent a lovely afternoon yesterday in the craft room, but today we are going out and about for a drive out of the city to see the autumn colours..til tomorrow….
Final Oh so succulent for now..
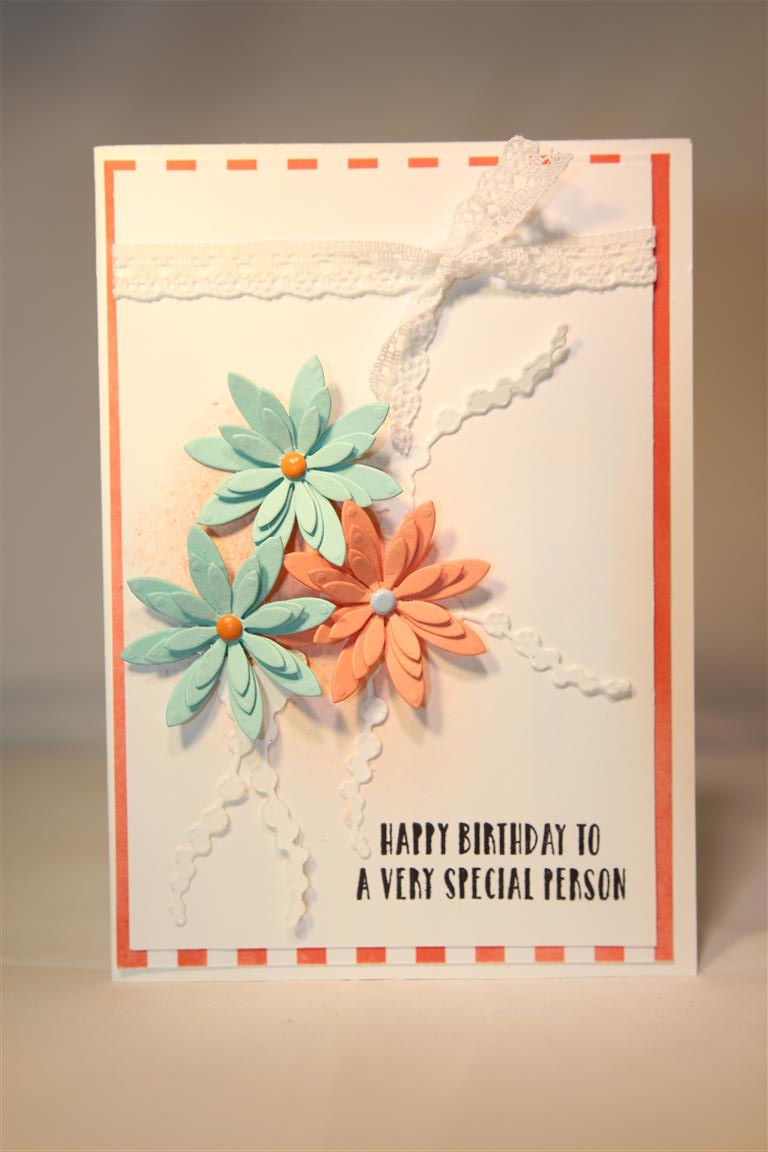
For this fianl card in the Stampin Up Oh so Succelent series I used the dies, stamps and papers from the collection.I die cut the flowers from stampin up cardstock, and used some brads that I had which matched the colours perfectly. I smudged some calypso coral ink ( stampin up) on a sponge behind the flowers and tied around the whole panel with a piece of dainty lace. I can’t wait to get back to this collection to try some other colour combinations! Til tomorrow…..
Oh so succulent stamp set..
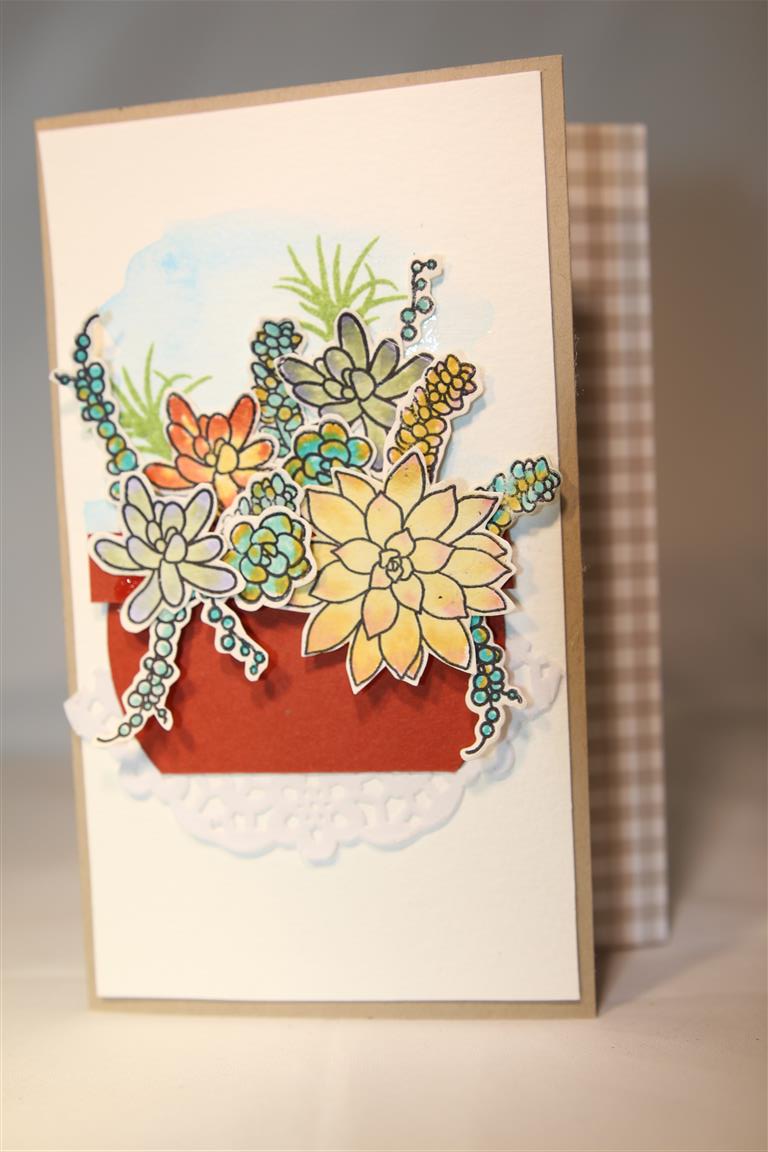 For this card I used the Stampin Up Oh so succulent stamp set, stampin onto watercolour card and colouring with inks. Although I have the matching die set i found it quicker and easier to fussy cut the images myself. On another piece of white card I did a watercolour wash in blue, stuck down half a doily, die cut a circle and trimmed it to a pot shape, and then arranged my plants! I trimmed some of the front of the card off, and added a strip of patterned paper on the back part of the card. I truly enjoyed making this card even if I did spend a little bit of time on it! I have been busy this week making orders, 12 at last count, but everything is caught up with now and I am hoping to cut into my new papers ( 2 lots now.. Kaisercraft High tea and sage and grace) in the coming days. til tomorrow….
Oh So Succulent..
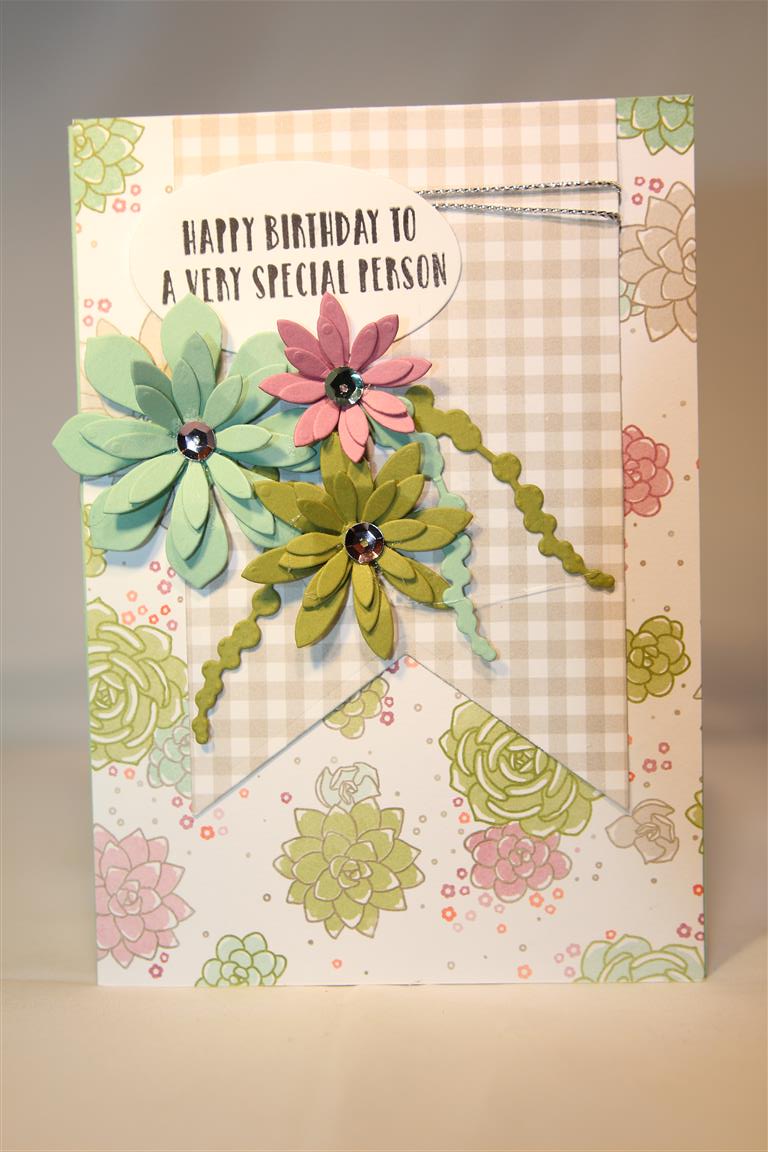 Over the next couple of posts I will show you what I have been making with my Stampin Up Oh so Succulent stamps, dies and designer papers. This one today uses all Stampin Up supplies, including the sequins and silver thread. The range of dies in this set are lovely,lots of opportunities for lovely built up flowers. Today I am taking a break from preparing for my craft fair and meeting up with some great ladies I converse with in our craft group. It will be a lovely afternoon of crafting and chatting! Til tomorrow…..
Kaisercraft Madamoiselle Box card
 The final card I made with Kaisercraft Madamoiselle paper collection was this box card.I have simple instructions for constructing this shaped card on my you tube channel ( helens card designs), so much easier than it looks! The papers were from the 6″ pad as was the sentiment and I fussy cut some butterflies from the 12 x 12 sheet from the same collection.I just added some Foliage die cuts ( kaisercraft die) to finish this one. Today I am heading in to the craft room to fulfill some orders, after i tidy my desk..if I can find it under the pile of bits and pieces I keep stacking on it! Til tomorrow…
Side stepper card
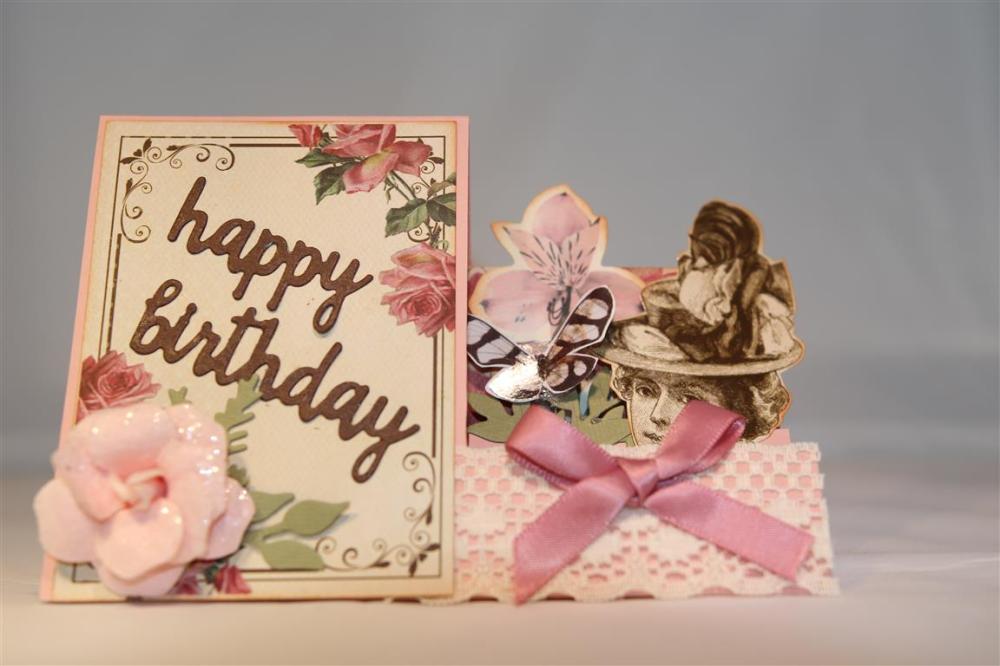 Today’s card is a side stepper card made with Kaisercraft Madamoiselle paper collection. I used a cut out from a 12 x 12 piece of paper from the collection, and all the other little bits are from the collectables pack. The sentiment is die cut with akaisercraft die (Occasions) as is the foilage, and I added a Prima flower, and some lace and a ribbon bow. I have instructions on how to make the side stepper card on my You Tube channel..Helens card designs. I picked up a few pices of new paper today from the Kaisercraft new release called Sage and Grace, lovely soft colours, so now just have to find some time to sit down with it! Til tomorrow….
