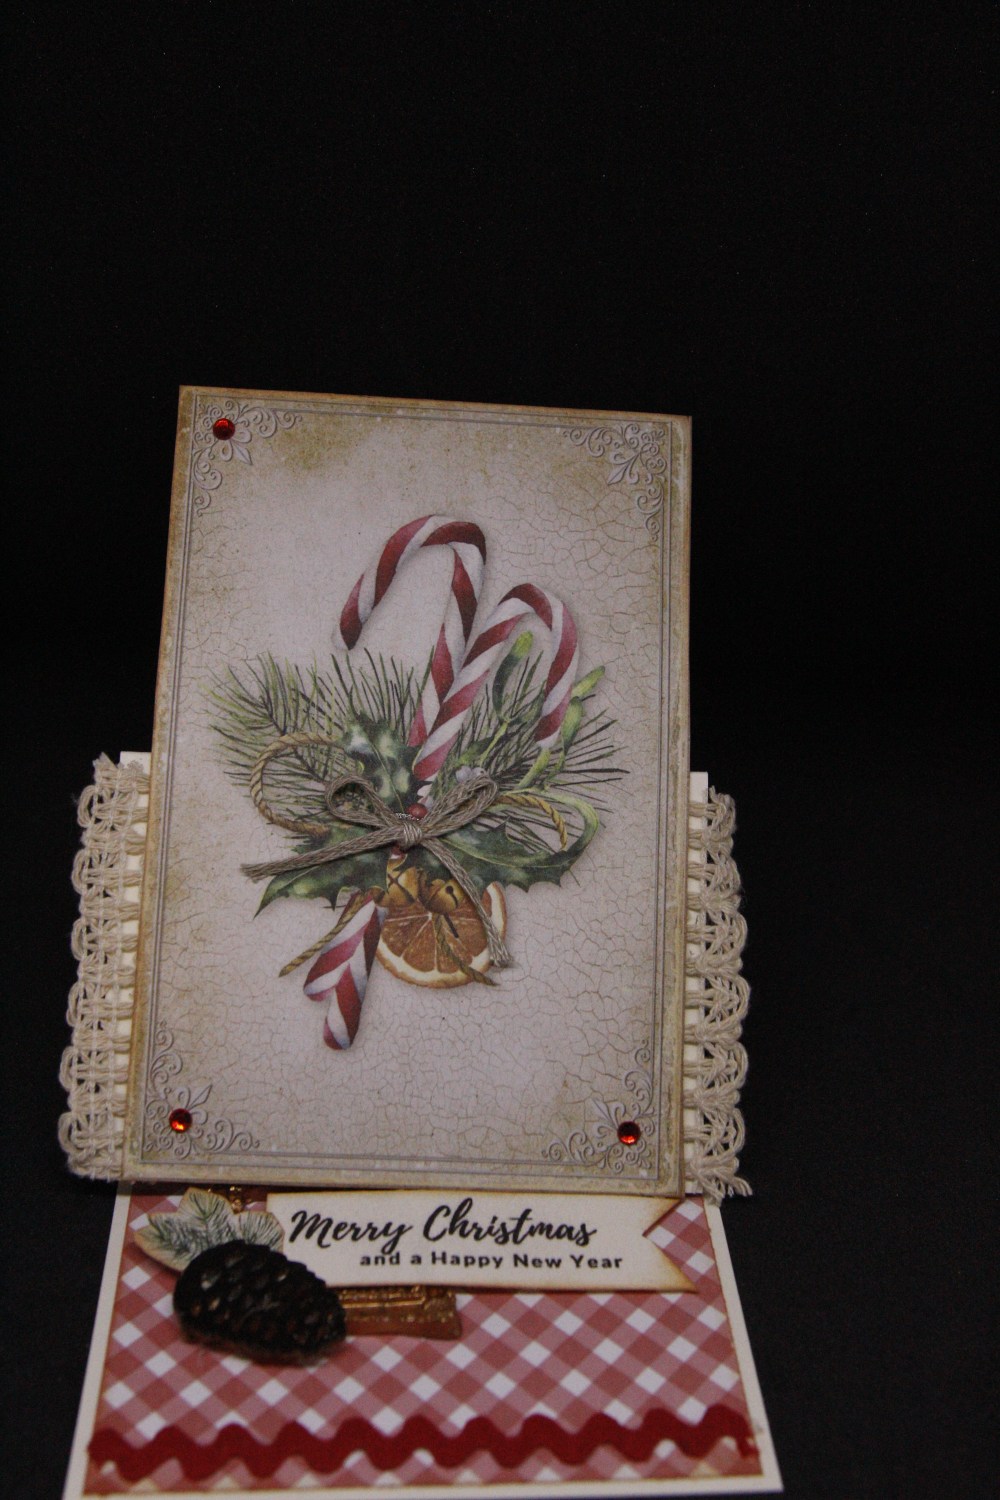
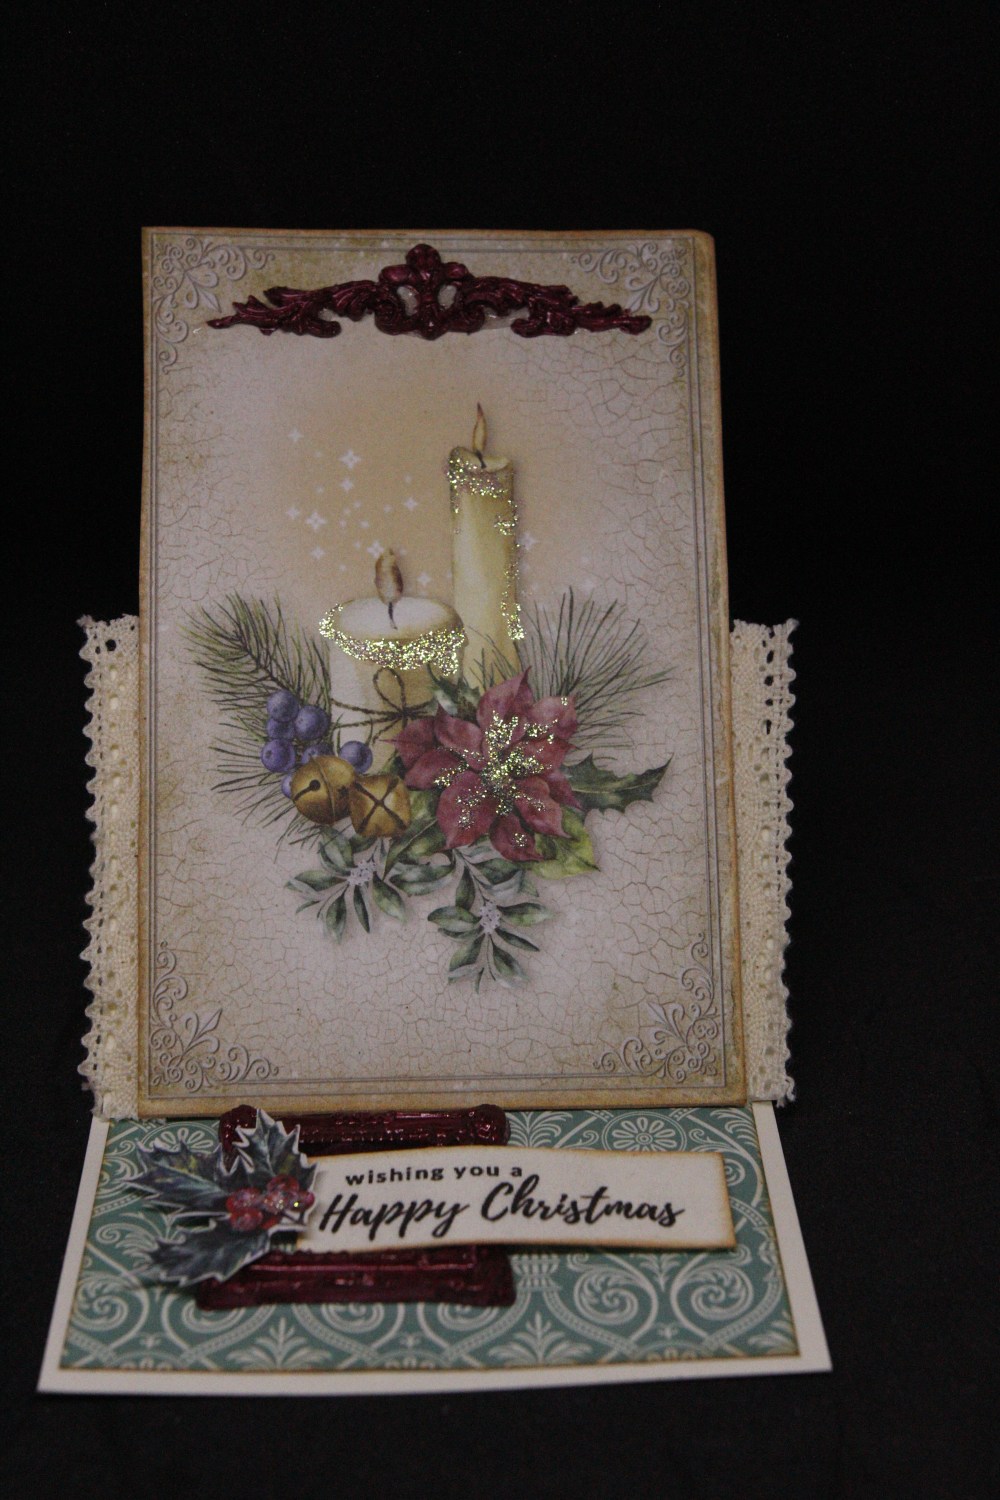
 Today we say farewell to my Lemoncraft Paper makes, and these three are made in the same way as the cards on the previous post. I have used a lot of the molds that I made on these cards, and I painted them with prima alchemy paints. I have been busy finishing off my January classes, and they are done now so I have a little window of time to do some ” me ” crafting, and I am thinking wedding cards,I have some new stamps and dies to try out although you know these plans could go out the window when I actually sit down to craft! Til tomorrow….
Category: Vintage style cards
Mintay Christmas Stories vintage style 1,2..
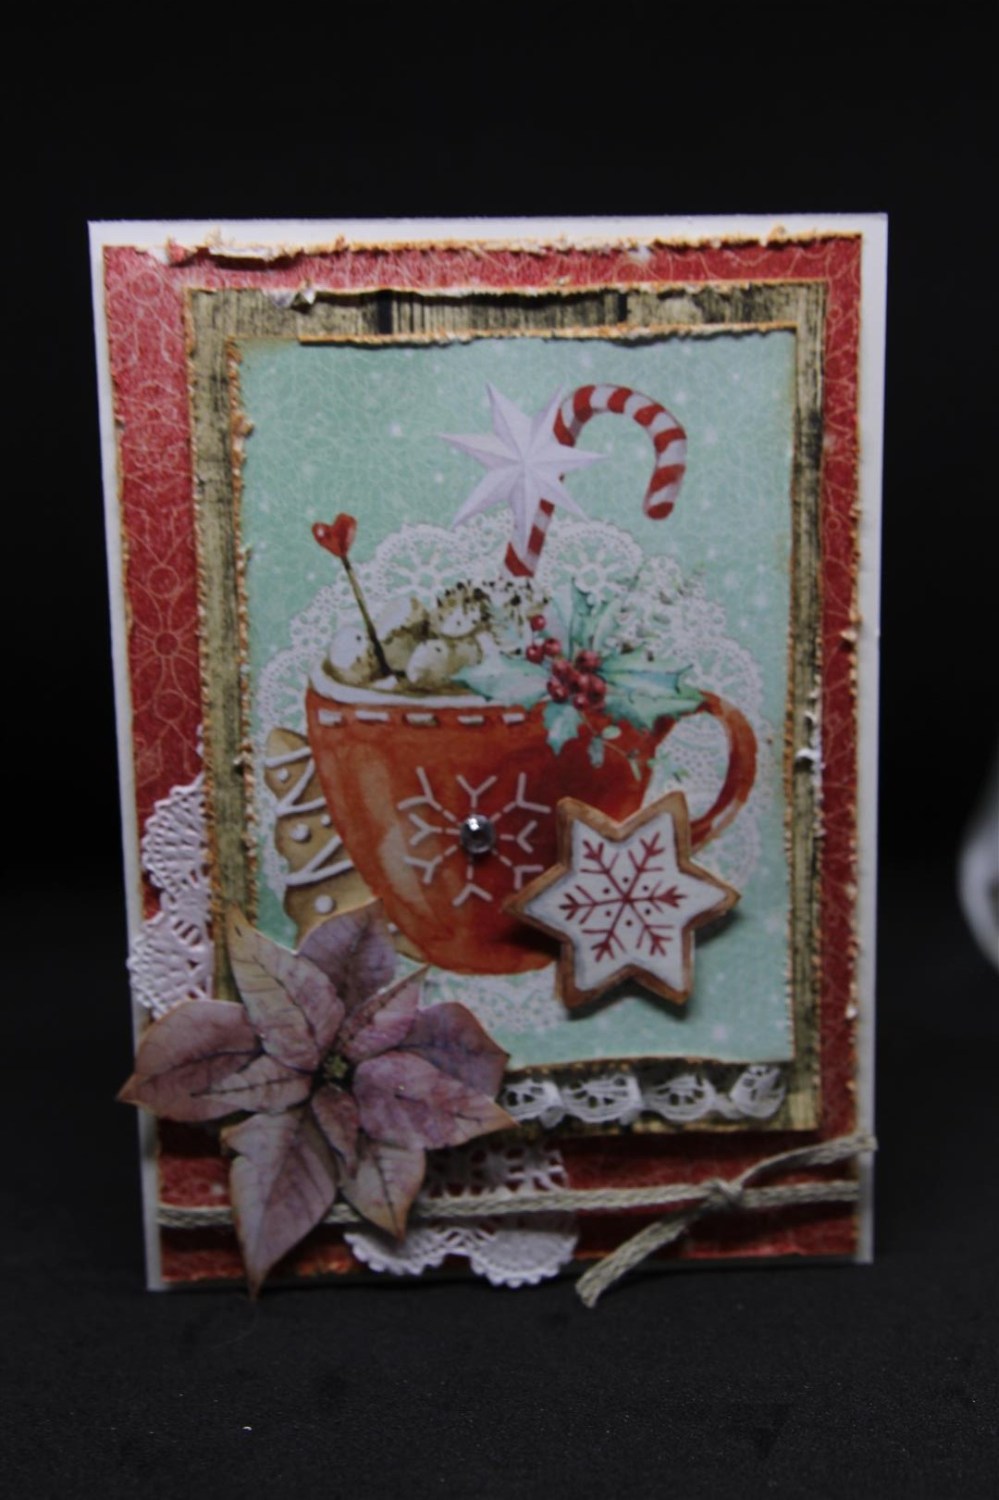
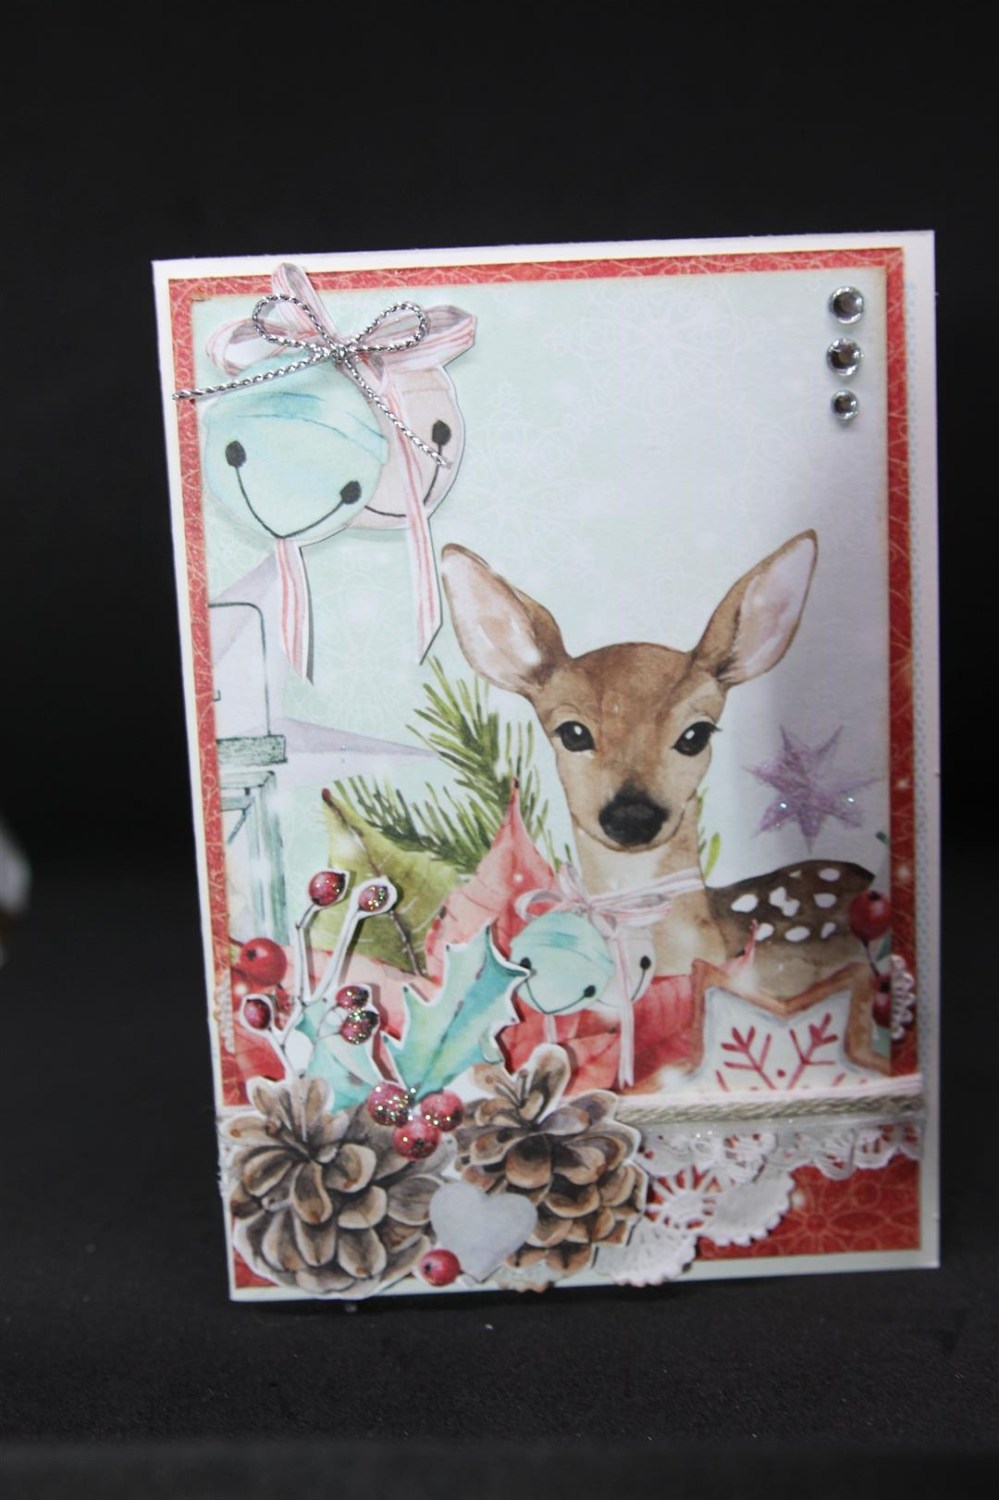 We are taking a short break from kaisercraft Chrismas Wishes to have a look at a few cards I made with MIntay Christmas Wishes collection. This beautiful Christmas collection is very much styled for shabby chic and vintage card makes.On both cards I have just added a doily and some twine. Nothing else was needed here. I distressed all my edges on the top card and inked with tea Dye ink. I did a little fussy cutting on the lower card but that was it – very simple! til tomorrow….
Lemoncraft House of Roses…not so shabby!
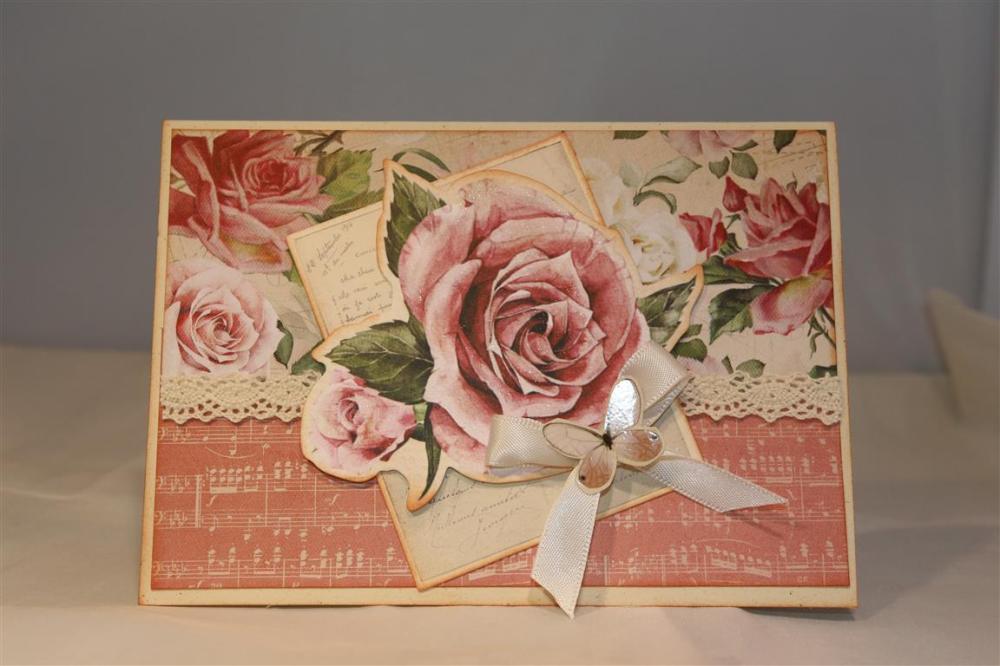
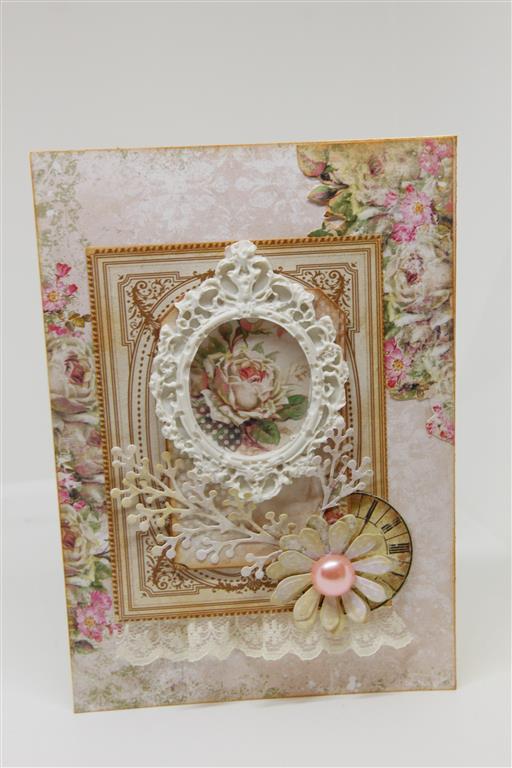 One of the classes I teach at paper Flourish is called Not So Shabby because although I love the shabby chic look I still haven’t mastered the genre and so have created my own take on it.I also need a fair bit of practise so that I can stay one step in front of my pupils so you will be seeing my progress here. This is a card I made with a paper collection called House of Roses by a company called Lemoncraft. lemoncraft have the most amazing shabby style papers and also A4 sheets full of fussy cutting options, both of which I have used on this card. I did a little die cutting ,fussy cutting, added some lace and the focal point on my card is the resin frame which I made with a silicone mold and No More gaps ( available at your local hardware store!). I didn’t paint this one , it is as it came out of the mold. It has been a busy morning full of housework, Roast is in the oven and after lunch I plan to relax in the craft room – can not wait!! Til tomorrow….
stamperia letters and flowers..
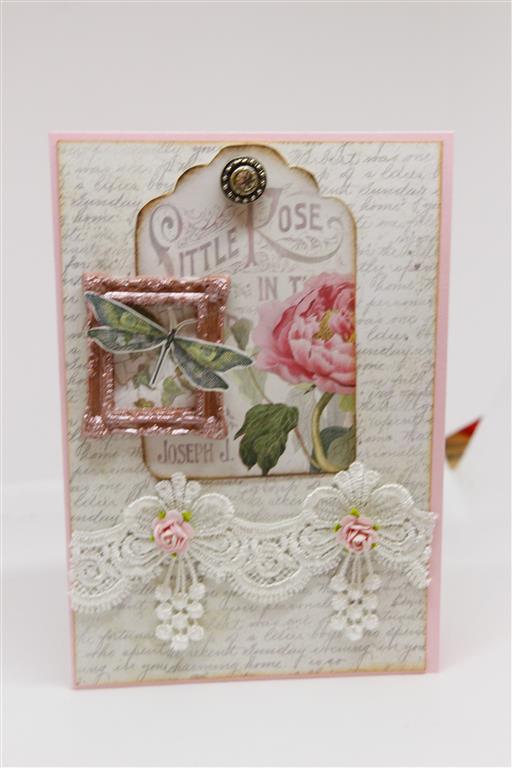 Another card today using the gorgeous Stamperia letters and Flowers papers,and some stunning lace! The frame which I painted with Prima Sparks acrylic paint is interesting because I made it with a silicone mold and some No more gaps from the hardware store! it takes a couple of days to dry in the mold but comes out beautifully! I have made a lot of these molded frames and flourishes so you will see them from time to time on my projects.For now though i have picked up my new kaisercraft papers and it is a Christmas range so I am all ready to start the Christmas makes! off I go… til tomorrow….
Kaisercraft Romantique…shabby..
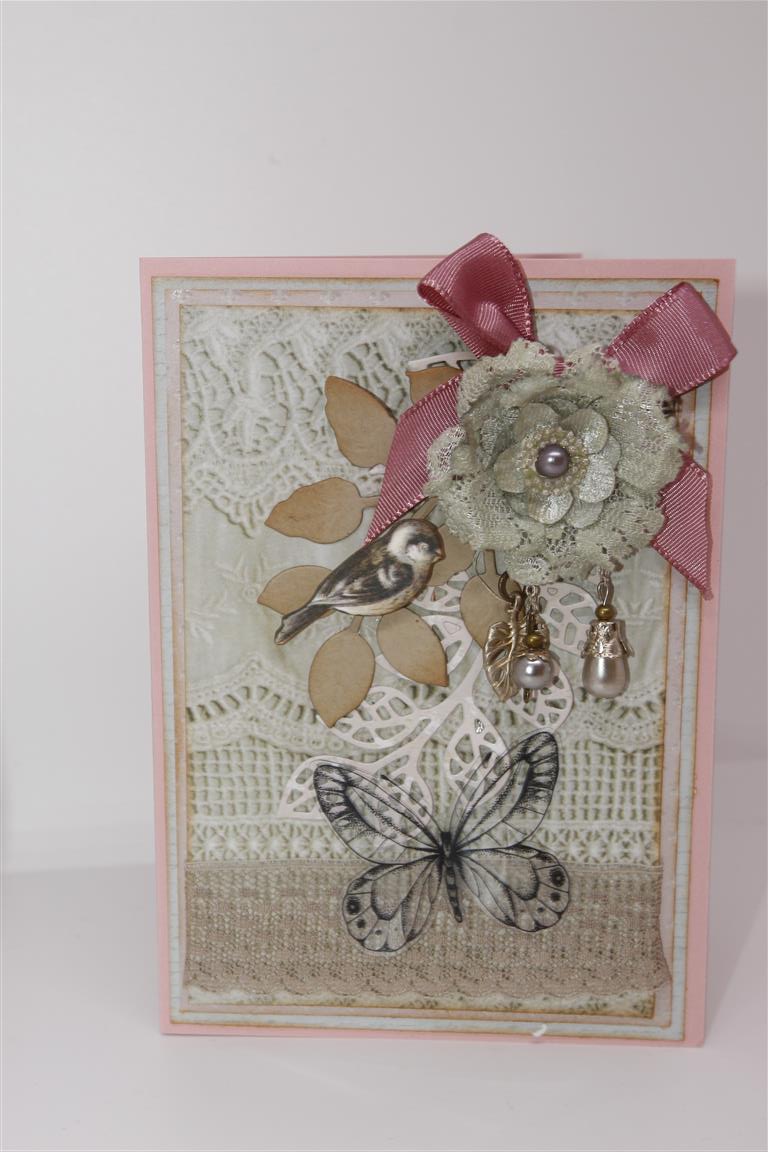 I really haven’t had the time to play with this collection, but I have made a few for you to see. It’s the Kaisercraft Romantique collection and it lends itself beautifully to the whole Shabby Chic style, a style I will embrace once I get over the whole ripping my paper hang up I have!Here, I have layered a few of the 12 x 12 patterned papers, and fussy cut an acetate butterfly – in this collection there is a whole sheet of these butterflies and I love them! The leaves are die cut with creative expressions dies, and I inked around every edge with Tea Dye distress ink. I tied a big bow and on top of that I glued a Prima flower with dangly bits that I have been holding onto for ages! The top layer of patterned paper has a lacey print but at the bottom of it I added my own lace in a taupe colour ( Stampin Up lace). I hope everyone had a lovely Christmas break, with family and friends, I can’t believe that’s Christmas over for another year! we still have our son home for another few days before he flys back to Sydney next week so the celebrations continue on here ! Til tomorrow….
Tie Dyed t-shirt card
 This is the first card I made with my new stampin up stamp set..Custom Tee, so I was really just getting the feel of the stamps.The background paper was just a scrap on my table as were the felt flowers and button. I stamped the t-shirt on plain white card, cut it out and used my copic markers to do the tie-dye design ( will practise that a bit more!) The Vintage sentiment is in the same stamp set, and the happy birthday is from another stampin up set. All of a sudden I have a few projects on the go.. thinking about a whole new range of cards to do for our cruise next year, I am making a box for a challenge,still need some wedding cards,new kaisercraft paper to play with and some village lesson cards to prepare. My sister gave me some new stampin up stamp sets yesterday and so I am itching to try them out too….ahhh life’s good! til tomorrow….
Graphic 45 St. Nicholas 3 and 4..
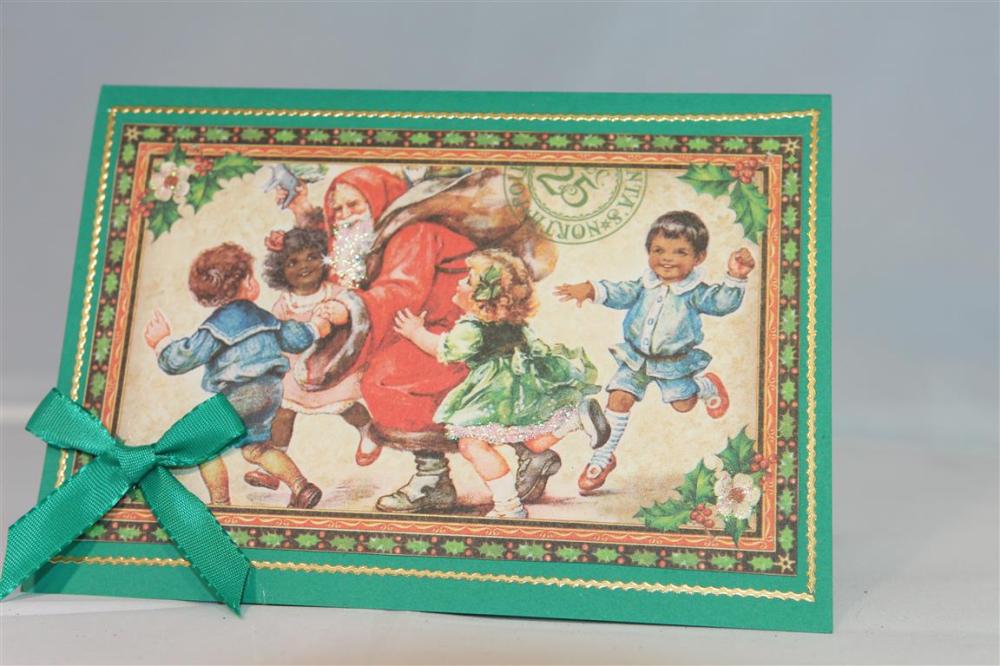
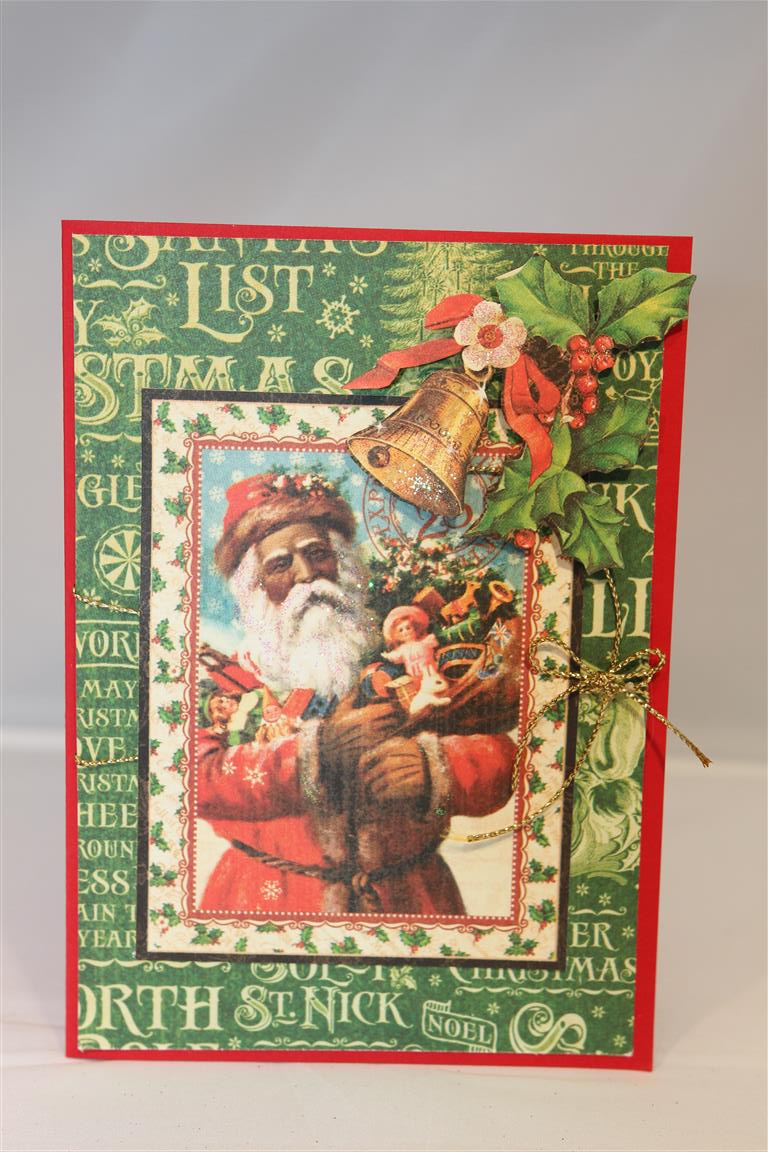 Here are the other two cards I made with Graphic 45 St. Nicholas paper collection. I had to pack that paper away to work on some orders, and I haven’t got back to it yet.On the top card I did something a little different – I used border stickers to frame the main image, while the bottom card has a little bit of fussy cutting. I think we will take a bit of a break from all things christmas next time and have a look at a few other cards I have been making!Til tomorrow…..
Kaisercraft Barber Shoppe 3 and 4

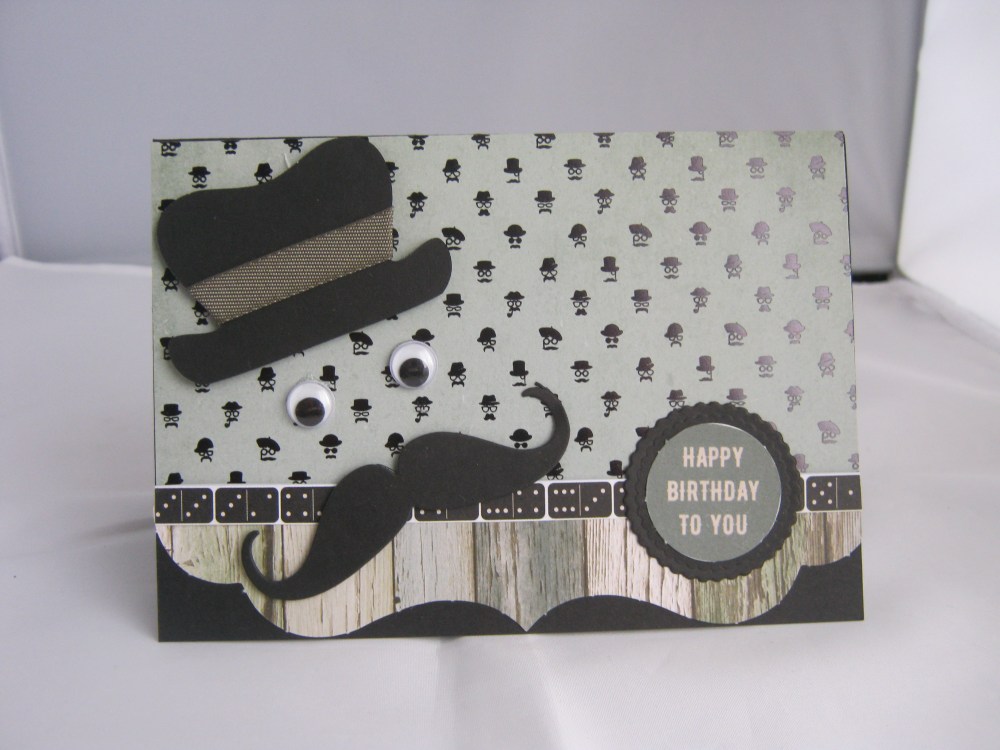 Here are the other two cards I made with Kaisercraft Barber Shoppe 6″ paper pad. I used a kaisercraft die on the top card,with a couple of the pop outs from the back of the pad, and for the bottom card I used a sizzix hats and moustaches die with a couple of wobbly eyes. Today is the start of Christmas cards!! I have spent the morning going through my boxes finding all my dies,embossing folders, and stamps with a christmas theme, but i have been distracted because I can’t find two new kaisercraft dies..I had them recently because I used them on the next group of cards I am showing you, but they have disappeared! I have decided to stop looking and they will show up when I least expect it..That’s the theory anyway! Til tomorrow….
Kaisercraft Mademoiselle..
 The Kaisercraft Mademoiselle paper collection is gorgeous, so much so that I have used it for my August class at Paper Flourish!For this card I have used the 6″ paper pad,and a couple of the collectables.The trim is by Prima, and the butterfly is fussy cut from another of the papers in the pad.The secret to this vintage style paper is to ink around all your edges…I have used Tea Dye distress ink.We will continue this collection after Nathan has photoed the cards I have since made up, meanwhile tomorrow we will have a look at some stamped cards I recently worked on. Til tomorrow…..
Magnolia Lane collection
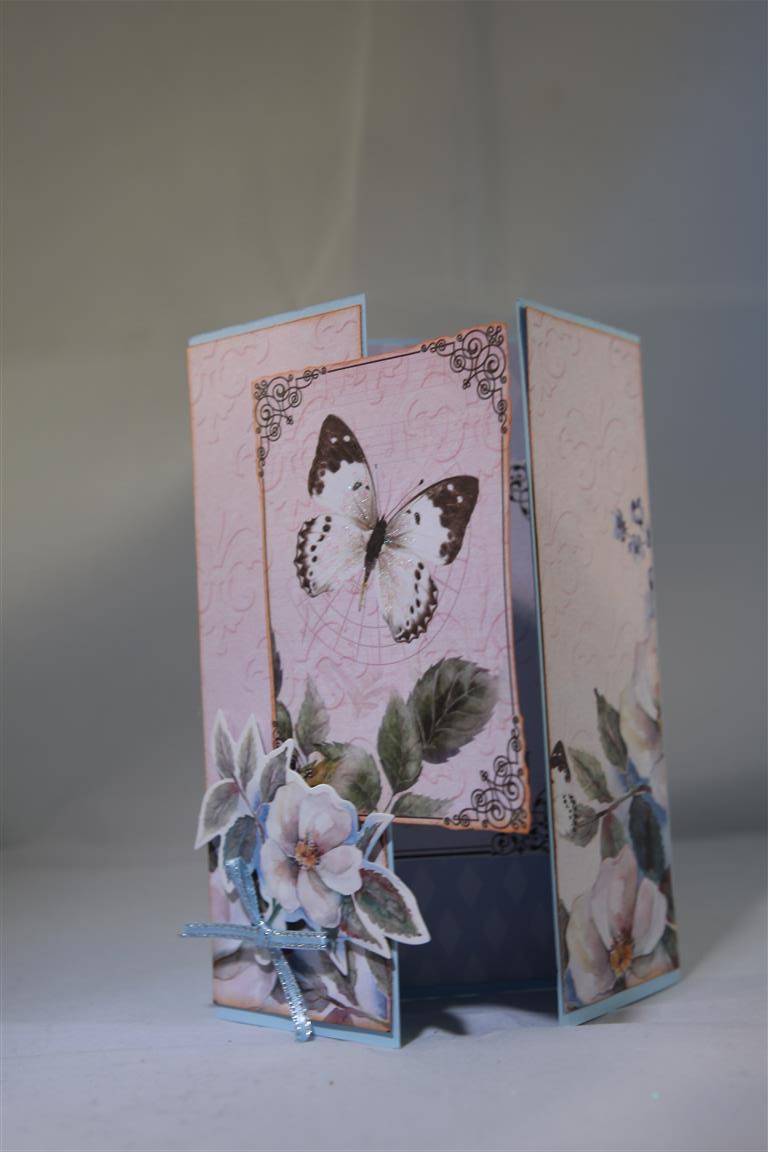 I found some lovely vintage paper that I had to have, it’s called Magnolia lane and the paper company is Ultimate Crafts.I have been a bit time poor for crafting lately but I did find a spare 1/2 hour to cut into this gorgeous paper. I also bought the matching collectables, and really the papers don’t need much else. Here is the first one , I made it in a gatefold style and decorated the inside as well as the outside.Inked all my edges with tea dye distress ink and the cardstock is from Stampin Up.My Body is protesting at being back at work, my muscles are a wee bit sore, so I am off to fill the hot water bottle and treat my back to some heat! Til tomorrow….
