 This is the last in my Kaisercraft Porcelain Rose series – I am sure I must have used all this paper!! This card uses paper from the 6″ pad, and a couple of the collectables from the same range. I tied a few flowers together with ribbon to form a bunch of flowers and attached a charm to finish. Family day today so I haven’t been in the craft room, but I am heading there as soon as I have cooked some dinhner! Til tomorrow…..
Porcelain rose number 15
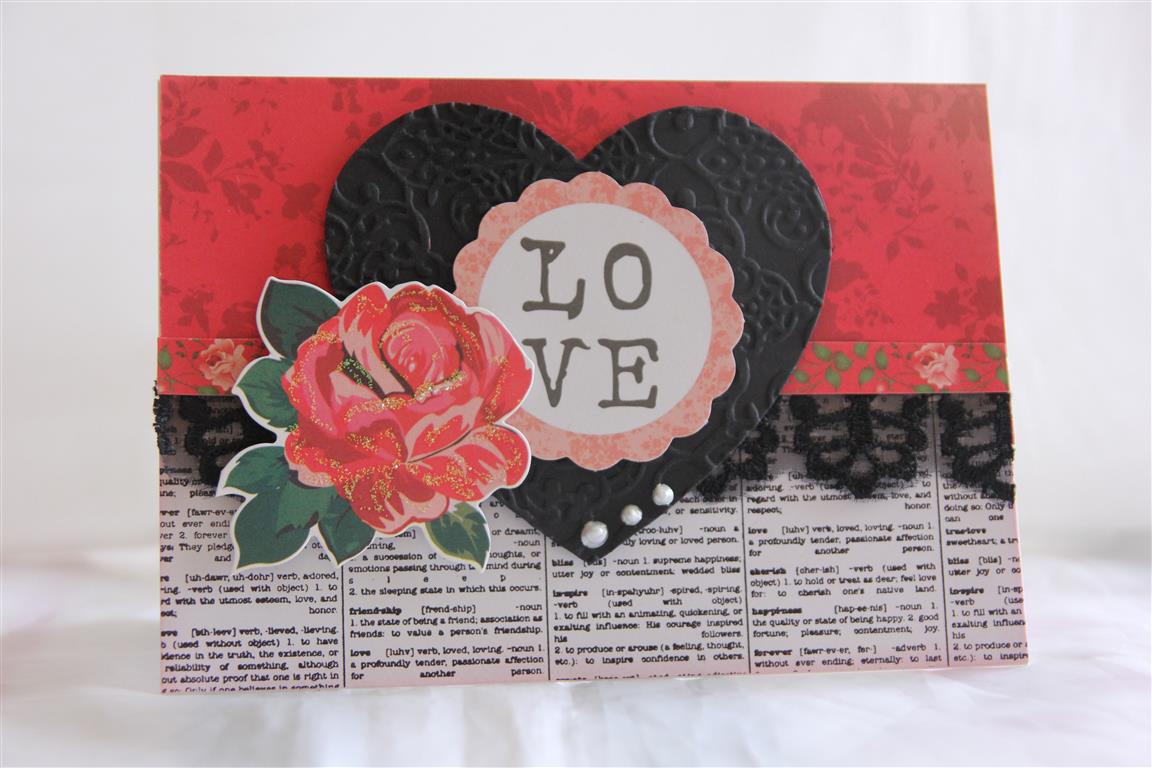 I can’t beleive we are up to number 15 in this series! This paper – kaisercraft Porcelain Rose truly inspired me! I think it was because there were a few different colourways in it, and I am particularly fond of this one – black ,white and red. The papers used here are from the 6″ pad, and i added a rose from the collectables, and a die cut heart which I ran through the cuttlebug in an embossing folder. I used some black lace and liquid pearls to finish. Today has been all about christmas with some new papers I bought yesterday, and tomorrow will be a big photo day to get them all onto the computer. Til tomorrow….
porcelain Rose number 14 with acetate…
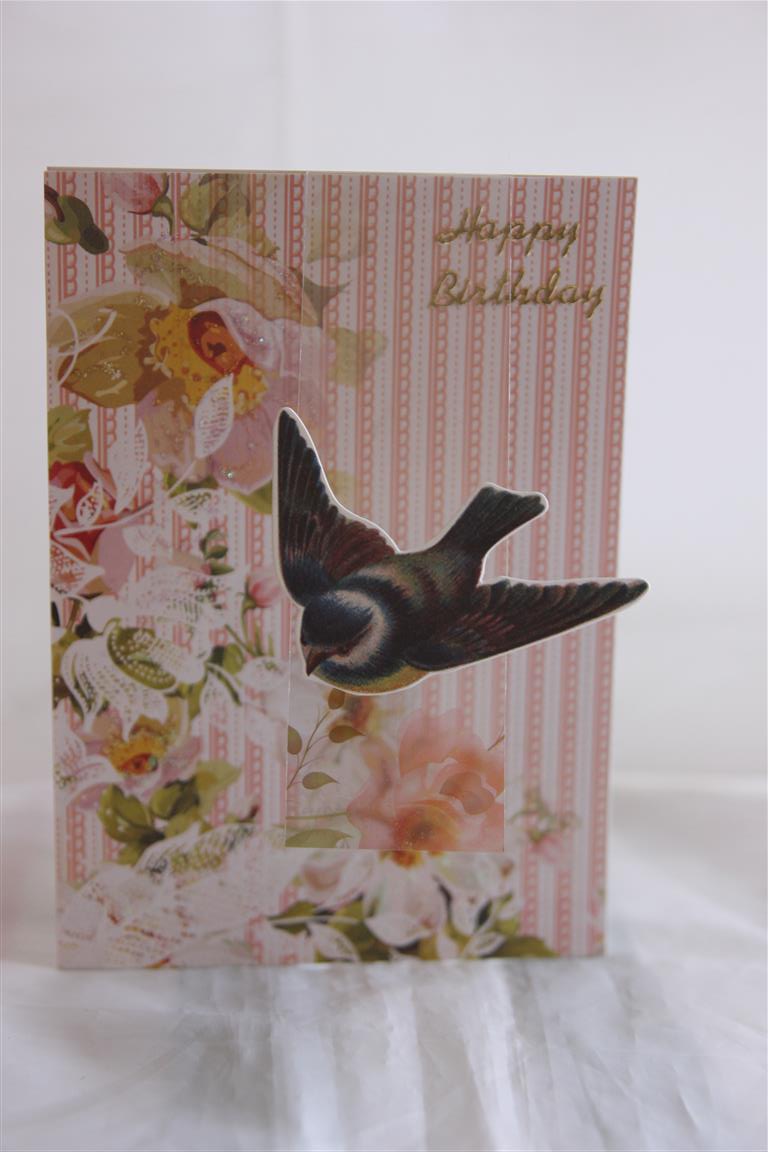 This card is a little different… although it doesn’t show up too well in the photo the bird on the front is actually swinging on a strip of acetate. I sandwiched the acetate between the card front and the patterned paper. The paper is from the Kaisercraft Porcelain Rose 6″pad and the bird is from the matching collectables.I really liked this effect and will be doing it more often – I can see it working for male themed cards with a plane flying by, or kids cards with balloons or kites …We lots of cards to photo this weekend, but have realised I have been a bit naughty and made all these cards without the inserts, so tonight i will be busy making inserts..sigh…Til tomorrow….
Porcelain Rose number 13
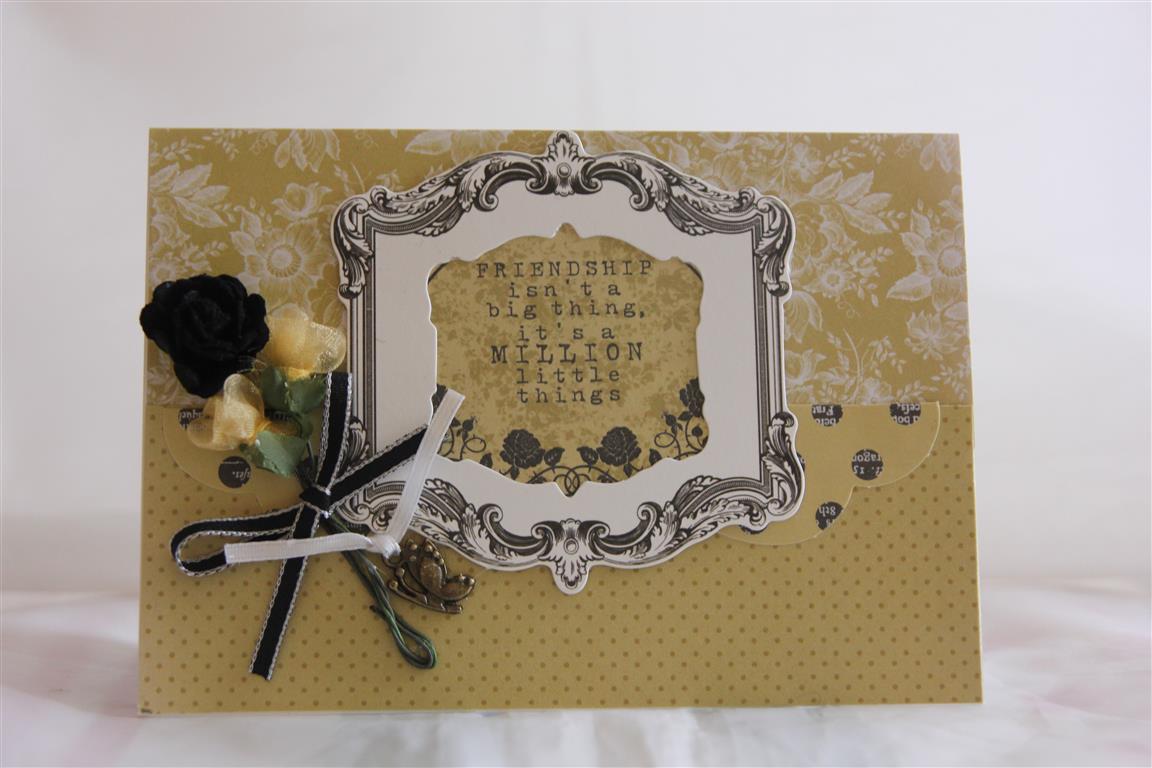
 I purchased a few Kaisercraft Kaiserfusion markers, and this is my first attempt at using them. The paper collection is Kaisercraft Porcelain Rose, and the stamps are from the same collection.I used Stampin Up Framelit labels collection Dies, and added a little ribbon bow to finish. I am quite impressed with the markers, and I am slowly building up my collection and will continue to practise!I am battling a cold just now so not feeling 100% and have had a couple of days off work to try and recover – It seems the fresh sea air on last weekends mini break did me more harm than good! Til tomorrow…..
Porcelain Rose number 12
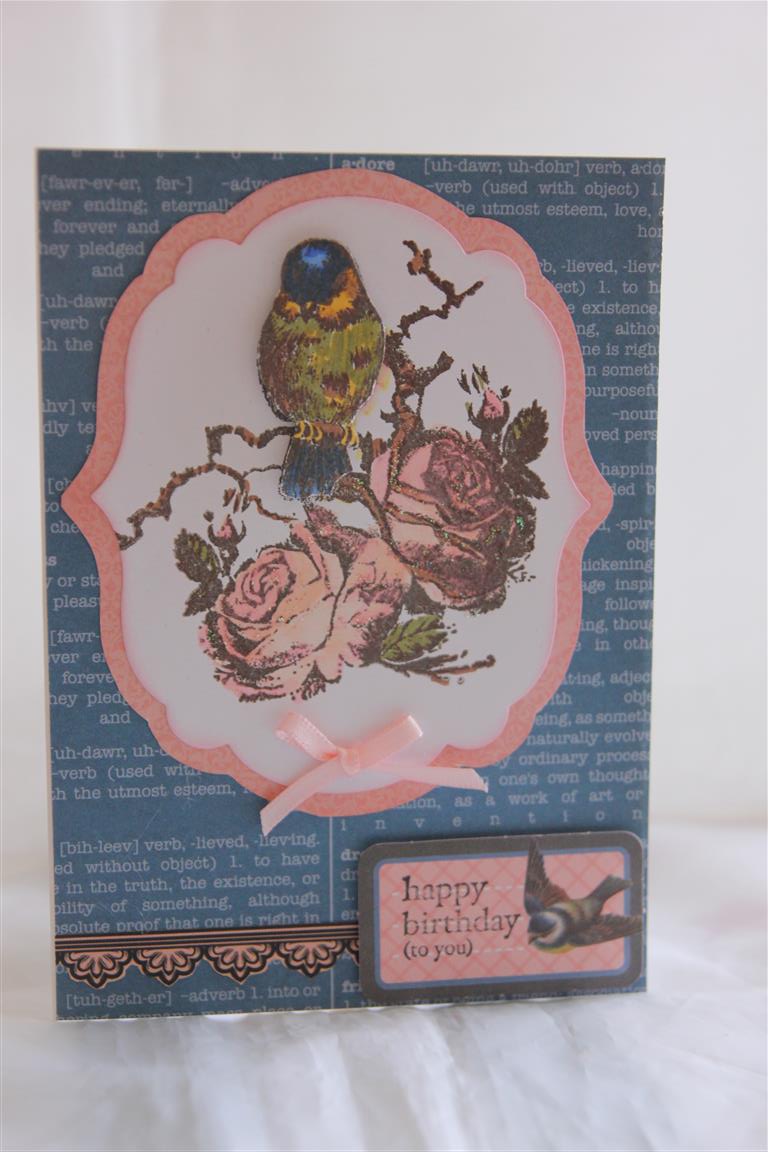
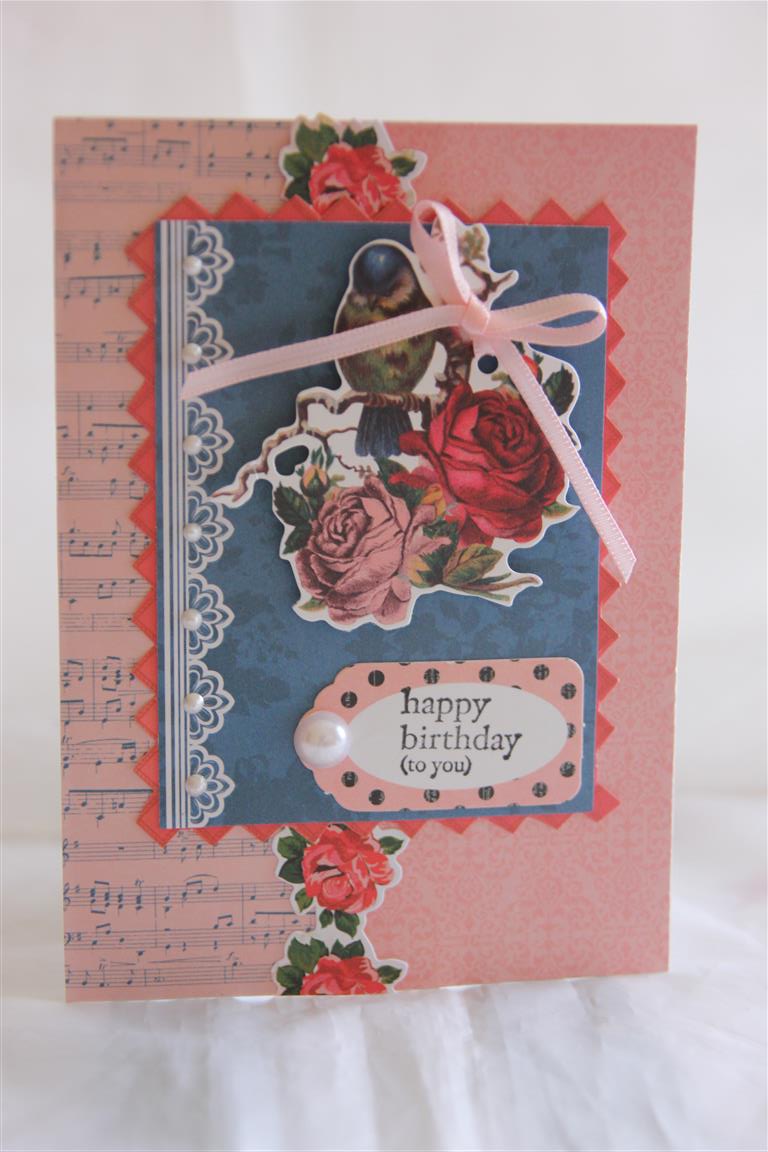 A little while ago I went back to some previous paper collections and made some more cards with them ( to try and use up the paper to make more space for new stash!) so over the next few days I will post the results – this card is made using Kaisercraft Porcelain Rose paper collection – here I used the 6″ pad for the base,and a sheet of 12 x 12″ paper for the top layers. The rose border is from the sticker sheet and the bird image is from the collectables. Stampin Up sentiment stamp, pearls, and ribbon to finish.Til tomorrow…..
Stamping fun
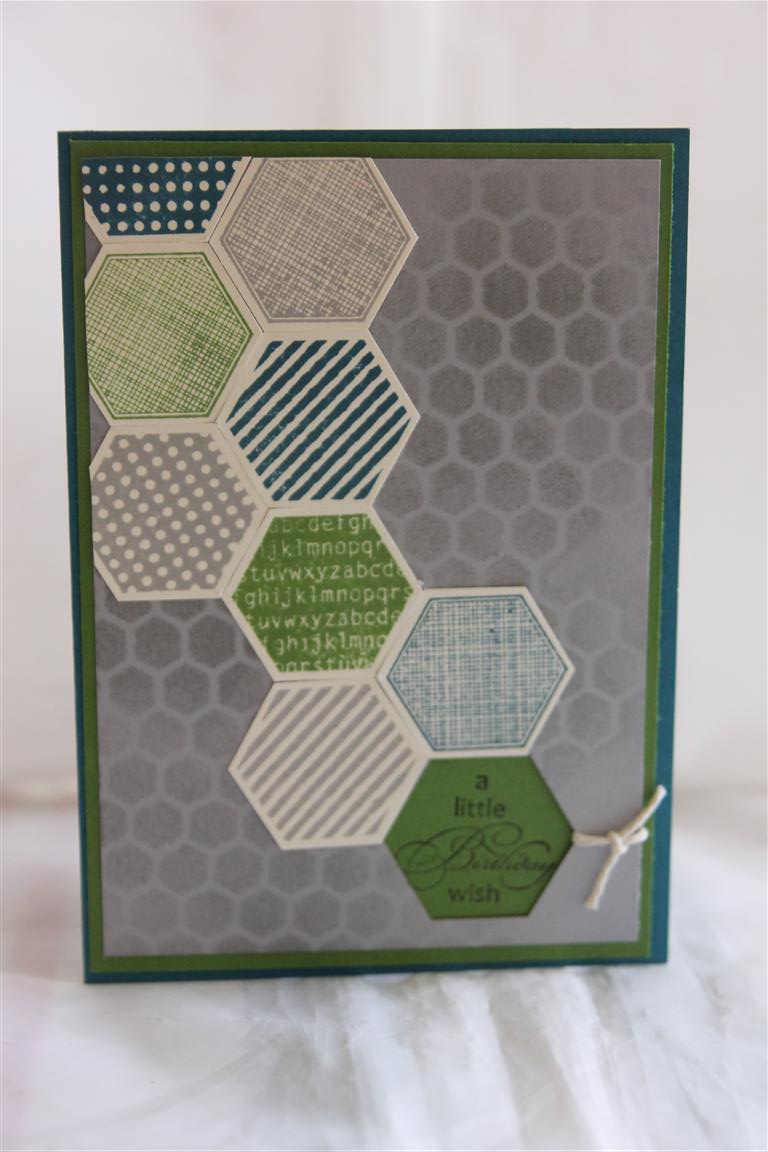 I recently purchased a new stamp set from Stampin Up – Six Sided sampler, along with a hexagon punch, and after i made the card on the previous post I took things a step further, and discarded all my patterned paper to make this card. I used 3 different colours – Smokey slate, bubblegum green and midnight muse ( cardstock and ink pads from Stampin up)and stamped a few hexagons onto cream cardstock which I then punched out. I had a hexagon template so I inked through that and I punched a hexagon out of my top layer so that the greeting would show through. I tied a little bit of string through the hexagon to draw attention to the sentiment.I have an idea in my head now to do one like this in yellow/orange with some butterflies…….Til tomorrow….
Stampin Up Gingham Garden
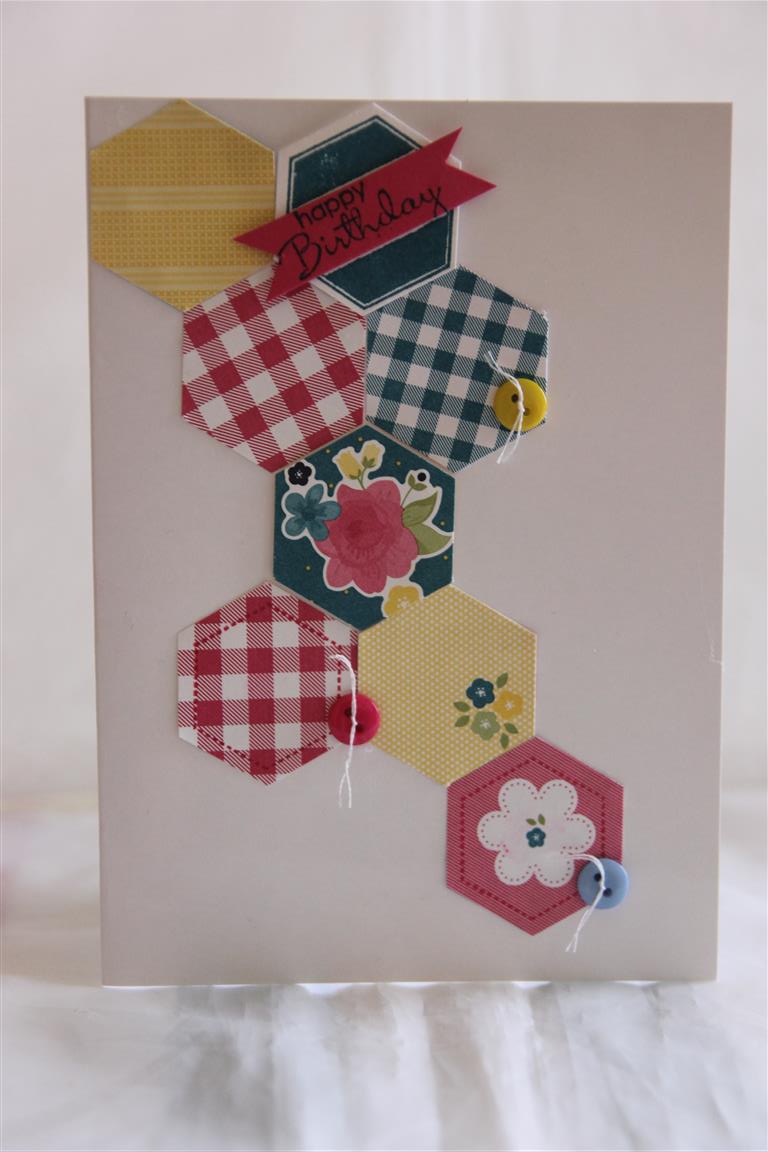 I am back after a few days break, we had lovely weather and did a lot of walking and relaxing and I have come back with batteries recharged and itching to get started on lots of new ideas! Todays card is as clean and simple as I can do – I punched some hexagons out of the patterned paper with a stampin up hexagon stamp, and stamped a couple of them with the matching stampin up six-sided sampler stamp set. I had some fun rearranging them on the front of the card and added a few buttons for texture and interest. Til tomorrow….
Canvas art in shades of grey…
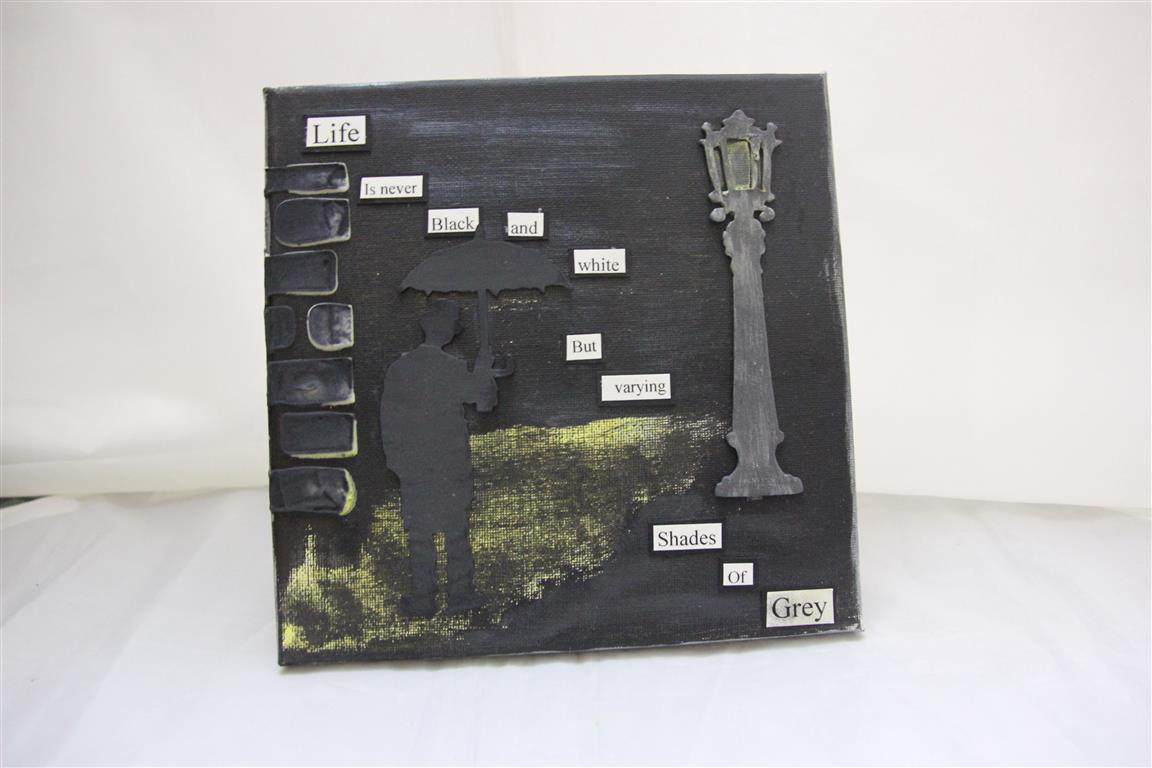
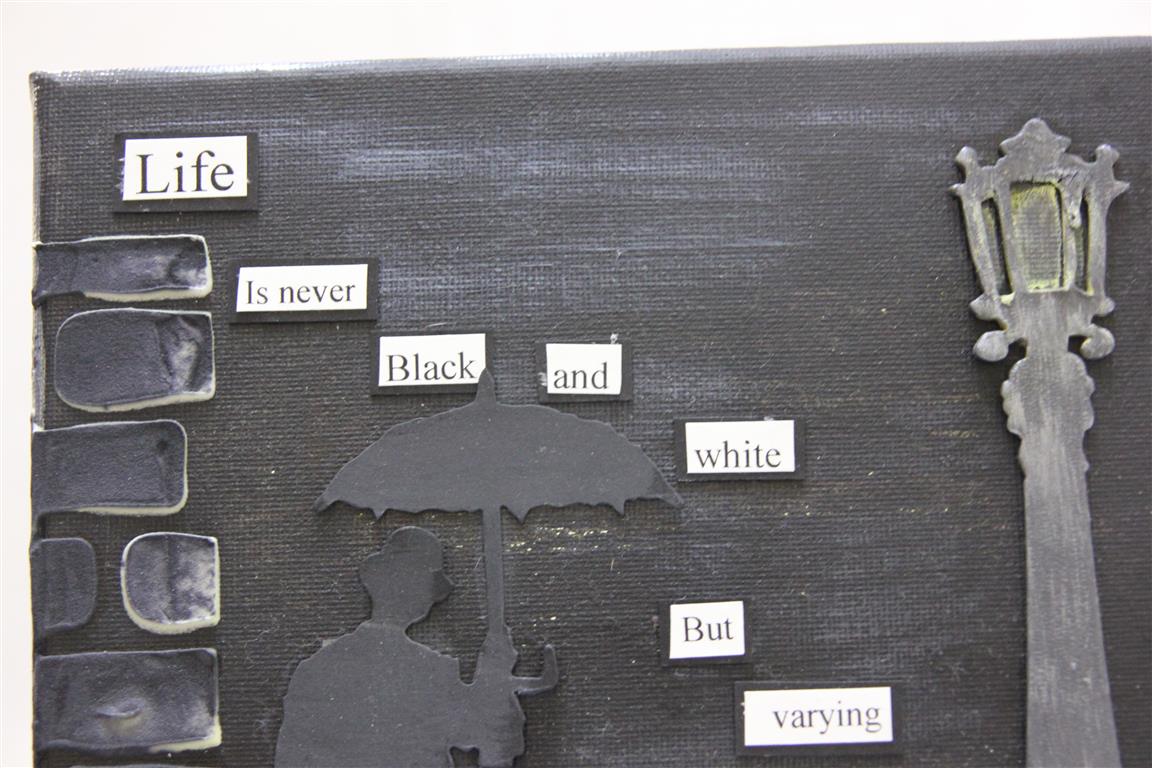 I am going to be MIA for the next few days – My sister and I are leaving all the males we are surrounded by in our families and going on a girly road trip down the coast to Robe. We are looking forward to a lovely relaxing time of good food, lots of fresh sea air to blow the winter cobwebs away and hopefully a little sunshine! So today I have posted a canvas art I made instead of the usual card. I painted my canvas black and added a few strokes of white to vary the background a little. I had left a little patch without paint which I sprayed with Dylusions spray in yellow. I die cut some thick chipboard using my Tim Holtz sizzix umbrella man and lamp post, painted black and then swiped a little more white. I used a stencil for the brick wall, and some texture paste and once again painted roughly black. I typed the sentiment on the compter, and matted each word with black cardstock. Something completely different for me – not a ribbon or bling in sight but I always knew I was going to do something a little different with my umbrella man – I love him! Til Monday, keep safe…..
Wedding Cuttlebug card
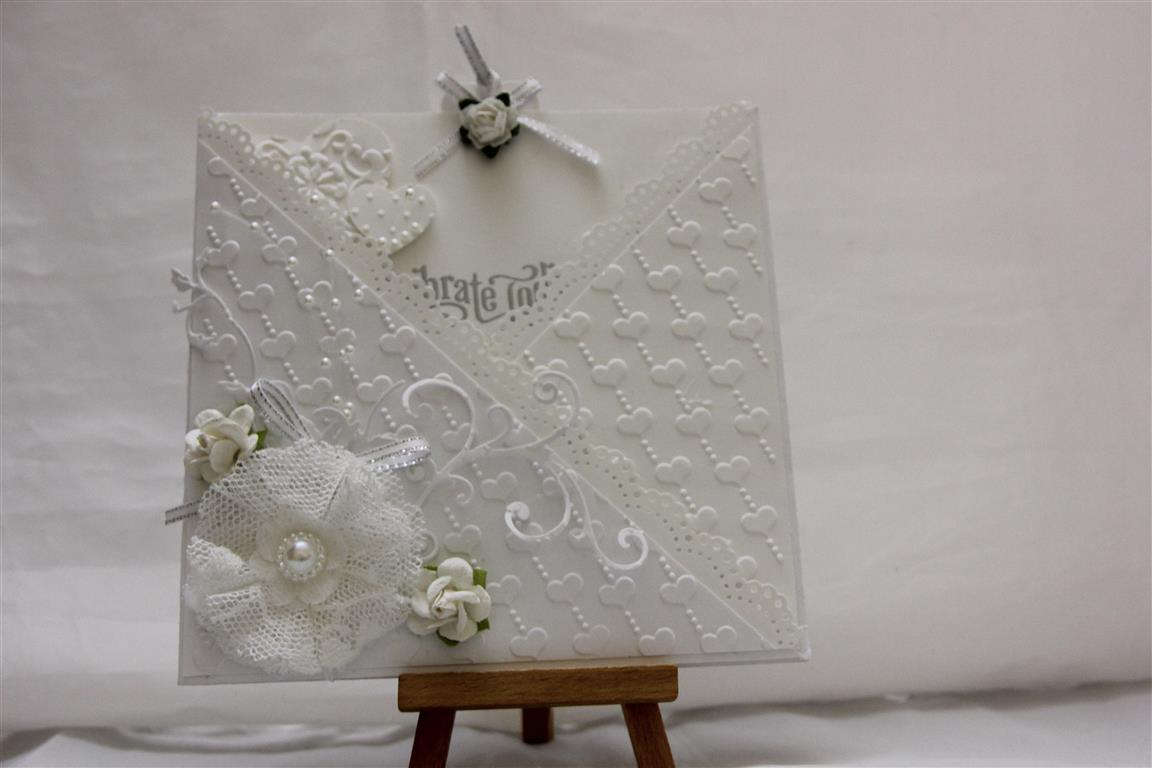
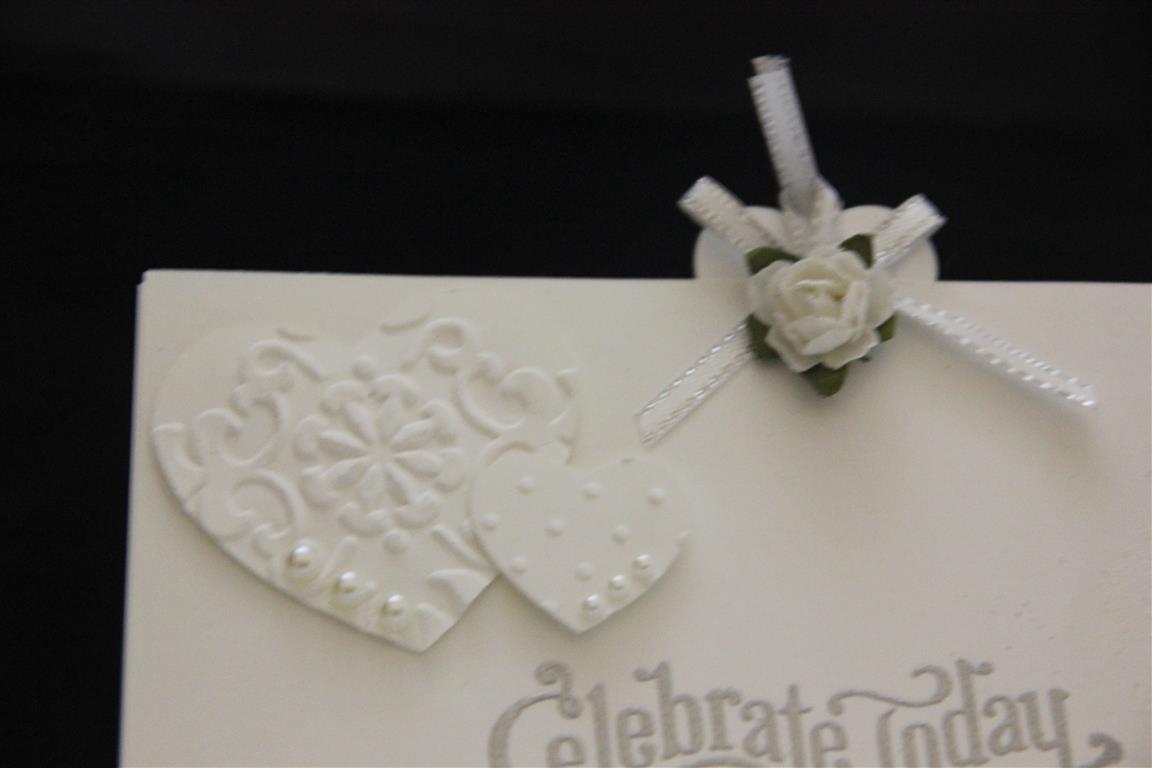 This is a card that I made for a friends wedding.I used two 6′ white cards, cut the fronts on the diagonal and stuck the backs together. I embossed the front triangles with a Hearts embossing folder, and punched the edges with Marhta stewarts lace doily punch. I added some prima flowers, a flourish die cut and some white and silver ribbon. Then the card that i slipped into the pocket created by the shaped front – a seperate piece of white cardstock stampoed and silver embossed with a stampin up stamp, two die cut heart run through the cuttlebug in two different folders, and a little tag and flower and ribbon.I have shown a close up of the insert detail.The computer has decided to type in blue all underlined today, hopefully when I publish this it all looks normal!Til tomorrow..
Christmas card with window die
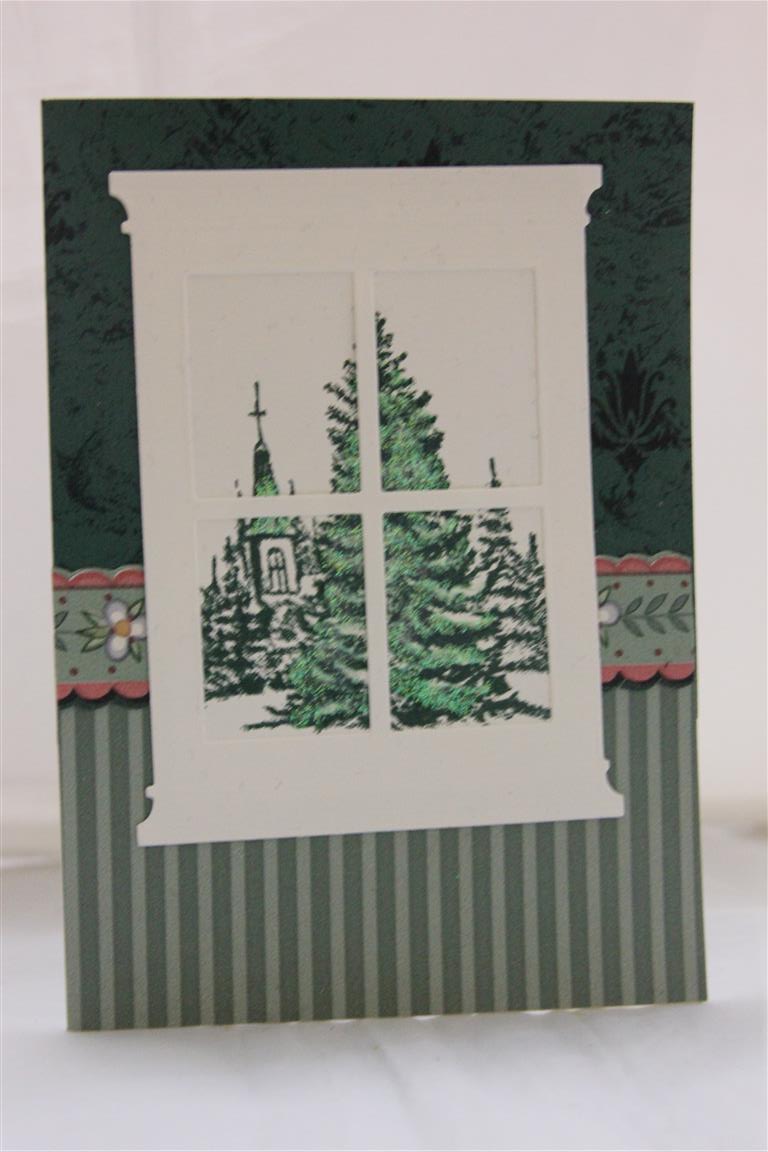 I found some wallpaper sample books in the bottom of my cupboard,some gorgeous papers in there! and so I have used a few to make some christmas cards .So the papers here are from my wallpaper sample book, and I used my madison window die, and a stampin up stamp set for the view from the window – A wish for peace – added a little glitter to the stamped image for interest.I have been scrapbooking today – not something I normally do, but it’s back to cardmaking now! Til tomorrow….
