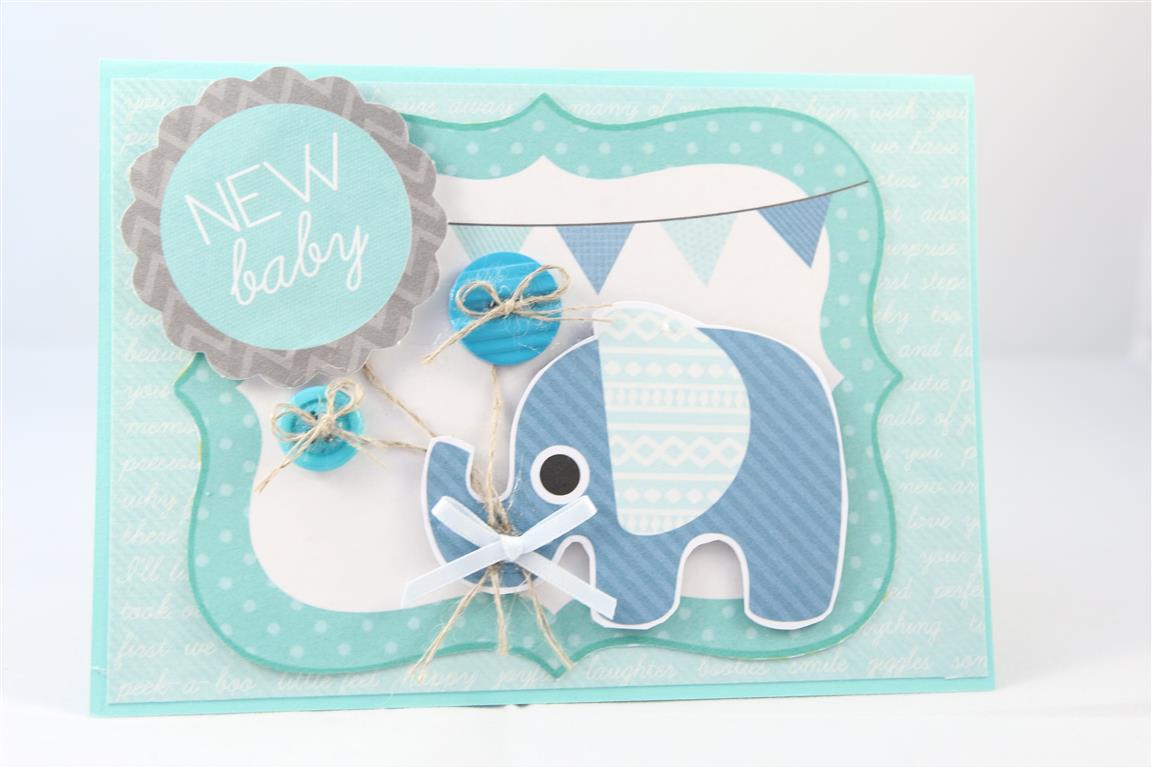
 A month or two ago I bought the kaisercraft Little One collection, and although I haven’t had much card making time recently I have managed to make a few cards from this collection. Here is the first one. A mix of papers from the 6″ pad and a piece of 12 x 12 paper and some collectables. I added some buttons, linen thread and ribbon to finish.The cardstock is stampin up . I have done a little card making today, sorted a class for Ocober and have been playing with some new stamps. I am going to stamp out some more images and sit in front of the tv tonight and colour them in ready for cards tomorrow ! til tomorrow….
Tag: buttons on cards
Stampin Up Sycamore street
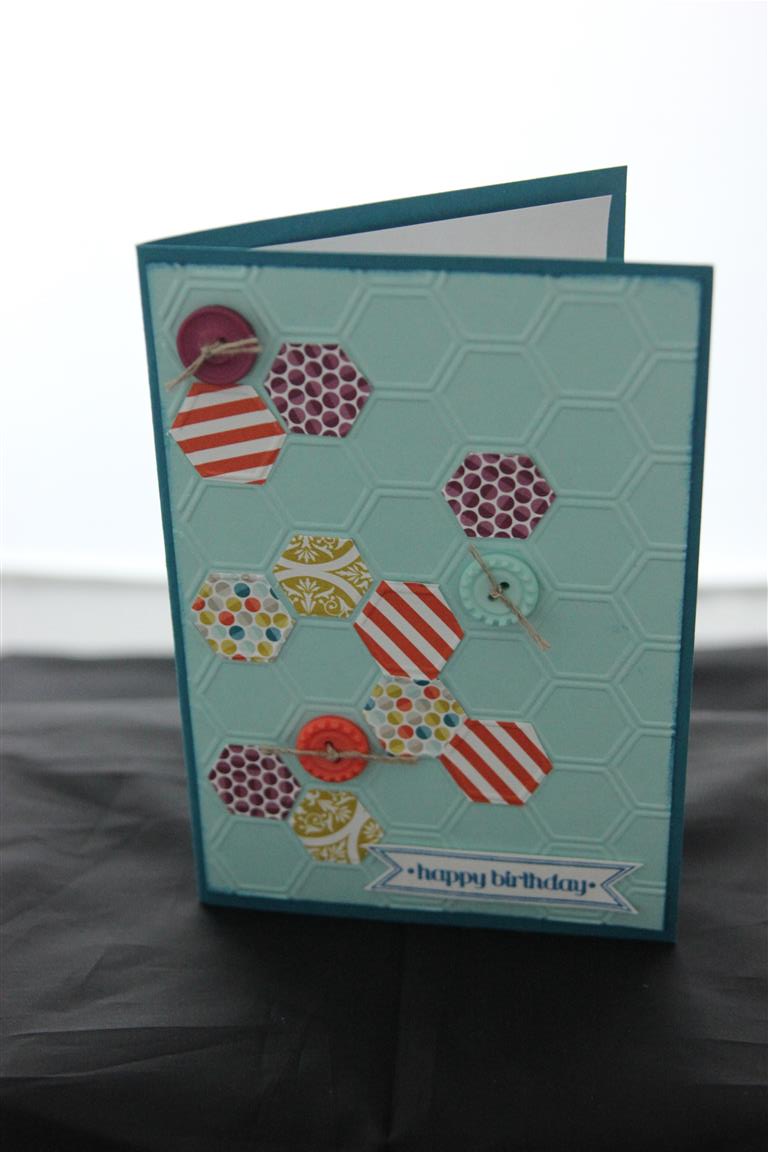 Something a bit different from last nights card – a nice bright one with lots of colour! Everything here is Stampin Up. The cardstock is Marina Mist and Pool Party. Embossing folder is Hexagon, and I embossed a few differents bits of designer paper ( from the Sycamore Street range) and fussy cut out the hexagons to stick over the embossed panel. I added a few matching buttons tied with linen thread, and stamped an itty bitty banner for the greeting.this one is a great way to use up all those little bits of scraps at the end of a crafting session! Til tomorrow….
Double pocket card
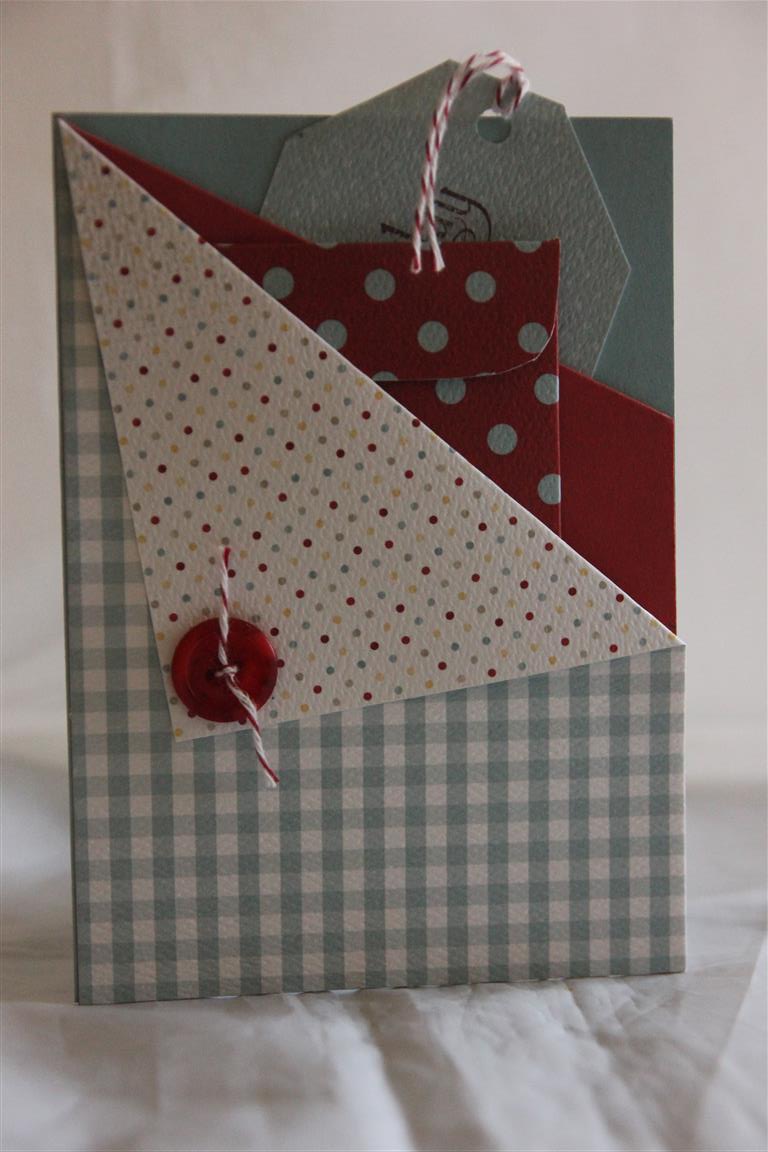 This card was the third one at last months village lesson. I have called it a double pocket card . We made a tag for the first pocket, and an envelope to hold gift cards for the second pocket. The pockets were easy to construct – two pieces of paper/cardstock the same size as the front of the card, one folded down a little further than the other, and stuck on three sides with double sided tape, but not across the top allowing us to tuck in our tag and envelope. Just a button and twine to finish this one!You could make a bookmark instead of a tag or envelope if you wanted – we put our greeting on the tag, but you could put the greeting on the front of the card, and maybe slip in a book voucher if you made the book mark….lots of potential for this design! Til tomorrow…..
October Afternoon farm Girl Number 5
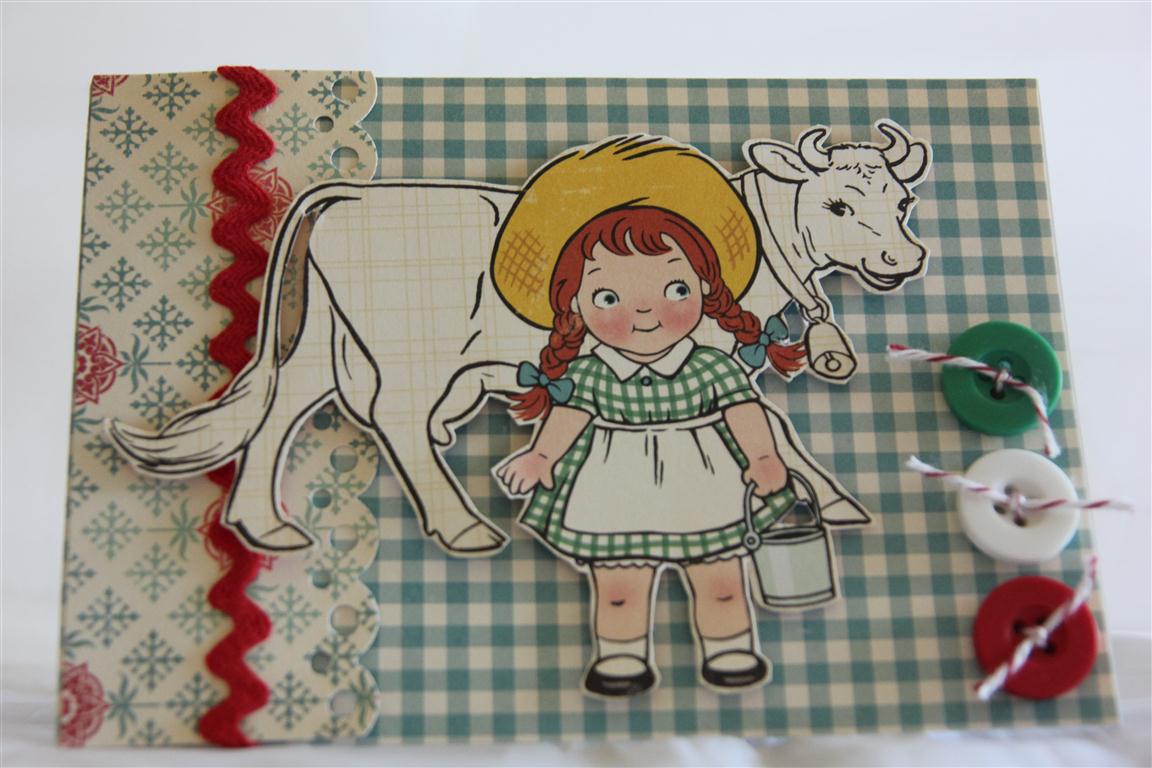 Number 5 in my October afternoon farm Girl series, and for this one I used a lovely gingham patterned paper to cover my card blank,and a strip of paper on the side, punched with a martha stewart punch, and highlighted with a little ric rac. three lovly buttons threaded with bakers twine down the opposite side, and I fussy cut the farm girl from another piece of the patterned paper.Thats the last of the animal images, tomorrow we move on to what else you can do with this wonderful collection.I taught a class this morning with my lovely ladies, and had a terrific time with them, as always. I came home full of ideas for my March classes, so have been creating in the craft room, and will head back there now while I am in the Zone! Til tomorrow….
crate paper little boy blue 4,5,6,7, baby boy cards

 Crate Paper little Boy Blue patterned paper makes excellent Baby Boy cards. Here are 4 I made with the 3 sheets of paper I purchased. I just added ribbon, bakers twine, buttons, and Dummies that I picked up from the local $2 shop. I used a scalloped edge punch, and thats it !No cardmaking today – it’s my birthday, and I’ve been out to lunch, and now waiting to see if anyone is organising tea! Til tomorrow….
Crate Paper Little Boy blue 3
 When I made these cards, I sat down and made them all in one sitting, and the reason I loved using this paper ( Crate paper Little Boy Blue) was because it gave me a reason to use my big bright buttons! The bakers twine matches perfectly, and I fussy cut one edge of the paper, following the printed pattern, then flipped the off cuts over to use as well. The cardstock is Stampin Up real red and bashful blue.Today I have been busy making boxes for some cards, must get Nathan out with the camera.. Til tomorrow…..
It’s a boy/girl cards
 Todays cards are it’s a boy/ girl cards made with Stampin up baby prints stamp set,and stampin up pink piroutte and bashful blue cardstock and inks. I added assorted flowers,buttons and ribbon for some interest. I used my tim holtz emboss diffuser number 2 to create the unembossed circle in the centre of the cards so that I could stamp on the white cardstock, and still have the embossing around the stamped image. I do like this gadget and must investigate the other diffusers in this product line.The other thing I am looking for is a die which cuts a window with a window ledge – if anyone knows the name of this die I would really appreciate the information! Til tomorrow….
Baby Girl cards
 I made these Baby Girl cards a little while ago, but forgot to post them – The one on the left is a box style card, and both cards use a scrap of Bo Bunny paper I had left over from a collection I once bought. The Bear is a Hot off the press stamp which I stamped a couple of times onto pink patterned paper and then cut out and paper pieced to achieve a 3d effect. I mounted it on a Spellbinders picot edge cirlce die in white. The rest of the card was easy – just some flowers,ribbons and buttons to complete the look! Til tomorrow….
