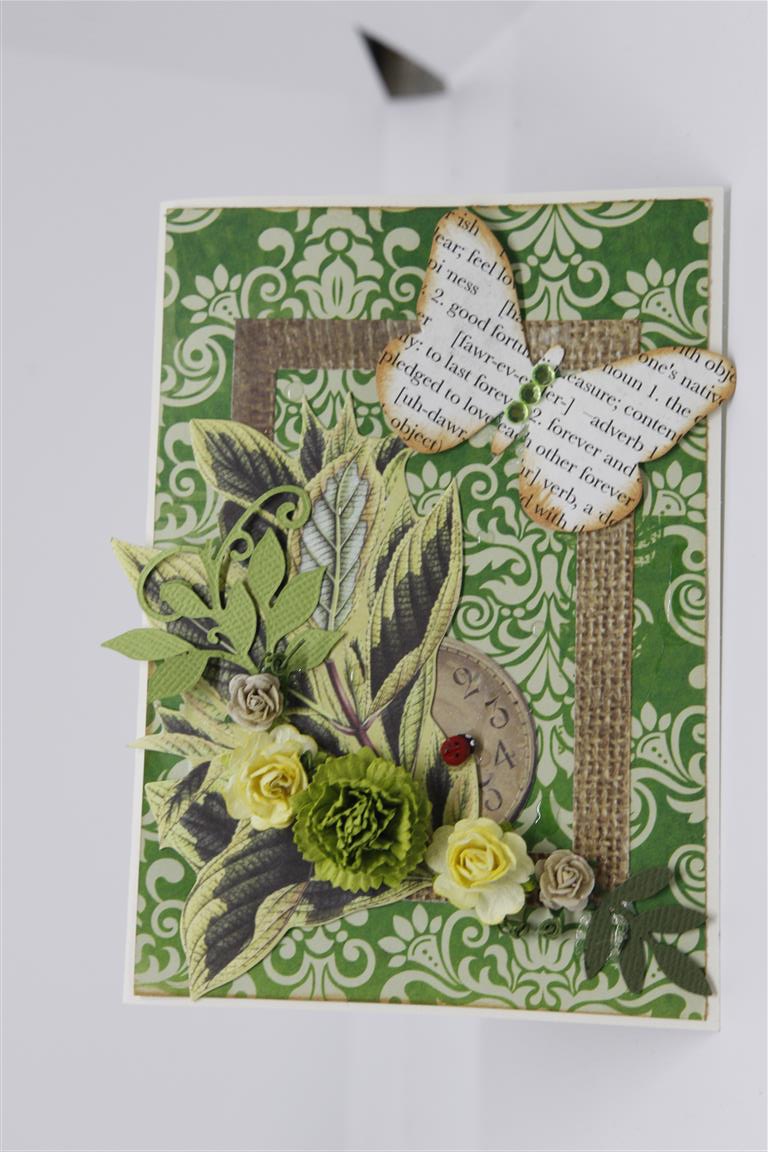
 I have so many paper collections where I have only made a couple of cards and moved on, so my goal is to re visit these and get my moneys worth! This collection is an an older Kaisercraft collection called Limelight, and originally I had only made 3 cards with it so I have made another couple and this is the first of those. The good thing about going back to collections is that since purchasing I have gathered other bits and pieces that may work with said collections! A case in point here is the little ladybird – Nathan found a pack of 100 of these little cute bugs so you will see them popping up everywhere on my projects!I used matching collectables, flowers, and a couple of die cut leaves and lots of layers to complete this card. Til tomorrow…
Tag: easy handmade card ideas
Not so Shabby lesson card 2..
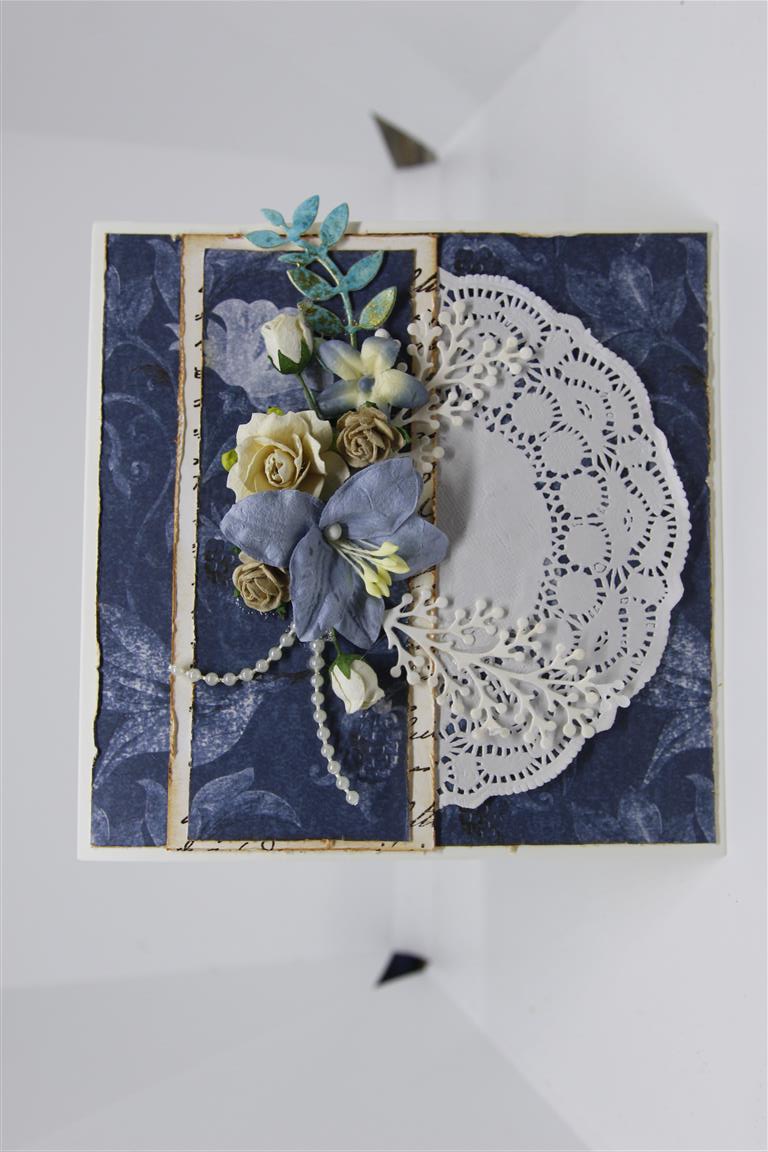 This was card 2 in the Not So Shabby class I ran at paper Flourish a couple of months ago, so the patterned paper we had as the first layer on the first card and which was very much hidden, just glimpses of it through the second layer became the focus on the second card. We used a little more of the cardstock we coloured with antique linen distress oxide and overstamped with darkroom door french script stamp,and distressed everything! Flowers, doilies, string of pearls,and more leaves sprayed with the tumbled glass and mica powder mix to finish this card! Quick post today as I am teaching later today so must go and get myself organised! Til tomorrow….
Not so Shabby Chic…
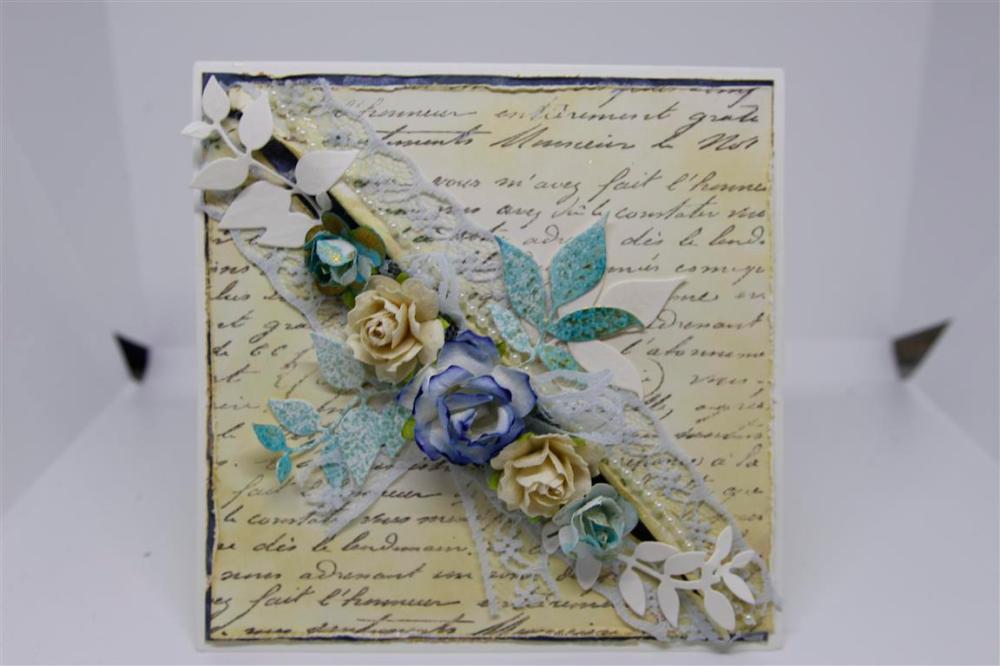 I have been experimenting with Shabby Chic, and although I really still haven’t mastered the whole “rip the paper” technique ( too fond of paper to willfully rip it!)I have been teaching my experiments every month at Paper Flourish.This card is one of two we did a couple of months ago. I will pop up its partner next post.For this one we took a white sheet of cardstock and coloured it with Antique Linen distress oxide ink and stamped over it with a Darkroom Door French script background stamp, distressed the edges and inked with tea dye ink. Cut diagonally and roll those inner edges in and ink again.Add lace, string of pearls,flowers and die cut leaves. Some of the leaves and flowers are coloured with a spray we made with Tumbled glass re-inker ( just a drop in a spray bottle topped up with water) and a small scoop ( just a smidgeon!) of gold mica powder .Give it a good shake before use. Today is going to be a crafty day… I am working on a technique to teach in september and continuing on with cruise card ideas, and of course my mind is starting to drift towards Christmas card ideas! Til tomorrow…..
Graphic 45 Floral Shoppe cards
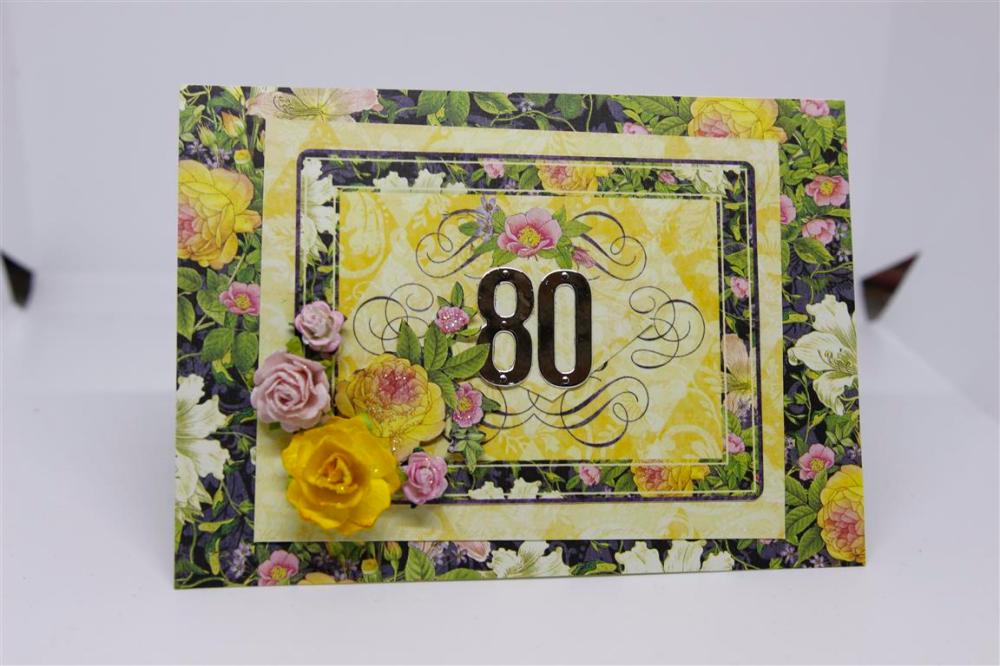
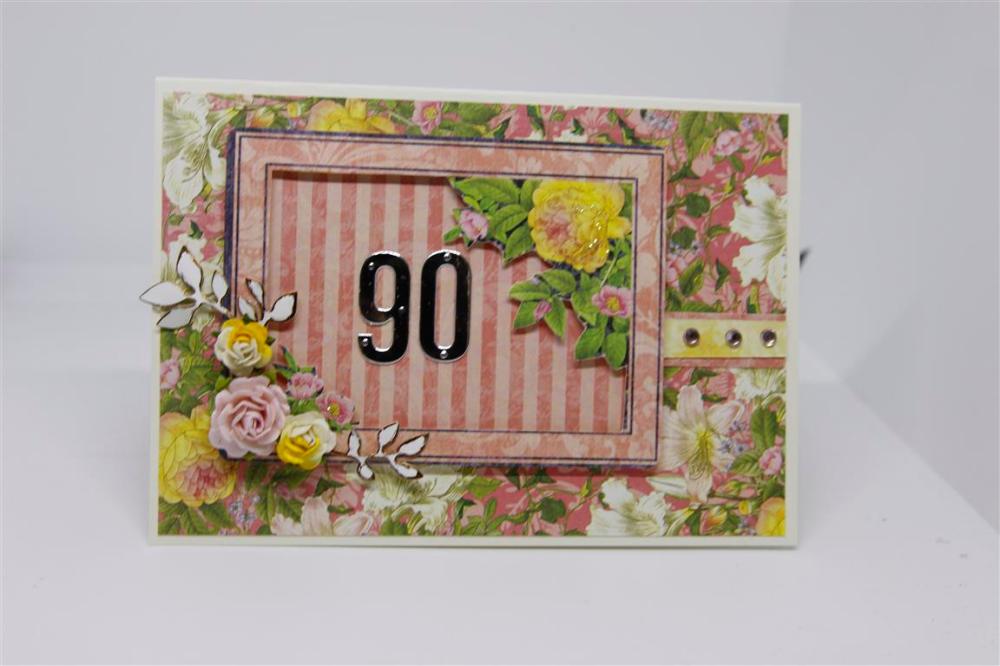 Todays cards are made with the gorgeous Graphic 45 Floral Shoppe designer papers, and journalling cards. I have done a little fussy cutting,and I added some pre made flowers. I did these for my Fair stall..I always get asked for age birthday cards and try to have just a few of each significant age to choose from. You may notice on the 90 card I cut a frame from the journalling card and put some striped paper behind it to put the die cut 90 onto. Now I am off to the shops, so..Til Tomorrow…..
Another lesson card….
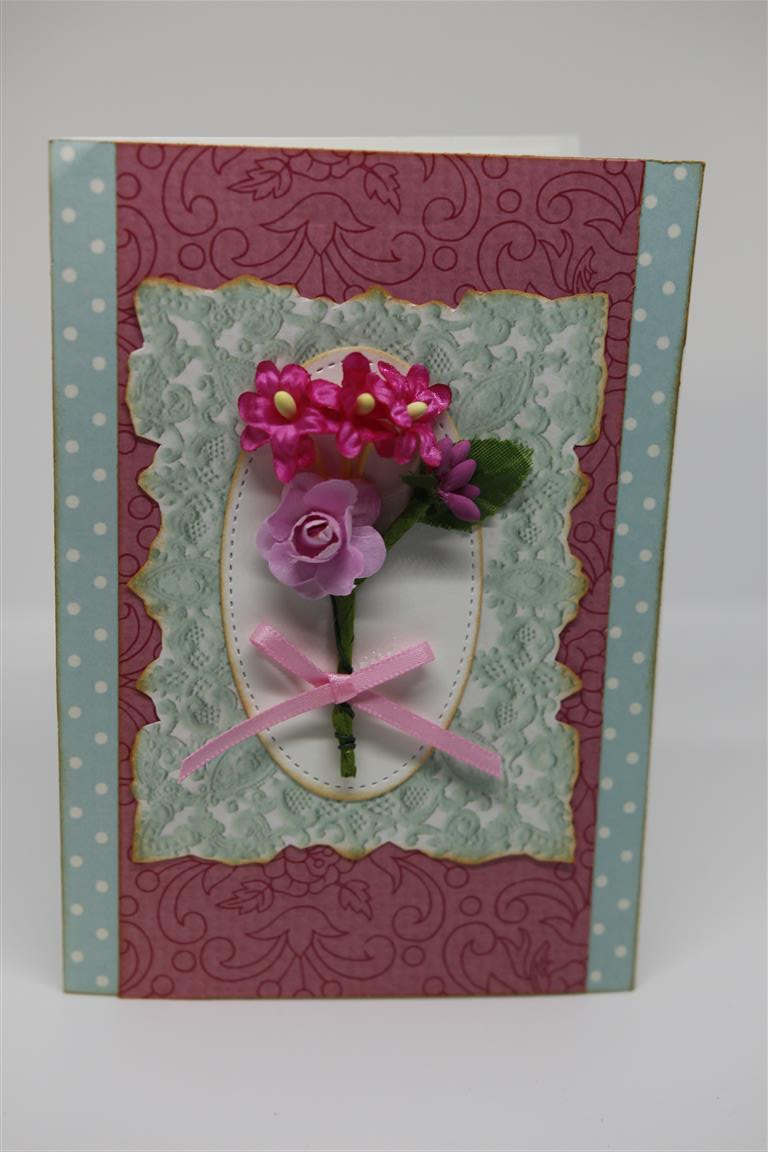 To finish off this group of photos is another card I designed for a lesson. We used Kaisercraft Miss Betty paper, layered it all up, die cut an oval and added a bunch of flowers and a ribbon bow. All the edges were inked with tea dye ink.I will be back tomorrow with some cards I made using Graphic 45 floral shoppe papers – absolutely gorgeous papers! It has been so cold here this week, my sister knitted us some fingerless gloves so that we can keep warm but keep crafting! I have made a little headway on designing the cards that I will teach on the cruise, and I have sorted all my August lesson cards, so maybe this week i will get to play with all my new Pion and Maja designs papers which are sitting in the craft room teasing me with their beauty! Til tomorrow…..
embossing and die cutting…
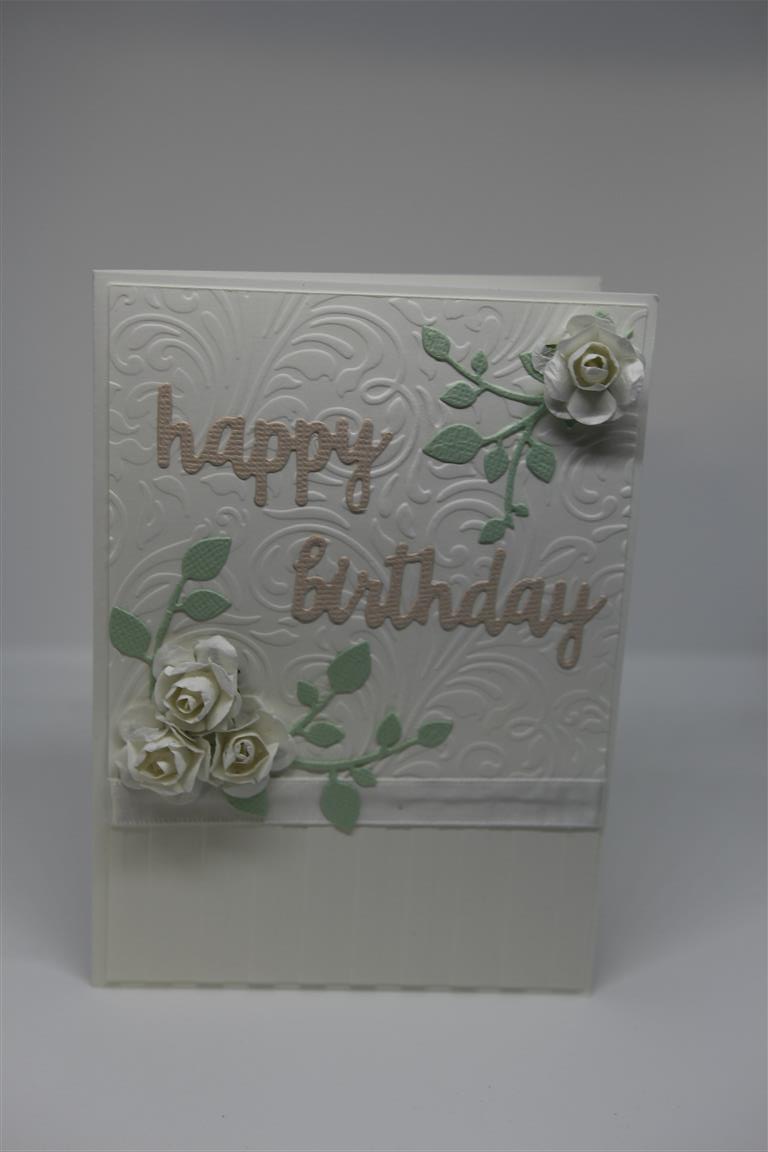
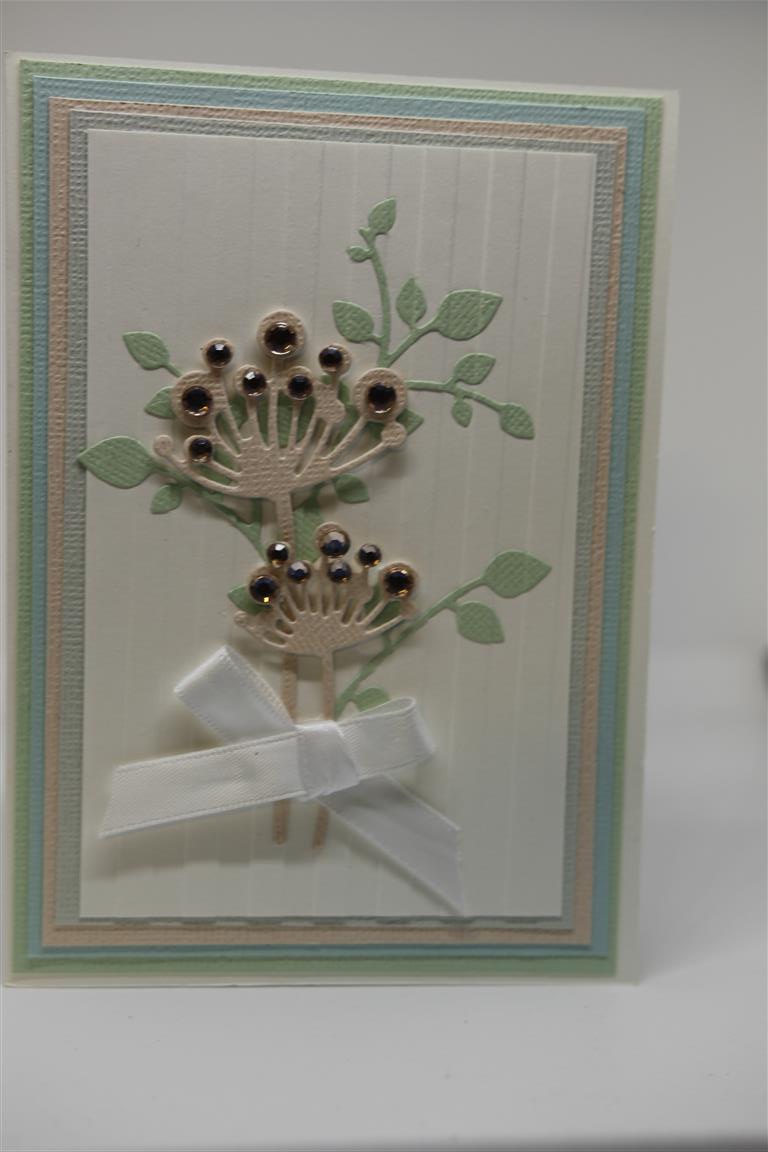 I think Dry embossing ( using your die cutting machine to emboss with embossing folders) is making a comeback, and for me it never went! It is the easiest way to add texture without excess weight to your cards. The two cards I am showing today were cards that I taught in a class at paper Flourish, using my favourite pastel shades and a good dose of white. Both Embossing folders are kaisercraft brand, Uniquely Creative Stamen stem die on the bottom card, and pre made flowers on the top card. The Happy Birthday is a kaisercraft die. I spent a lovely day yesterday in the craft room, it was so cold here in Adelaide, too cold to do anything else. I put all my projects to one side and just sat and created, great fun!.Today I am off to our craft and chat group , looking forward to catching up with everyone, and getting a start on my cruise cards. Til tomorrow…..
Neat and Tangled Unicorn stamp
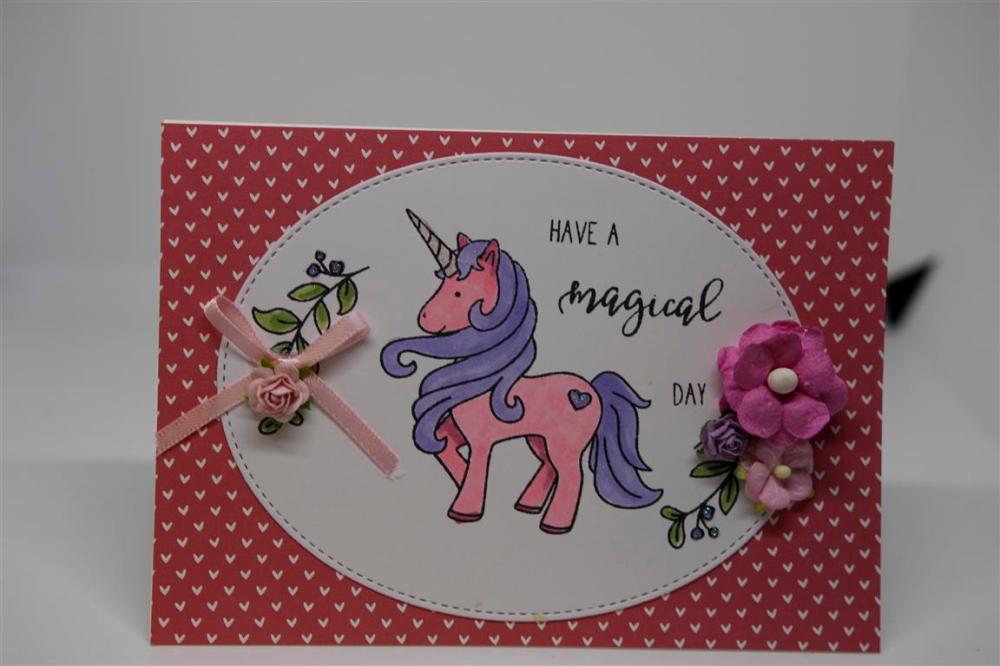
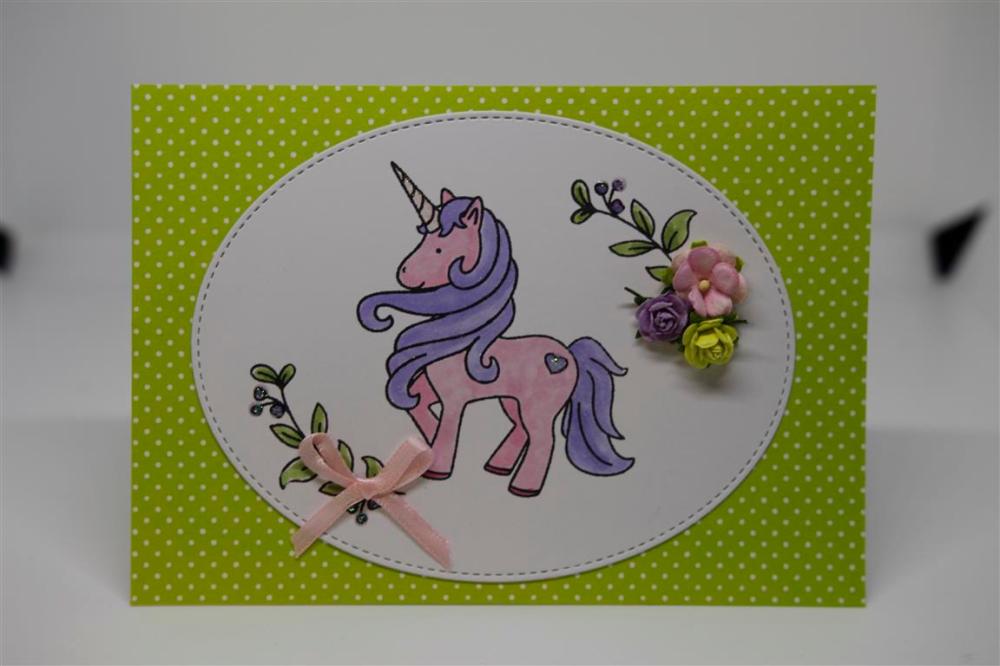 I couldn’t resist this cute little Unicorn stamp set by Neat and Tangled. After stamping i coloured with Copic markers, and added flowers and ribbon . The background paper is a from a 6″ pad by lawn fawn. My Puppy Daisy is recovering well from her operation yesterday, she was very sad and sorry for herself last night but seems to have forgotten all about it today and now the challenge is to stop her from jumping up on everything until the wound heals.Meanwhile I have been busy in the kitchen this morning making a big pot of vegetable soup for tea as it is so cold here, and also some lemon butter spread to use up some of our lemon crop. Til tomorrow….
Making good use of my Die cutting machine!
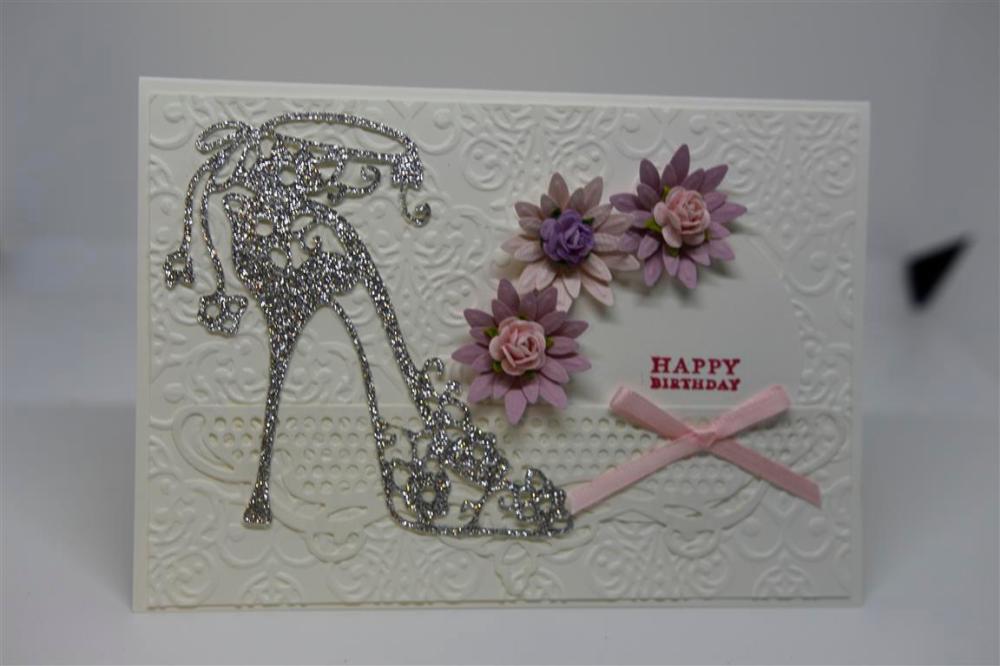 Although this one looks like a lot of work it is actually deceptively simple..I dry embossed the first layer with a stampin up embossing folder through my big shot machine, and die cut a border, still in white, using a Kaisercraft die . The shoe was also die cut with silver glitter cardstock. Tucked in behind the die cut border is a white die cut circle which I stamped with the birthday sentiment. I die cut some flowers with a Uniquely creative die, and layered pre-made roses in the centres.A pink bow , and finished! I had a great time at the craft fair last weekend catching up with familiar faces and making new friends. I sold a lot of my cards and now I can start filling my boxes all over again, but the next month or so will be concentrated on planning the cruise cards. Til tomorrow…..
Glitter card and die cutting…
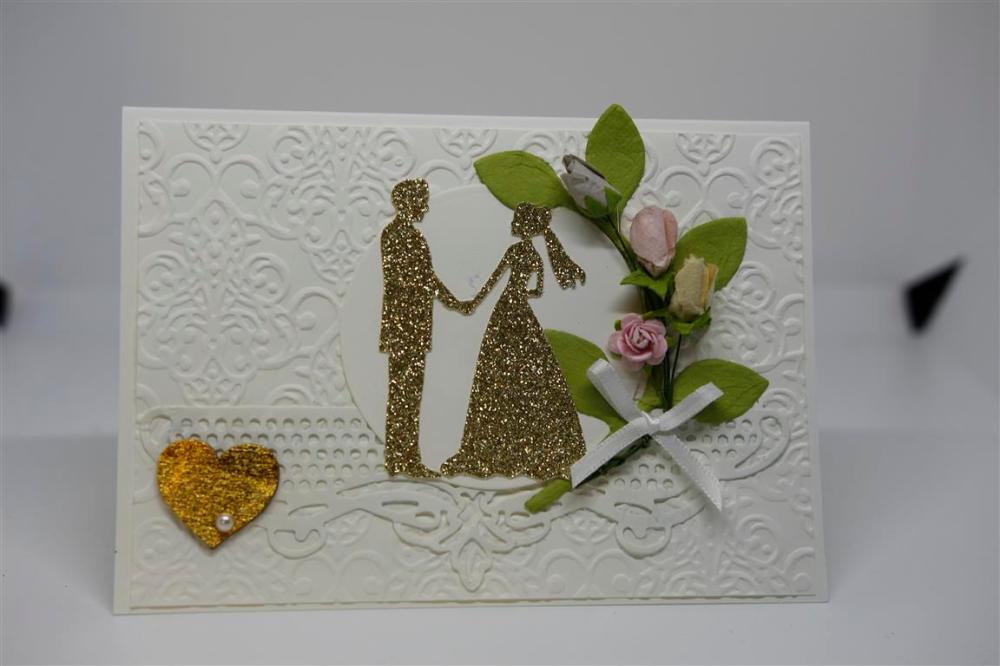 I was going to put up two cards today as I will probably be missing for a few days as it’s the craft fair this weekend and I will be there with my stall for three days, but this card has a few different techniques on it to explain…Firstly, layers of white, the top layer embossed with a stampin up embossing folder.I die cut the bride and groom from glitter cardstock, die cut the fancy border with a kaisercraft die, also in white, as was the die cut circle) The chipboard heart was foiled with my go press and foil machine, and a little flat backed pearl popped onto it, I made the flower spray by creating the bunch and twisting the stems together. The leaf spray was die cut and I added a white ribbon. Although it looks like I spent quite some time creating the card all these bits and pieces were already on my craft table from other projects so it took no time at all and it is one of my favourite cards! Til tomorrow…..
Carta Bella Flora..
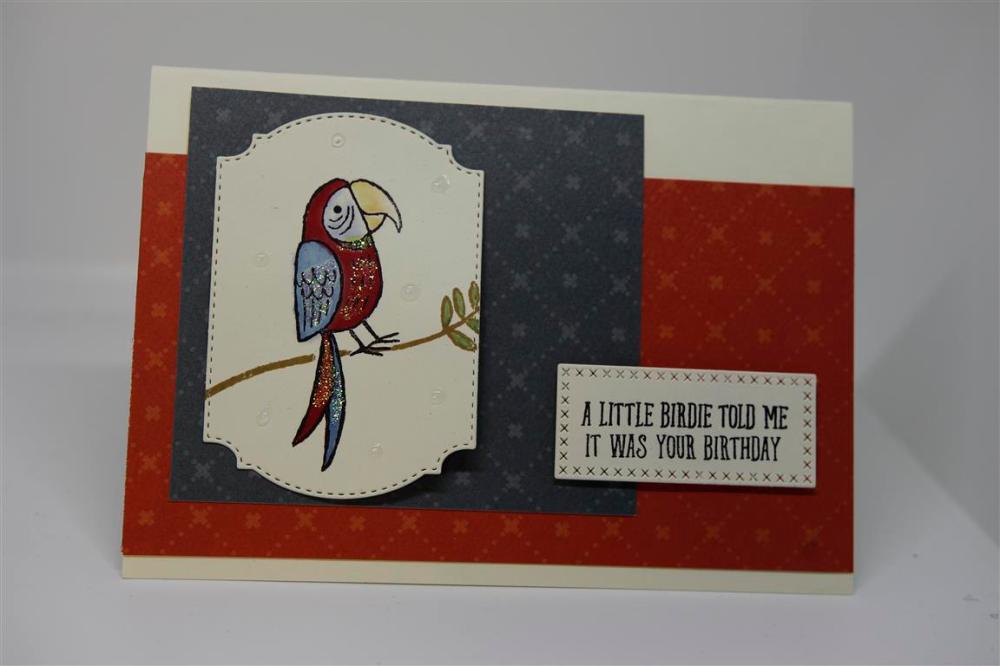
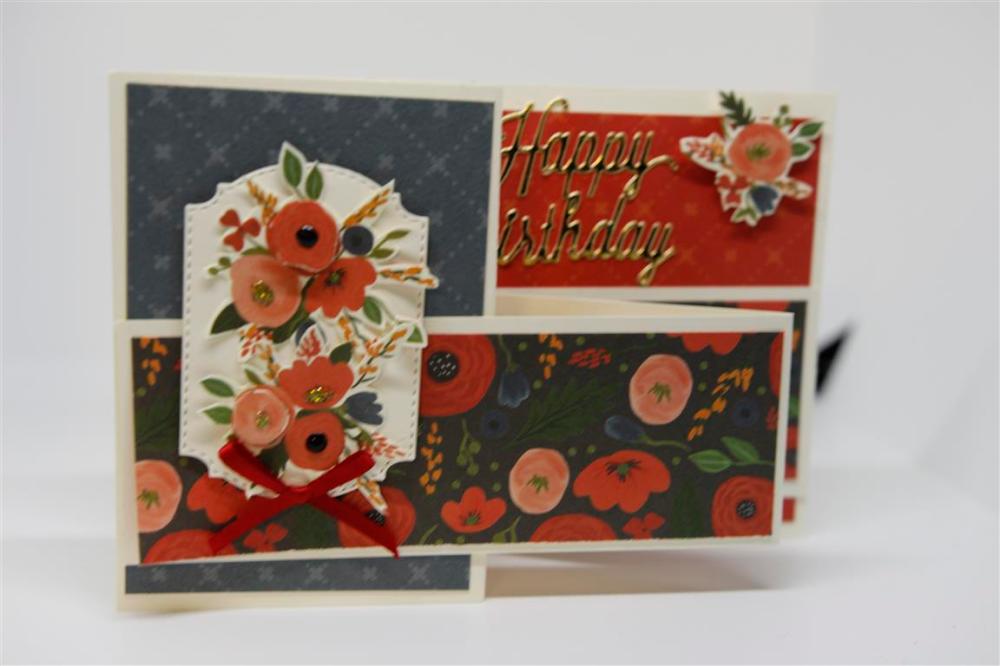 I had a couple of sheets of paper by Carta Bella from their Flora range, and I thought I would show you a couple of cards I made with it. The bottom card is made relying on the papers to do the talking, with a bit of fussy cutting involved in this one, and the top card I had a new stamp set from Stampin Up called Bird Banter, which I stamped ( I used a Tim Holtz stamp press to line up the branch) and coloured my bird with Zig markers and a water brush. I dabbed a little Nuvo crystal drops around the bird just to add a little texture. The dies I used were by Seven Paper Dolls, and I used Canson watercolour paper to stamp on. I have found when watercolouring the best paper to use is the most expensive you can afford, in the case of watercolouring, the better quality the better. The Canson I used is a cold press paper, but the girls at work swear by hot press paper so I have bought a couple of sheets to experiment with and I will let you all know my findings! Meanwhile in the craft room I have organised all my fair boxes ready to go, completed an order, prepared my July classes , so up to date and doen’t it feel great! Til tomorrow…..
