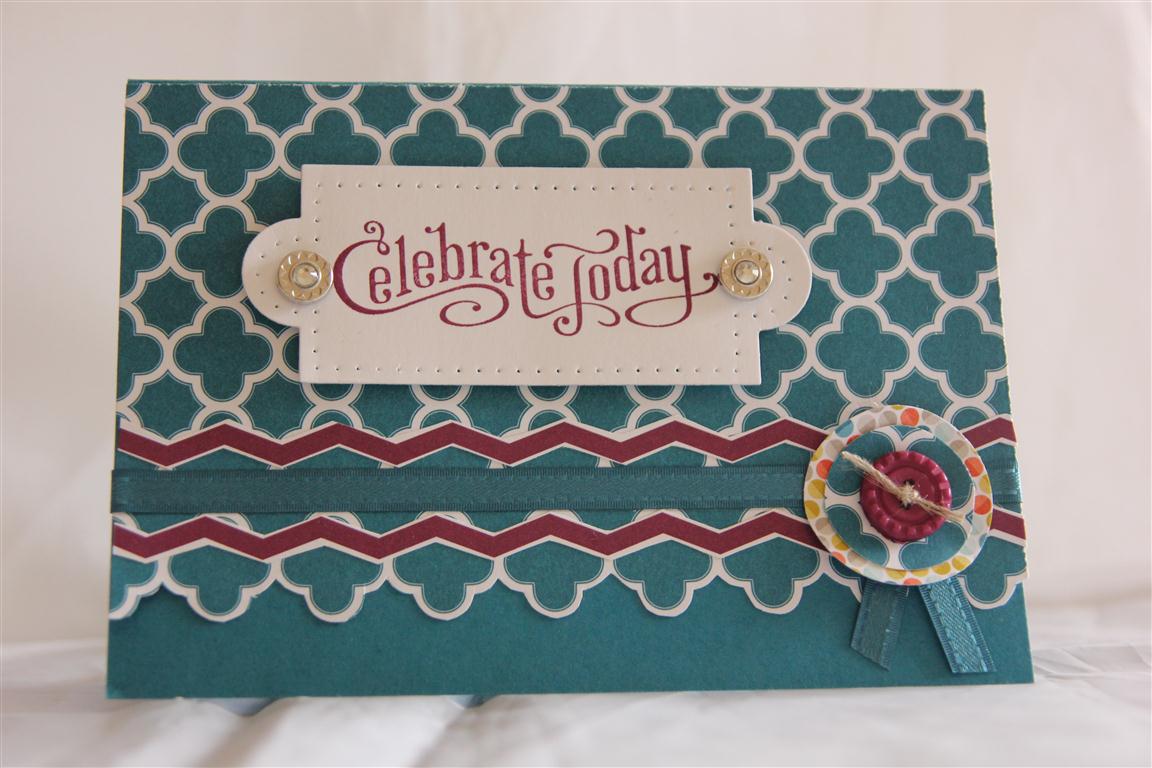
 Here is a complete change of colour, and I love it! Everything used in todays card is from stampin Up – starting with the cardstock which is Island Indigo. the papers, and ribbon and button pack are from the Sycamore street range, and I die cut the label from Apothecary Accents Framelits. I paper pierced around the frame and stamped the sentiment in Rich razzleberry ink, with a stamp from the perfectly penned set. I punched a couple of different sized circles to make the flower in the corner, and threaded my button with some linen thread.I taught alovely class this morning – thank you to all the ladies who braved the horrendous heat to share the morning with me!I am now deciding whether to go and do my grocery shopping this evening or leave it until tomorrow night, but I believe it’s going to be just as hot tomorrow so I guess I should just go and get it over and done with! til tomorrow….
Tag: home made card ideas
Echo park Love story 5 and 6
 Here are the last two cards made with echo Park Love story.Although they look the same there are quite a few differences. Nathan thought we should play a spot the difference game with them, but really there are a lot! I have stamped the cameo image with a stampers anonymous tim Holtz collection stamp, and the sentiment is a hero arts stamp.I have added lace, liquid pearls, and some rhinestones as a necklace to finish.I have had a productive day in the craft room today, and cleared all my outstanding orders, as well as the upcoming family birthdays. Then for the fun stuff …. playing with some of my new purchases, and trying some new ideas. I have also done a few Easter cards – don’t let that sneak up on you everyone – it’s only 4 weeks away!Til tomorrow…..
Echo Park Love Story 4
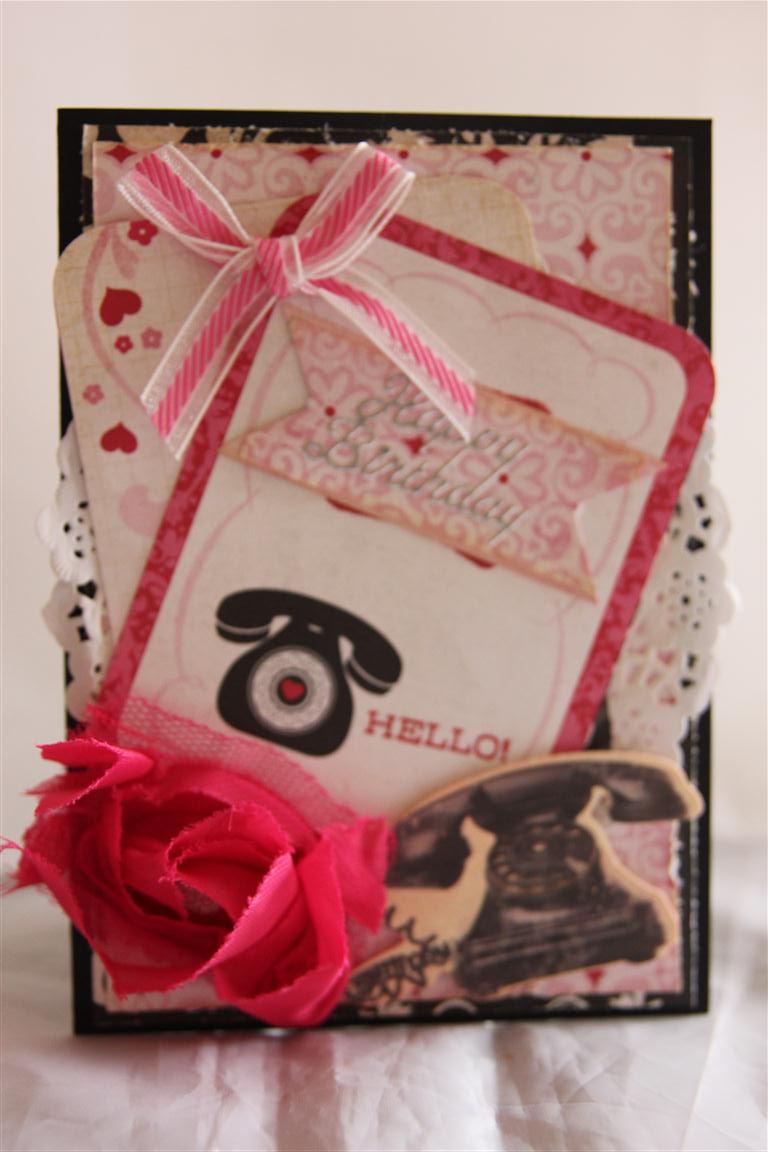 Sorry People, this image appears to have missed quality control and is a little blurry!It is still in my Echo park love Story series, ( Only one more post of this paper and we move on to something else) and I have layered, inked and embossed on this one. The addition of an inked doily,stampin up ribbon, kaisercraft rosette,and phone die cut from kaisercraft timeless collectables, and this was a very quick one to complete.It is extremely hot here today, but I have so much crafting piling up in my room that I will have to make the effort this evening when it is cooler to sit in there and get things back under control – I have so many new products on my desk that I haven’t had time to play with and I am very grateful that I am on holidays at the end of next week! Til tomorrow…
Echo park love story number 3
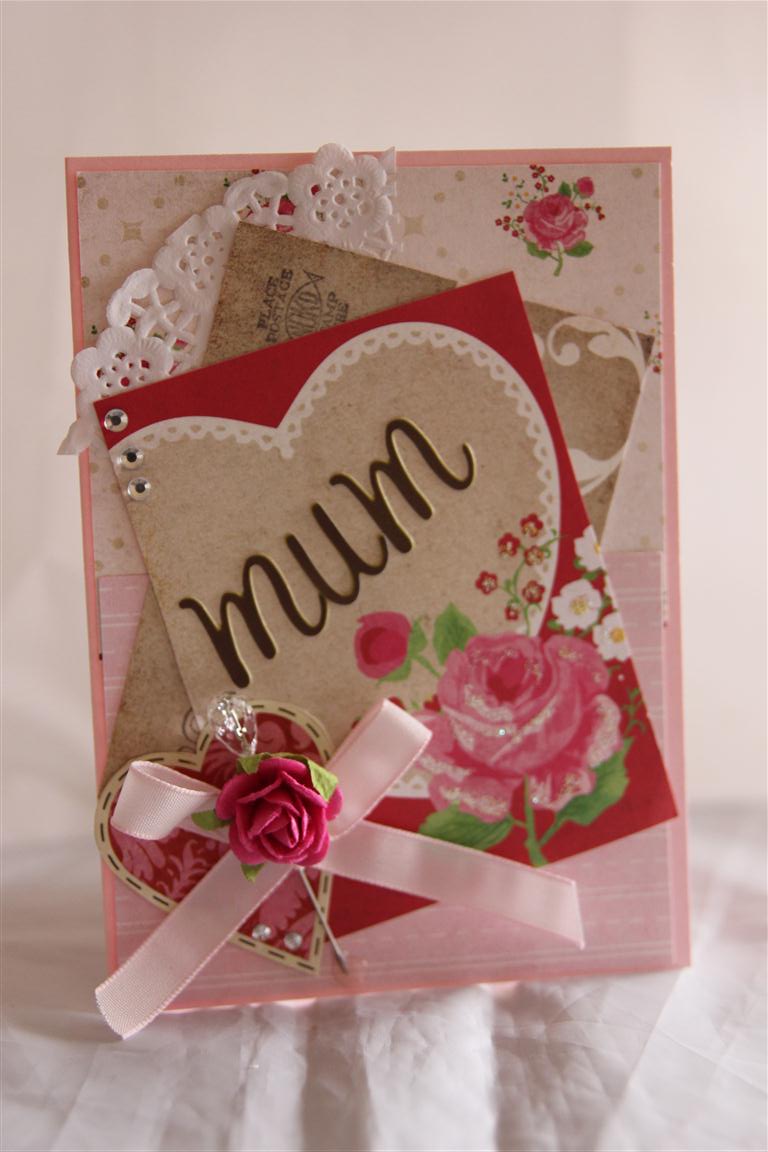 No distressing or inking on this one, although looking at it now, maybe I should have!The patterned paper is Echo Park Love Story, and I added a doily, lace, hatpin,ribbon,flower and rhinestones for decoration. letter stickers spell out Mum. I‘m so glad the weekend is here, I have missed my craft room this week, but will make up for it over the next 3 days.I had a lovely class this morning with my ladies, such a lovely group.First on the list this weekend is a couple of orders – 80th birthday, wedding ,engagement, and then husbands birthday card – have to think about that one..it’s hot again here, so I am sure his card is going to have a bit of a beach theme happening! Til tomorrow….
Echo Park Love Story number 2
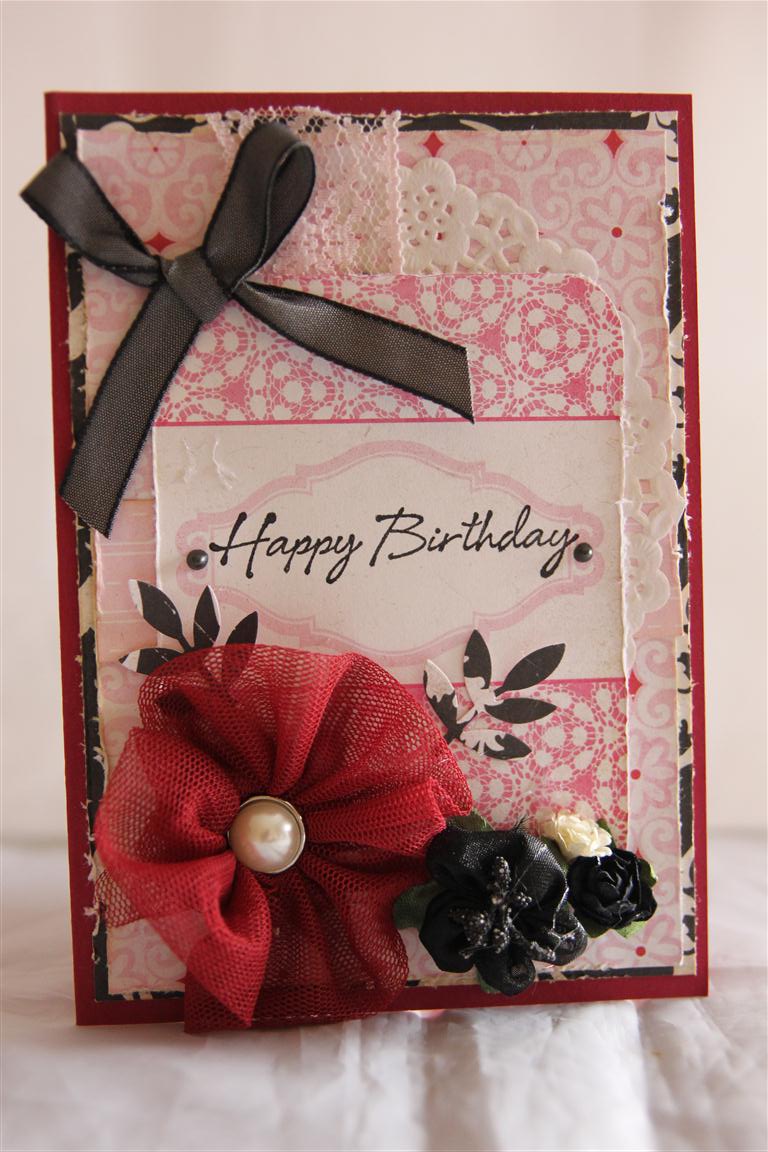 Echo Park – Love story patterned paper, ansd another not quite shabby chic style. I distressed and inked all the edges of my layers, added a doily, a couple of leaves die cut using a memory box die – Meadow Leaf. Assorted flowers, and a big one made from some netting with a kaisercraft brad in the centrer,and all that was left to do was stamp the happy birthday!Til tomorrow….
Echo park love story – not so shabby…
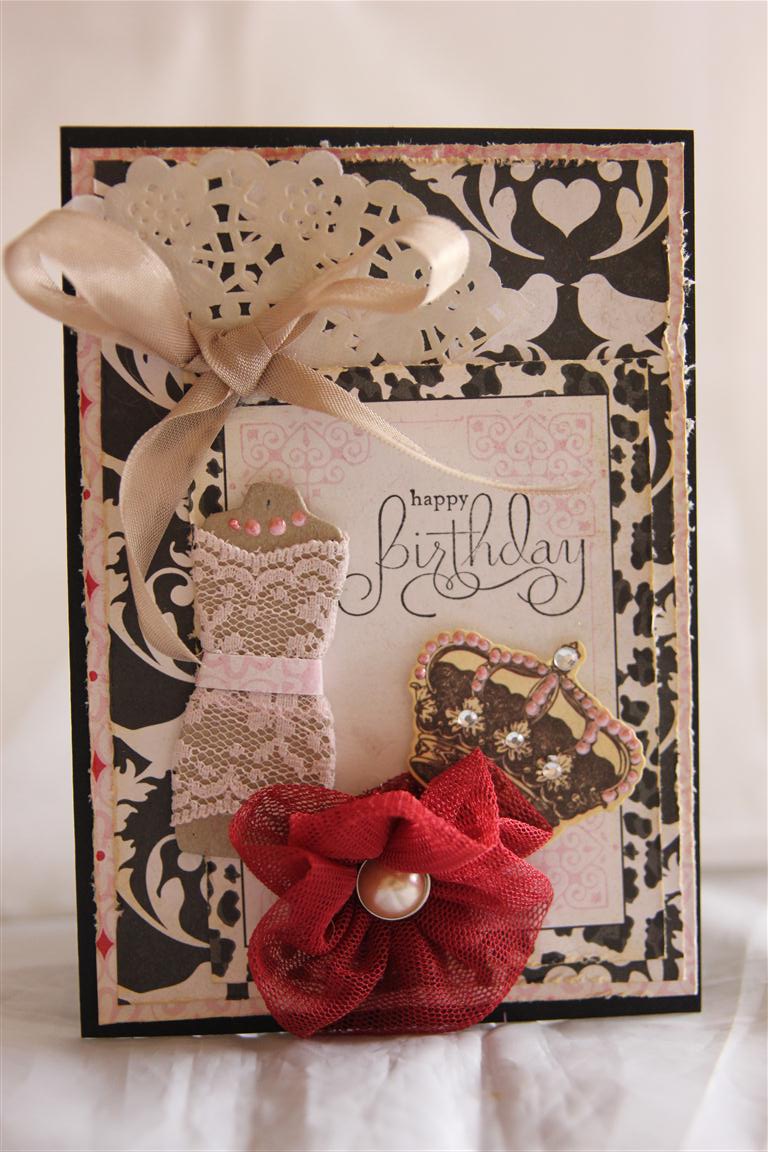 I only bought a few 12 x 12 sheets from this range of paper – Echo Park Love story – and have only made a few cards with it so far – I have put it aside for now to work on some classes, but I thought I would show you what I have created so far. I used a base of black cardstock, and layered a couple of the papers on top – after distressing and inking the edges. I then raided my bits and pieces drawer, and found this chipboard dress form and crown which I decorated.I inked a doily, and added it, as well as a seam binding bow. I made the flower by folding a length of netting in half lengthways and sewing a running stitch along the raw edge before pulling the thread to gather it. I threaded a brad ( kaisercraft) through the centre. These are amazingly easy to make, and I am going to sit in front of the t.v. tonight and make some more!This style is my cleaned up take on shabby chic, and it’s my favourite at the moment, so I think my ladies will be making some cards in April to this style too! Til tomorrow….
Art Deco Style number 3
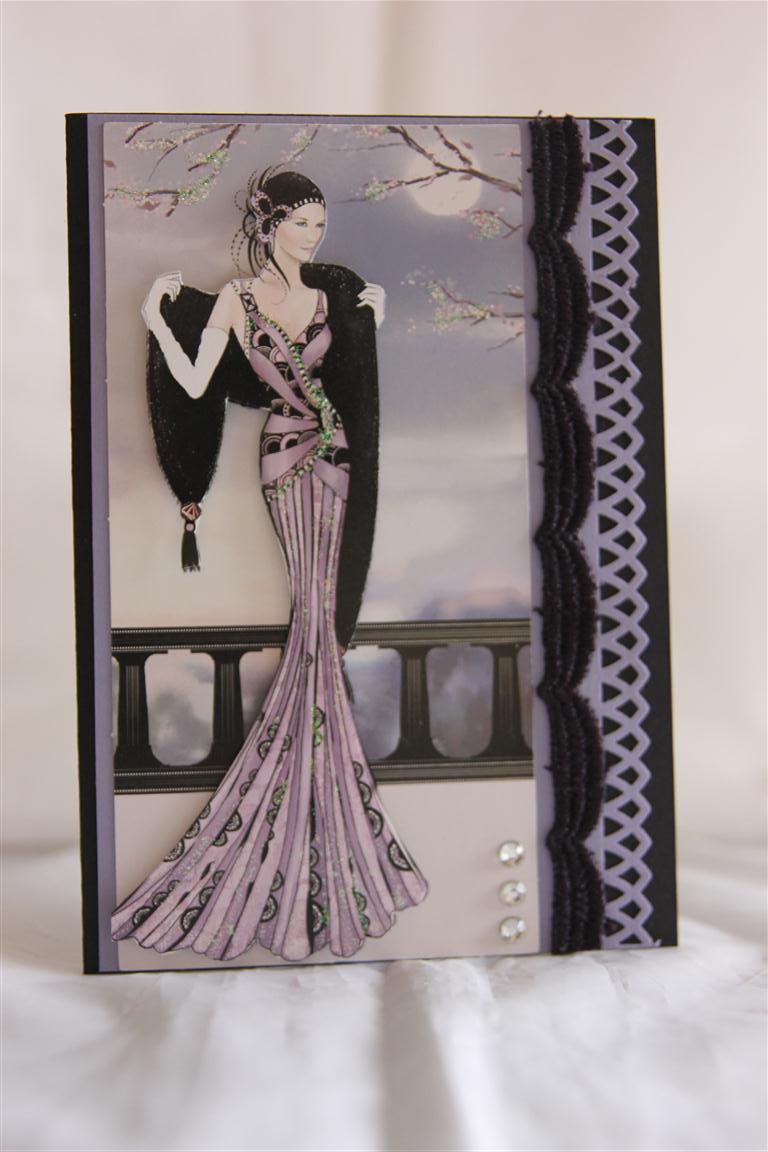 This the third in my Do Crafts Papermania Art Deco series, and tomorrow we move onto something a little different… For this one, I have stayed with the black/purple colour scheme, using black and wisteria wonder cardstock from stampin up. I used a Martha stewart border punch, and then just some black lace and a bit of bling to finish. I have been busy making cards for orders today, but I am itching to get started on the new box of goodies I got on the weekend from Stampin Up – hopefully this evening I will make a start on that! Til tomorrow….
Art Deco style, number 2
 I have a couple of cards left to show using my Do Crafts papermania Art Deco pack, so thought I would show them before I start on the cards that we photo’d this morning.I made good use of layering on this card, using cardstock from stampin up – wisteria wonder.It just matched perfectly with her gorgeous dress! The trim was also a lucky find in the back of my ribbon drawer, and it is from Websters pages. I just added a couple of flowers, and this simple card was done!Spent a lovely afternoon today with a group of card making friends, all sitting around doing our own thing and chatting – very relaxing! Til tomorrow….
A wedding card
 This is a wedding card I made for an order,I usually take inspiration for the colours for wedding cards from the colours of the invitation, in this case it was white,black and silver. The small amount of patterned paper is from kaisercraft After 5 collection, as is the label with the sentiment ( stampin Up mr. and mrs stamp)and the die cuts which are from the collectable pack The two hearts are die cut with Do Crafts x-cut hearts and I ran them through a couple of different embossing folders to add a little texture.All that was left to do was add bling,lace and a flower! I have had a hugely enjoyable day in the craft room today, it’s been a shabby chic day in there today, and a little tidying up and using some old stash happened as well. All in all very productive! Til tomorrow….
Basic Grey Serenade number 6 ..the final…
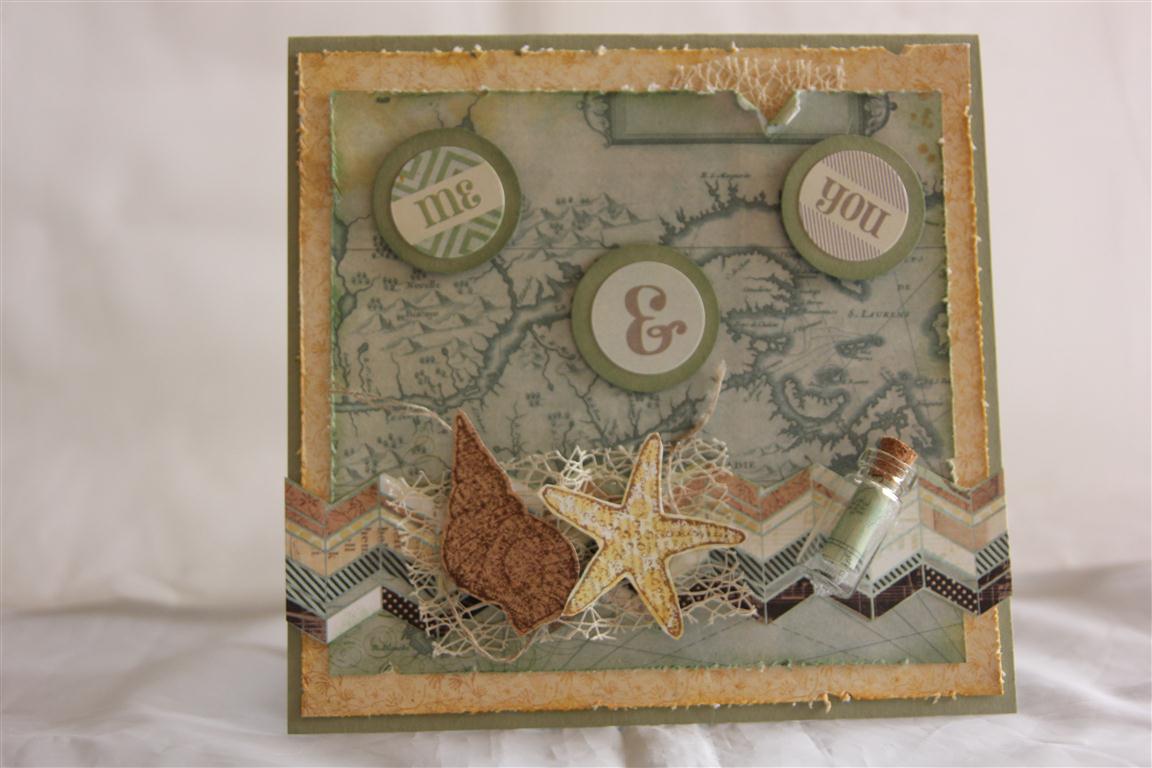 This is the final in my series of basic grey serenade 6″patterned papers and sticker sheet. It’s special because it’s my husbands Valentines day card.I mounted two graduating pieces of patterned paper on to my card base, and fussy cut some more of the patterned paper to form the band across the bottom. I stamped some shells from my stampin Up By the Sea shore stamp set onto patterned paper, and cut them out too. I mounted the round stickers onto punched circles,and added some netting and twine. My favourite is the Tim Holtz idea-ology corked vial, which I opened before I attached it to the card, and added a handwritten note.I distressed all edges of the papers.The second photo in this post is the state of my craft room table! I left a project unfinished a few days ago, and due to work commitments haven’t been back in there – I nearly fainted when I went in there this afternoon! I should be ashamed of myself! I have 3 days off now, so first on the agenda is to complete that project! Til tomorrow….
