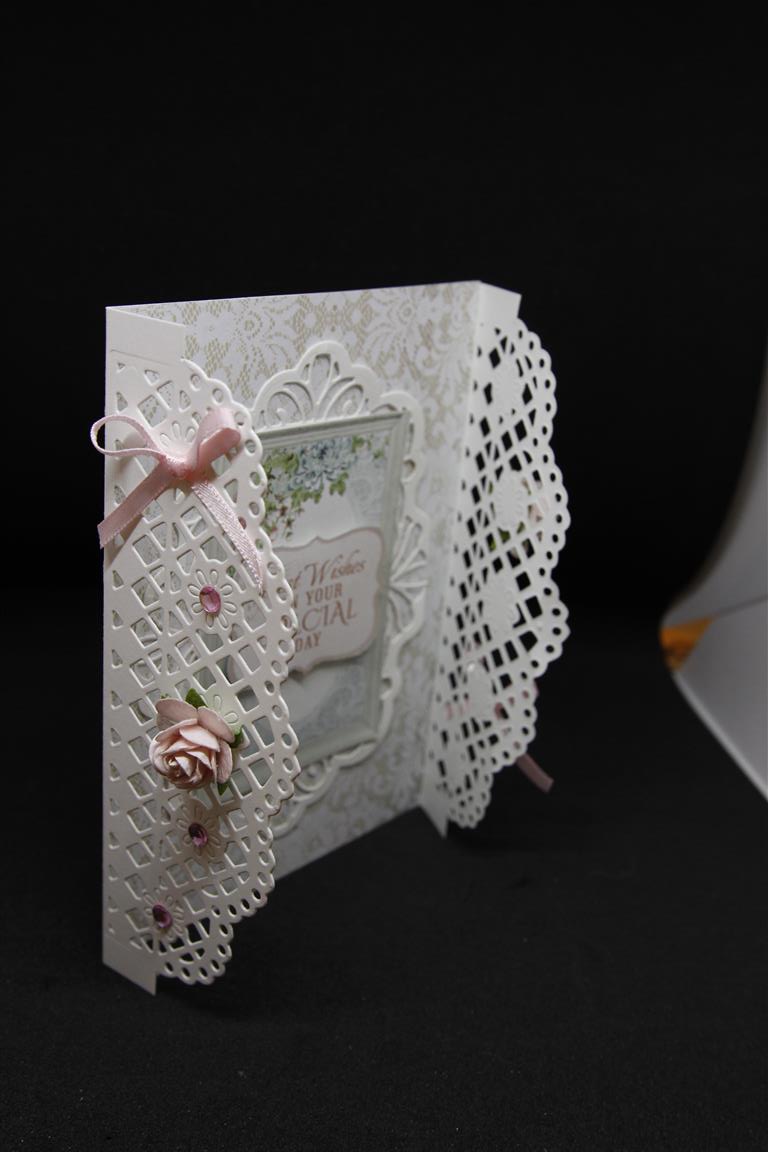
 Todays card is made with a gatefold design, and then I die cut the edges of the folds with a border die to give the gated effect! A very light decoration on the outside, just some bling and a couple of ribbon bows and flowers, because all the decoration really happened inside the card. The papers are Kaisercraft Rose Avenue from the 12 x 12 paper selection. Today is my get together with some crafty friends, we meet once a month and the time always comes around quickly, so I must get a move along and gather some projects together to work on while we are chatting! Til tomorrow….
Tag: homemade card designs
Kaisercraft Rose Avenue 3…
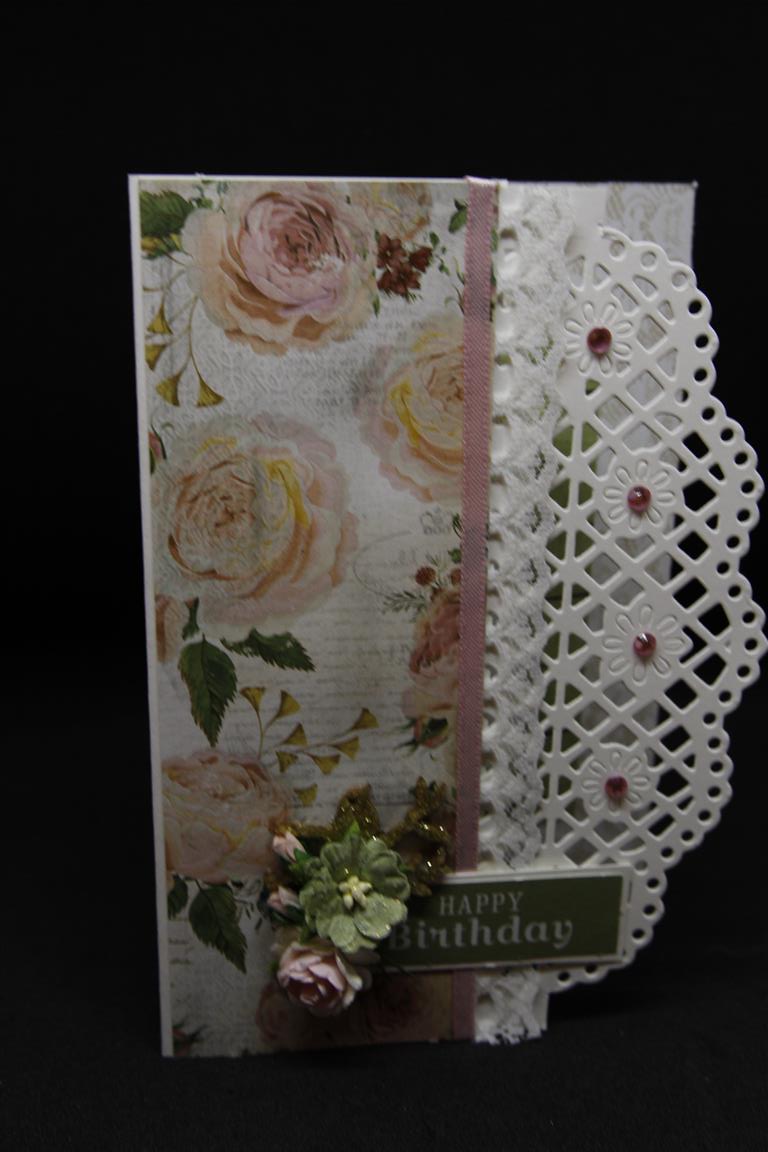 I used a die to die cut a border on my card front for todays’ card, and then decorated my card inside and out with papers from Kaisercraft Rose Avenue ( the 6″ pad). I added lace, ribbon, flowers and bling,and a sentiment also from the 6″ pad. The photos in this next group are a little dark, I wasn’t home when Nathan took the photos and he was trying out the black background….I will tell him no more experimenting when I am not around! This afternoon, I am doing that most boring of jobs…putting inserts inside my cards. When that is done I get to choose which paper collection I am going to play with next…I have a bit of a pile happening because I have been too busy with class cards, cruise cards and Christmas cards!Looking forward to that ! Til tomorrow….
Kaisercraft Rose Avenue number 2….
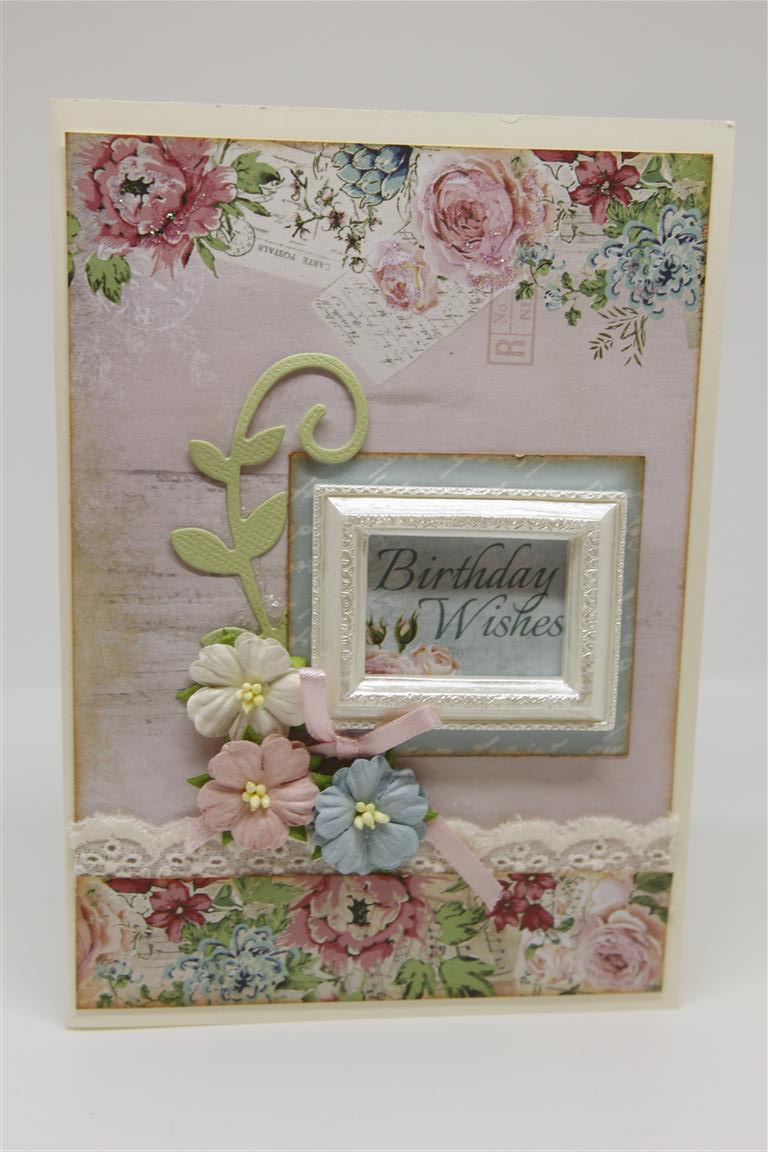 I used a piece of patterned paper from the 6″ pad for the first layer of todays’ card, and a strip of paper left on my desk from yesterdays card ( also from the 6″ pad) for a border across the bottom, with a strip of old fashioned lace peeking out from the top of it. The sentiment is from a piece of the Rose Avenue 12 x 12 sheets and this time I trimmed it a little bigger than the frame, and inked around everything with tea dye distress ink. A die cut flourish, flowers and ribbon were the finishing touches.I am spending the morning at the craft desk putting finishing touches to januarys lessons, and I am so happy to report that all the cruise cards are cut,die cut embossed and ready to pack!! I am teaching tonight and looking forward to catching up with my ladies! til tomorrow….
Kaisercraft Rose Avenue number 1….
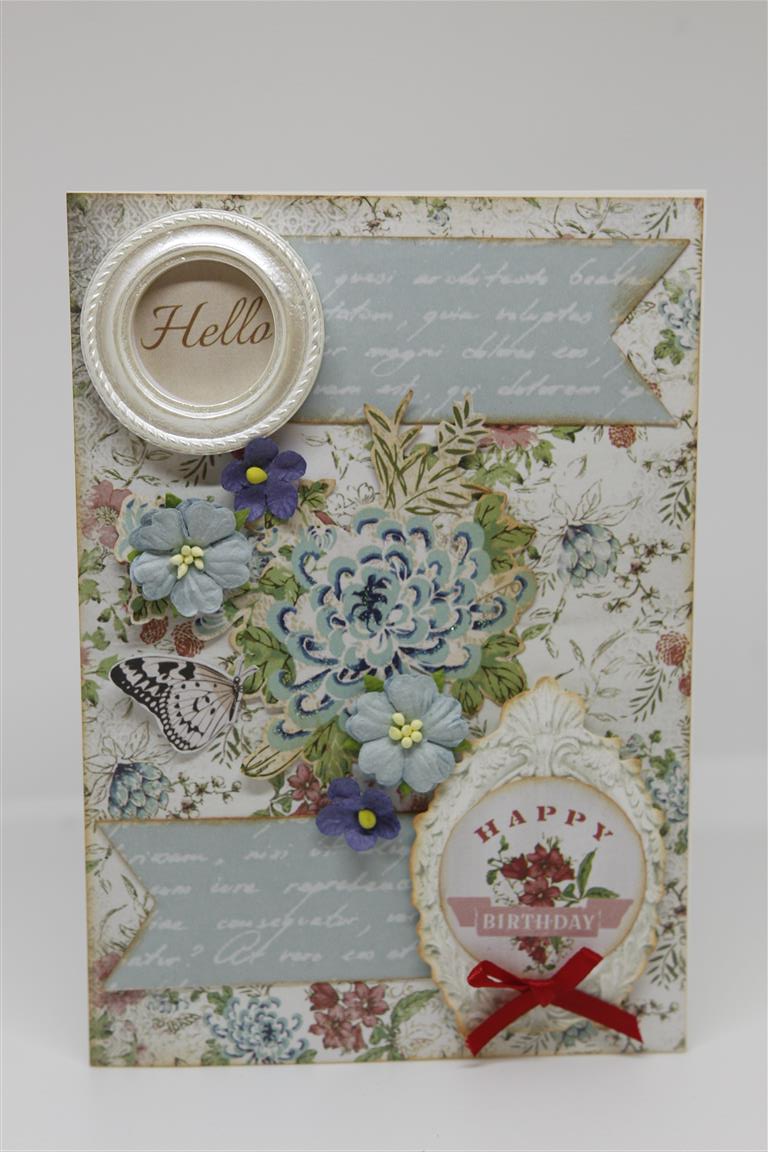 Today we start a new series, Kaisercraft Rose Avenue. This paper collection is so gorgeous! I have made a lot of cards with it already, and have only just now reluctantly packed it away for the moment.We will have a couple of breaks during the posting of this group just in case you guys don’t love it as much as I do! This was one of my first makes….all edges were inked with tea Dye distress ink, and I have used a piece of the 6″ pad and matching collectables. I cut a couple of banner pieces from the script paper, and mounted a sentiment from the pad onto the back of a resin frame. Down in the lower part of the card I mounted one of the sentiments from the pad into the middle of a collectable and added a red ribbon bow. A collectable butterfly and scattering of small flowers to finish! It is very hot here today, 33 C..so everyone in the household is very lethargic, and under the air conditioning ducts is the best place to be! Til tomorrow…..
chipboard foiling..
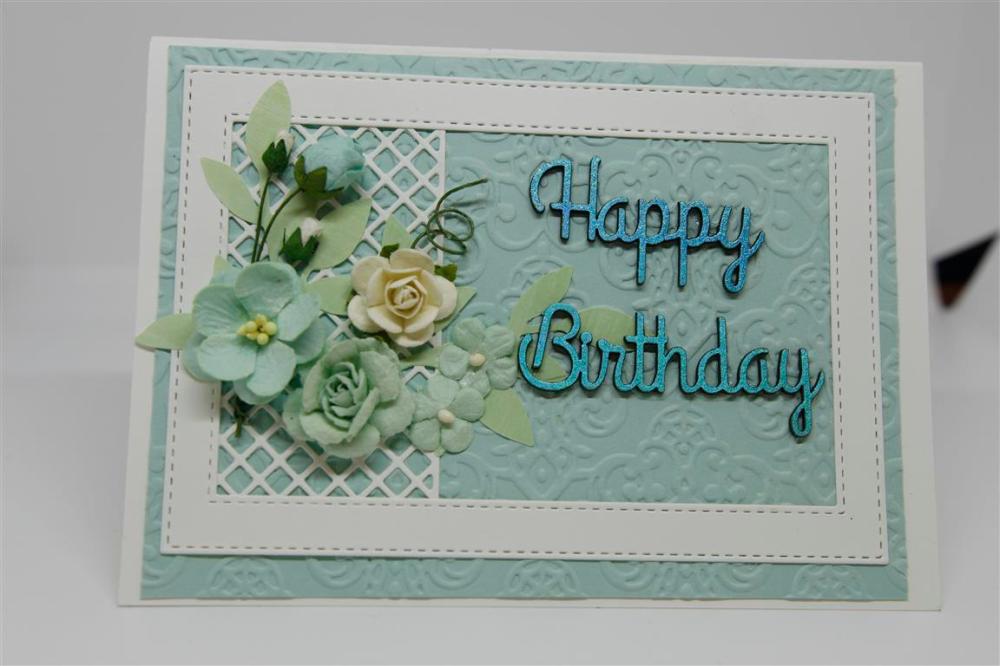
This is the card I made that inspired the whole theme of the class I taught this week at Paper Flourish. I loved the mix of white and soft sea green. I have used a Stampin Up embossing folder, Paper Rose nested stitched dies,and the sentiment is a Dusty Attic chipboard piece which I foiled in the Go Press and Foil machine. The green foilage is a Memory box die, and all the flowers are from I am Roses. I must fly now as we are off to a garden wedding, hope the weather stays dry! Til tomorrow…..
kaisercraft Mint Wishes number 6
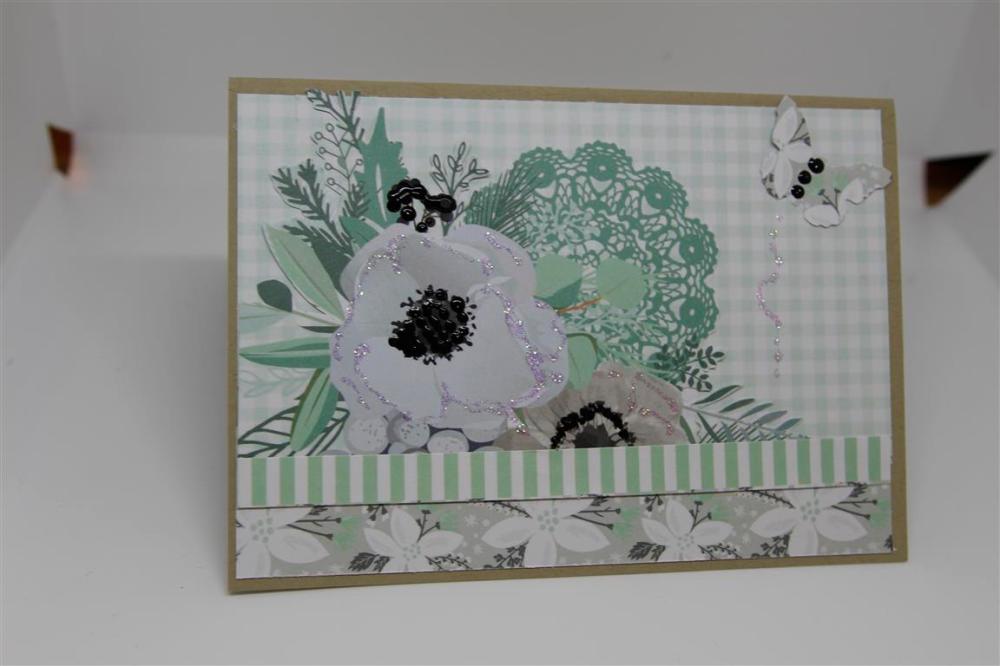 This is the last of my Kaisercraft mint Wishes cards. The left over of my 3 sheets of paper I gave to Mum. This one isn’t a Christmas card, it’s a card for any occasion! I did like the pastel green colour used in this range, and really this was just a corner panel of one of the sheets of paper, with a strip stuck across the bottom and a punched butterfly in the top corner. I highlighted little bits of the design with kindyglitz.A whole new series starts tomorrow! Til tomorrow…..
The last of the Christmas Z-fold cards!
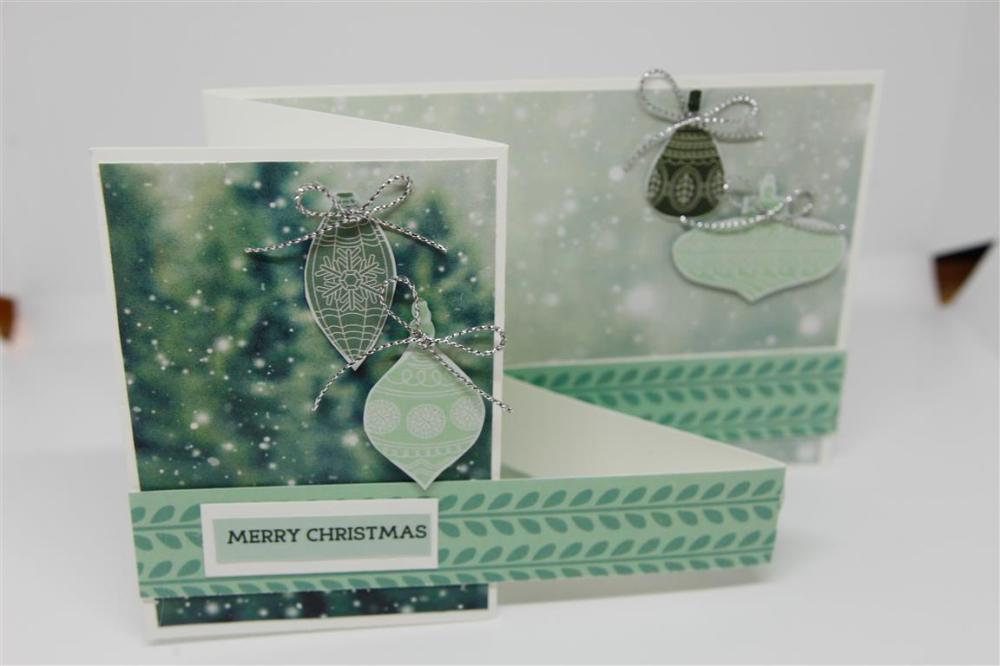
 Here are my last two Z-fold cards made with Kaisercraft Mint Wishes, still the same 3 sheets i purchased with just the addition of some pearl bling and silver twine. I think I mentioned that i bought the sticker sheet in this range, but I didn’t! the strips on the smaller z-fold pieces were conveniently on one of the sheets of paper already to size which made these cards really quick and easy to put together, and the merry christmas sentiments that I used were on the bottom of one of the sheets on that identity strip that we usually trim off and throw away! Tomorrow one last “normal” card that I made with the leftover pieces and then we move on to something completely different! Til tomorrow…..
Kaisercraft mint wishes double z fold cards..
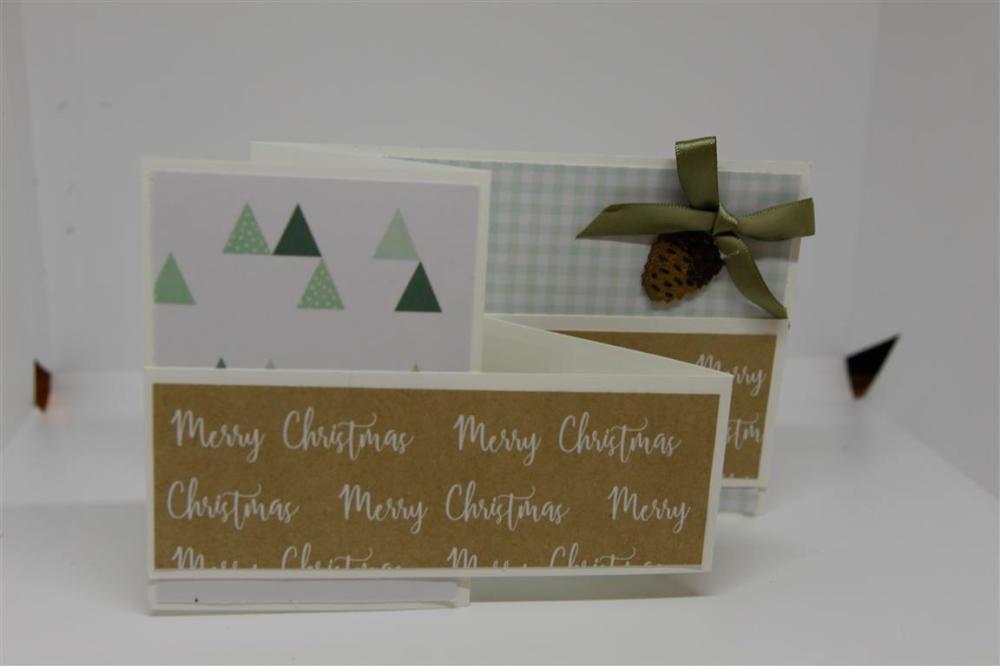
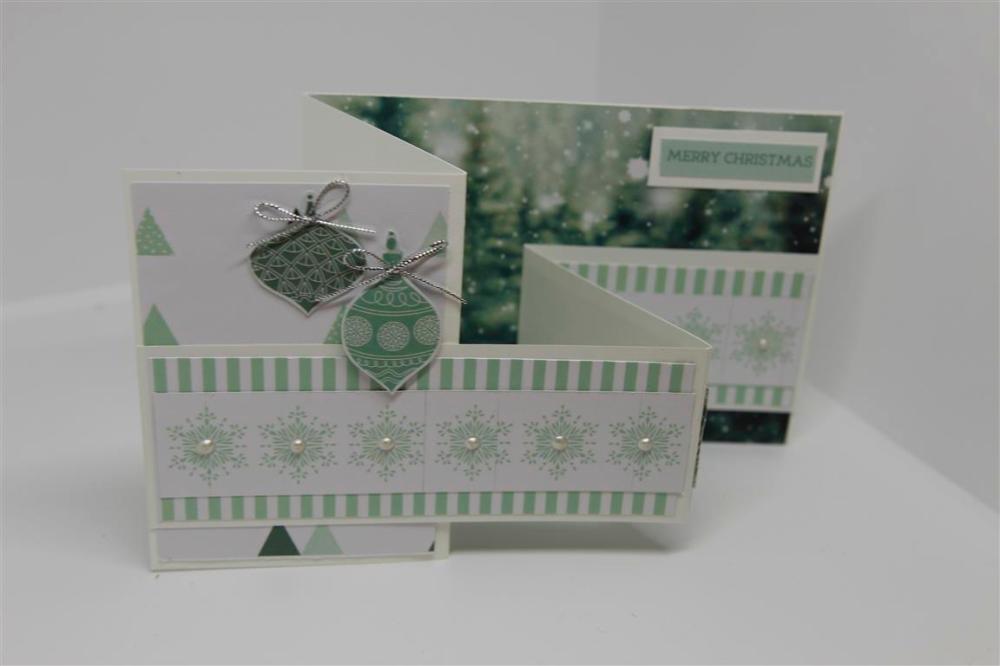
 two more double z – fold cards just using a couple of bits of paper from Kaisercraft Mint Wishes collection. The pine cone on the top card pictured is a kaisercraft wooden piece which I foiled in chocolate through the Go Press and foil machine. The Baubles on the second card are fussy cut from a piece of the patterned paper from the collection.I have added a photo under my script to show you what I spent last evening doing! We got in some new Nuvo Products at paper Flourish and I just had to try them out.They are Nuvo glimmer paste and come in a range of colours, but I just picked up the clear and the gold, and so far I have tried it out on wooden pieces,painted on with a paintbrush, dabbed little bits ( mainly to clean my brush off) on flowers, and then I found a stencil, attached it to some cardstock and painted the glimmer paste through the stencil..this technique looks amazing! It dries in about 10 minutes, so no long waiting around for it to dry.
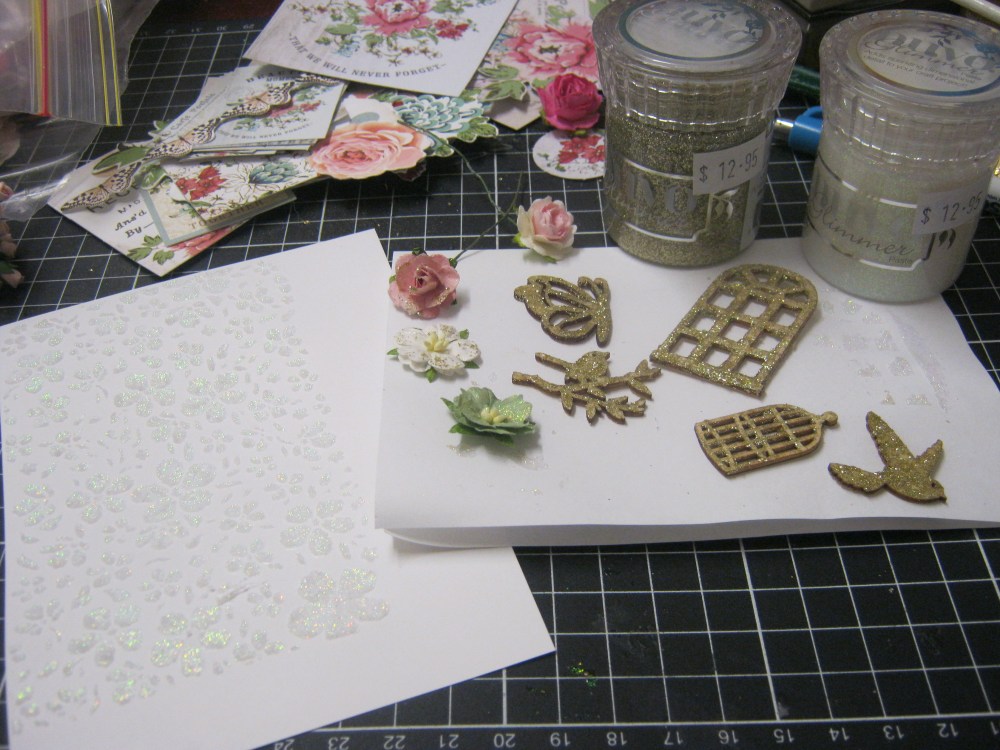
Kaisercraft Mint Wishes number 1…
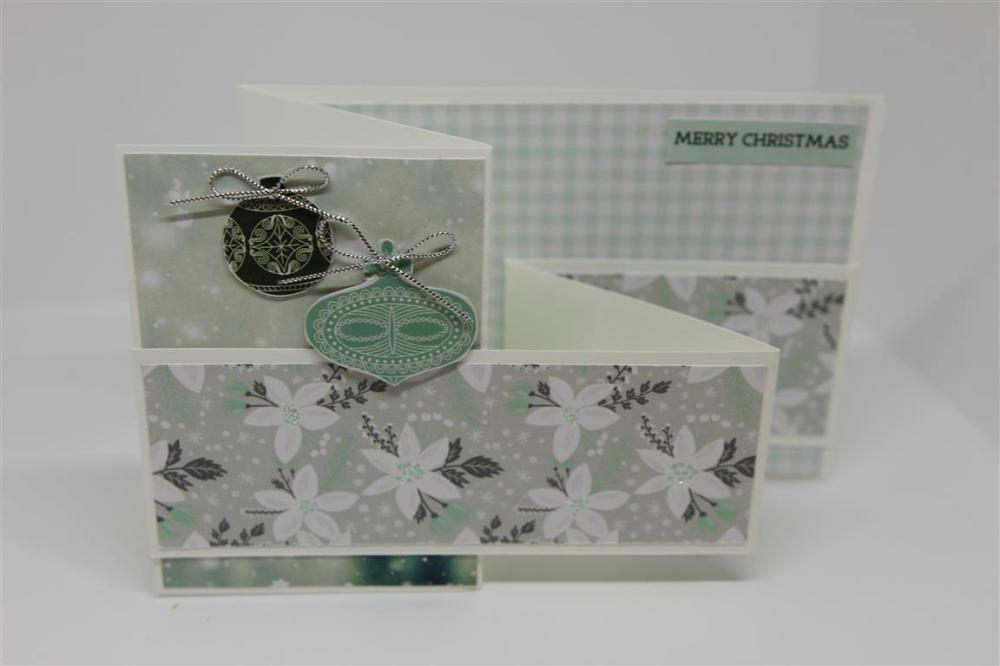
 Quick post this afternoon! I have been busy working this week, so having been a bit lax on the posting front! Today has been another busy day with work this morning, and grocery shopping this afternoon, but I wanted to make a little bit of time to post the last Christmas 2017 series which is Kaisercraft Mint Wishes.Just a few cards in this series , I only bought 4 sheets of paper, including the sticker sheet, because the paper was perfect for my christmas double zig zag cards. For this first card I used the same sheet for both panels, fussy cut some baubles from the second sheet, a strip from the third sheet for the smaller zig zag, and a greeting from the sticker sheet mounted onto scrap white cardstock. It is a hot day here in Adelaide today, so I am off to cool down in the shower, then a seat for a little while under the air conditioner! til tomorrow…..
Go Press and Foil Christmas
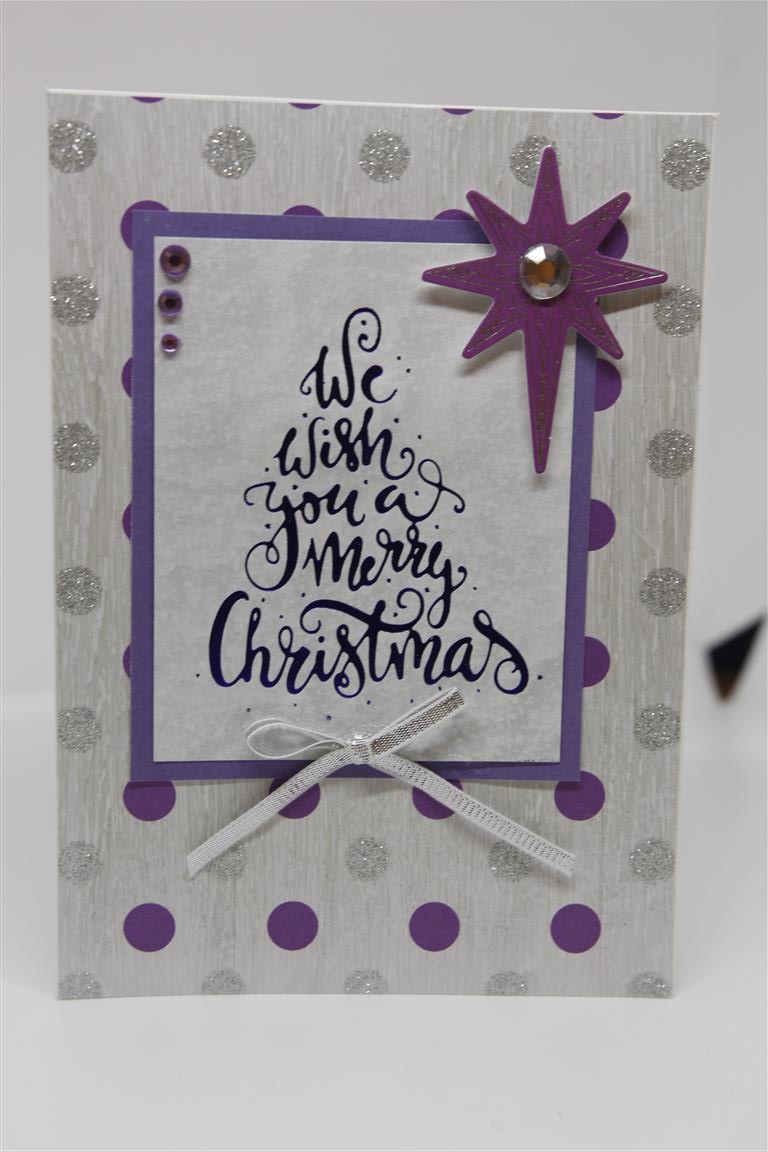
Some Kaisercraft Christmas Jewel paper collection today, and an experiment using a Go Press and Foils stamp on patterned paper. it worked a treat, and I will be doing this a lot more!The background papers are from the 12 x 12 papers in the Kaisercraft Christmas jewel collection, and I foiled a lovely purple foil onto the patterned paper for the sentiment. a matching collectable and ribbon bow to complete a very simple Christmas card. i have been foiling this morning…. I have been die cutting my own chipboard pieces and foiling them. The secret is in getting the shim correct. I have found that using a piece of the chipboard cardboard is just the right thickness for a shim on my die cutting machine, but everyone’s die cutting machine is different depending on how loose it is so experimentation is essential. If your first run through is patchy, you need a thicker shim and you can just foil over the top with another piece of foil.Til tomorrow…..
