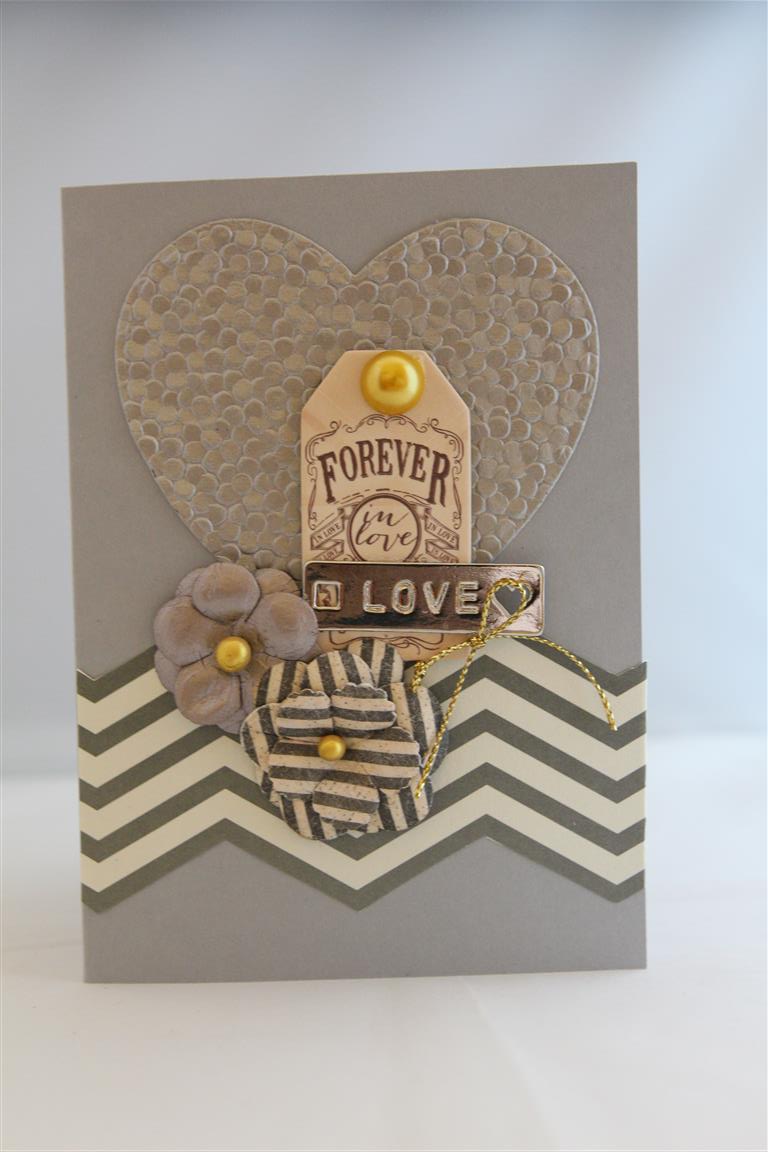
 The collectables pack from the Prima Rossibelle collection had some wonderful bits and pieces in it, and the silver plaque and tag were the base for this card. The flowers were also Prima and I added some gold thread and a flat backed pearl. The papers were some random pieces that were in my stash and I used a bit of the silver textured one to die cut a heart. Today is a day off, so i have been busy in the kitchen experimenting with a chicken casserole – no recipe so hope it turns out alright – smells ok as its simmerimg, so hopefully I have succeeded! Now I am off to the craft room to make a start on 6 orders, and looking forward to relaxing! til tomorrow…
Tag: inspire
Prima Rossibelle number 3..
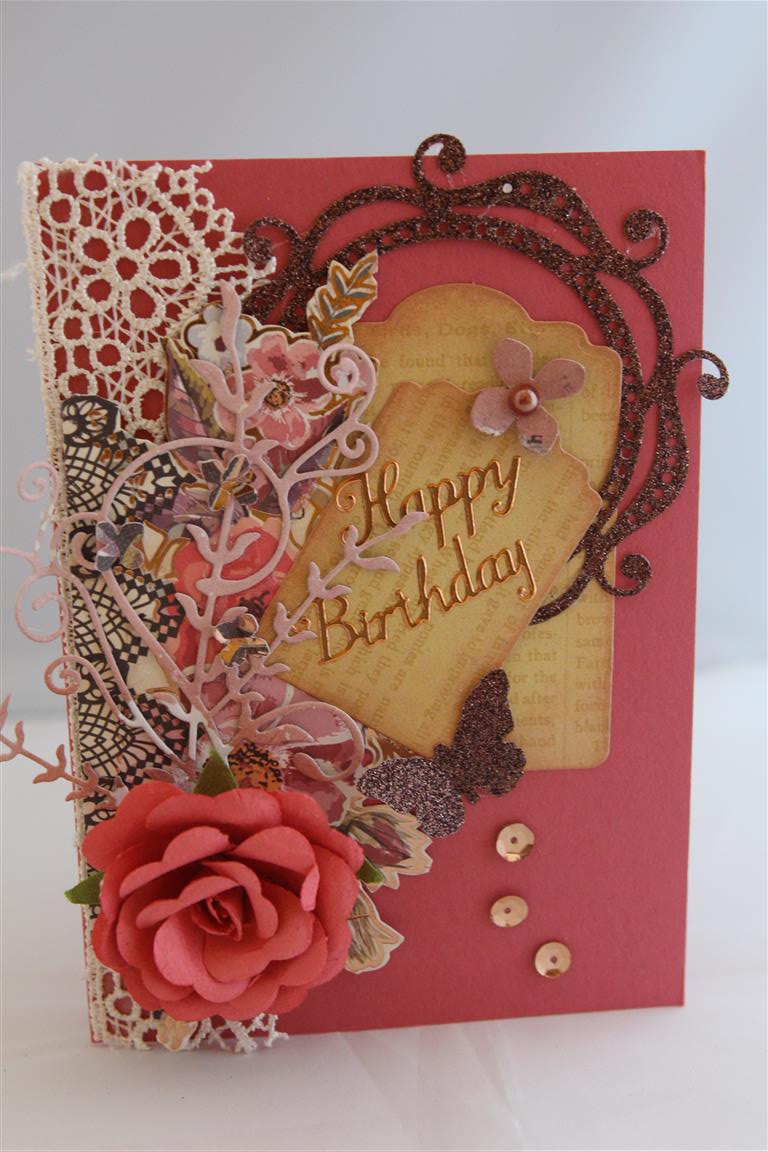 Oh, Dear I threw everything at this one didn’t I? There is die cutting ( All Paper Rose dies – tags, ornate circle and leafy flourish ) Punching ( tim holtz butterfly and Martha stewart hyacinth) fussy cutting, and flowers ( prima), lace and sequins!The tags were die cut from some prima vintage paper. The next card in the queue is the exact opposite of this one..maybe I used everything up on one card?I had a lovely lesson with the village ladies yesterday,today I popping over to Paper Flourish to drop off my march lessons and have a look at the new Paper Rose dies. Til tomorrow….
Prima Rossibelle number 2…
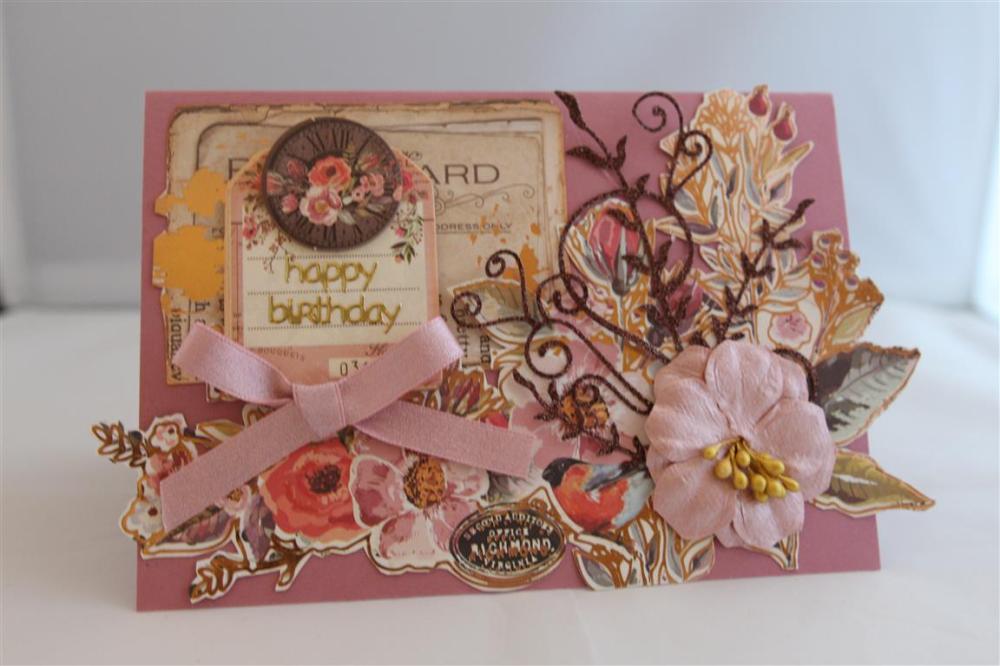 Prima Rossibelle paper collection, along with matching flowers and chipbboard. For this one I fussy cut the paper and stuck it on some plain cardstock ( stampin up Sweet Sugarplum). I then added ribbon, a flower, and die cut Paper Rose Leafy Flourish ( in copper cardstock)A couple of pieces of chipboard and a sentiment finished this one. Today I am off to the retirement village for a class, and we will make some cards and enjoy afternoon tea( the ladies always put on a lovely handmade spread!)Til tomorrow….
Prima Rossibelle number 1..
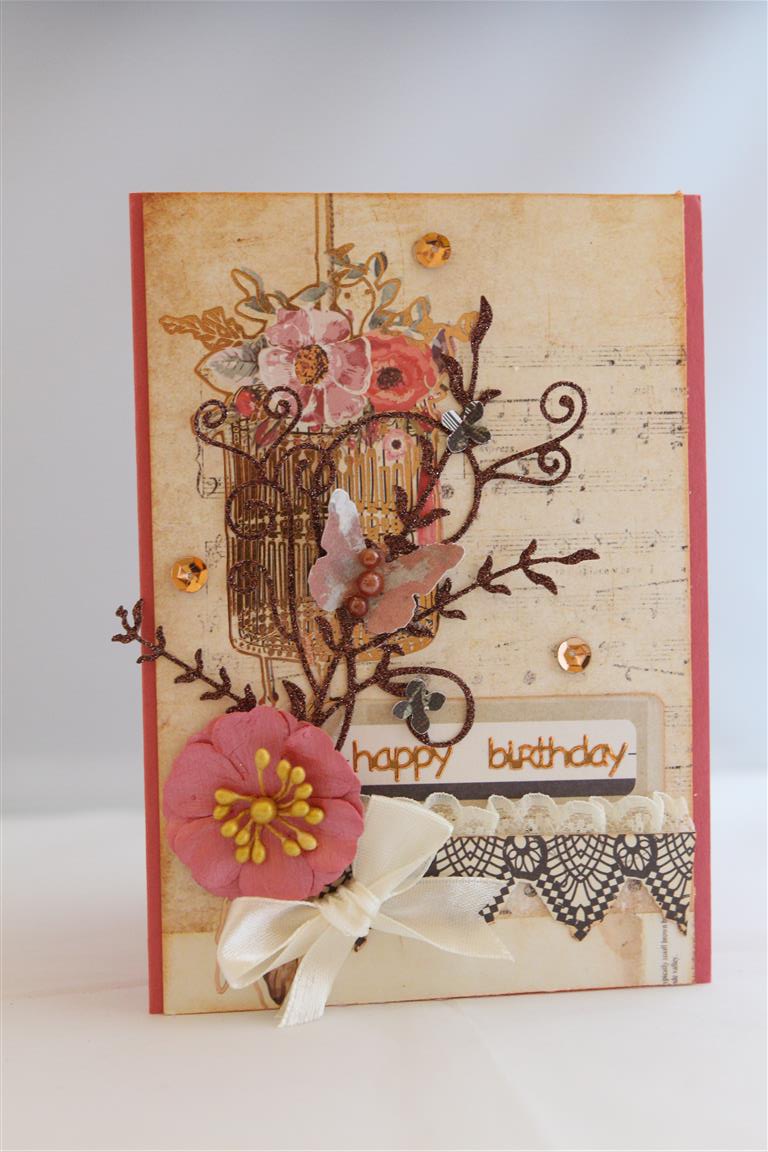 A new series today, this one is Prima Rossibelle papers, and I bought the matching chipboard and flowers as well.For this first card I cut the paper so that the birdcage was positioned on the left hand side of the card,fussy cut some paper with the lacy border,tucked lace behind , and added a prima flower,ribbon, little punched flowers and a punched tim holtz butterfly. I went searching through my bits and pieces to find anything copper related because I thought copper would be a good fit with this paper and found some copper sequins, pearls, glitter paper and even copper sticker sentiments so they all found their way onto the card! The die I used for the leafy flourish is called just that and is by Paper Rose.Til tomorrow….
KaisercraftPeek -a -boo 7,8..
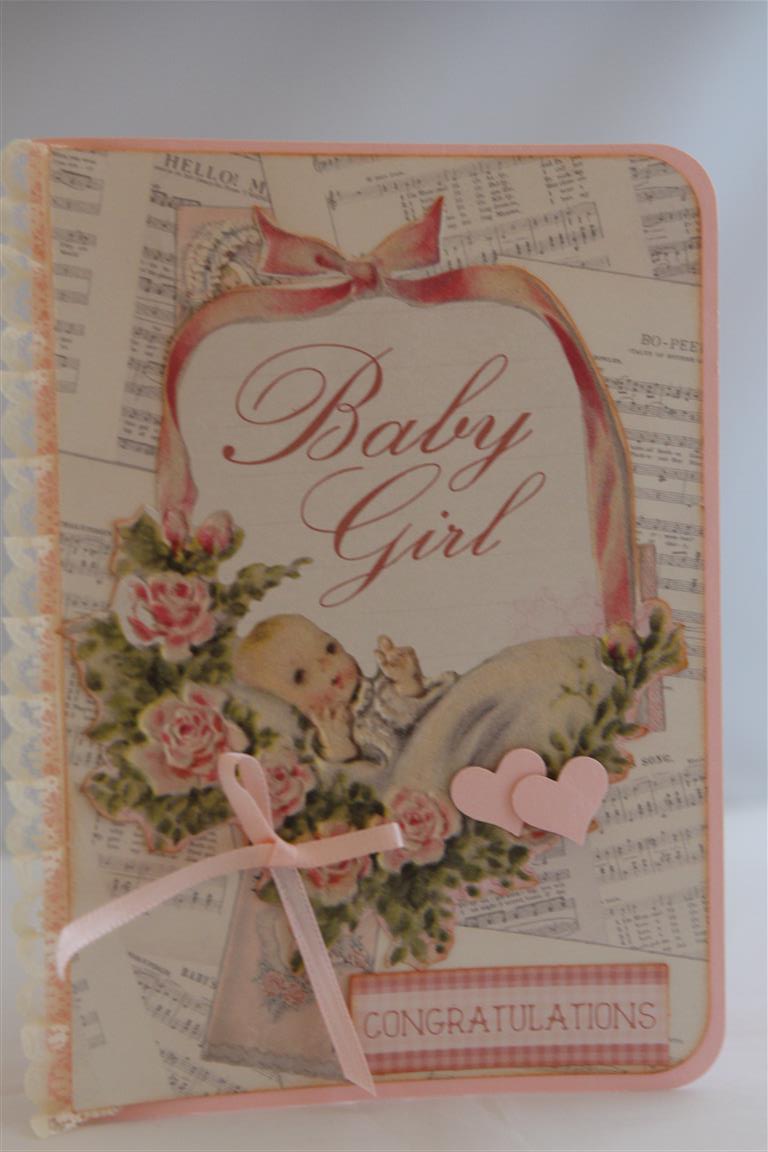
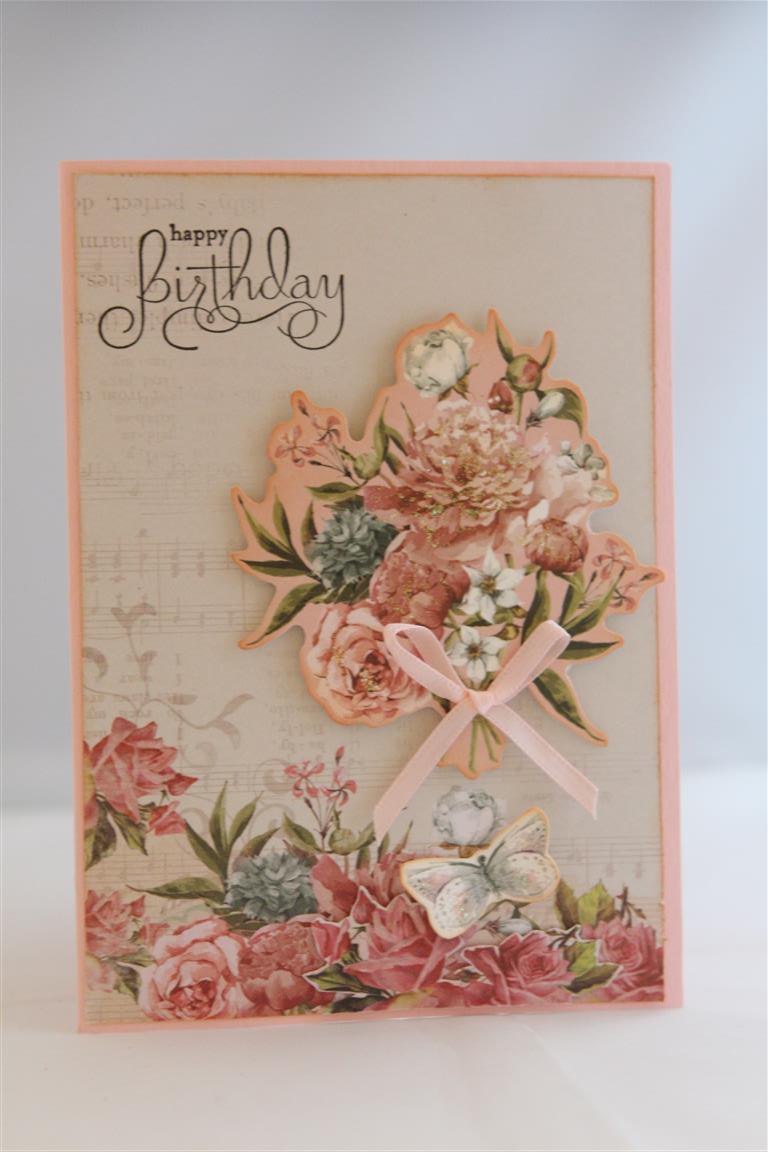 Here are the last two kaisercraft peek-a boo cards for now, the top card has lace, ribbon and a couple of punched hearts, rounded corners and paper from the 6″ pad, while the bottom card is still using the baby girl collection and matching collectables but i have managed to make a lovely floral birthday card with it. I have been busy putting the final touches to all the cruise kits, with the help of my wonderful sister Kay – so lucky she was able to do most of the work while I was out of action with my shoulder ( which is now well on the road to recovery but i still have to be careful) So glad she is coming along with me on the cruise, she deserves it after all the work she has done! Today is all about preparing march lessons if I get a chance to venture into the craft room. Life is hectic here just now! til tomorrow….
Peek a boo baby girl..
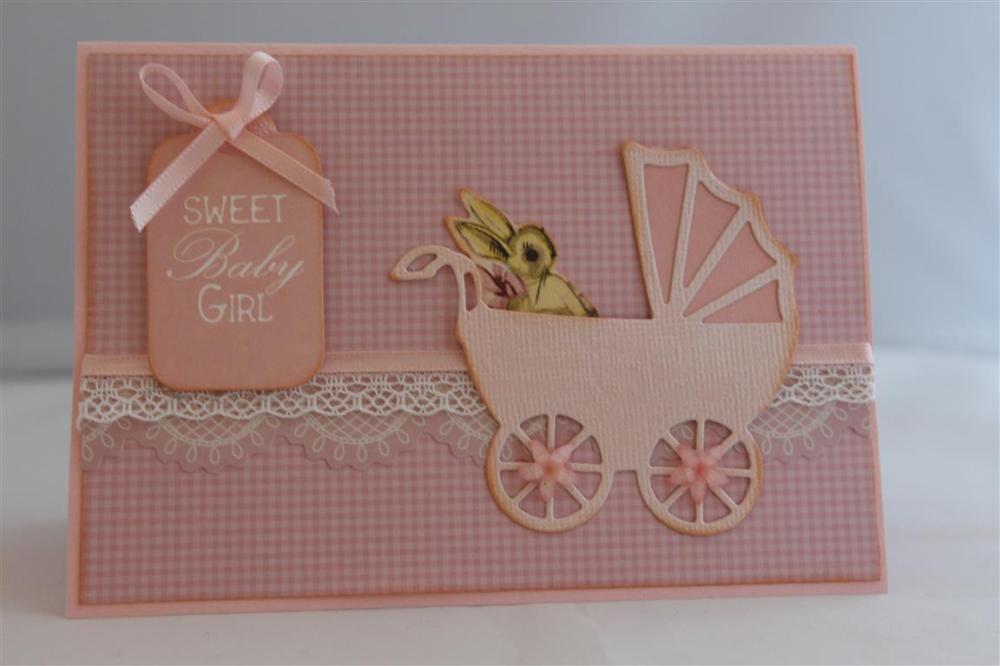
 Two cards today because I have been missing on the blog this week, had a few Dr’s appointments to sort out my knee which has been playing up. Turns out it’s arthritis, so I will just have to get used to it,I am just so relieved it isn’t a cartlidge problem again!Todays cards are made using Kaisercraft Peek a boo in the girls colours. I also used the Kaisecraft dies for the pram and the word baby.I used a matching collectable to pop into the pram on the top card, and for the bottom card I punched a circle and added googly eyes to represent a baby peeking out of the pram ( I like this one – the fun nature of it). Went to town with the lace , ribbon and buttons! Day off today so i am off to the craft room to sit and relax for a couple of hours at least, til tomorrow…..
Kaisercraft Peek – a – boo, the pink ones!
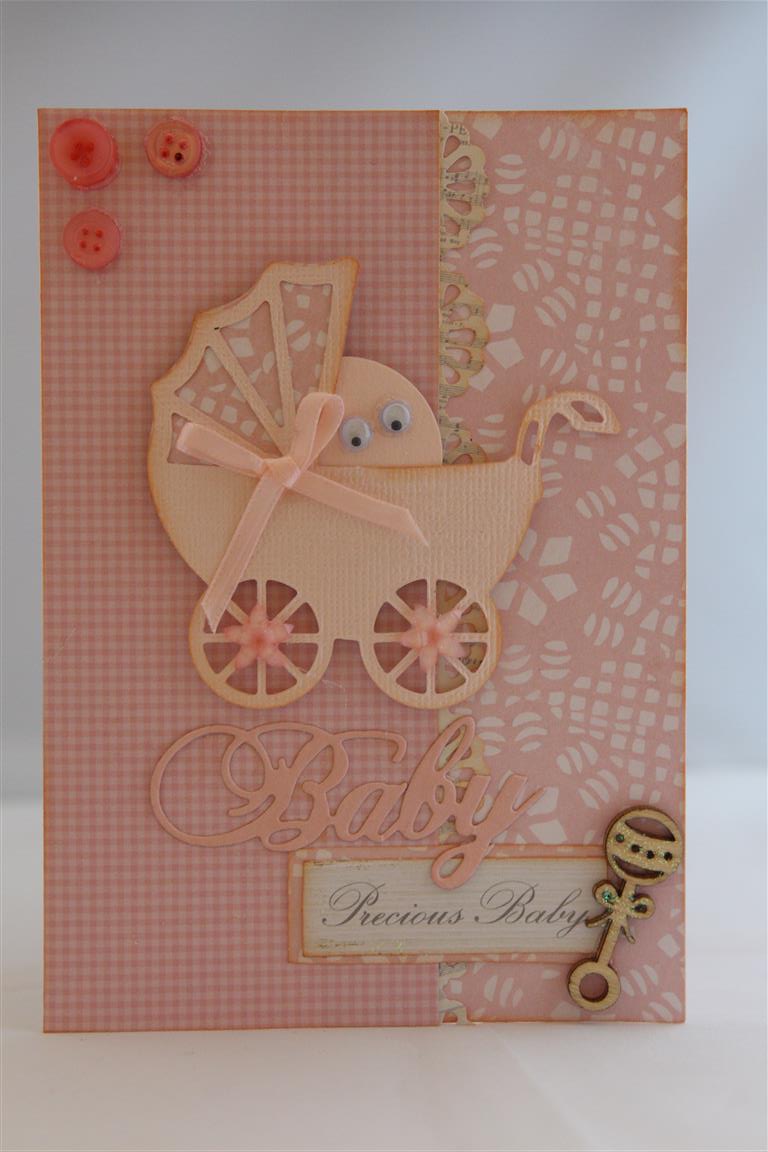
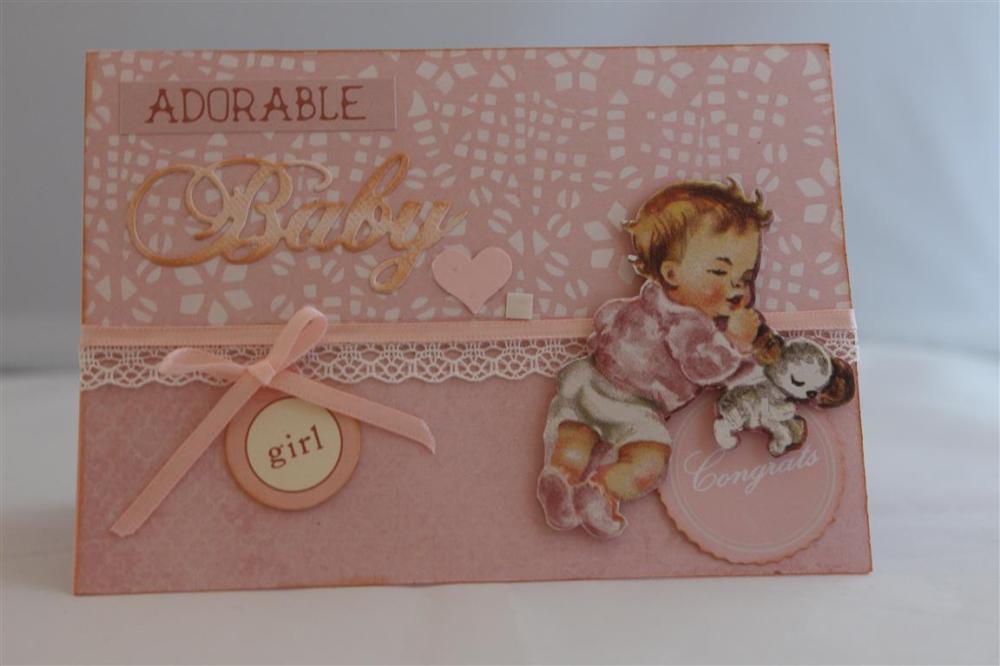 Still with kaisercraft Peek-a-boo, but the pink version. Girl baby card today,and here I have used the 6″ pad ( which is a mix of pink and blue papers) for the background layer, and some matching collectables. The “Baby” was die cut with Kaisecraft die and inked around with tea dye ink to make it stand out a little from the pinkness of the papers. ribbon and delicate lace to finish! Housework is done, roast is in the oven so now it’s time to craft! til tomorrow….
Kaisercraft Peek a Boo.
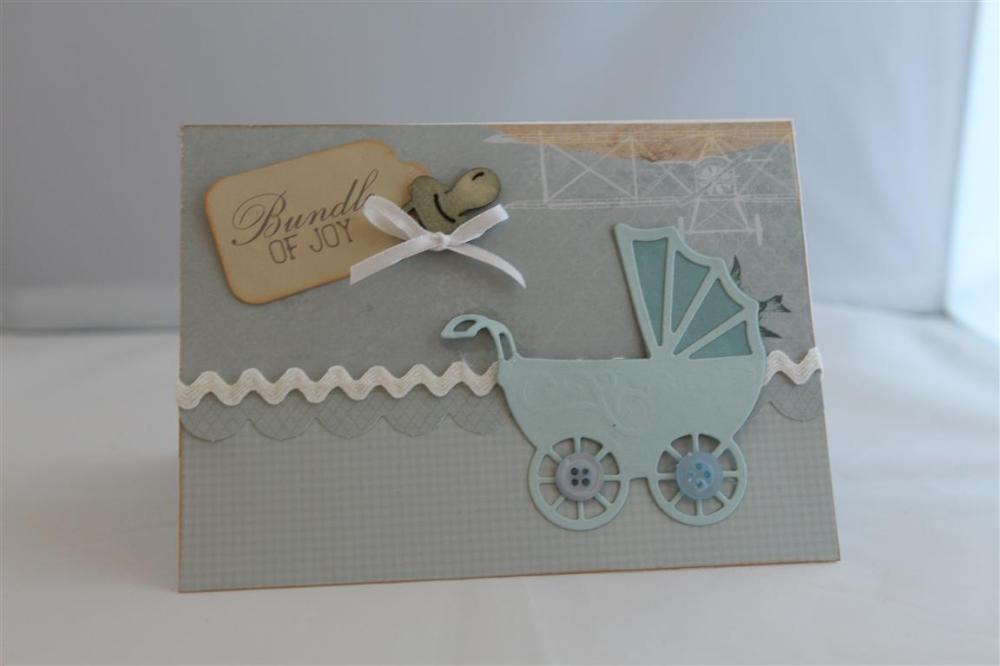
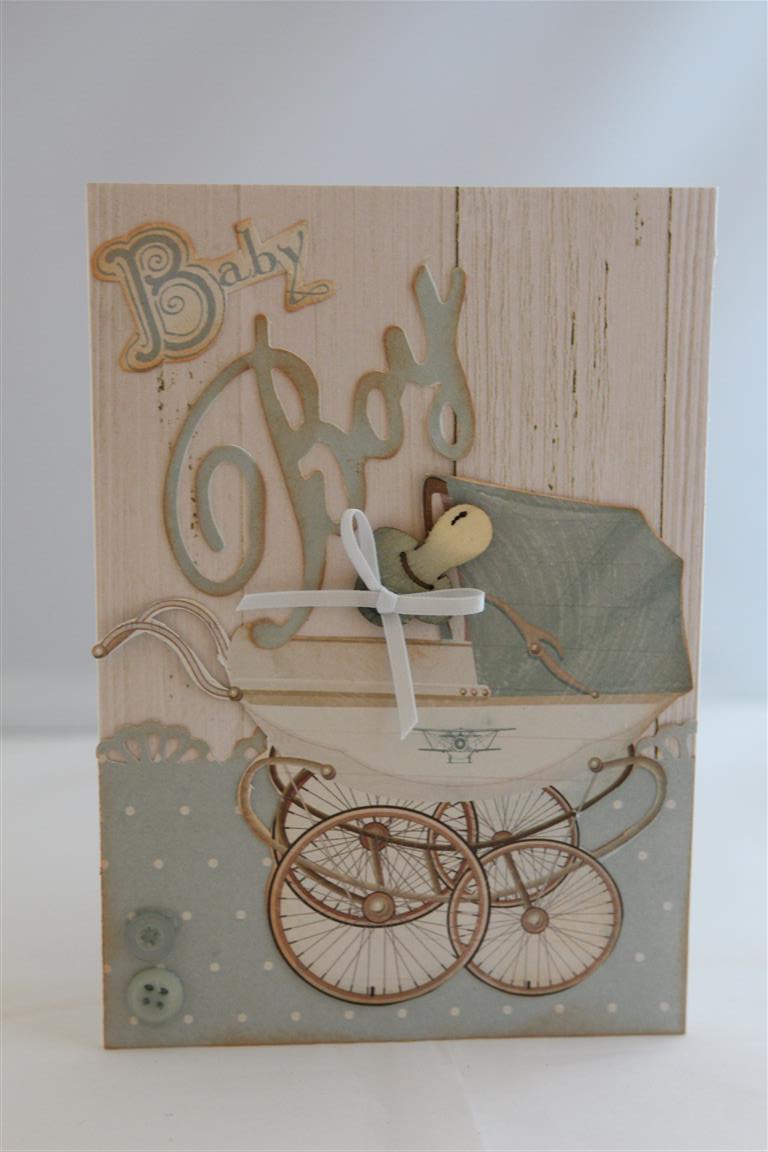 The Kaisercraft Peek a Boo paper collection comes in two parts, you can purchase pink or blue, great idea, but I had to have both! I have made a few cards from both colourways and we will start with the blue. For the top card I used 2 pieces from the 6 ” pad and punched a border on one of the pieces.The tag is from the pack of collectables, and I used Kaisercraft die to die cut the pram. The chipboard piece is also from a kaisercraft pack.Butons ,ric rac and a ribbon bow to finish that one. The second card also has two pieces of patterned paper to cover the base card ( from the 12 x 12 papers) and I fussy cut the pram from another piece of the 12 x 12 paper. I fussy cut the word baby from a 12 x 12 paper and die cut Boy using a kaisercraft die. Again a chipboard piece, ribbon bow and buttons to finish. I am off to teach a class this morning, looking forward to seeing my ladies as I had to miss my december class due to the whole shoulder injury thing which is improving now but still not 100% yet! Til tomorrow….
PS I LOve You number 4
This is the final card ( for now, until I find where I have put the papers!) of Kaisercraft PS I Love You , I have used the 6″ paper pad and matching collectables on this one. I added a couple of Green Tara flowers and inked around the large collectable with some Tea Dye ink for definition. A ribbon bow to finish. I had a lovely day at the Paper Flourish Teachers car park sale, and sold a lot of bits and pieces that were taking up valuable real estate in my craft wardrobe. I still have a lot of clearing out to do , but I at least I have started! And of course it means more room for new goodies! Til tomorrow….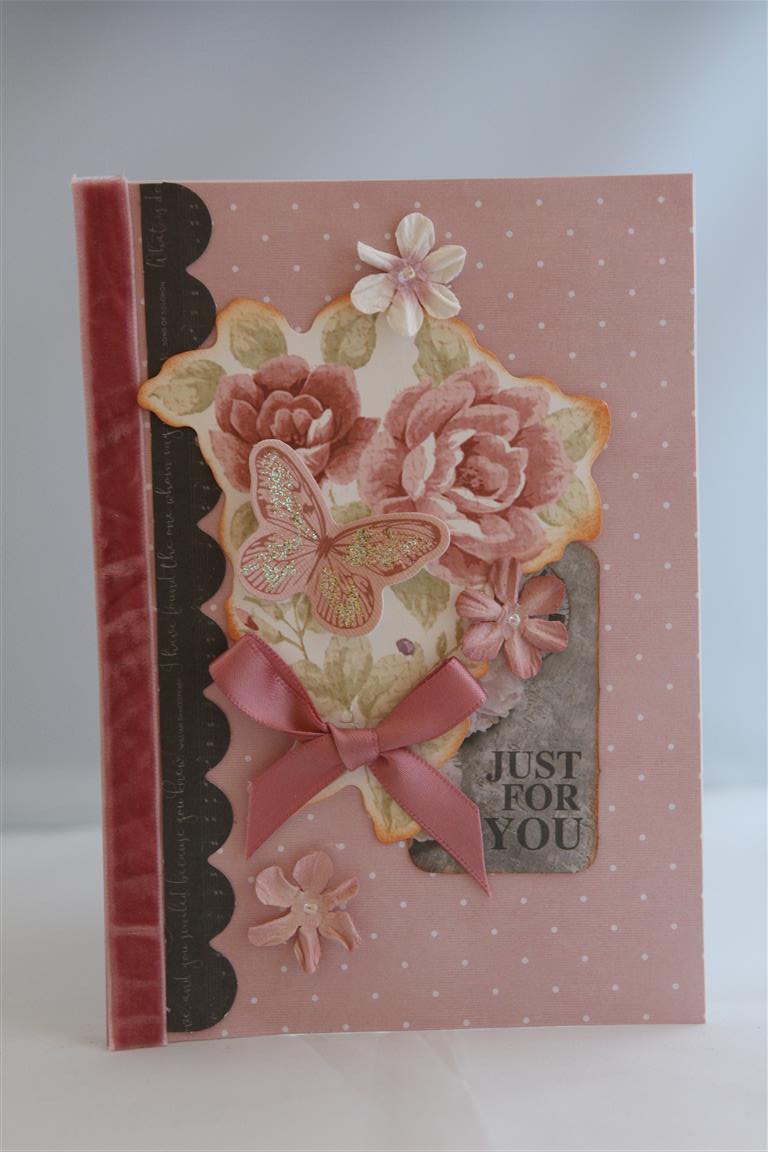
Age birthday card..
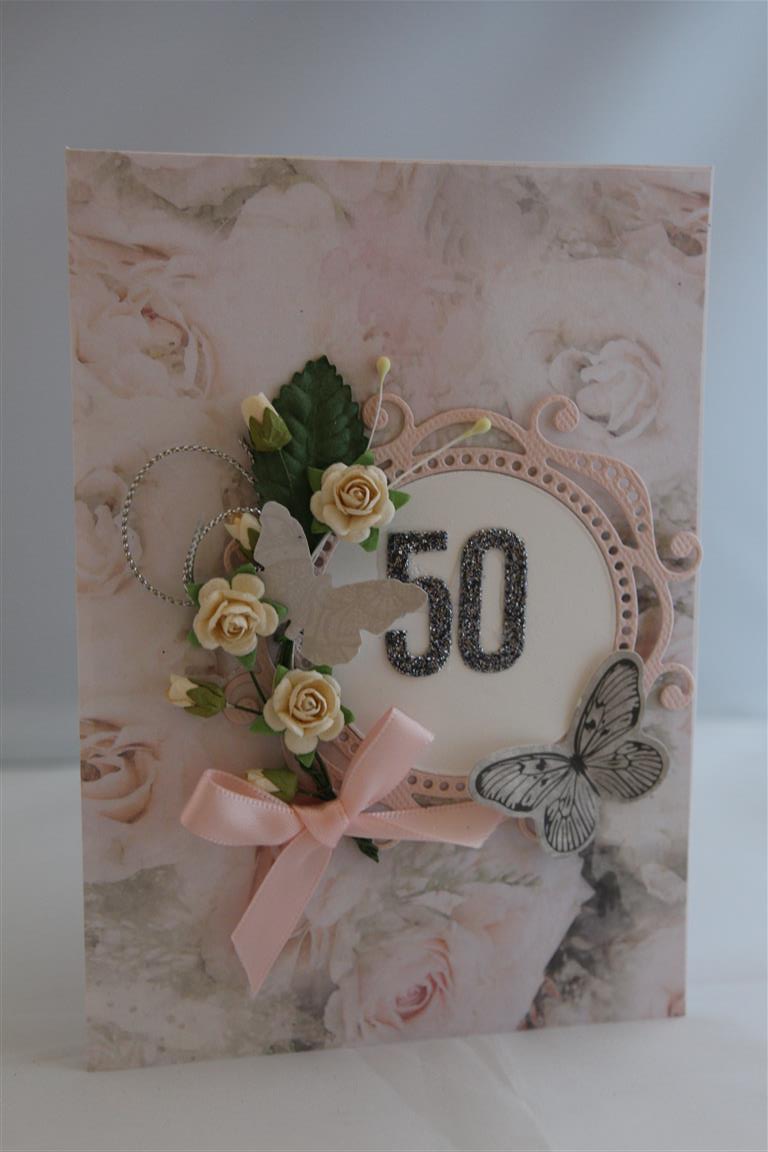 Todays card is the last for now of my age birthday series, and like the previous cards uses Kaisercraft PS I Love you paper for the bottom layer. The die is Paper Rose Ornate Circle,one butterfly is from the collectables pack of the same paper collection, and I made a small spray of flowers with a ribbon bow to finish. These are actually quite quick and easy cards if you take the time to prepare a few sprays while sitting watching TV in the evening, This one in particular was just a case of winding the flower stems around each other, placing them at different heights before winding. Once all joined together you can bend the wires to spread them out or shape them around the circle as I have done here. A leaf, stamens and some silver thread is all added after the spray is stuck on the card front. Another scorcher here today,no good for crafting as the glue drys before I am ready to stick anything to it! Til tomorrow….
