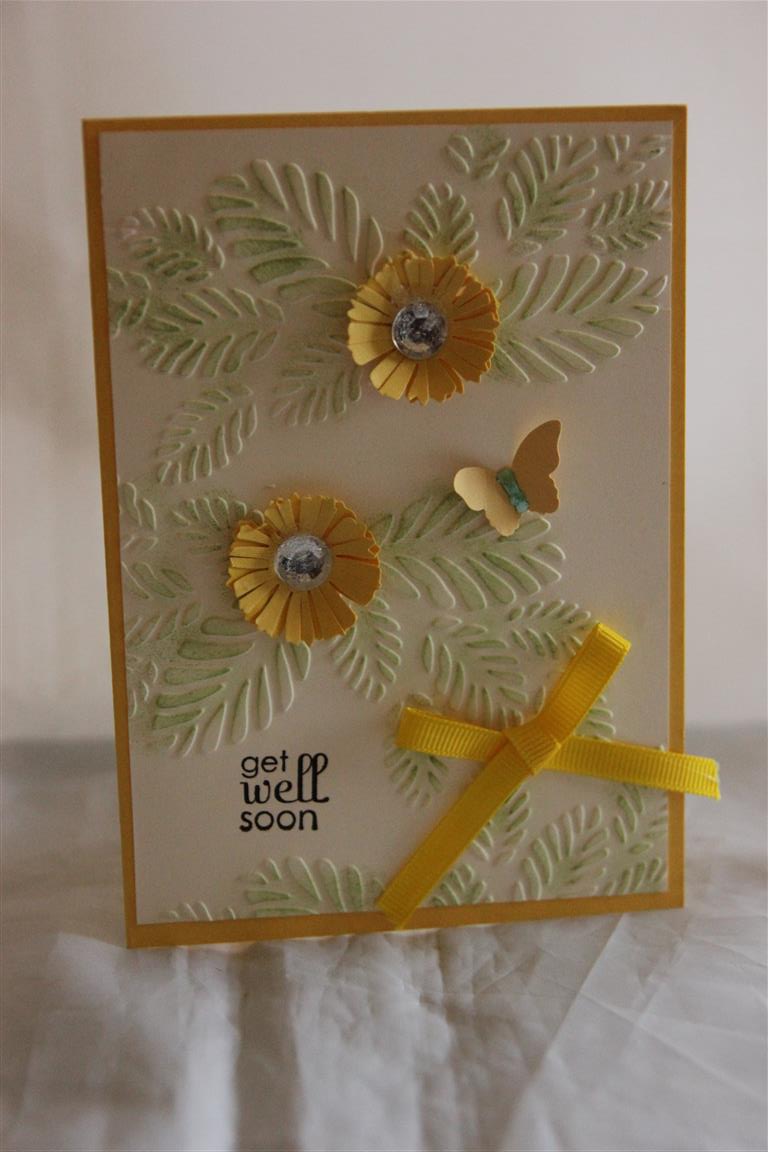
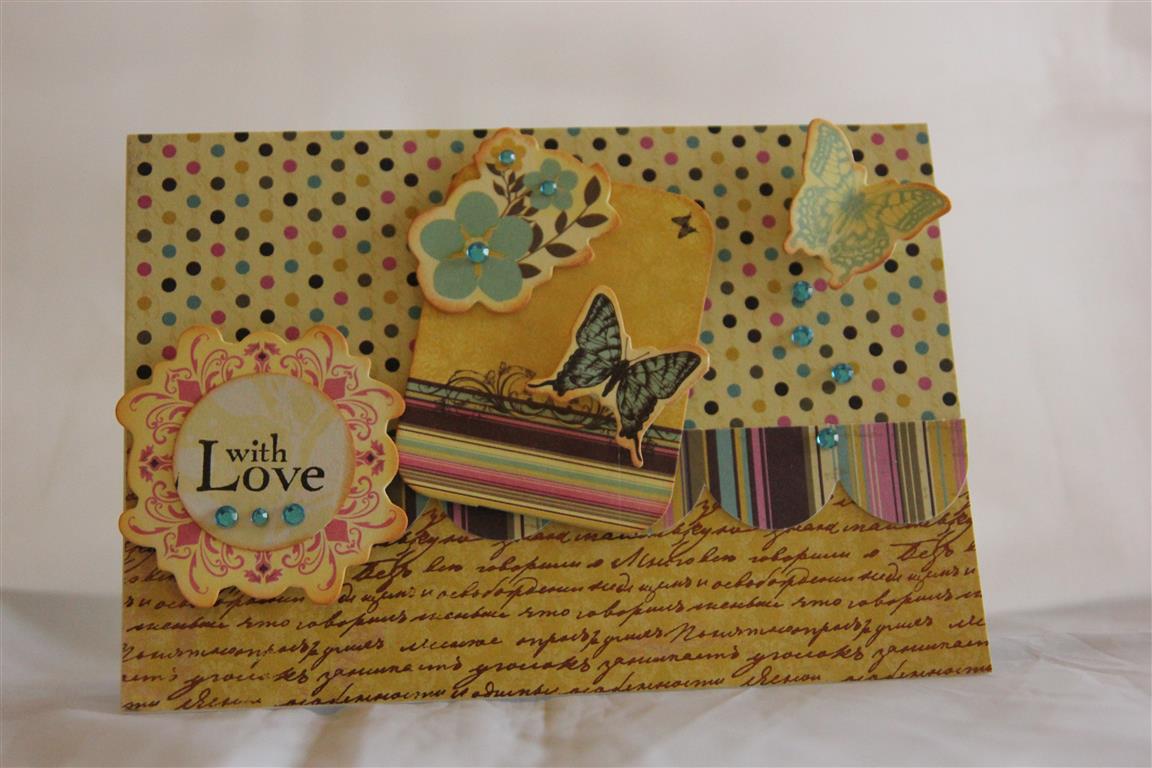
 This is another village lesson card – the ladies gave me the embossing folder which they had purchased and asked for some ideas on how to use it.I embossed a piece of cream cardstock and then inked the raised areas with a green ink pad and sponge. The flowers were punched using a cosmos martha stewart punch and I added some bling and a ribbon bow, and mounted everything onto stampin up daffodil Delight cardstock.The butterfly was punched with a stampin up punch.I have been busy in the card room making some more class lessons,and preparing for my class later in the week, but when I go back in there later I will be creating with some new papers – can’t wait!
Tag: simple card designs
Cuttlebug card
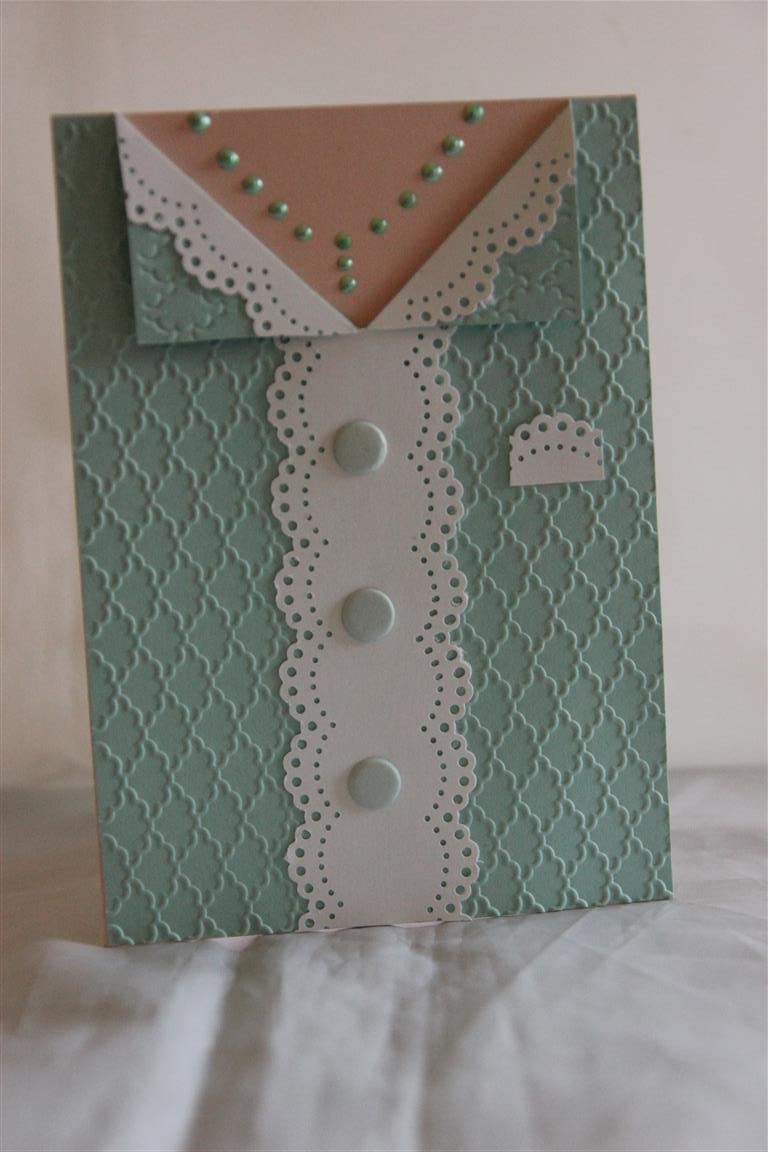 This afternoon I taught a class over at the retirement village which reminded me I didn’t show you all the cards I taught last month over there, so here’s the first one – very simple – cardstock is all stampin up – Pool Party, blushing bride( which is the card base) and whisper white. The embossing folder is Stampin up fancy Fan folder, and the border punch used is martha Stewart lace doily punch. I found the middle of the embossed piece of cardstock , cut down 4 cms, and folded each cut back to create the V necked sweater. The buttons are craftworks craft candii, and liquid pearls for the necklace. Have a look at your embossing folders – I’ll bet one of them would work for this design!A lovely evening last night spent in the craft room, and I am heading in there again this evening as all my lot are busy putting on a wrestling show…..peace…..Til tomorrow….
Great Southern land number 3
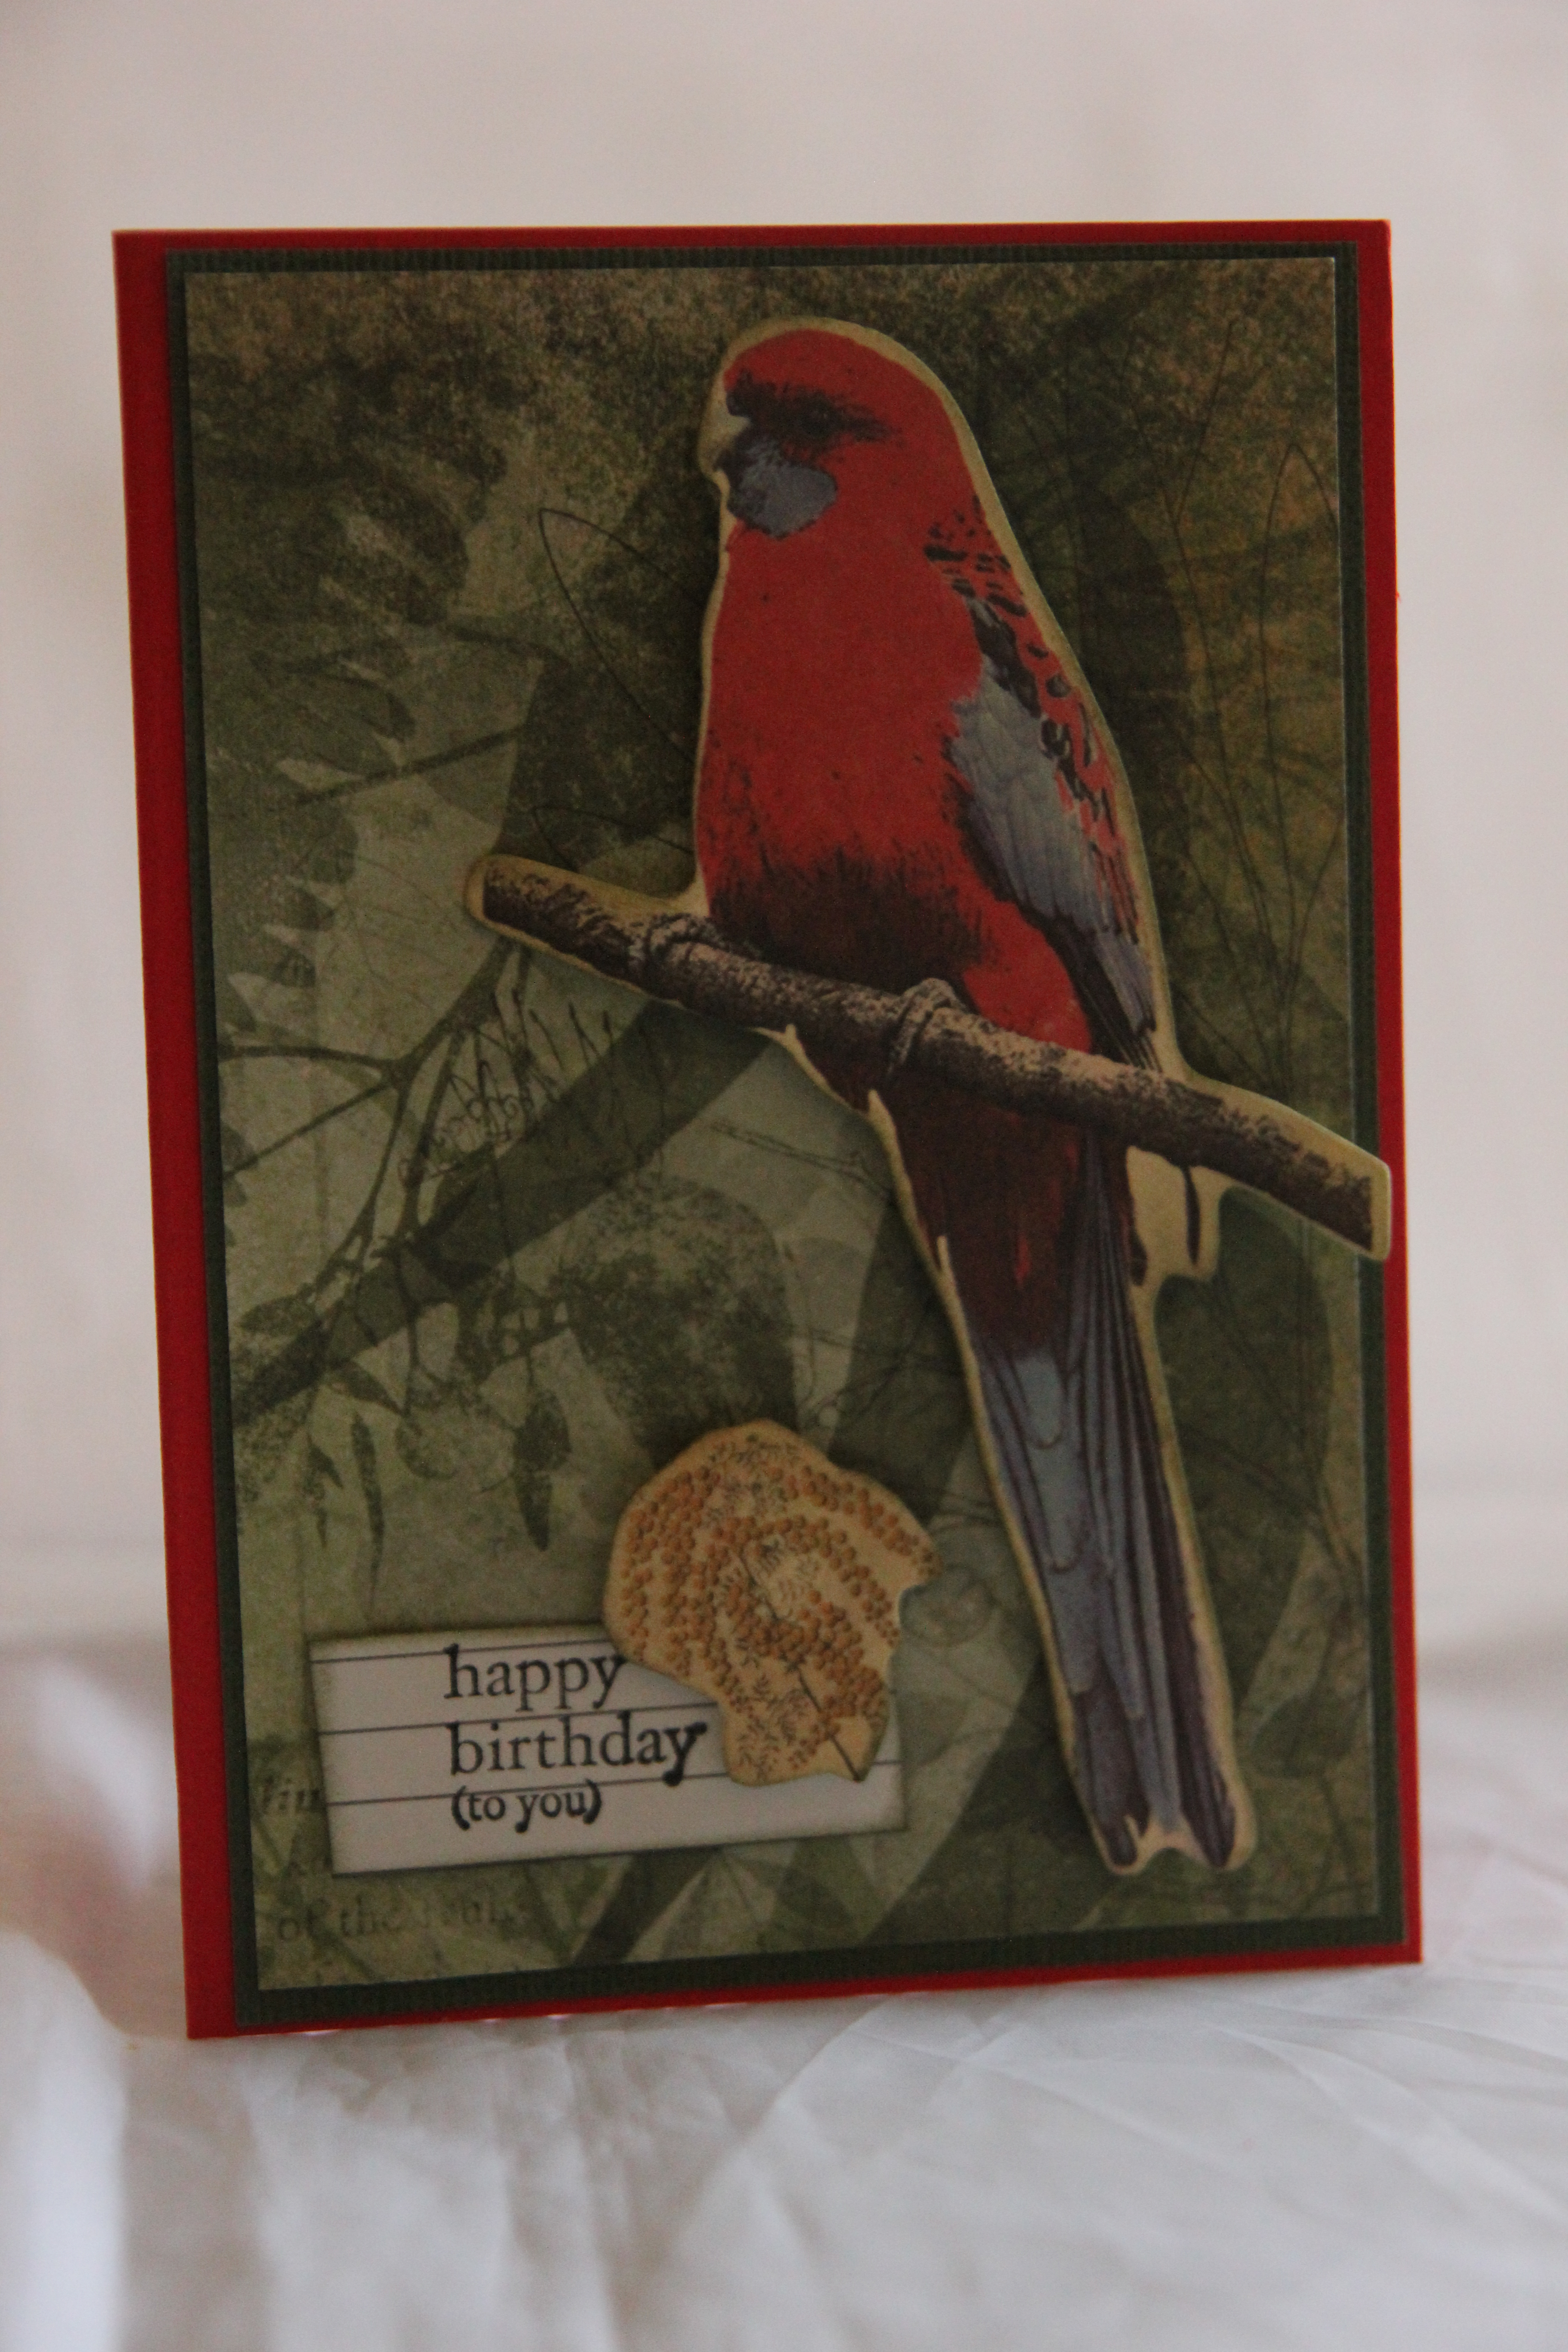 This is the final card in my Kaisercraft Great southern Land series – still a bit dark – sorry! The parrot is from the matching collectables pack ( isn’t it great?) and I used stampin Up cardstock and sentiment stamp.Tomorrow we will move onto something completely different. I had a lovely morning over at paper flourish, I was setting up my lessons, while a big group of ladies were enjoying the cardmakers club.Its always great to see what they come up with for each months challenge. This month the challenge ( which I always join in with) was Criss cross card – white on white. And it was amazing how different they all looked even though it was quite a narrow frame. All the cards were photograghed and will be up on the paper flourish facebook page soon, I urge you all to have a look – these cards are stunning!I picked up a great amount of new papers today, the new releases from Kaisercraft ate fantastic – I was spoilt for choice, so tonight and for the rest of the weekend I will be in the craft room creating. Can’t wait. Til tomorrow….
Great Southern Land
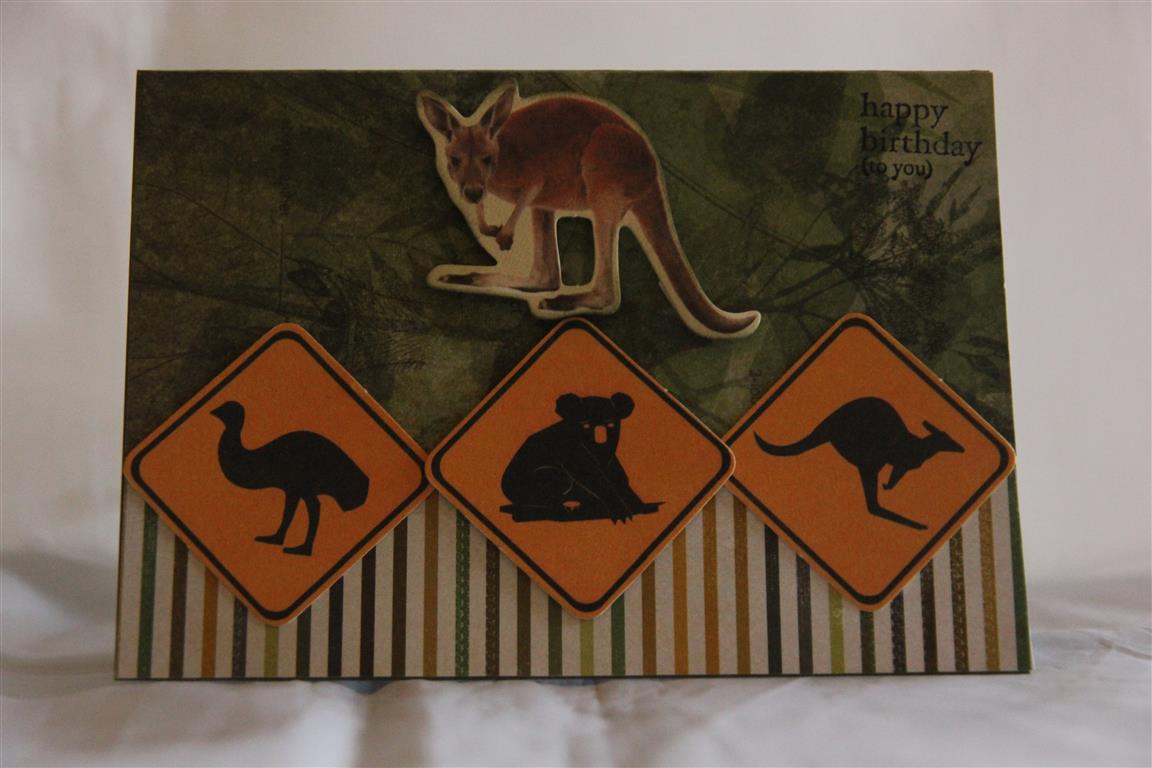 This photo is a little dark – in real life the background isn’t quite so dark, the paper is from Kaisercrafts Great Southern Land collection and I used the matching collectables as well. This was a release in the second half of last year, but it should still ba available. I used it for a class last september, and we all thought it would be good for xmas cards to send overseas.this one though I have made into a birthday card stamping a stampin up sentiment stamp straight onto the paper.I will be found in the craft room tonight as I have a few orders to make including quite a few wedding cards! Til tomorrow….
Kaisercraft Botanical Odyssey number 5
 While browsing my files I found another Kaisercraft Botanical odyssey card which I havent shown yet. I used the 6″ pad, and collectables on this one and inked all the edges with Tea dye ink. I added some kaisercraft rhinestones, and the sentiment is a Stampin up stamp.Welcome to my new subscribers, I hope you all find something here to inspire you, and I love hearing from you all ! Til tomorrow….
Sewing Box
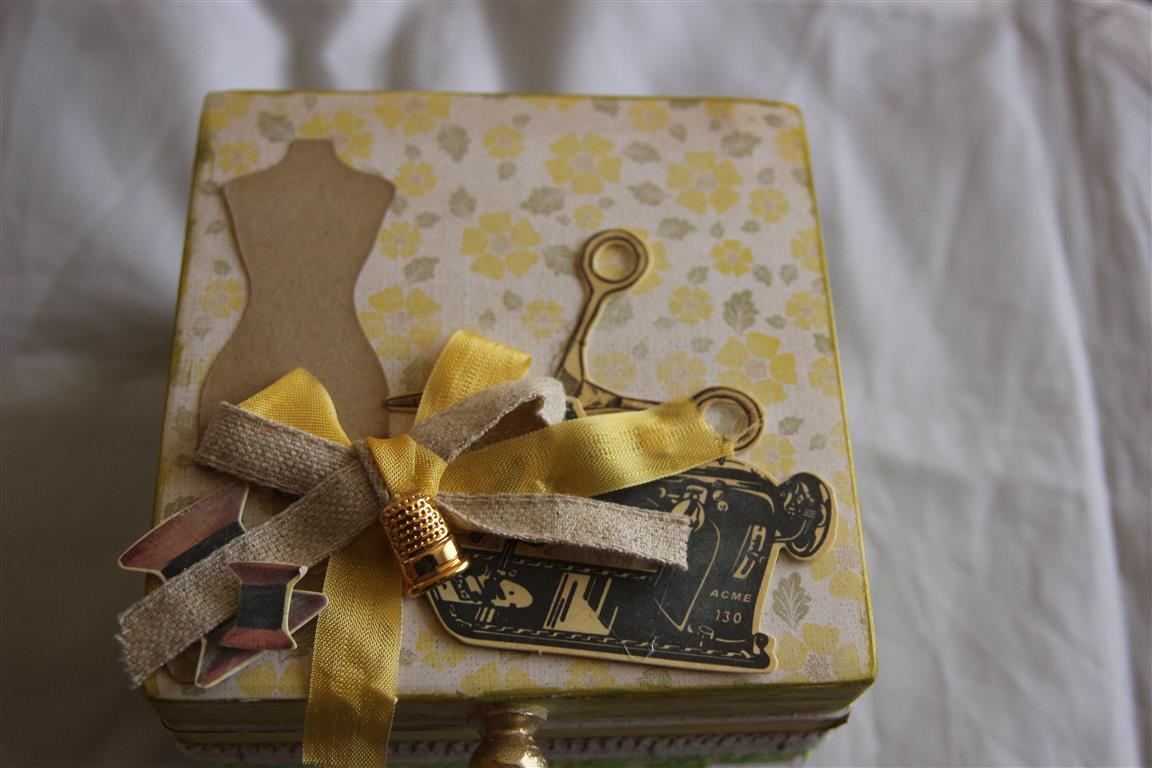
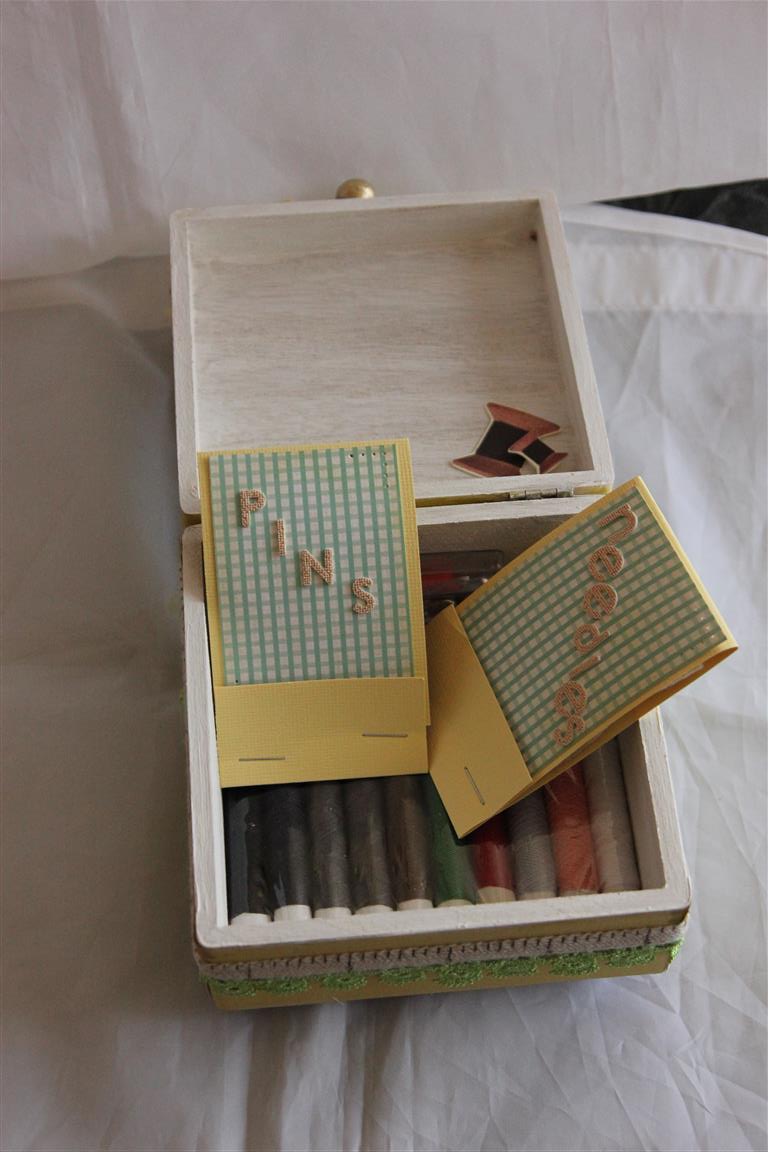 Not a card today! My Niece turned 21 this weekend, and I made her a sewing box from a little box that a very generous friend gave me. I painted, and covered the box with papers, found some sewing themed die cuts to decorate, made little pockets to hold the needles and pins, added some thread, scissors, buttons, tape measure etc, and even found some cute little cotton reels which I painted gold for the feet.Added some money, and her present was organised – everyone should have the tools to sew on a lost button! Today I have been working on some teen girl cards, and sorted out my June classes. Tomorrow we will start a new group of cards, til then…..
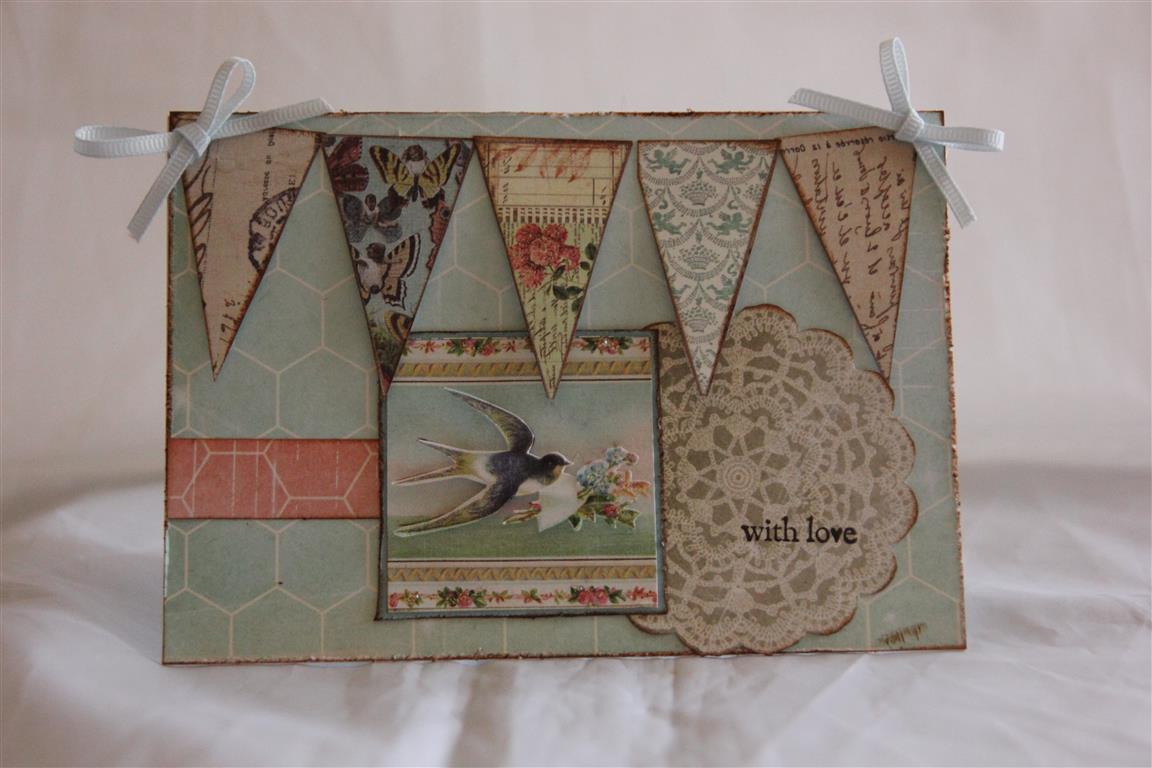
Prima Divine 7 and 8
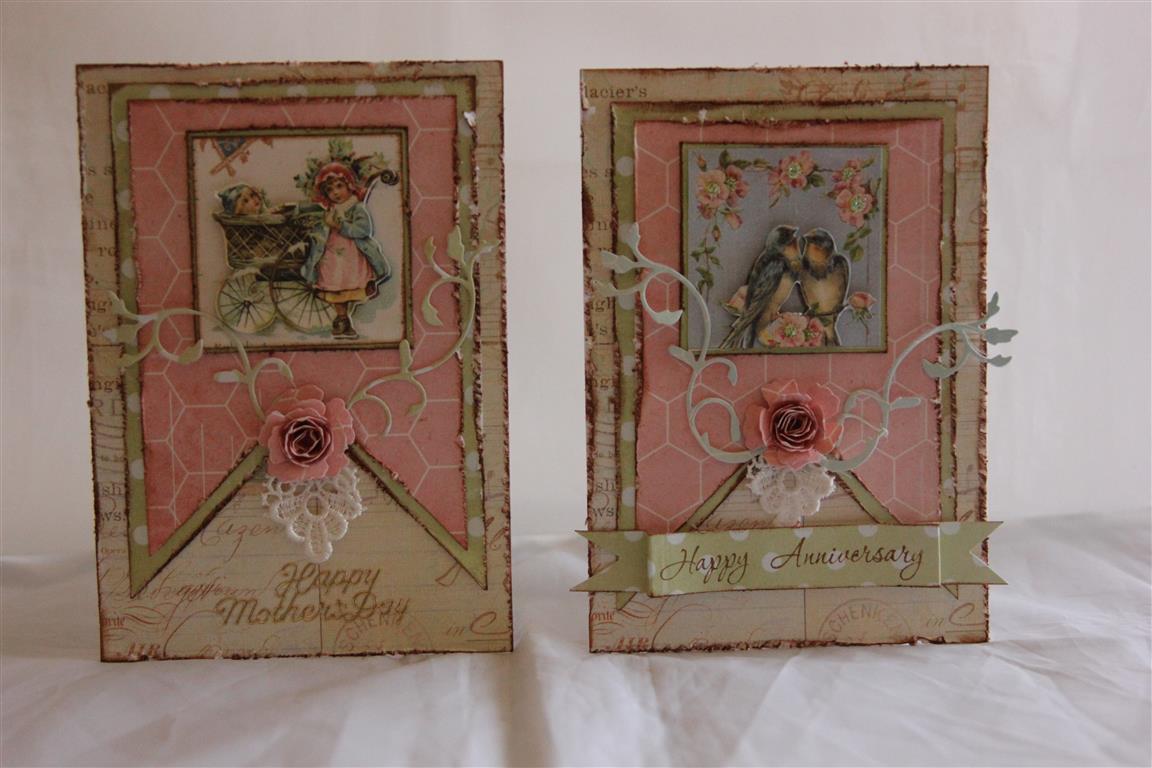 Here are the last two cards in my Prima Divine series. I have used the same sketch to create these two – I love this design and can’t wait to try it out some other papers.Lots of layers, some cut into oversized banner shapes, and every edge distressed and inked with Tea dye ink.I made the flowers with Spellbinders bitty blossom dies, and the flourish is memory box La Rue flourish.A tiny bit of lace finished this design which as I said previously I actually saw in a cardmaking magazine! Til tomorrow….
prima Divine number 6
 This is the second to last card in my Prima Divine series, and here I have used all the bits of strips that were left on my desk when I made all these cards.I inked around all edges with ranger Tea dye ink, and distressed most edges. I added a little lace and some kaisercraft rhinestones to this one. A lovely class with my ladies this morning, and now three days off to spend some time working on my June lessons! Til tomorrow….
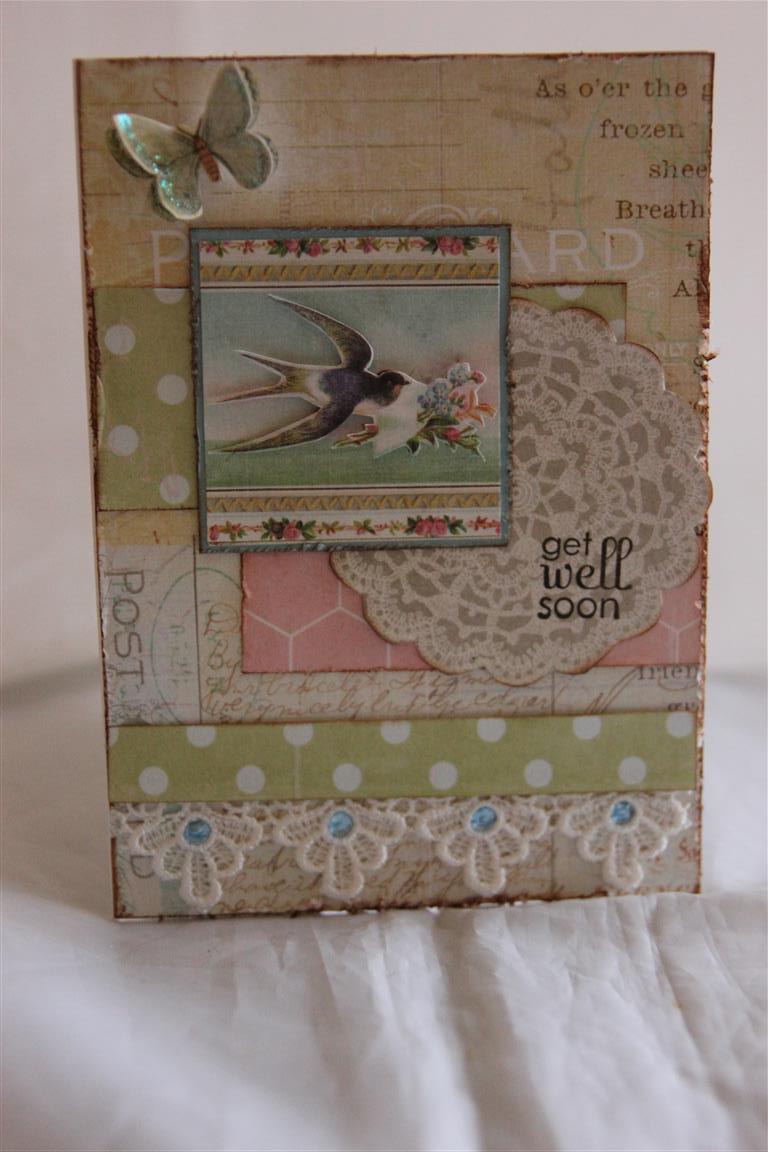
Prima Divine number 5
 Very quick post tonight as I haven’t started tea yet! We are sticking with the Prima Divine a4 paper pad , and I have used one of the chipboard pieces with this card. I matted a couple of layers of the paper, and distressed all the edges with my martha Stewart distressing tool. Ink used is Tea dye distress ink. I added a trio of flowers at the bottom of the card, picking out the colours in the dress.The sentiment is a stampin up stamp.Til tomorrow….
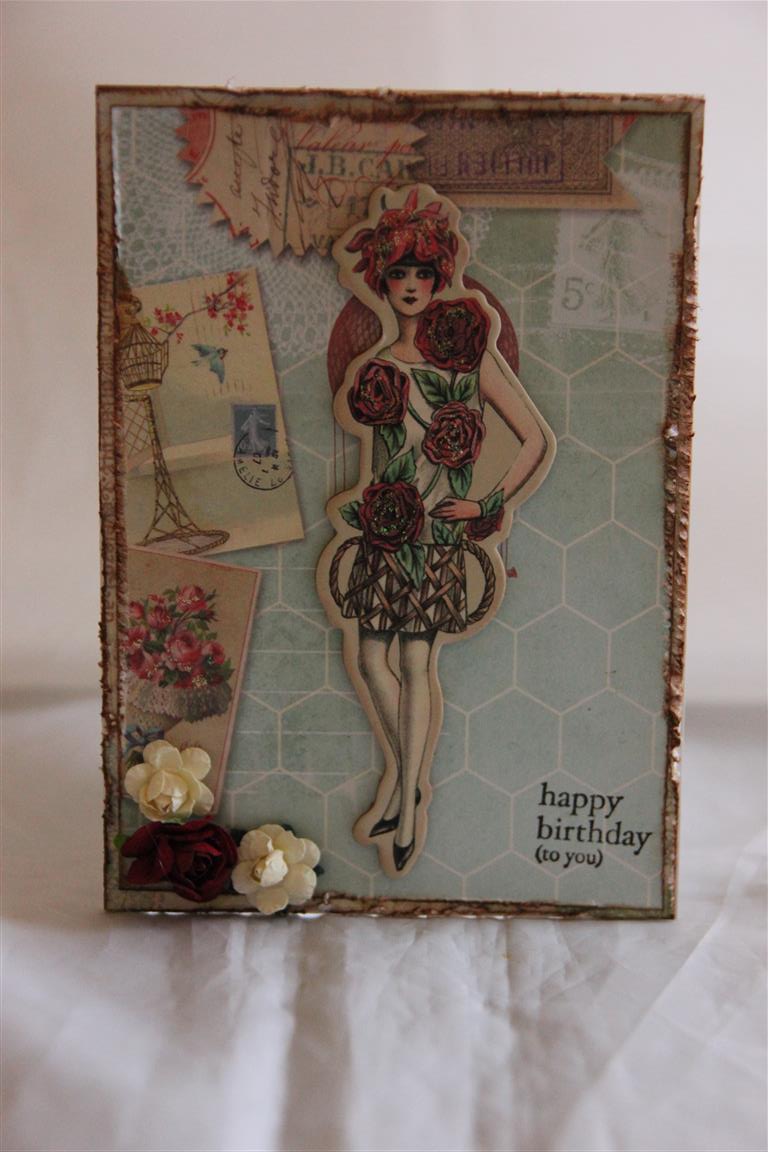
Prima Divine number 4
 Prima Divine paper, the a4 size pad, with a little fussy cutting, and just two ribbon bows. The sentiment is a stampin up stamp. I inked all edges with tea dye ink, and cut the bird out twice and put the second one on top of the first with a couple of foam pads.The banners were already shaped like that on the paper so it was just a matter of cutting them out – too easy!Til tomorrow….
