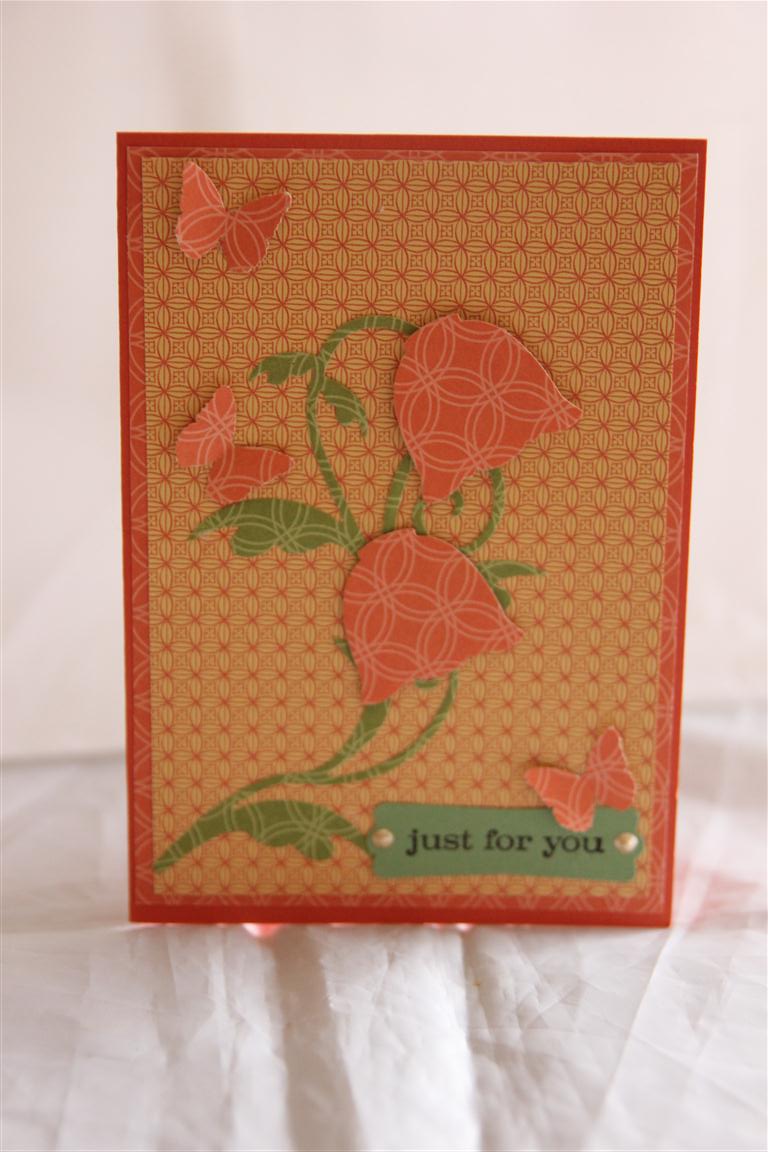
 Here is the third village card, made using the spellbinders nested dies. I can’t take credit for this particular design – I saw something very similar in a magazine, which actually prompted me to buy these dies!The tea cups are turned upside down and used as flowers, and a Cheery Lyn tropical flourish acts as our flower stem. I just added a few butterflies punched with a Martha Stewart punch, and a greeting and window punch for the greeting ( both from stampin Up) . The cardstock is stampin Up Tangerine Tango.I have some projects on the go in my craft room, but once again the hot weather is holding me back! Til tomorrow….
Tag: simple card designs
Spellbinders nested tea cup card ideas
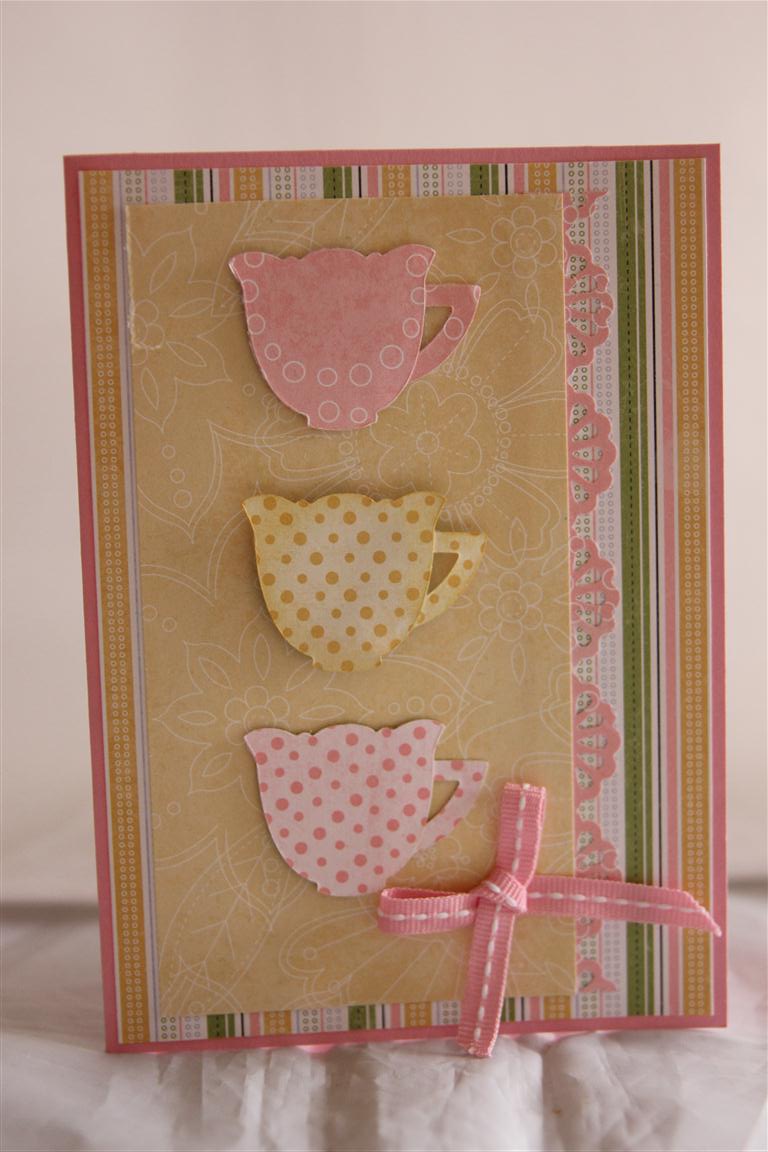 Yesterday I taught a class over at the retirement village, and we focused on finding different ways to use Spellbinders nested Tea cups dies. Here is the first card, using the dies as they were meant to be used – Tea cups! The cardstock is stampin Up Pink Pirouette, as is the ribbon, and the paper is also stampin up but sadly it is retired.I also used an EK success border punch.Good news – my comment button is fixed! see post below for instructions if you have difficulty, but it is straight forward now I believe.I will be in the craft room tonight planning out some lessons for April, then hopefully a bit of time to play with the new graphic 45 Secret Garden papers, which I can’t wait to cut into! Til tomorrow….
Graphic 45 Birdsong number 5
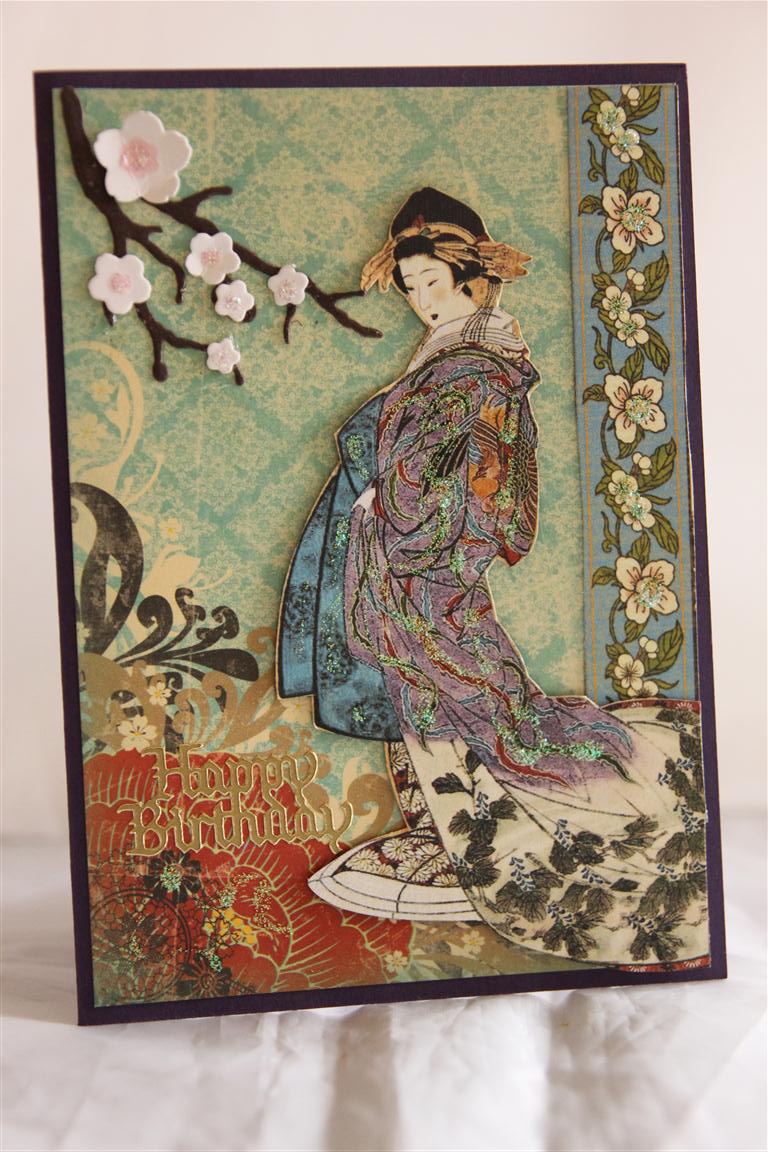 I have classed this card as a graphic 45 card, as the images that I fussy cut were from graphic 45 Birdsong papers, but the background paper that I used is actually a piece from my Bo Bunny Serenity 6″ pad.These two paper collections compliment each other perfectly. It’s very rare that I cross over like this – in fact I don’t think I have ever done it before. The only other thing on this card is some Cherry Blossom that I die cut using Spellbinders Cherry Blossom die. I hope all my Adelaide friends are surviving this terrible heat – I taught a class this afternoon over at the retirement village ( I will show the cards we made tomorrow) , and it was so very hot out there!I have had Nathan look at my blog to fix the leave a comment problem – and hopefully its fixed now – Above the photo is a speech bubble next to Leave a Comment. Click on this, enter your comment in the box, then under the box fill in the E-mail address requirement, and your name. The website bit is optional – don’t worry about filling this in, Then hit the Post comment button. I would appreciate it if someone could try it out for me to see if he has fixed the issue! Til tomorrow…
Graphic 45 Birdsong number 4
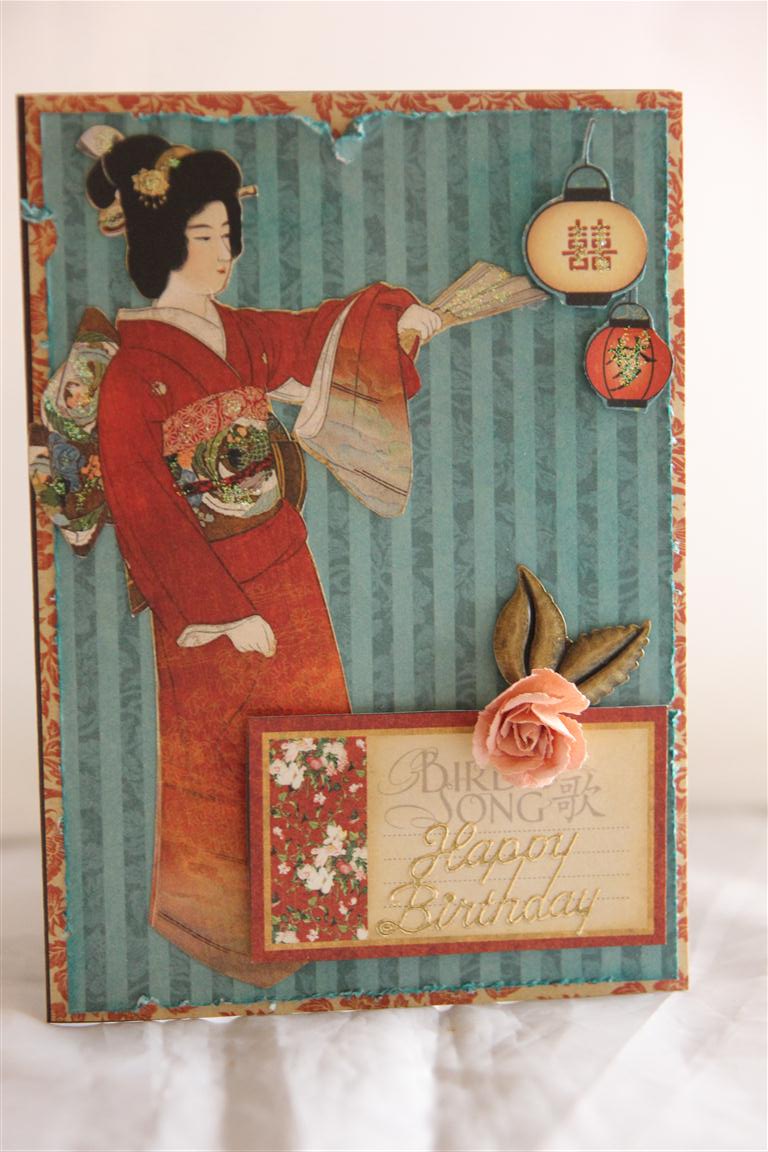 Still on Graphic 45 Birdsong paper series, and for this one I used one piece of paper to cover the card front, and I distressed and inked the second piece. I fussy cut elements from further matching pieces of paper,and made a paper rose, and added a brass leaf from Tim Holtz collection to finish.I had a lovely morning with a group of ladies in my card class, and i am on holidays now for 2 weeks, so looking forward to the break and lots of crafting!It has also been brought to my attention that many of you are having trouble commenting on my blog, so hopefully this weekend Nathan will have time to have a look for the problem – I will let you all know when the problem has been rectified, meanwhile if there is anything you wish to contact me about, you can e- mail me at helen@helenscarddesigns.com Til tomorrow….
Graphic 45 Birdsong number 3
 Here is number 3 using graphic 45 Birdsong patterned papers. I have rounded all my corners, and matted the main image onto early espresso cardstock ( stampin Up ) I used my Cherry Blossom spellbinders die, and added some seam binding and a vintage charm. I picked up the charm at a market with some other old broken bits of jewellry. I always keep my eyes open for finds like this , they usually cost next to nothing, and are agreat way to add interest and texture to my cards. Til tomorrow….
Graphic 45 Birdsong number 2
 Today I have revisited Graphic 45 Birdsong patterned paper,which I haven’t had enough time to play with but hopefully while I am on holidays next week I will be able to spend some more time with it! for this Mothers day card I matted everything with Stampin Up early Espresso cardstock, and used my new spellbinders die – Cherry blossom in the top corner. Just an organza bow and a little kindyglitz, and a simple card! Til tomorrow….
Echo park Love story 5 and 6
 Here are the last two cards made with echo Park Love story.Although they look the same there are quite a few differences. Nathan thought we should play a spot the difference game with them, but really there are a lot! I have stamped the cameo image with a stampers anonymous tim Holtz collection stamp, and the sentiment is a hero arts stamp.I have added lace, liquid pearls, and some rhinestones as a necklace to finish.I have had a productive day in the craft room today, and cleared all my outstanding orders, as well as the upcoming family birthdays. Then for the fun stuff …. playing with some of my new purchases, and trying some new ideas. I have also done a few Easter cards – don’t let that sneak up on you everyone – it’s only 4 weeks away!Til tomorrow…..
Echo Park Love Story 4
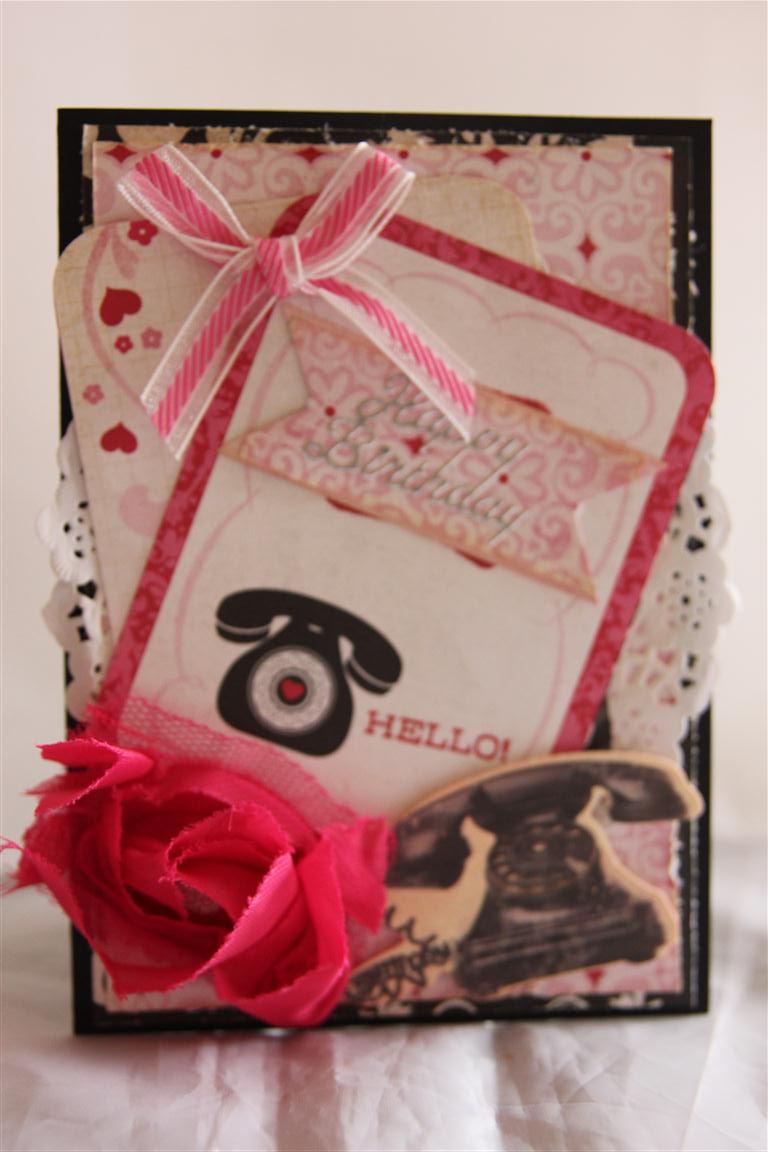 Sorry People, this image appears to have missed quality control and is a little blurry!It is still in my Echo park love Story series, ( Only one more post of this paper and we move on to something else) and I have layered, inked and embossed on this one. The addition of an inked doily,stampin up ribbon, kaisercraft rosette,and phone die cut from kaisercraft timeless collectables, and this was a very quick one to complete.It is extremely hot here today, but I have so much crafting piling up in my room that I will have to make the effort this evening when it is cooler to sit in there and get things back under control – I have so many new products on my desk that I haven’t had time to play with and I am very grateful that I am on holidays at the end of next week! Til tomorrow…
Echo park love story number 3
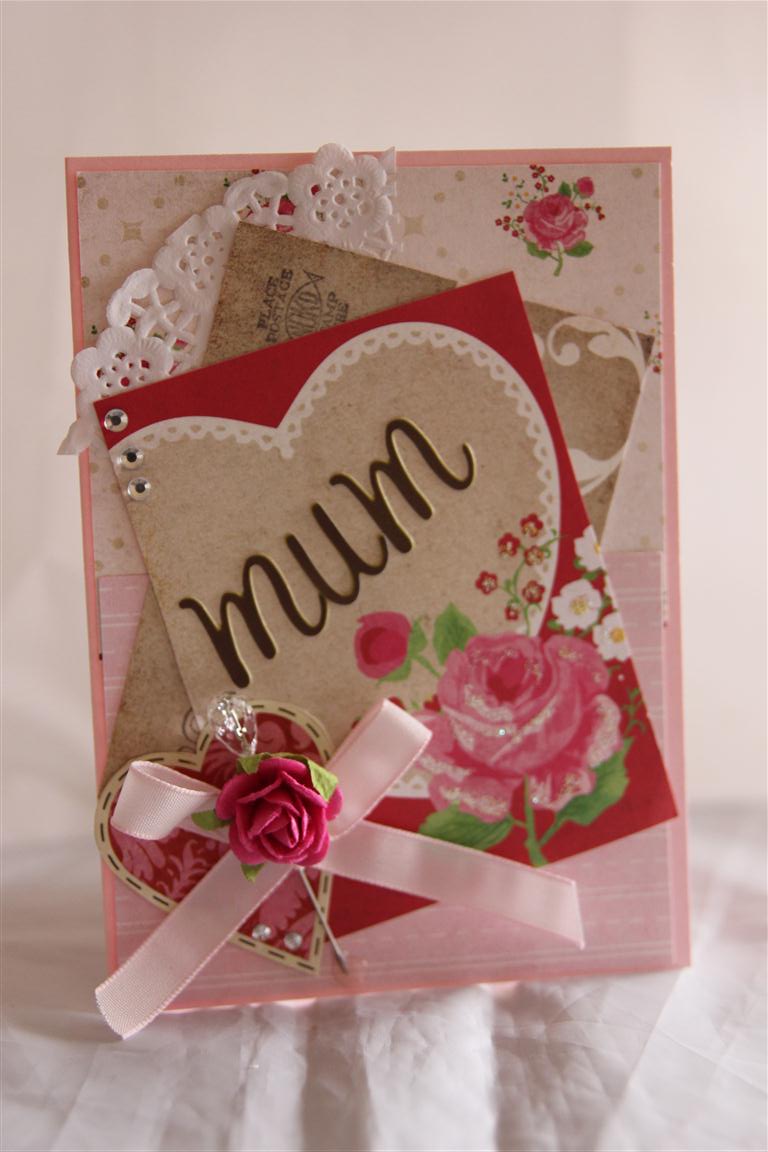 No distressing or inking on this one, although looking at it now, maybe I should have!The patterned paper is Echo Park Love Story, and I added a doily, lace, hatpin,ribbon,flower and rhinestones for decoration. letter stickers spell out Mum. I‘m so glad the weekend is here, I have missed my craft room this week, but will make up for it over the next 3 days.I had a lovely class this morning with my ladies, such a lovely group.First on the list this weekend is a couple of orders – 80th birthday, wedding ,engagement, and then husbands birthday card – have to think about that one..it’s hot again here, so I am sure his card is going to have a bit of a beach theme happening! Til tomorrow….
Echo park love story – not so shabby…
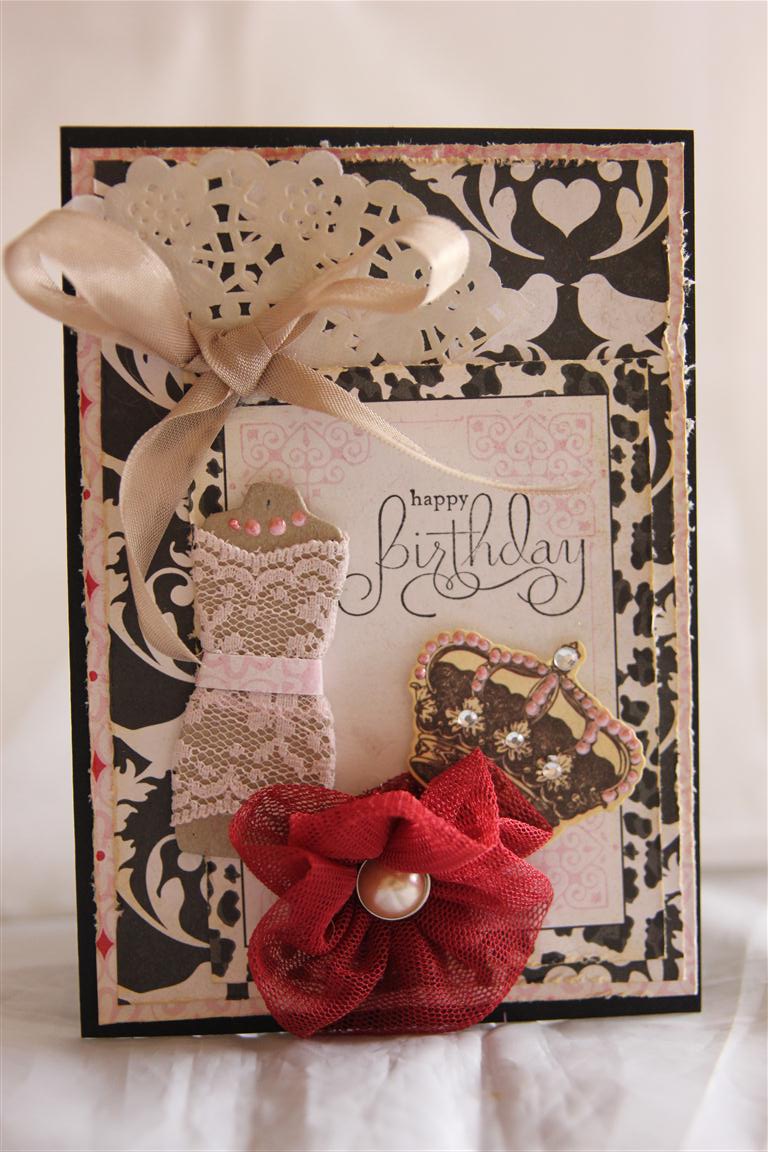 I only bought a few 12 x 12 sheets from this range of paper – Echo Park Love story – and have only made a few cards with it so far – I have put it aside for now to work on some classes, but I thought I would show you what I have created so far. I used a base of black cardstock, and layered a couple of the papers on top – after distressing and inking the edges. I then raided my bits and pieces drawer, and found this chipboard dress form and crown which I decorated.I inked a doily, and added it, as well as a seam binding bow. I made the flower by folding a length of netting in half lengthways and sewing a running stitch along the raw edge before pulling the thread to gather it. I threaded a brad ( kaisercraft) through the centre. These are amazingly easy to make, and I am going to sit in front of the t.v. tonight and make some more!This style is my cleaned up take on shabby chic, and it’s my favourite at the moment, so I think my ladies will be making some cards in April to this style too! Til tomorrow….
