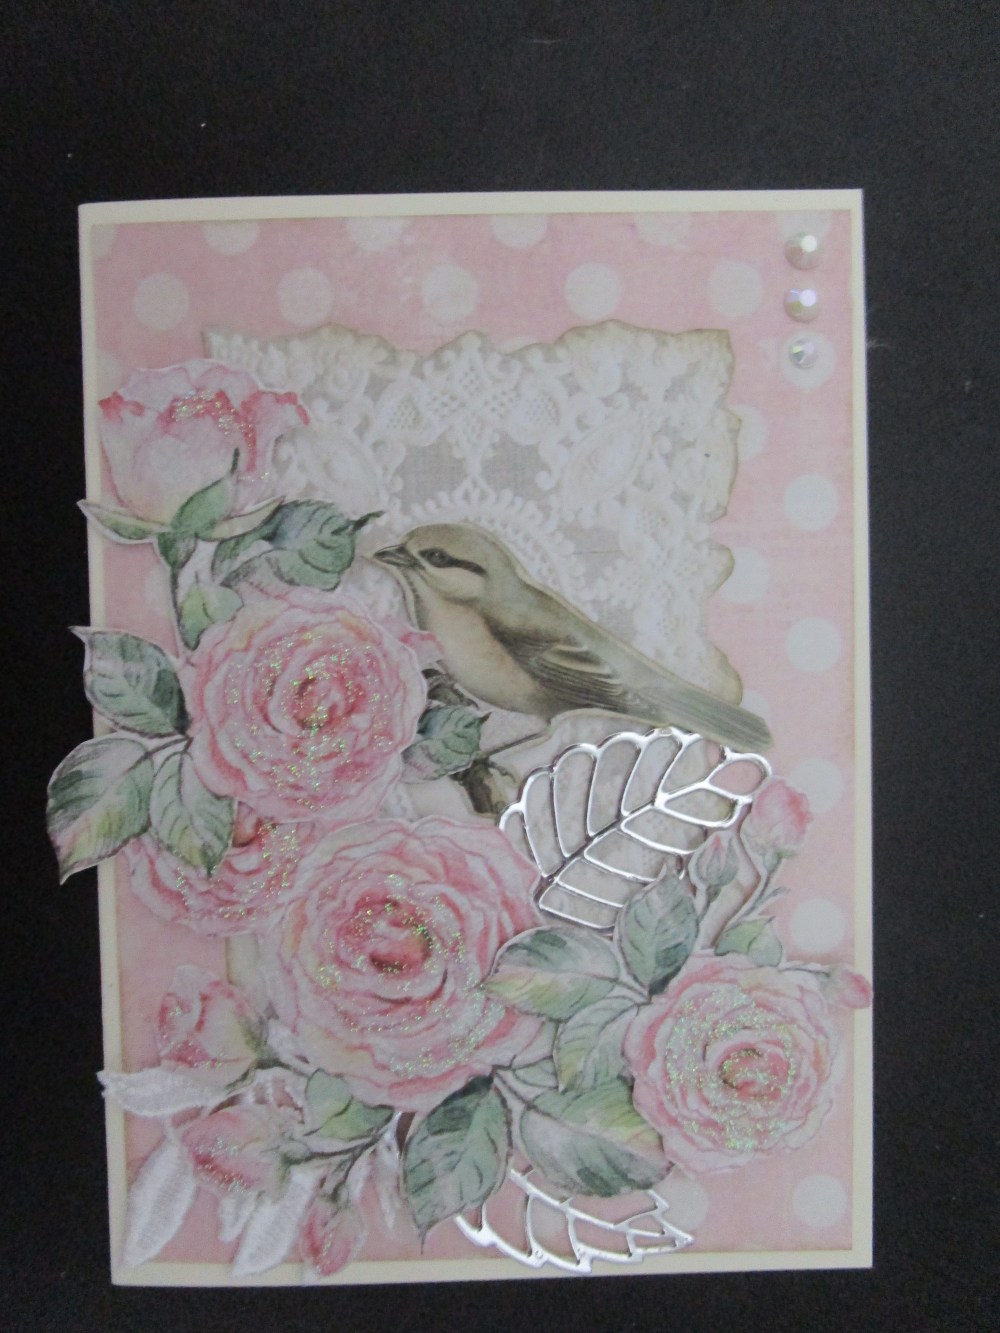
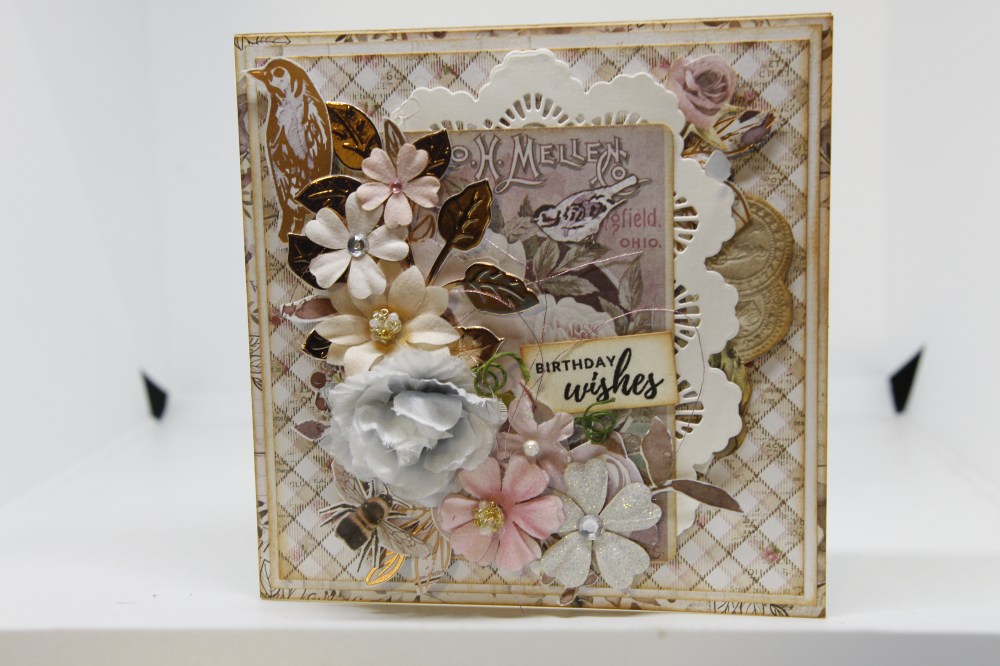
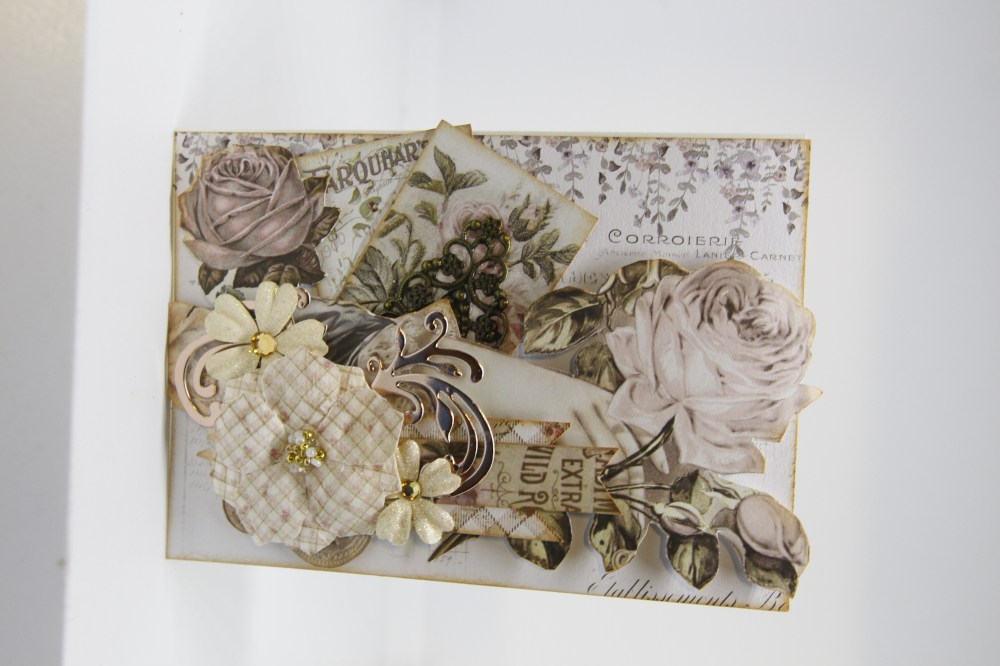
 This week I purchased Kaisercraft lady like 6″ pad, a packet of collectables, and a couple of sheets of the 12 x 12 papers. After a lovely afternoon of fussy cutting, dinner was put on the back burner ( literally!) while I made this first card.. I just couldn’t resist ! For this one I used the 12 x 12 papers, and the die is a Uniquely Creative little Leaves die. Today roast is in the oven and I am off to make more, this time with lots of lace, ribbon and bling… til next time…
Tag: simple handmade card designs
Final Stamperia Pink Christmas cards
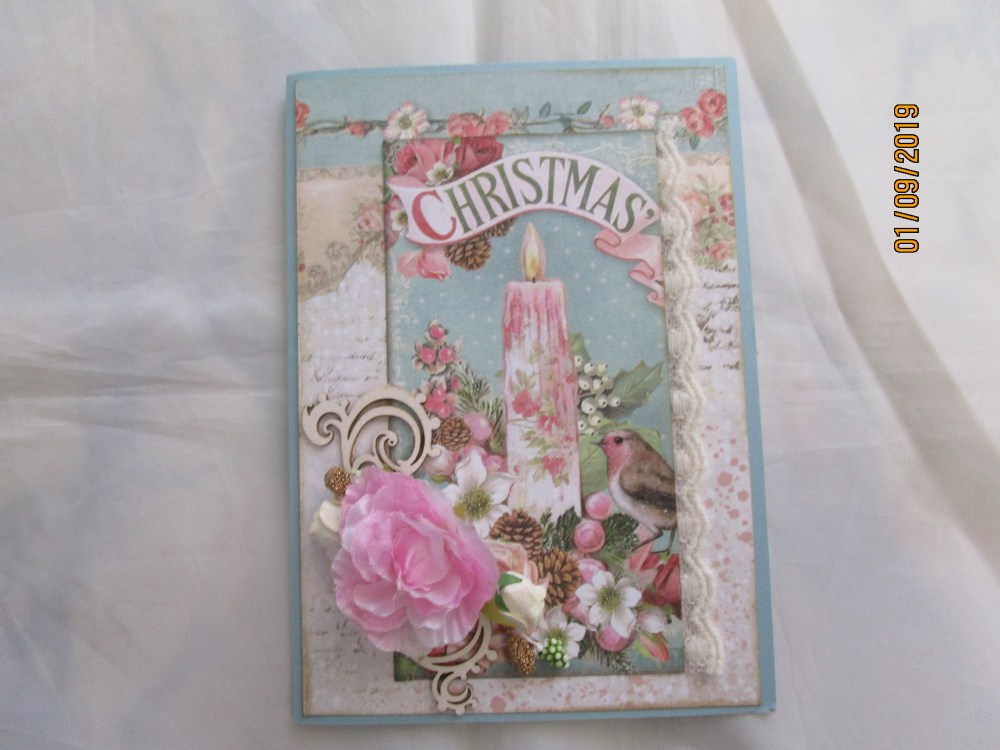
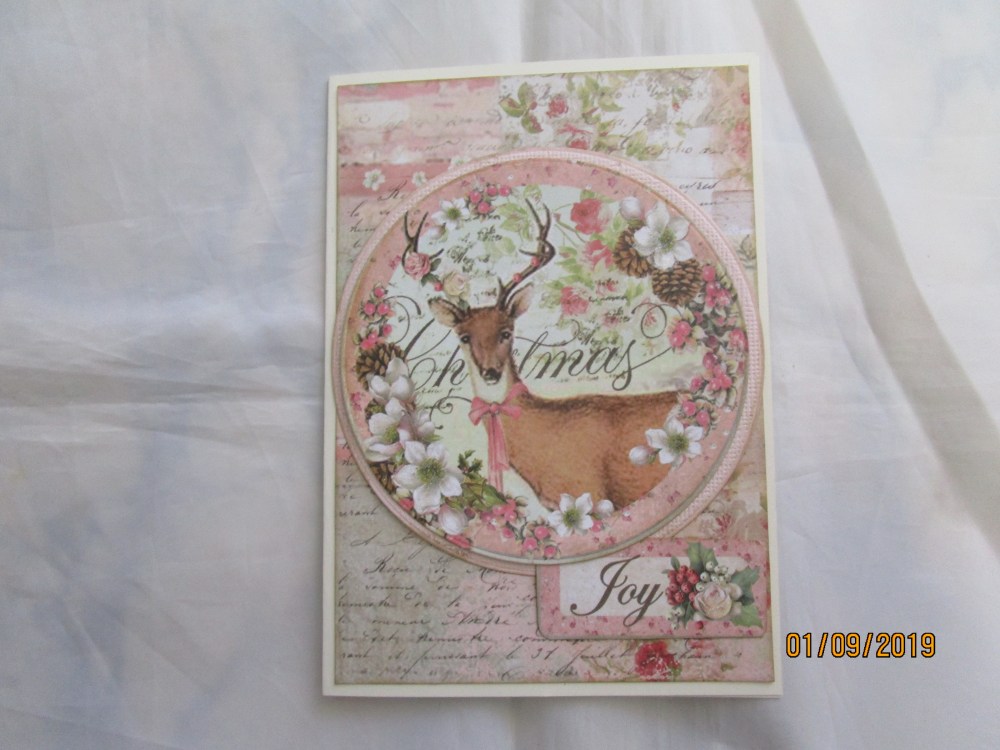
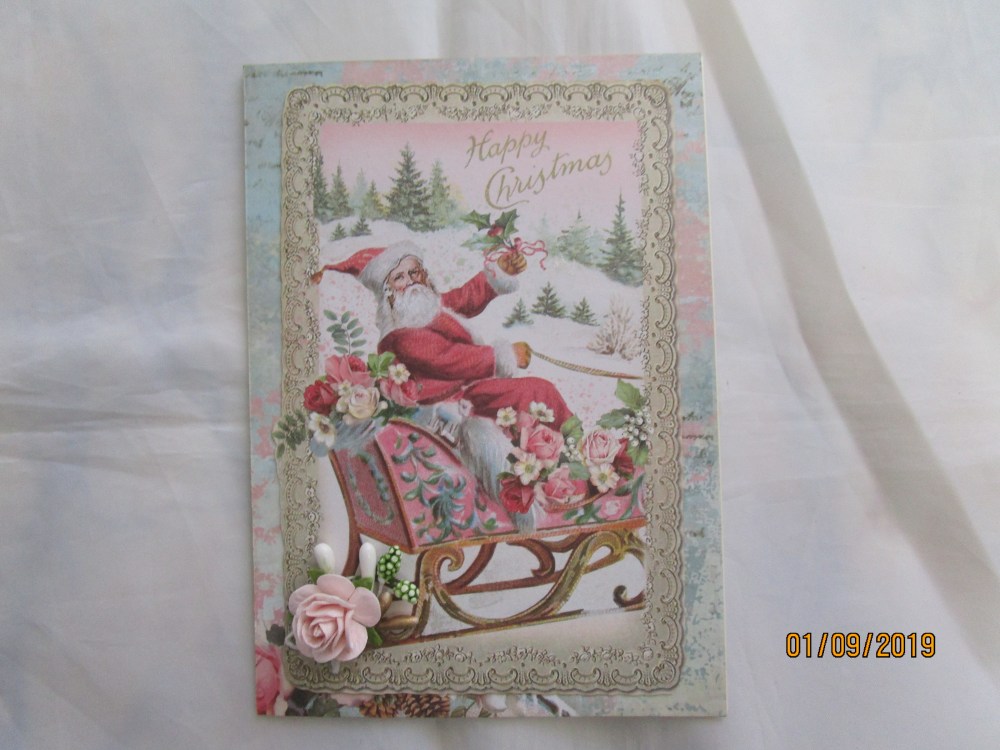
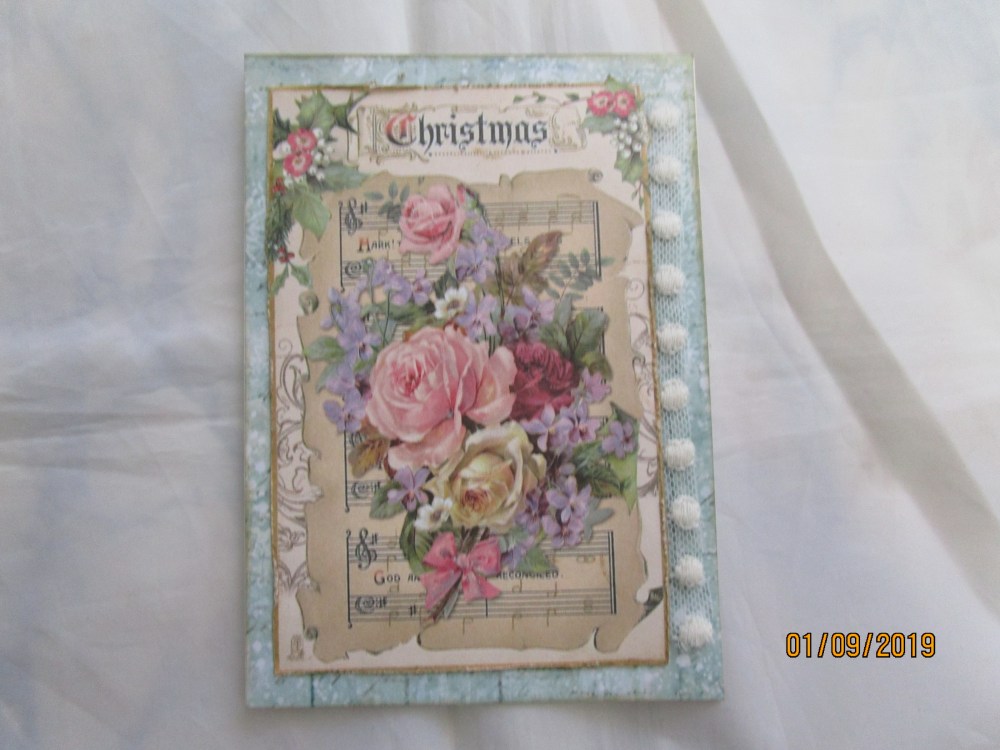
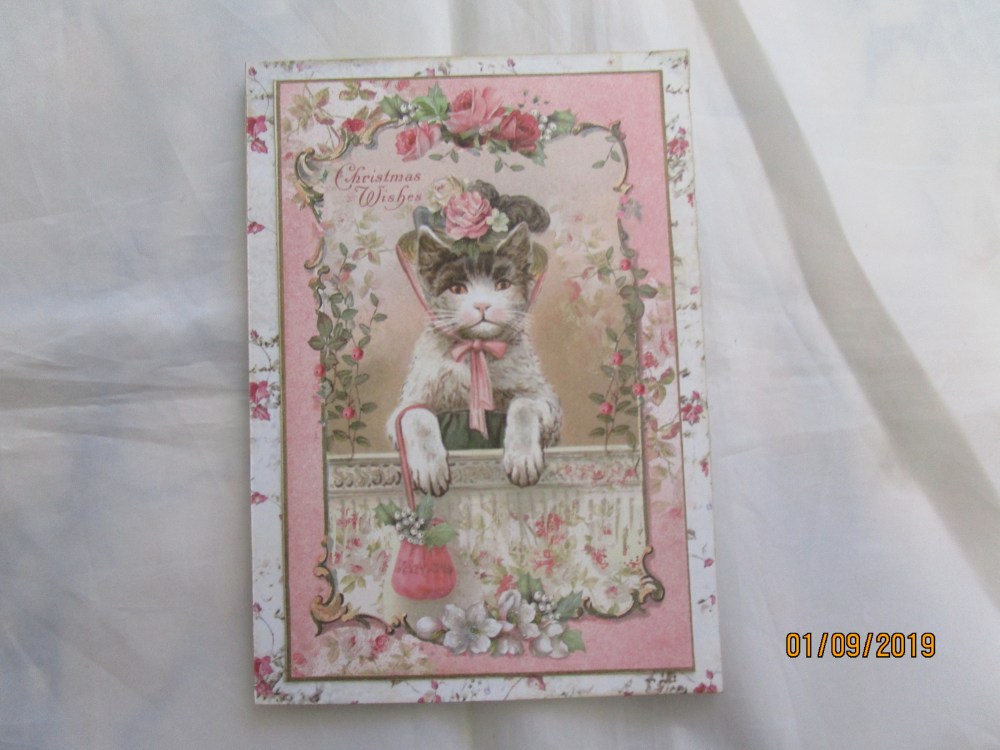 Five more Christmas cards made with Stamperia Pink Christmas. I have done a couple more with this paper collection, and still have papers to do more, but we will move on next week with something a little different!In the meantime these ones speak for themselves… except for a little lace and flowers on a couple of them it is all just the paper. Great value collection!Yesterday I had a lovely day meeting up with a gathering of fellow crafters. We had a great time and lots of projects and ideas were shared.I can’t wait til we meet up again next month! Til next time ….
All about butterflies!
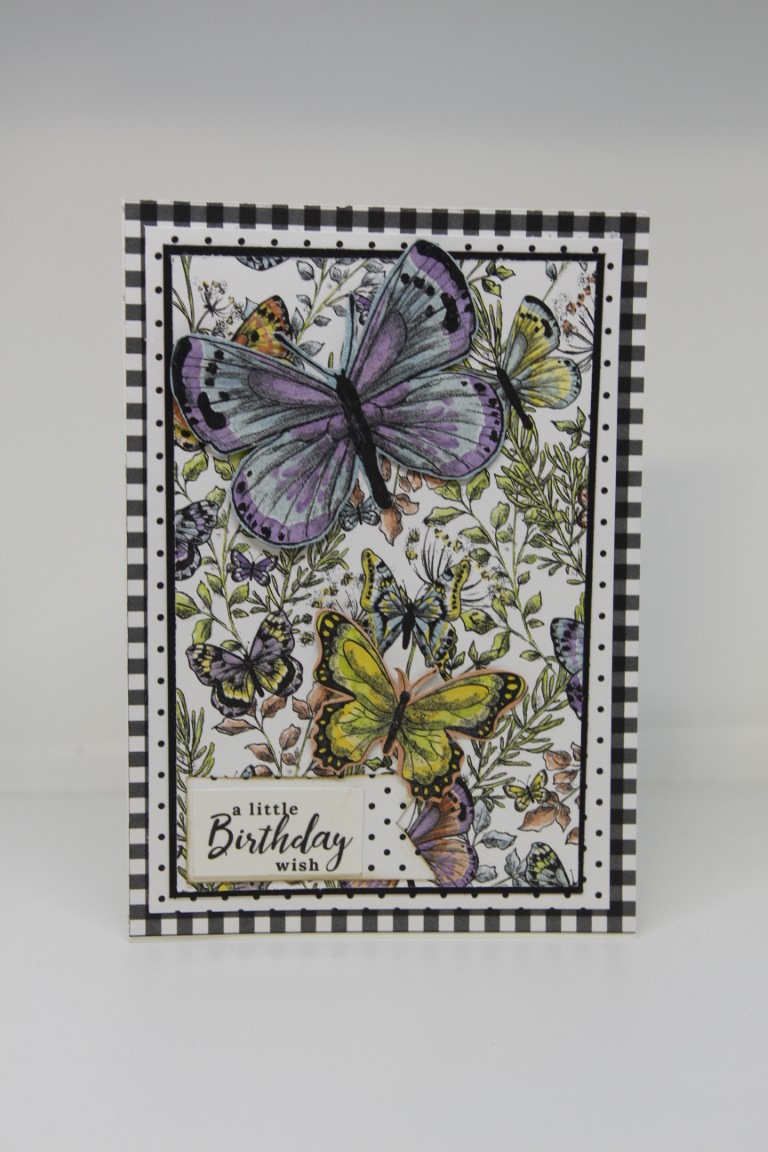
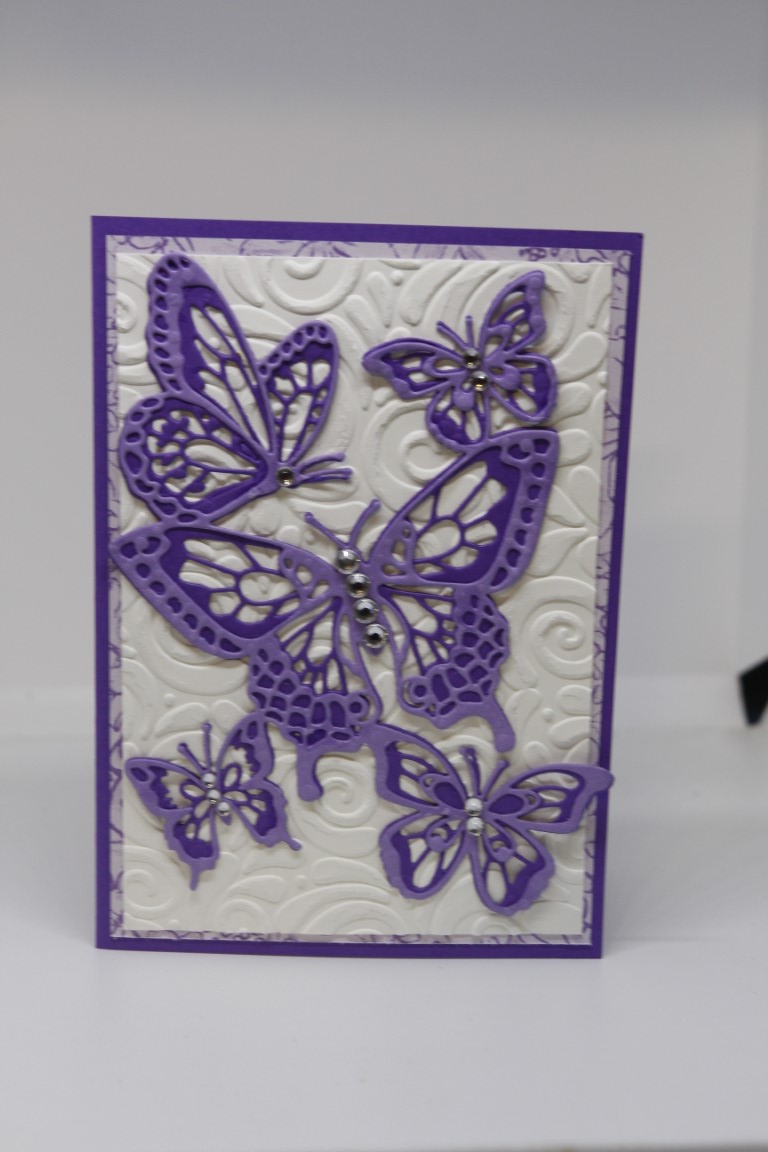 Today’s two cards have one thing in common – Butterflies! The top card has layers of black and white patterned paper, with the focus on the top piece of paper which is covered in butterflies. I fussy cut a couple of extra butterflies to pop on top for a bit of dimension. The papers are from Stampin up, but I am not sure if they are still available.The second card is a really simple card, a layer of patterned paper, an embossed piece of white cardstock, and then the butterfly die cut. The dies are all one piece, with the finer die stuck on top of the thicker die to make a shadow effect. It is a Stampin up die called Butterfly Beauty, and brilliant for quick makes. I just added some bling to the centre of the butterflies. Til tomorrow….
Stampin Up lovely Lattice..Watercolouring with re- inkers..
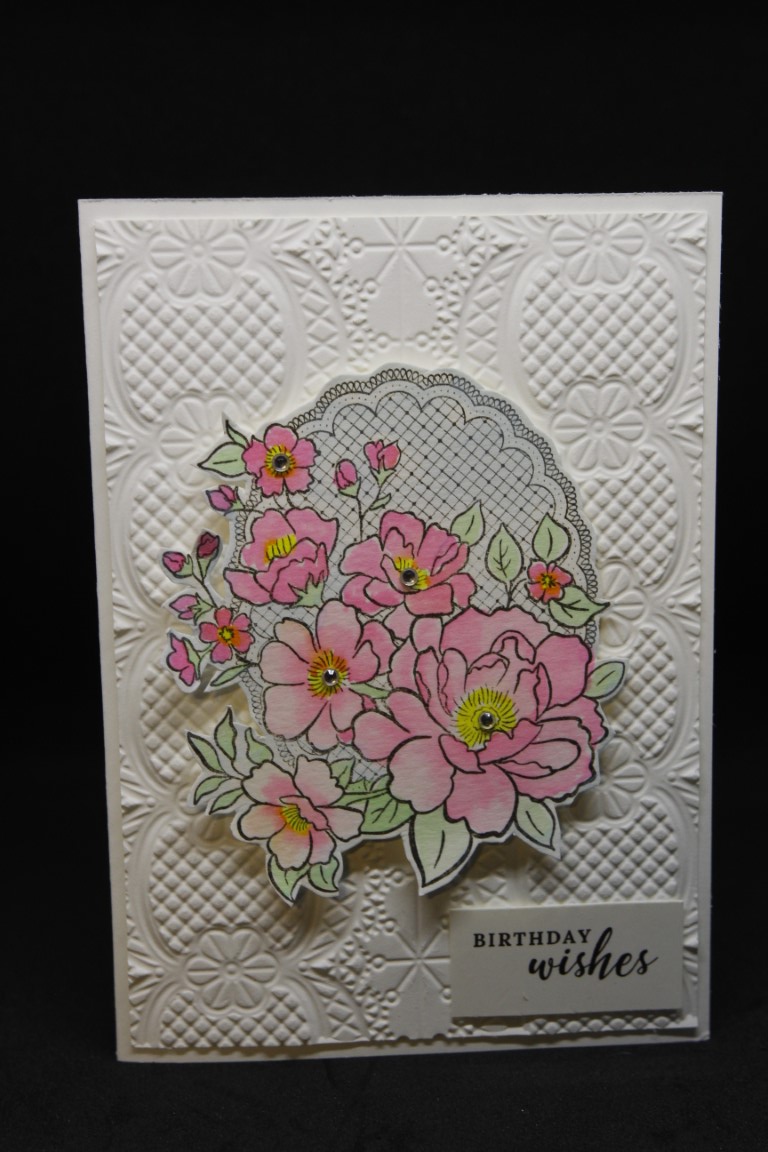
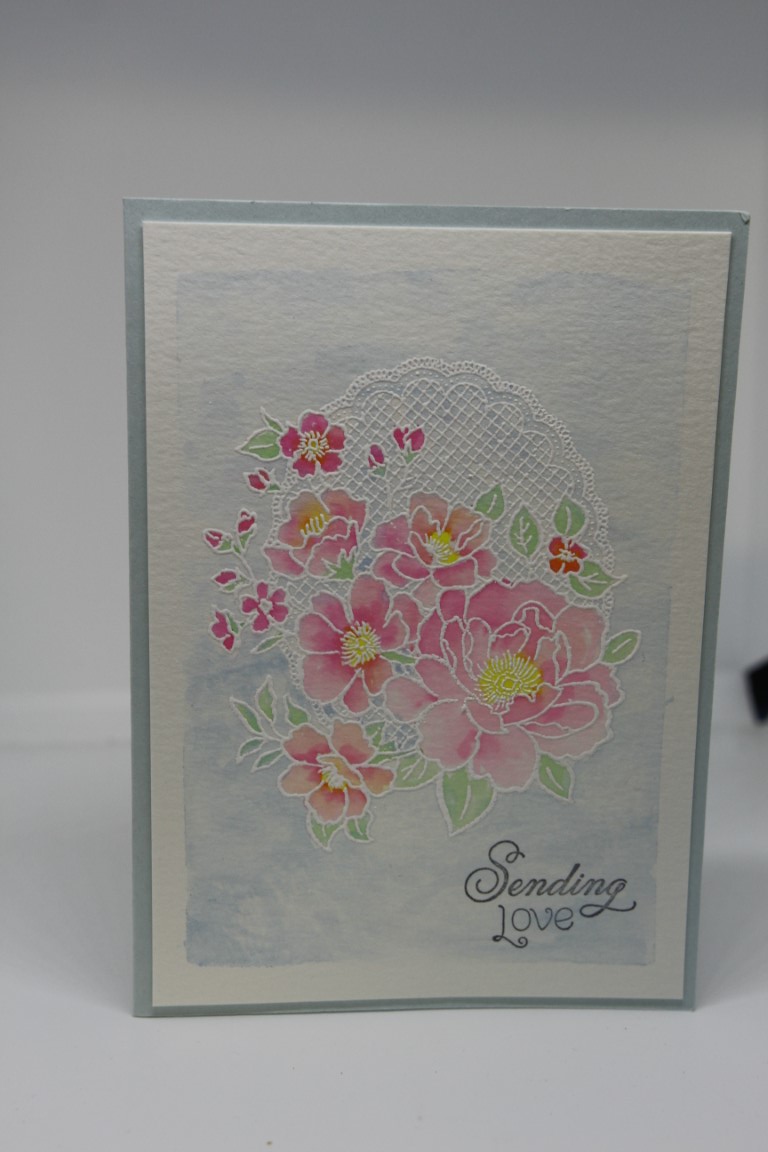 Today’s two cards focus on a stamp from Stampin Up called Lovely lattice. The top card has an embossed layer – the same Stampin up embossing folder as the card on the previous post ( Lace Dynamic Embossing folder) and I stamped the Lovely Lattice stamp on watercolour paper and coloured it with an aquabrush and re-inkers. For the lower card I stamped onto watercolour paper with versamark ink, and heat embossed with white embossing powder. Again I coloured with an aquabrush and re-inkers, also painting a very light wash over the background. If you want to know more about watercolouring with re-inkers check out my little clip on my you-tube channel – the link is over there on the right hand side of the page! I have been a bit time poor over the last couple of years, but I am retiring at the end of this week so will have more time to focus on my blog, and you-tube channel – exciting times!! til tomorrow…
The simplest card!
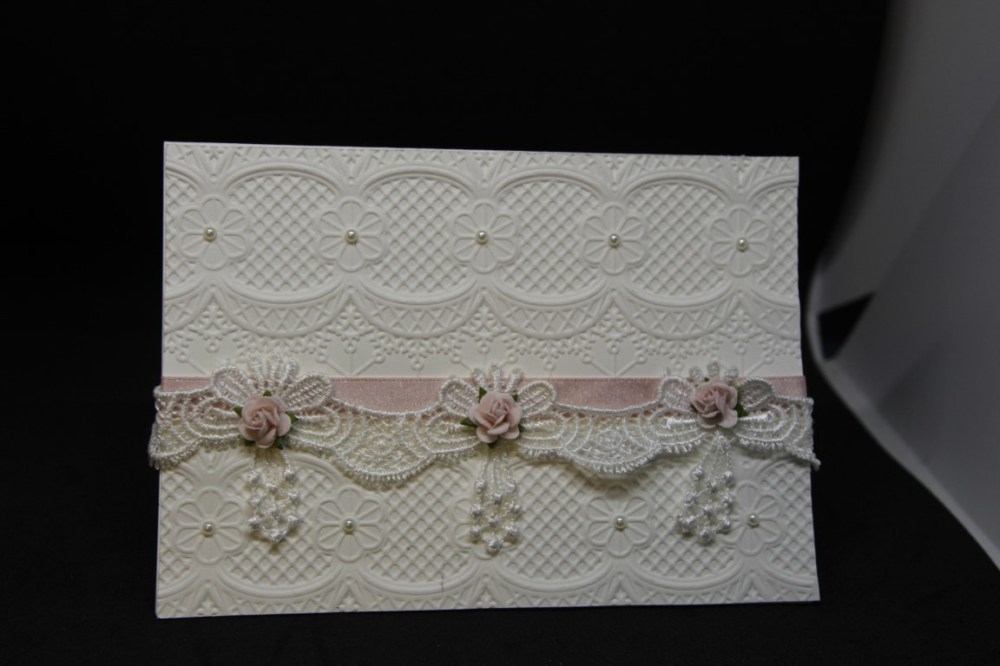 Here is the simplest card I have made in quite some time! White cardstock, a Stampin Up 3D embossing folder ( so gorgeous) a length of ribbon, lace , 3 little flowers and some pearl bling. This card would be perfect for a wedding card that had to be posted, but I think I will give it to my mum for Mothers day. Sorry for the late post this weekend, but I got completely sidetracked cleaning out my crafting supplies – it was time for a spring clean and I haven’t even scratched the surface yet. I have a little bubble of an idea forming for making card kits, but will have to pop it on the back burner until after the June fair. I will keep you all posted! Til next time….
Three more Prima Lavender Frost cards..
 Today I have three more cards made with the gorgeous lavender Frost paper collection from Prima. These were made with papers from the 6 x 6 pad, the 3 x 4 journaling cards, some of the matching flowers Prima released with this range,and few odd die cuts laying on my craft table.There is a metal finding on the lower card, some lace on the top card, and I did do a little fussy cutting from the papers! I love this paper, and as we speak I have some more cards in various stages on my craft desk waiting for finishing touches. I have also used it in a mega class I am doing in March at paper flourish. This week I picked up my Prima poetic rose paper collection, and have enjoyed some fussy cutting while watching TV in preparation for some cardmaking this afternoon. I am not sure if I will be back here before my cruise on thursday…depends how the packing goes, but if I don’t get back I will see you all in two weeks! Til then …..
Stampin Up Santas Workshop
 I had great fun creating with this collection of papers and matching card fronts from stampin Up ( Santas Workshop)..It was a change from the vintage and traditional papers that I have been working with. There were lots of images to fussy cut so I had fun building layers of the same image for a bit of dimension, and I really only had to add a little ribbon for texture as some of the papers were already embossed and glittered. tomorrow I will show you the other three cards I made before I had to pack up to create classes. I will get back to it though, I am going to be much more organised next year for Christmas – I think I will just keep creating all year ! Til tomorrow….
Stamperia letters and flowers paper…
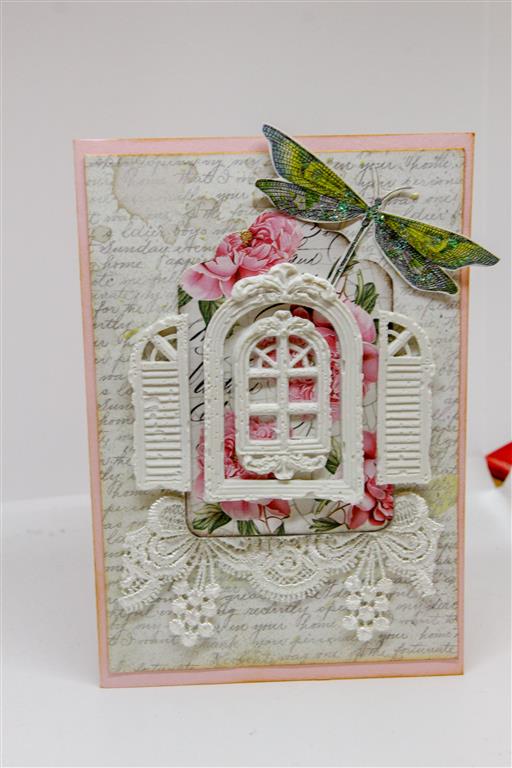 Todays card showcases a new range of papers to paper Flourish which I just couldnt resist,and something else I have been doing – making my own embellishments! First the paper…it is by a company called Stamperia and this range is called letters and flowers. I fussy cut the dragon from a piece of the paper, and the tag was printed on the paper so just had to fussy cut that out too. I added a little gorgeous lace,, but the main item on this card is the window.. I made it!! I know! I have a few silicone molds,and this is one of them , I used No More Gaps… you know those long tubes of gap filler from the hardware shop – one of those – and filled my mold, smoothed it with an old credit card and left it to dry for two days. It came out of the mold as you see it here although I have had good fun painting some of my frames with Prima sparks paint . It is a really cheap way of making frames and It is great fun. I didnt buy the most expensive brand, my tube cost just $2-25, and I have made so many with that one tube. I am off now to paint a few more ready for cards so you will see more as i use them… Til tomorrow….
Kaisercraft Rose Avenue double zig zag..
 I love this range of kaisercraft – it’s called Rose Avenue, and I have used it quite a lot, ( still have some left so it’s not the last time you will see it!), and for these two cards I made them in the double zig zag fold. On the card above I added a little strip of pearls,a die cut leafy flourish, some flowers , a ribbon bow,and a chipboard bird which I foiled with the go press and foil machine. For the lower card I just added ribbon and lace, and some matching collectables. I worked most of the weekend, but did find some time to make 7 cards for an order, I have some classes to prepare this week but I also want to find some time to play with my new 3D embossing folders..and I also have some more zig watercolours so I am off now to stamp out an image or two and just sit and relax with some colouring! Ah, life is good! Til tomorrow…..
Stash Tags!!
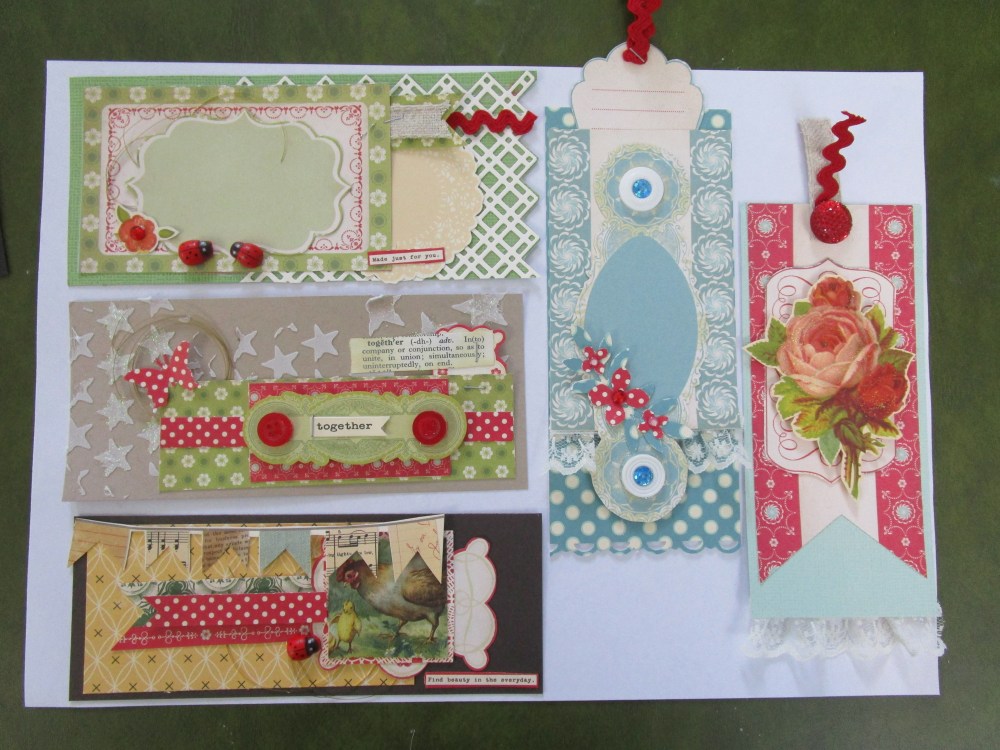
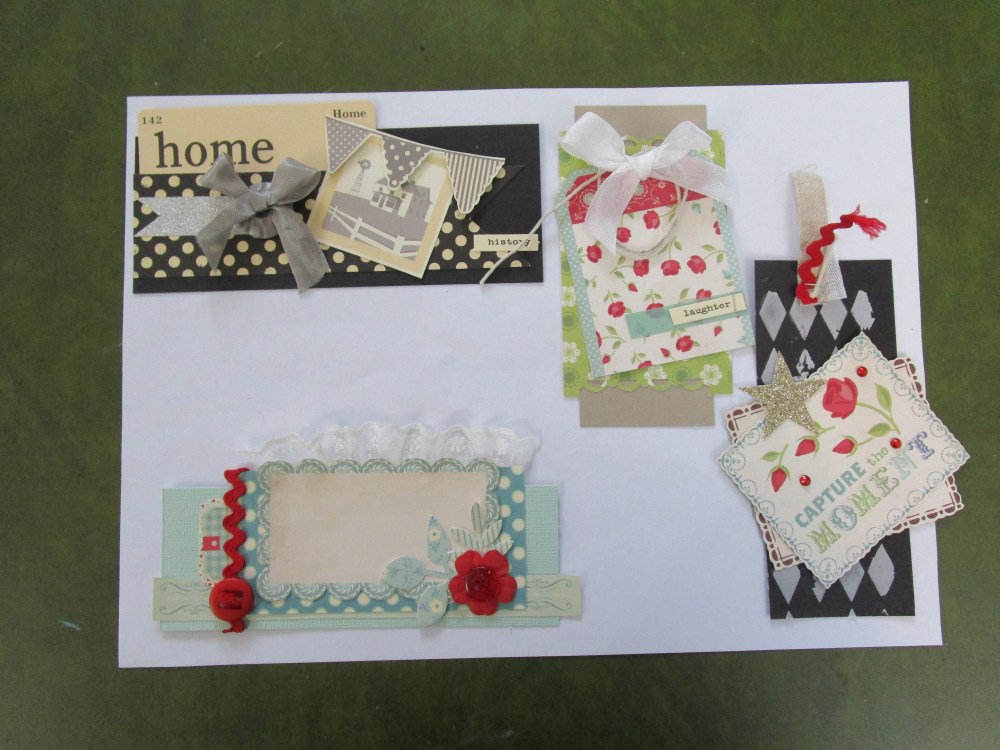 I know I said we would see the second shabby lesson card today, but I wanted to show you all something else I have been working on..something new!(We will get to the other shabby card tomorrow) . My workmate Lydell , who is a true artist, is running a class in August called Use your stash, and her ideas and samples are truly amazing and inspired me to grab all the bits and pieces ( die cuts, odds and ends of ribbon,buttons, flowers and papers) that were piled on my desk and turn them into what I am calling Stash Tags. These are made ready to pop on cards and scrapbook layouts and can be stored in one tidy box ready for when I need to make a quick card. Each time I finish creating I will whip up a couple of these to clear up my desk ( that’s the theory anyway!). These ones are actually going to America as a thankyou to a very lovely lady who sent me some beautiful things. I have a few more to make for her and a folder to file them in. I hope this inspires you all to use your stash! Til tomorrow….
