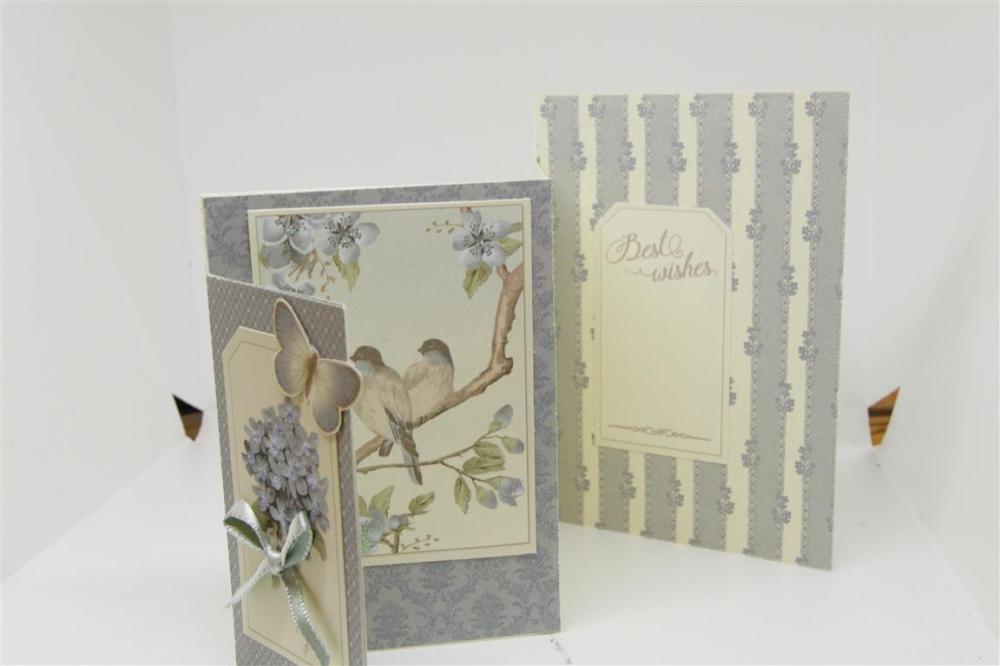

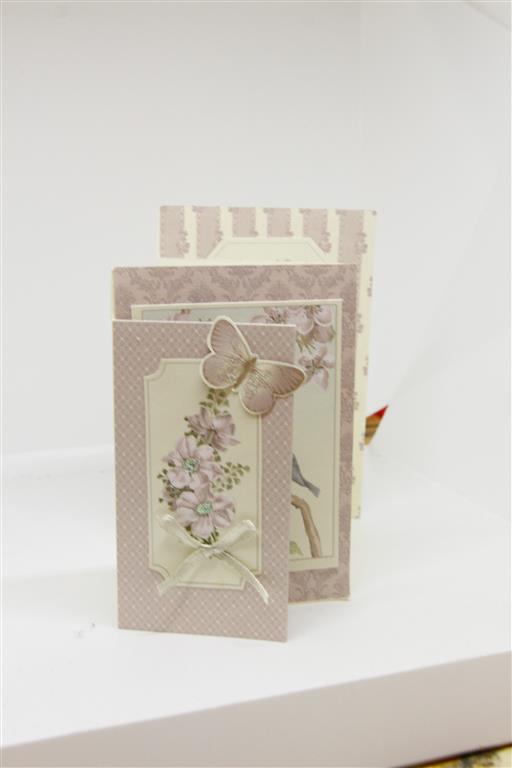
 Todays cards are made with Pion Designs papers, and I have done a different kind of card base…I guess you could call it a triple fold step down?I have used a 12 x 12 cardstock base, and scored it every 10 cm.( the height is 15 cm for the back panel, and stepped down on the other two panels). The front panel is an extra piece of cardstock, and I cut it with a tab which is attached to the front 10 cm panel and that is all hidden with papers. I have shown you two views of the top card so that you can see what I am talking about! I am officially all organised for the Christmas break, I hope you all have a safe and happy holidays and I will see you all after the festivities!
Tag: vintage
Helens Not So Shabby…
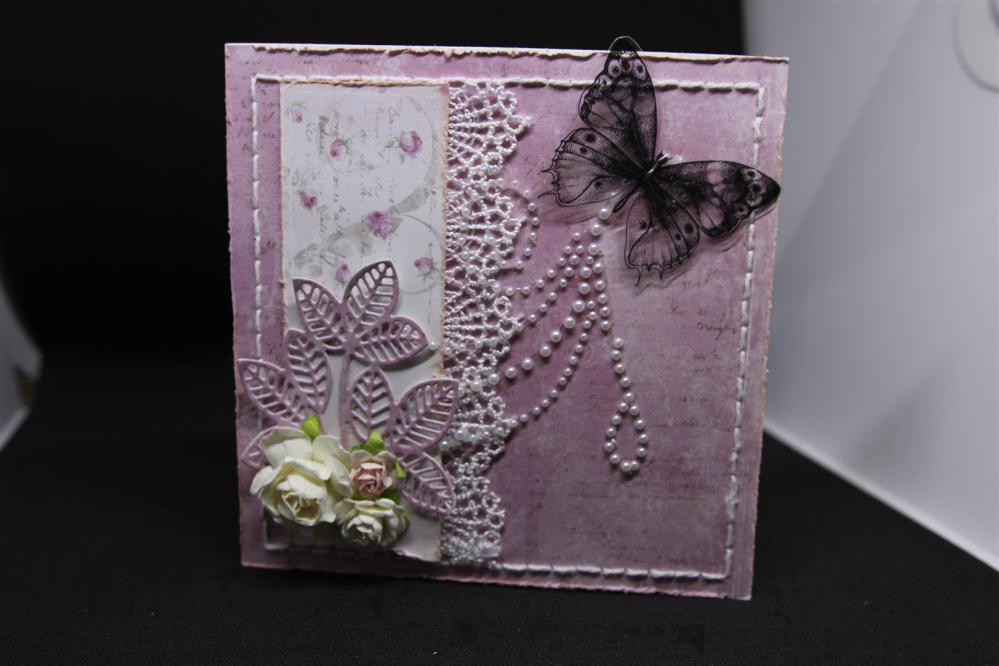
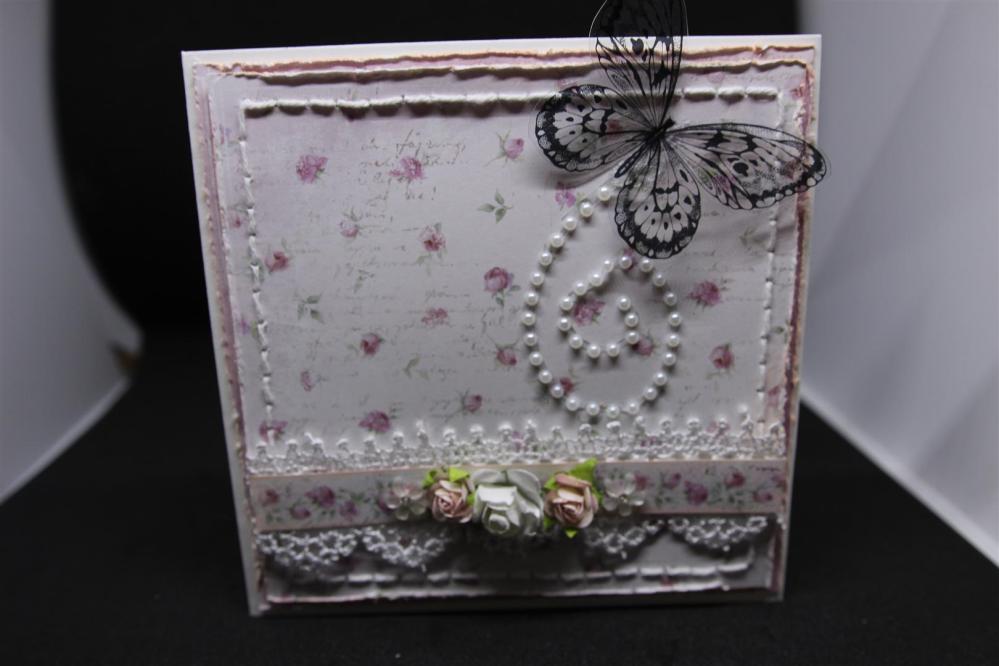
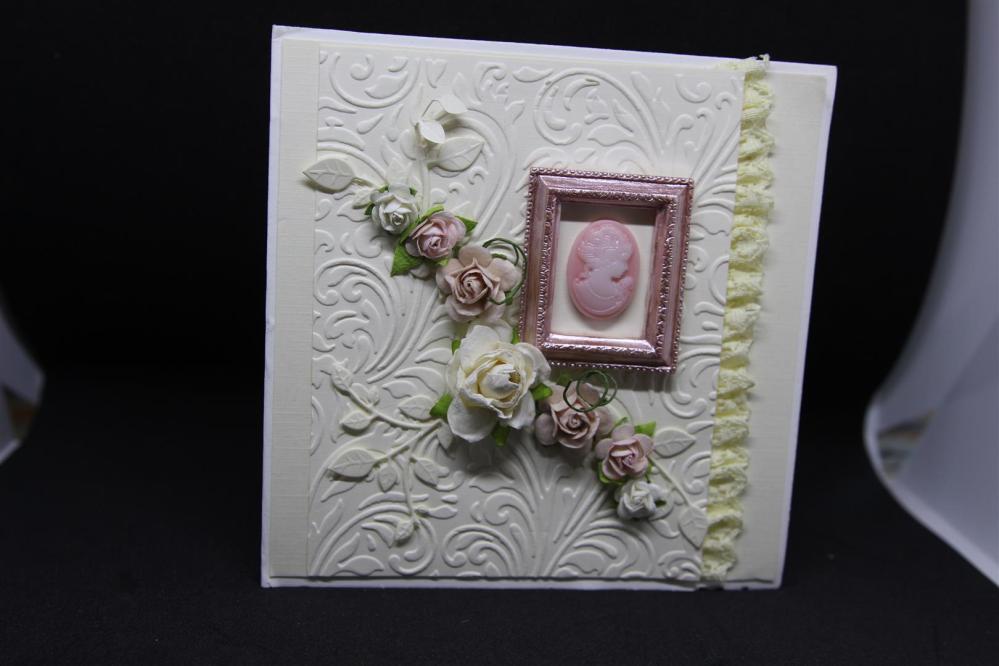 Here are a few cards I taught in my Not So Shabby class at paper Flourish. I call them Not So Shabby because no matter how hard I try my shabby cards still come out looking quite clean! On the top two cards we did some stitching, layering and distressing, while on the bottom card we painted our frame with prima sparks paint and did some embossing. The weather here is so strange, we have had thunder, rain and lightning this morning, but it is 35C so very hot and humid. Not good weather for anything except sitting under the air con vent! We have picked all the cherries ( 15 Kilos this year) and this morning have started picking the apricots and tomatoes so the garden is very productive just now.. Til tomorrow….
Last three lemoncraft Yuletide today..
 Today we say farewell to my Lemoncraft Paper makes, and these three are made in the same way as the cards on the previous post. I have used a lot of the molds that I made on these cards, and I painted them with prima alchemy paints. I have been busy finishing off my January classes, and they are done now so I have a little window of time to do some ” me ” crafting, and I am thinking wedding cards,I have some new stamps and dies to try out although you know these plans could go out the window when I actually sit down to craft! Til tomorrow….
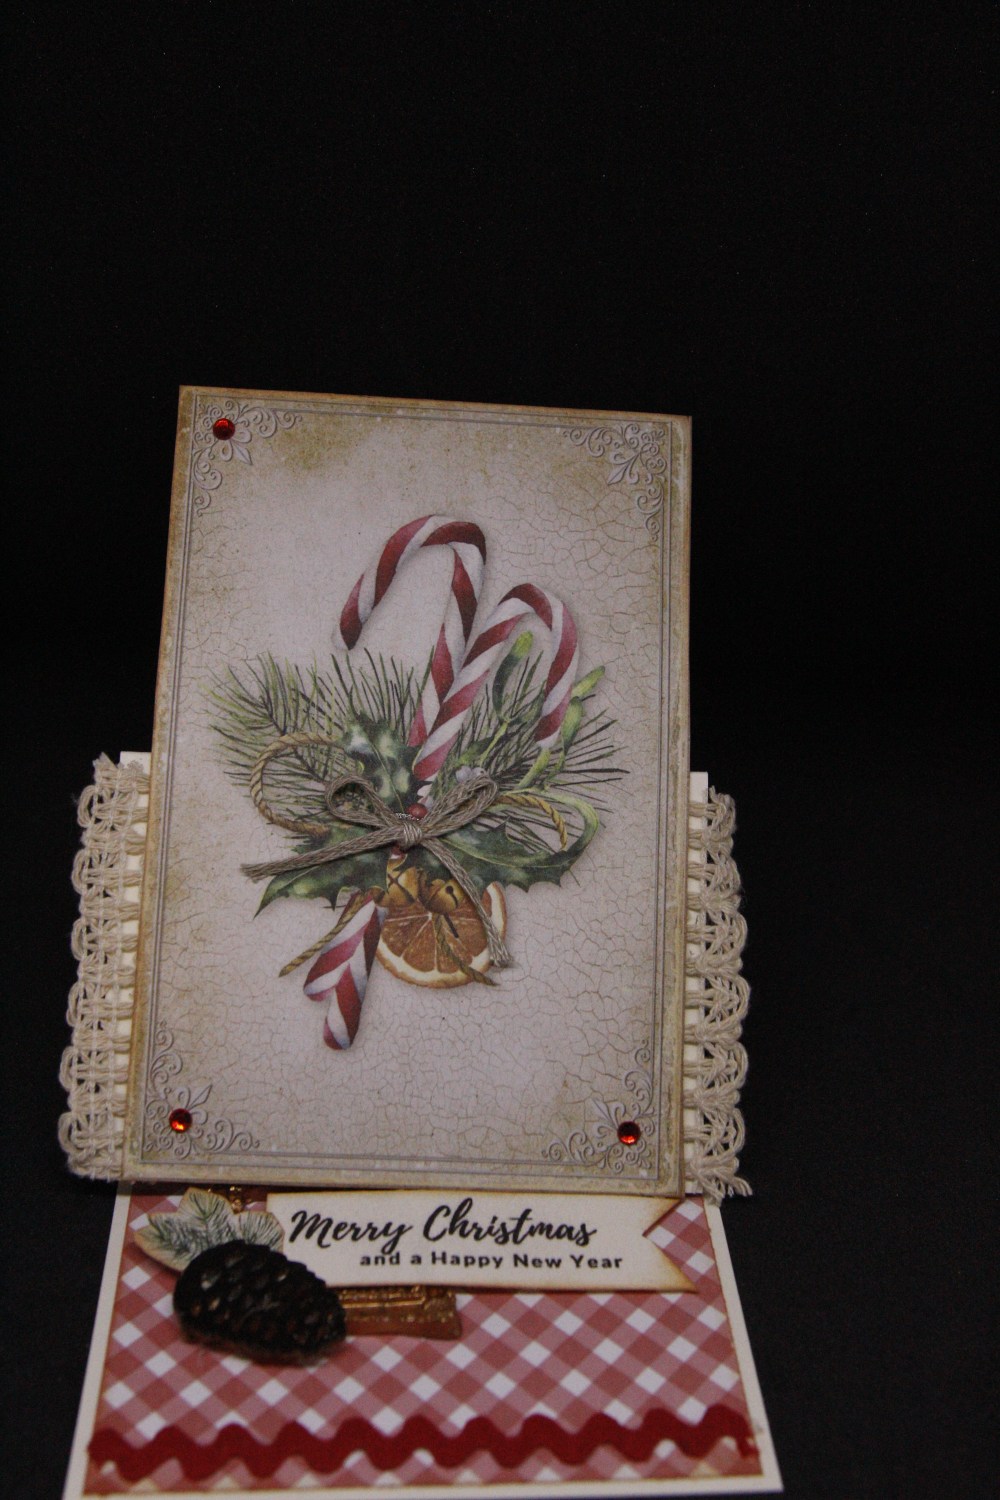
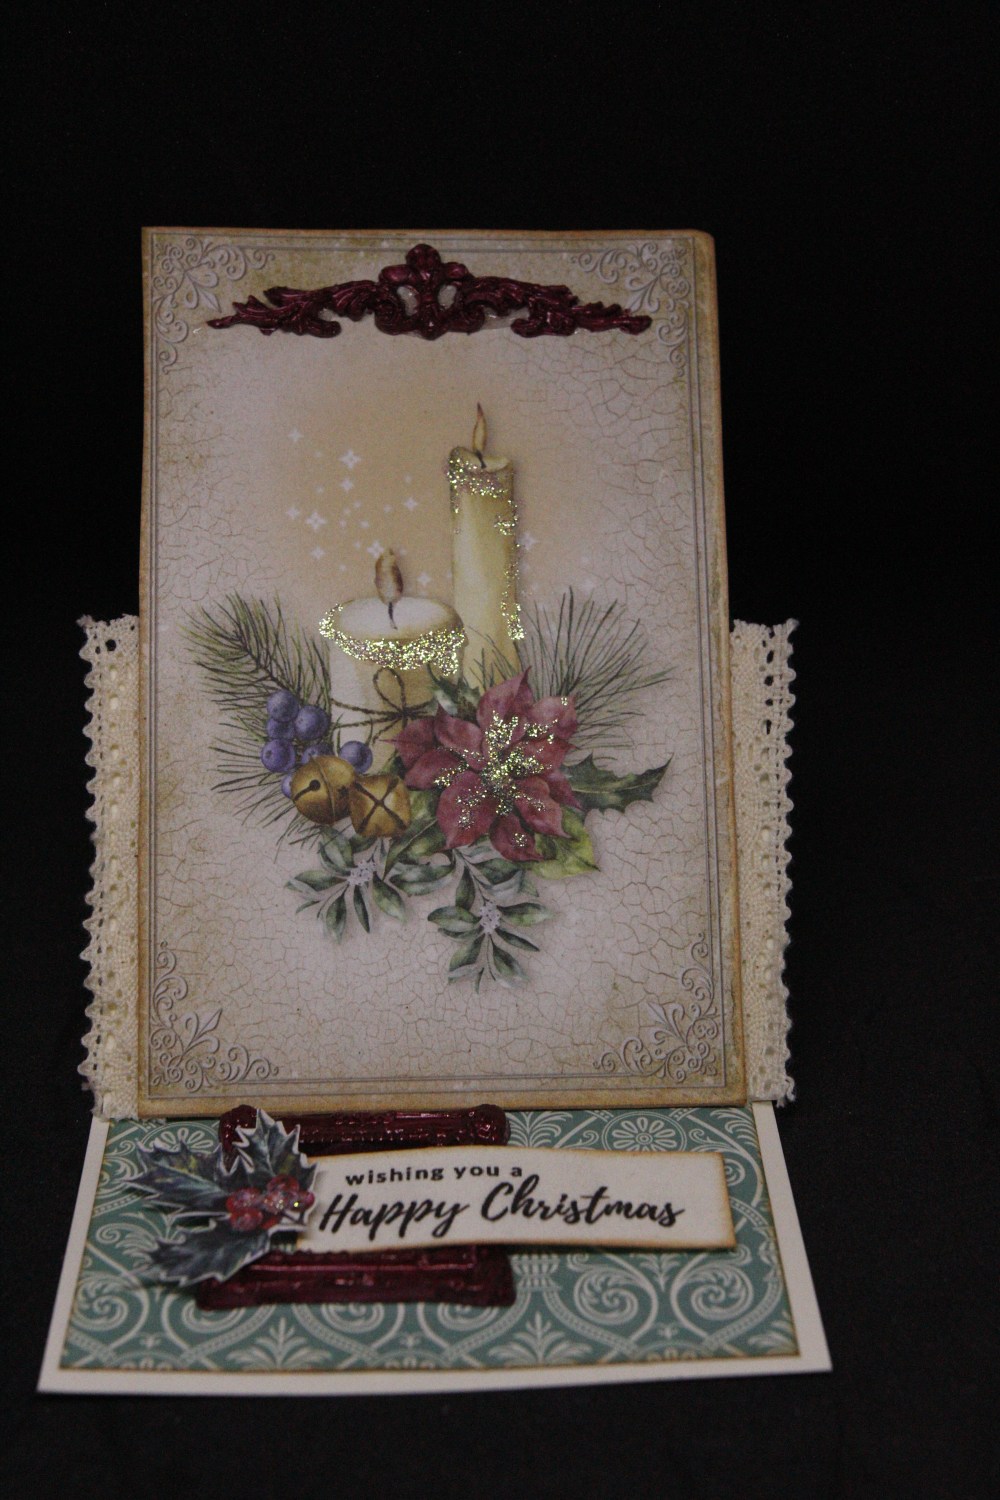
Lemoncraft Yuletide collection, easel cards..
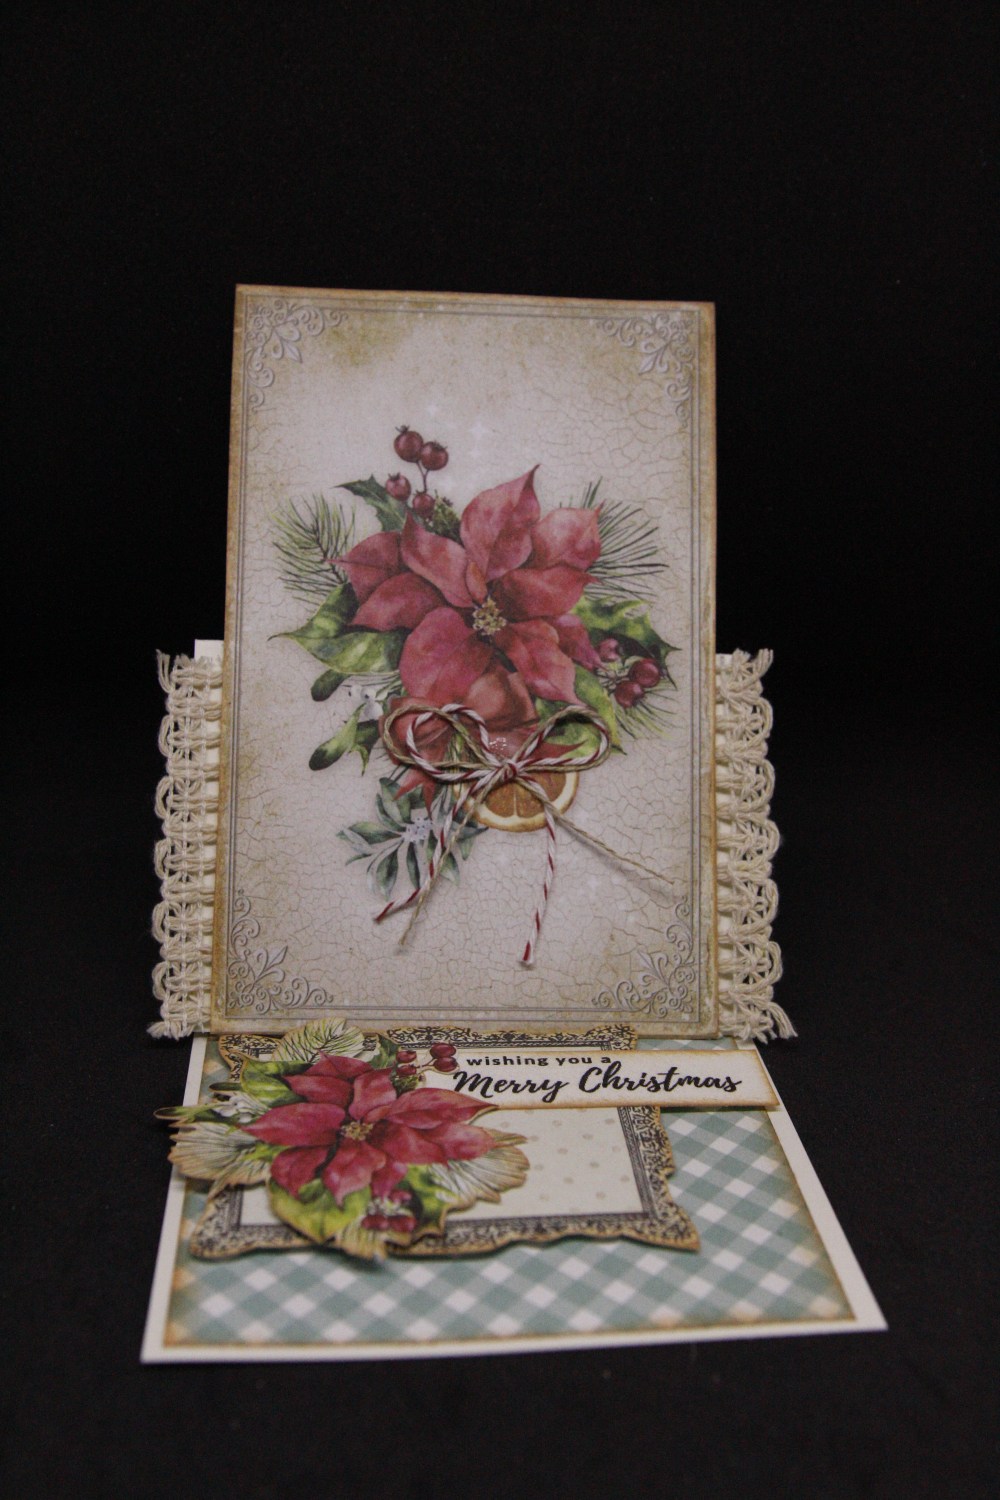
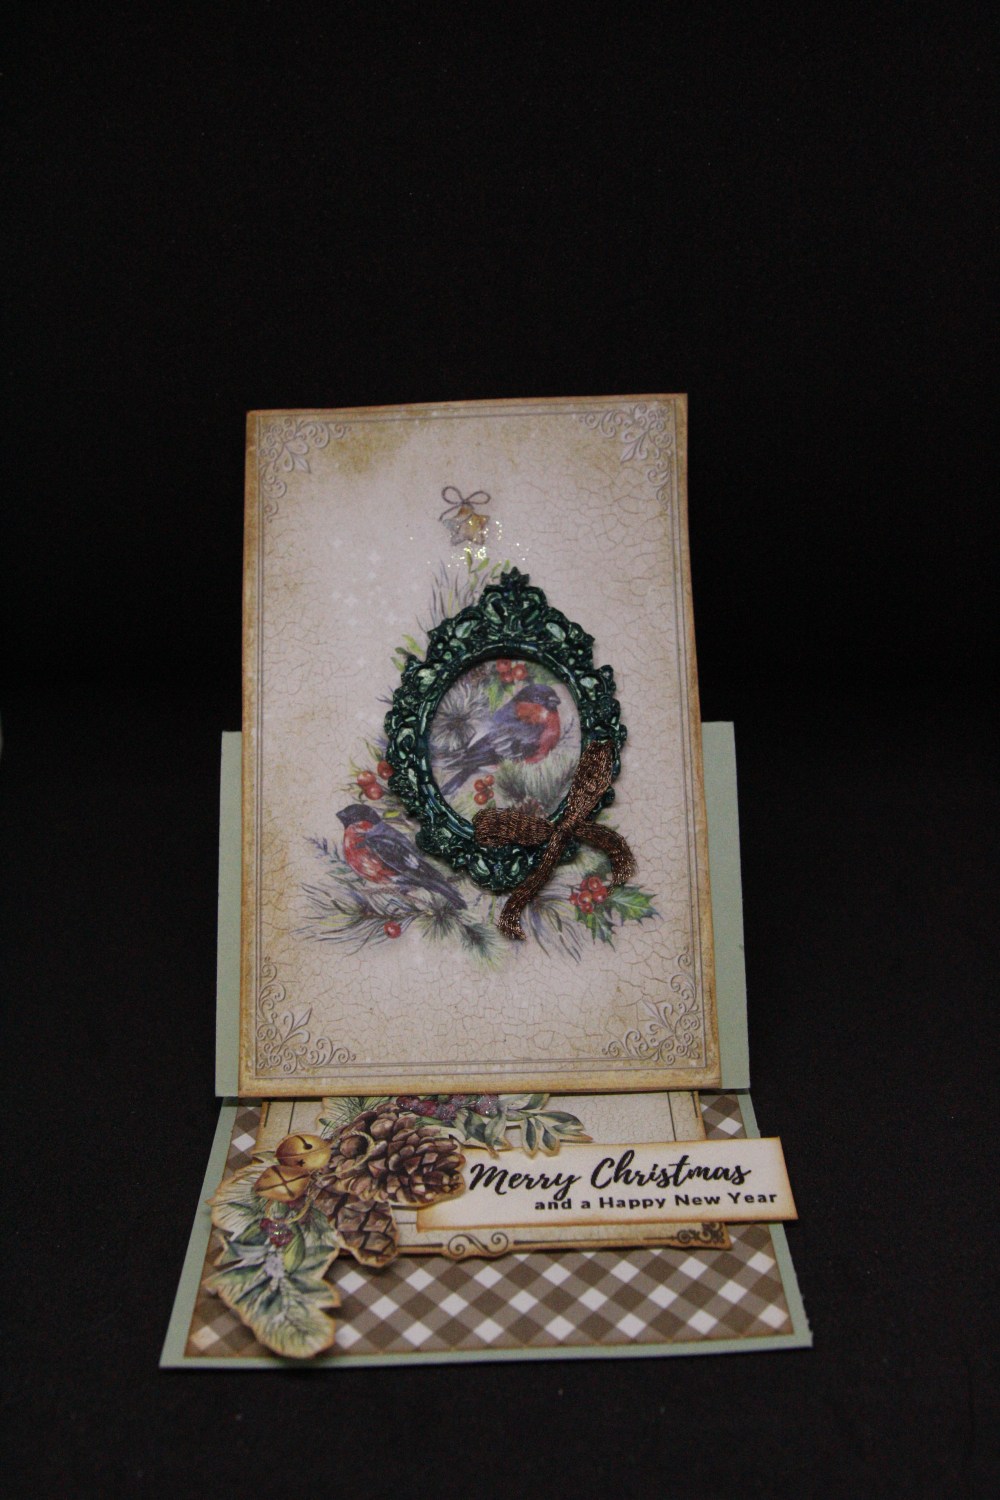
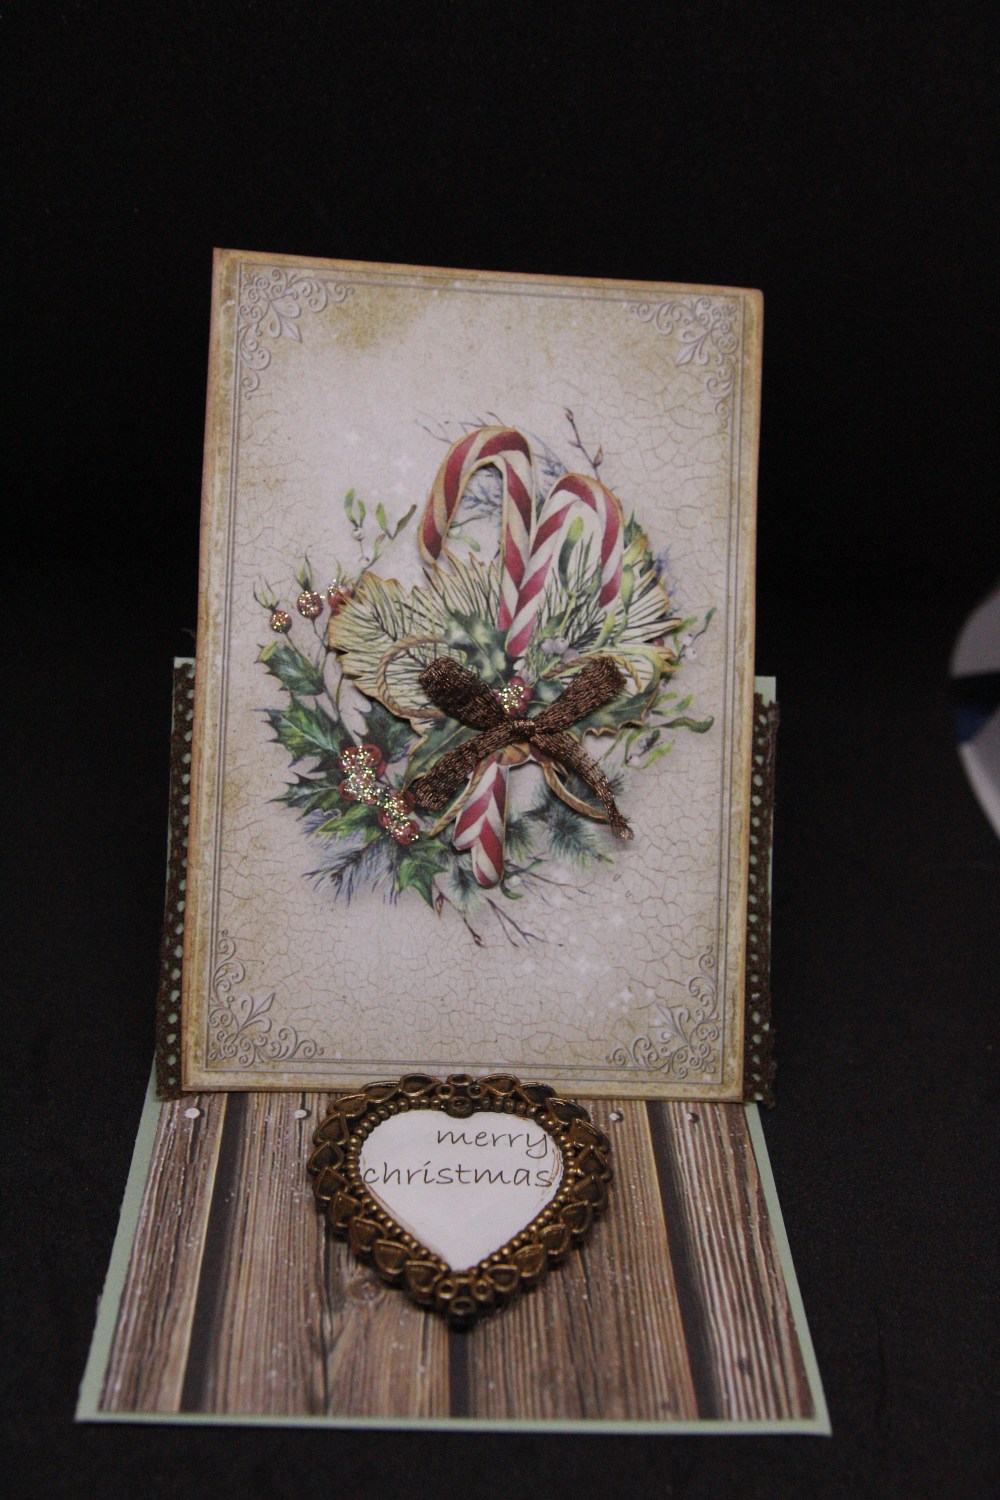 I made 6 Easel cards with lemoncraft Yuletide collection, I will show the other 3 next time…Most of the extra bits I added were already on my craft desk, The middle card has a frame I made with a mold and gap filler ( from the hardware shop) and painted with prima alchemy paints. the bottom card has as it’s stopper a Christmas tree decoration which I rubbed with some Nuvo copper mousse to give it a bit of shine. other than a bit of ribbon and lace the rest was various papers from the collection and a little fussy cutting. Today is my day off, and it is really hot here (35C) . Nathan and I have been grocery shopping, it’s all put away and we are exhausted! I doubt today will be a crafty day, maybe a good day to write out my Christmas cards! Til tomorrow….
Lemoncraft yuletide continued…
 Sorry I have been missing , but we had a computer hiccup here this week,and thank goodness it is fixed now with no loss of files! Today we are continuing on with Lemoncraft yuletide collection,which is perfect for vintage style cards.I did a bit of layering with bits of offcuts on these two, and added a ribbon to the left and a ribbon and a flourish that I made with a silicone mold and gap filler (!) and painted with prima alchemy paint.meanwhile i have finished my January lessons and have a couple of new stamp sets on my desk to play with. I have to make two male birthday cards and one of the stamp sets is perfect for both boys so that will be first on the agenda! Til tomorrow…..
More Vintage Lemoncraft Yuletide..
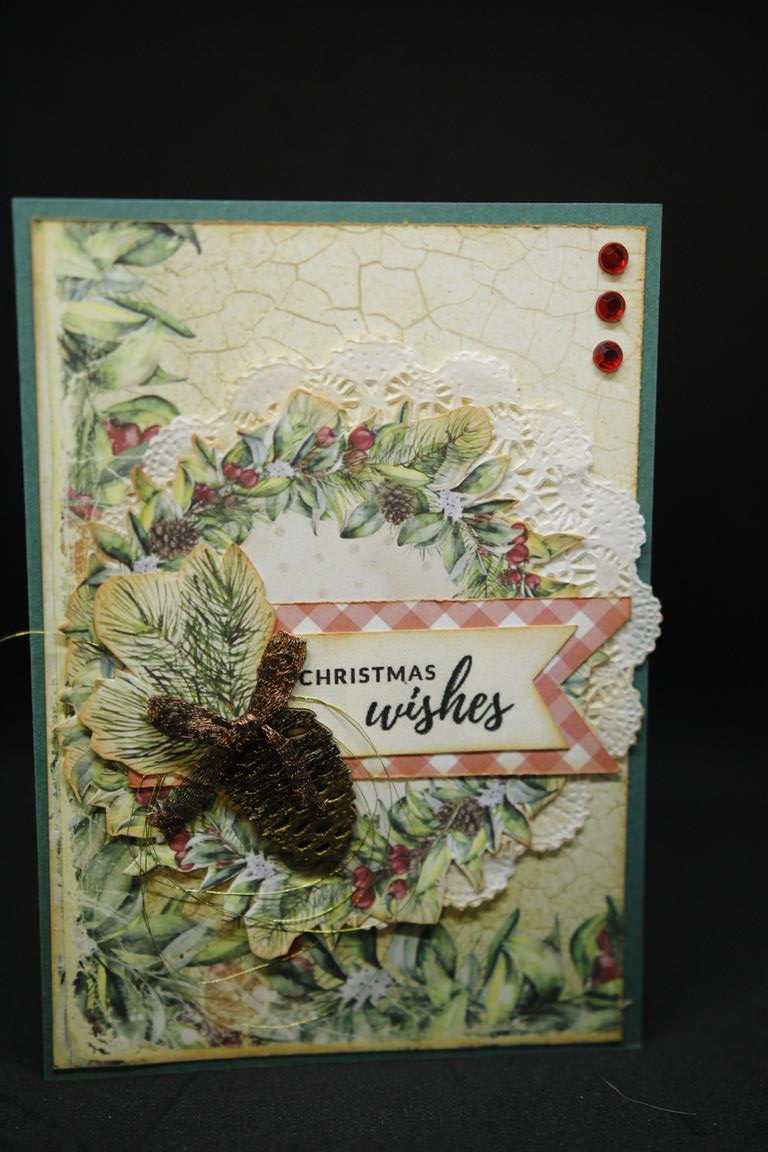 It is still Lemoncraft yuletide designer paper collection on my blog today, lots of matting, and using little leftover scraps as banners, a bit of fussy cutting and not too much more embellishing required, just bits of gold thread, and ribbon. The bottom card had a doily and a foiled chipboard pinecone as well. Everything is inked with tea Dye distress ink. Today is my craft and chat group so I am off to get some projects sorted although more chat than craft takes place! Til tomorrow….
Mintay Christmas Stories…3 and 4..
 Here are the other two Mintay Christmas Stories cards I made before I got distracted by other equally beautiful Christmas papers! I did a lot of fussy cutting here, and didn’t add too much more – just a little bling and sparkle! This week has been very busy at work, I haven’t had any home time to craft, and working tomorrow as well so not looking good for weekend crafting either..never mind I am sure I will make up for that next week! Til tomorrow…..
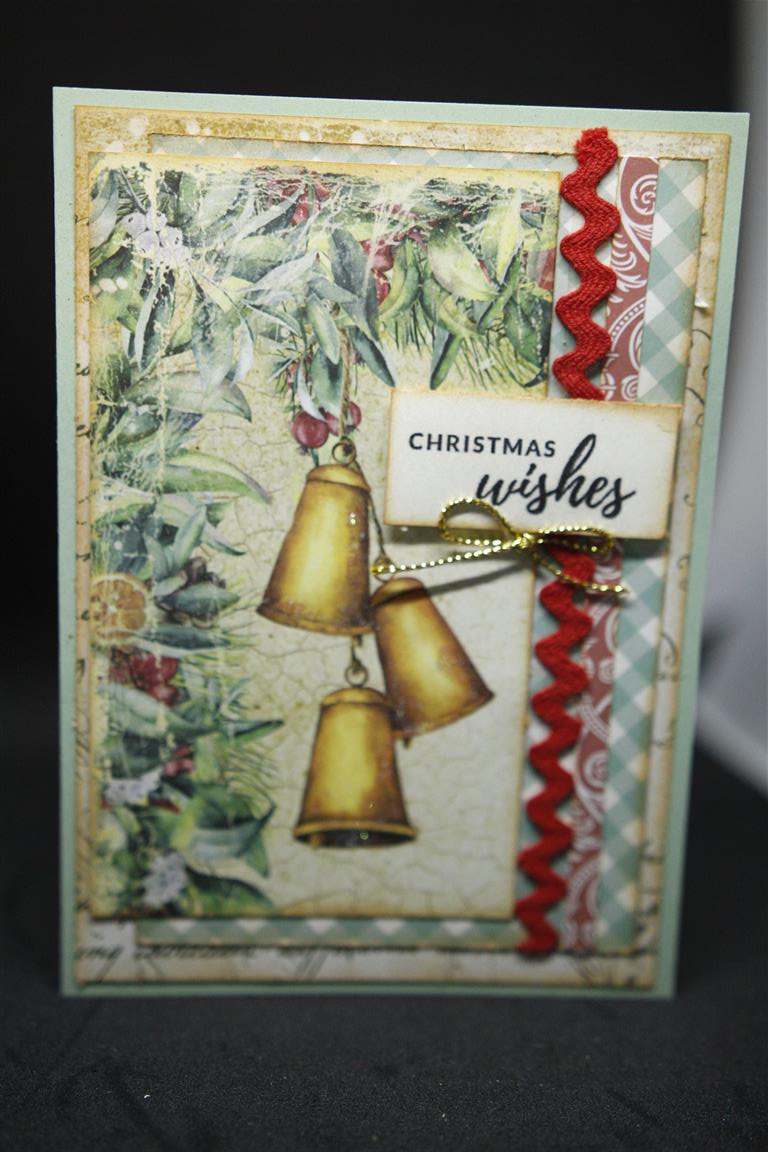
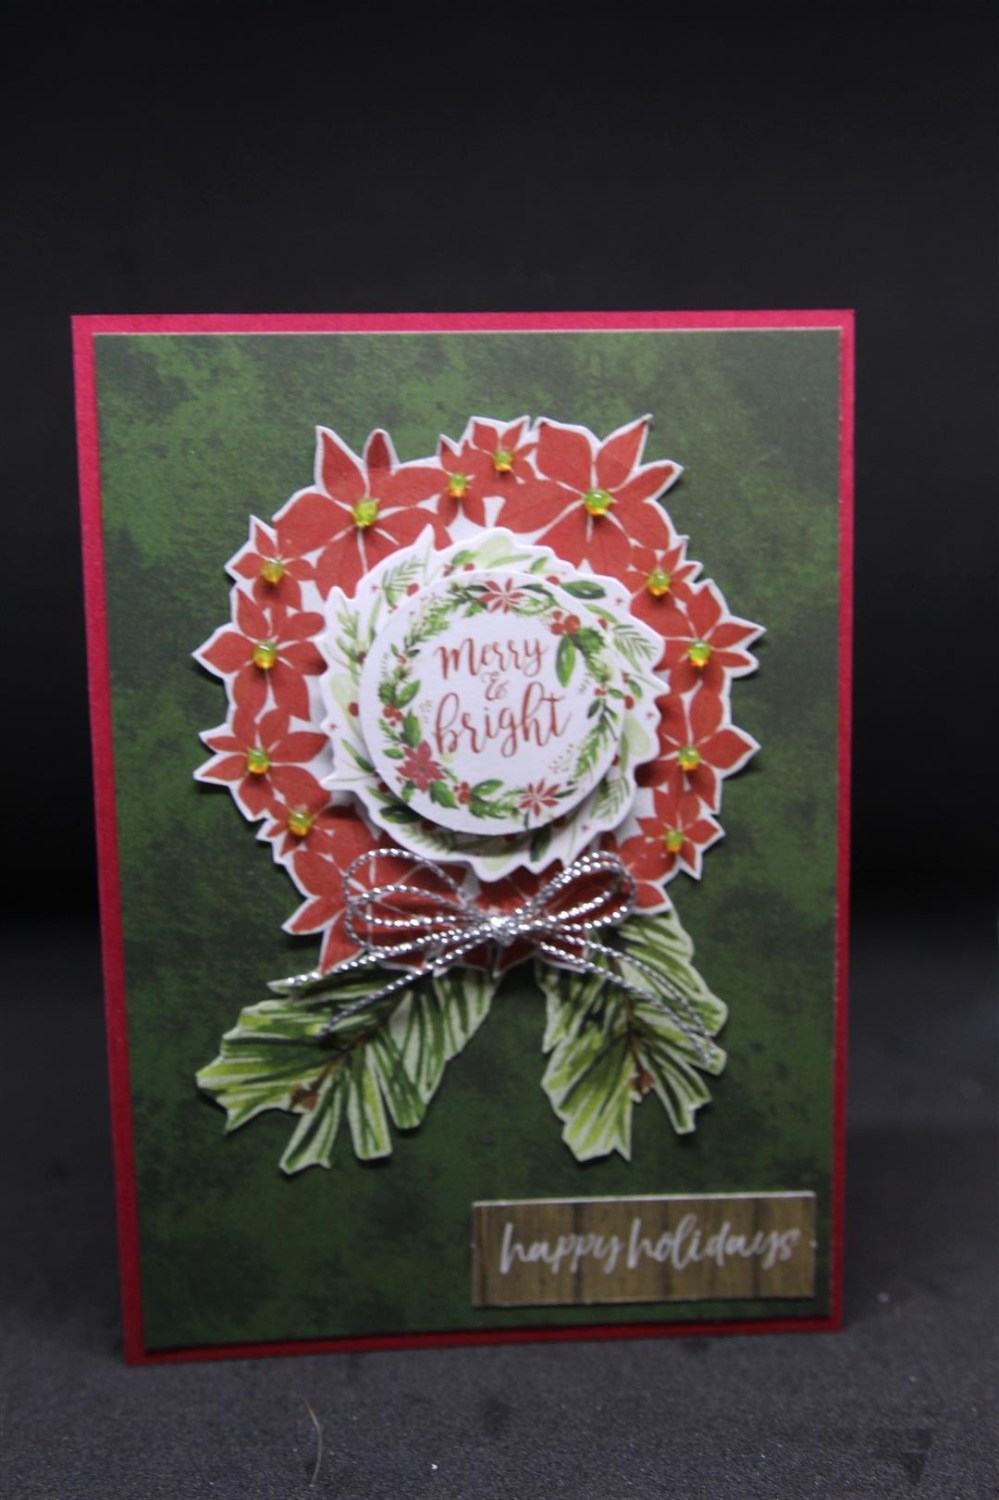
Kaisercraft Christmas Wishes 7, 8, and 9
")
")
Continuing on with Kaisercraft Christmas Wishes, I used some of the matching collectables on the top card, and a few fussy cut elements on the lower two cards. On the top card I have used some Nuvo drops, and of course there has to be a card with a ribbon bow amongst the group somewhere! Today is the start of daylight savings here, the clocks have gone forward, I have lost an hour and I am running behind in everything! Til tomorrow…..
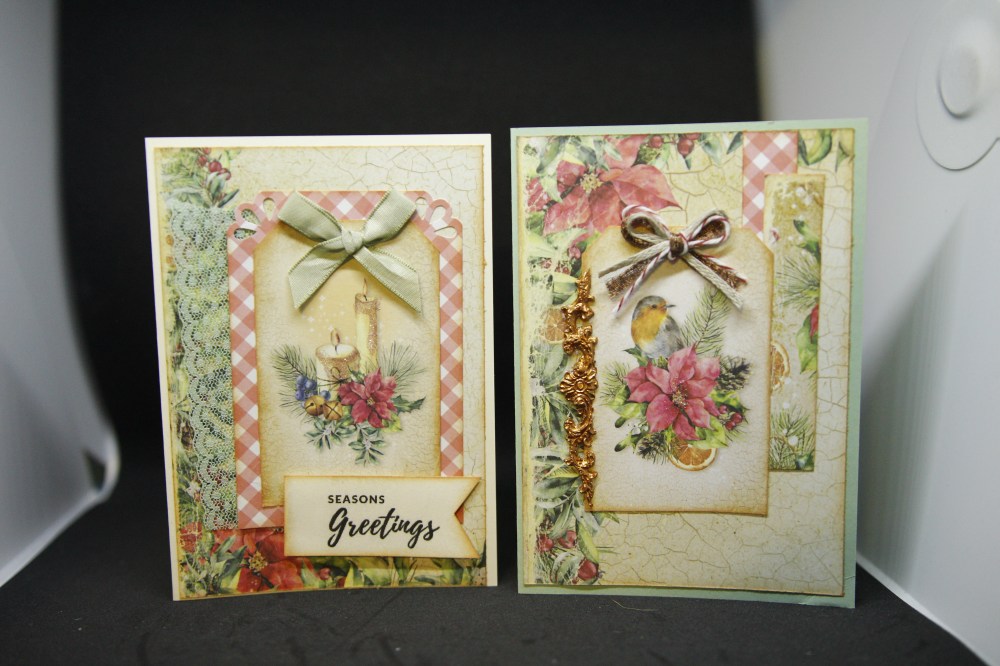
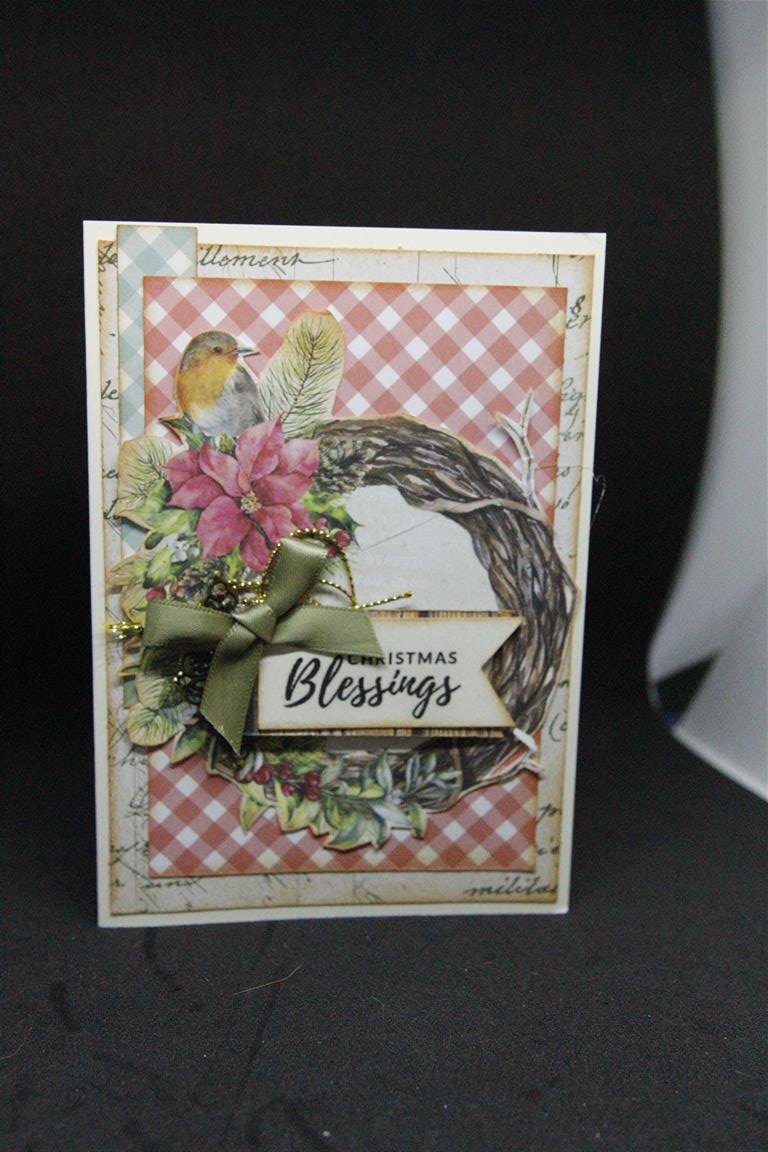
Not so Shabby…Maja Design Sofiero
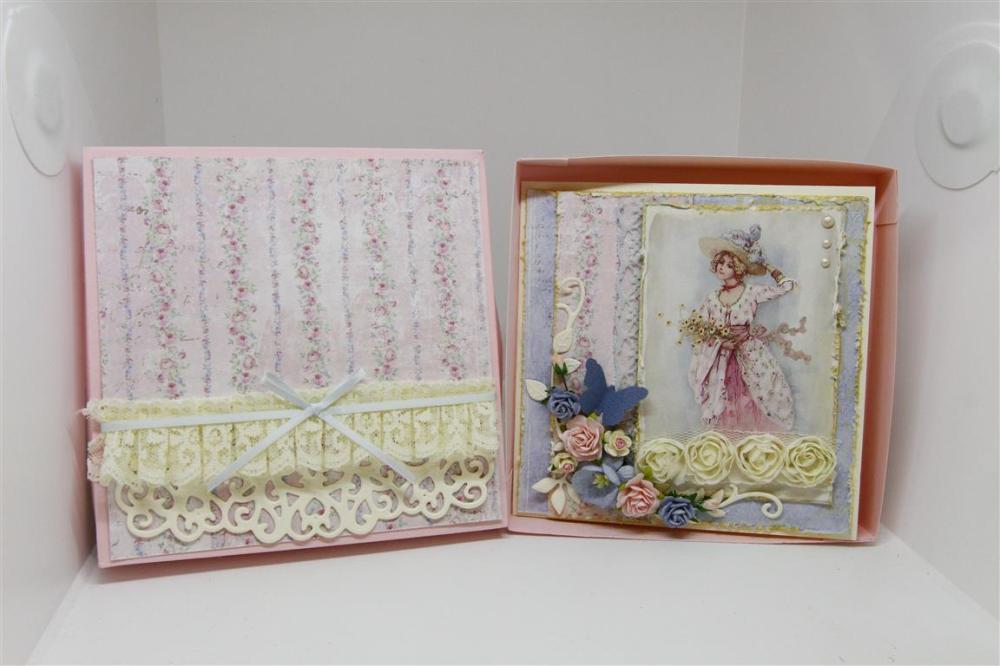 At paper Flourish we have discovered some new designer paper Companies, and Maja Design is one of them. This card and box is made from the Sofiero range. Their papers ( along with Pion designs, Lemoncraft, and Mintay ) are perfect for Shabby style and vintage and I have been having so much fun creating with them all! As I said todays card is made with Maja Designs Sofiero and I have layered papers, with distresses and inked edges onto a cream card base, and added lots and lots of gorgeous flowers along with a couple of die cut leaf flourishes , a punched butterfly, some lace and pearls. Once done I realised it would never survive an envelope so made a box and did a quick bit of decorating on the lid. I have since discovered the benefits of cutting an aperture in the lid and backing with Acetate, which I have shown you on a previous post. That’s it for today…I have a trip to the dentist later but I am going to take my mind off that in the meantime by heading into the craft room! Til tomorrow…..
Prima tales of you and Me …9 and 10
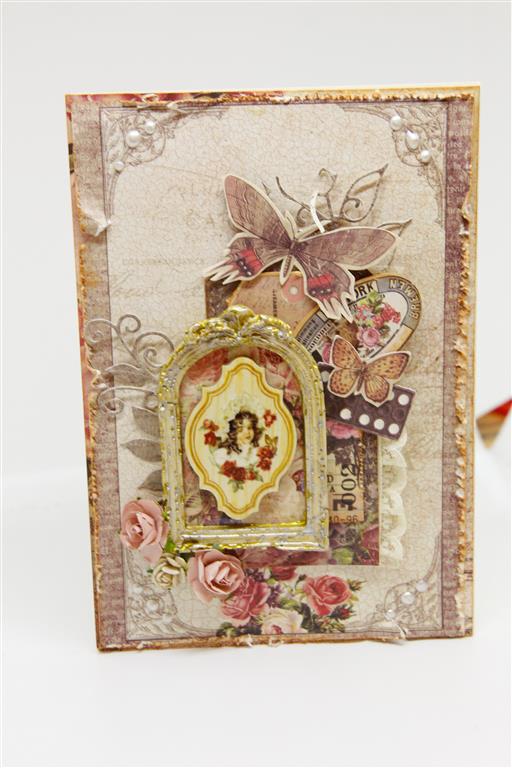
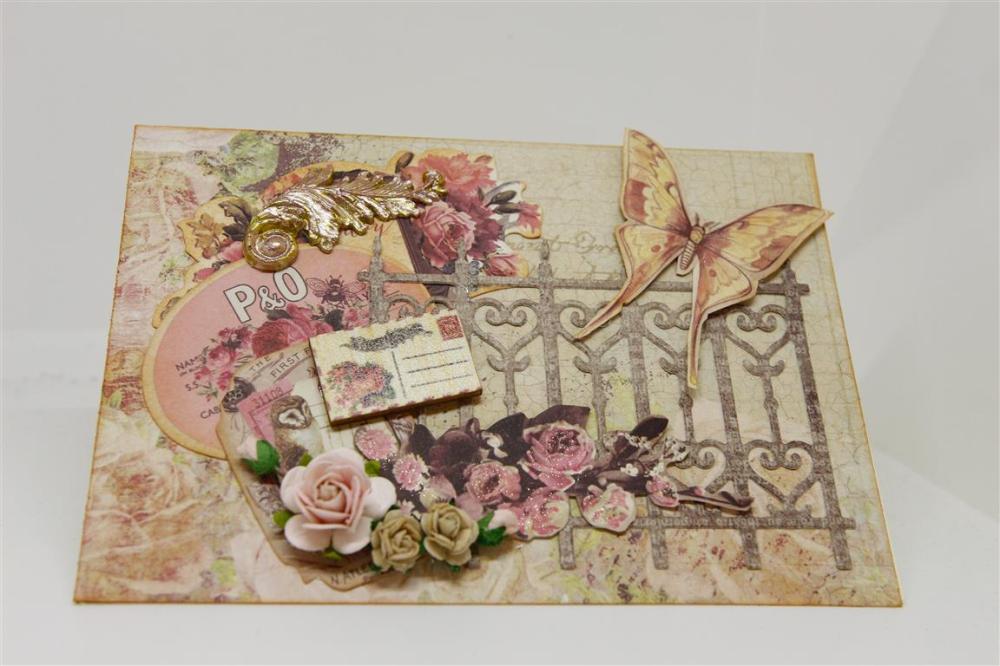 I made these two shabby chic style cards with an old Prima range that I found in the craft room,lots of layering of the matching empheria and a die cut gate…I think that was a stampin Up die, a few flowers and some of the frames and swirls that I made with silicone molds and No More Gaps ( from the local hardware shop!) I painted them with some Prima Alchemy paints. A day off today, so i have done my grocery shopping, planned what we are having for tea, and now time to think about some November lessons! Til tomorrow…..
