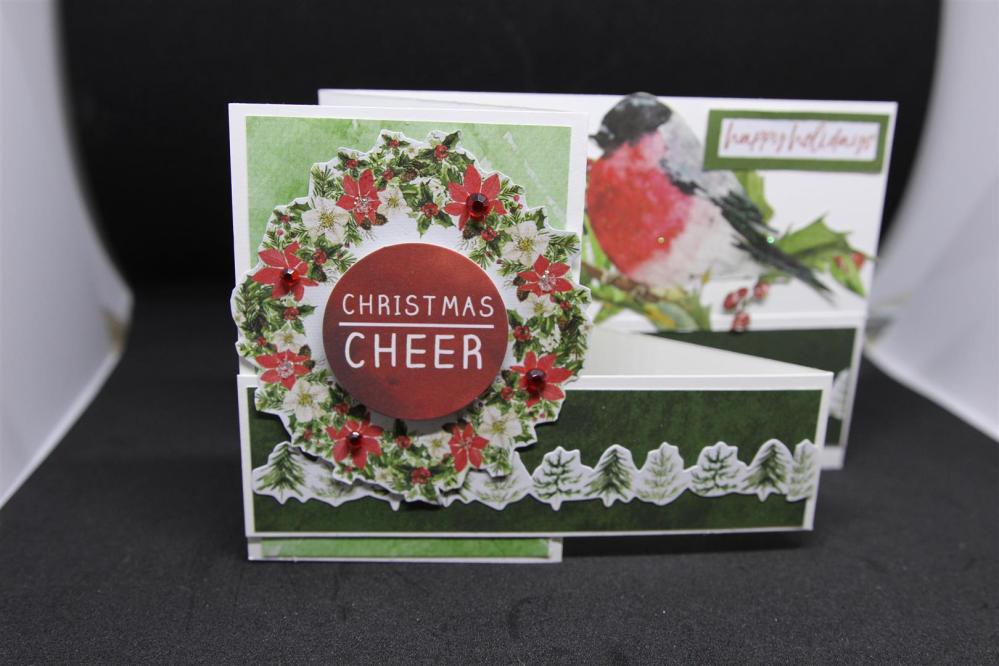
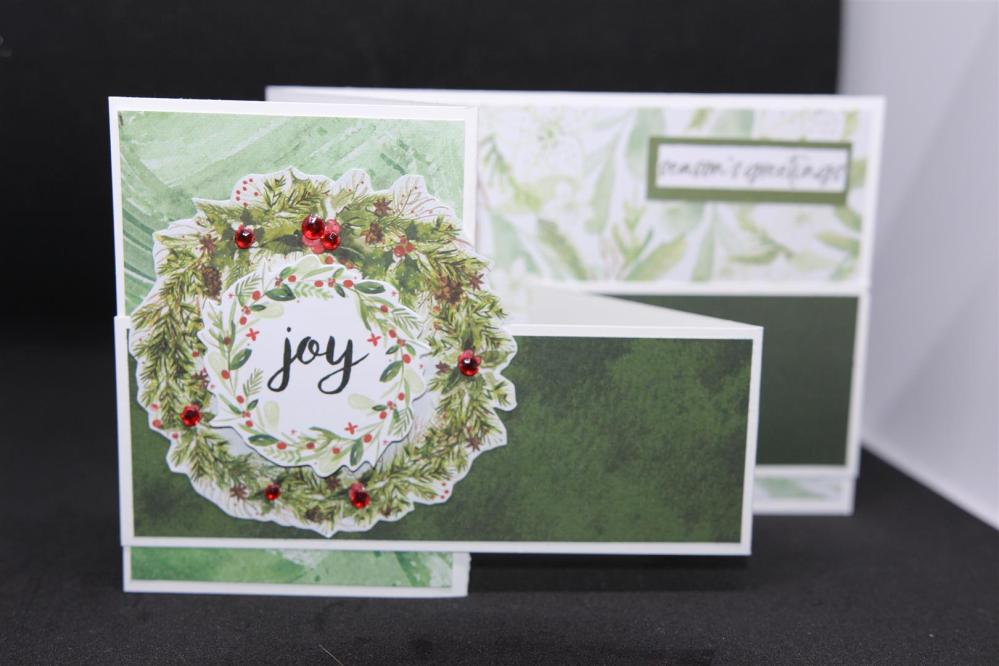
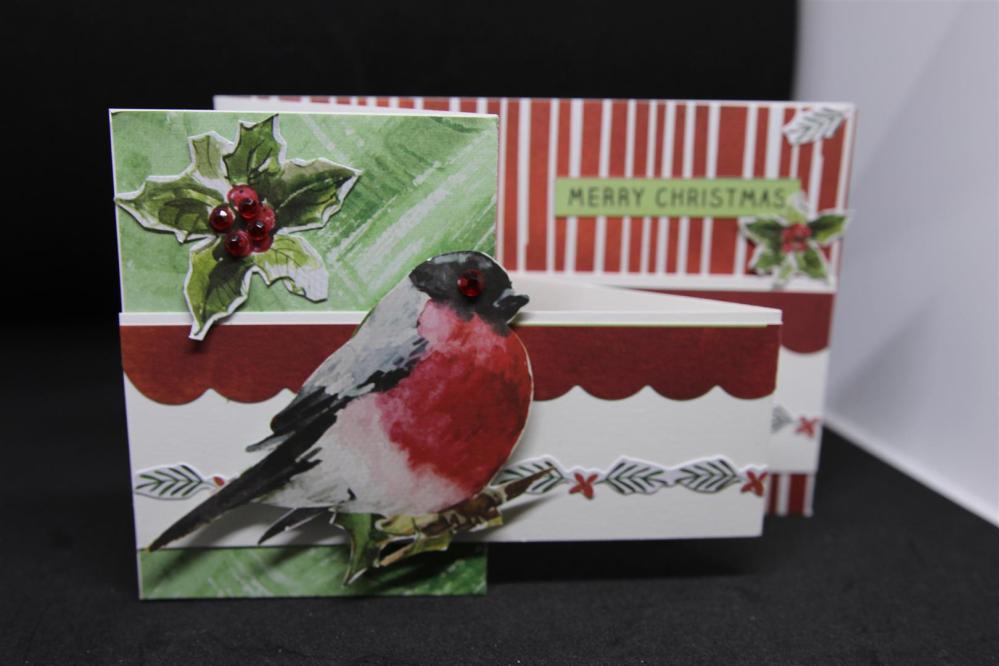
 Today begins the official start of my Christmas card makes..and I am starting off with cards made with kaisercraft Christmas Wishes paper collection. I purchased the collection pack, collectables and the 6 ” pad, and I have made so many with this collection already. I will ( to alleviate boredom!) put them up 3 at a time and we will have a couple of breaks through out to also see other cards I have been making. My favourite card fold this year has been the double zig zag card so the first few are all in this design. Everything on these cards except for the bling has come from the listed supplies at the start of the blog, the collection pack comes with a sticker sheet which has come in handy for the strips across the smaller zig zag fold. I have done a little fussy cutting from some of the papers – the birds and the holly for example. Today is a day off but I am off to have a cortisone injection in my foot…not happy as I have had these before and they hurt!! I am hoping for short time hurt for long time gain! Til tomorrow…..
Tag: cardmaking
Not so Shabby…Maja Design Sofiero
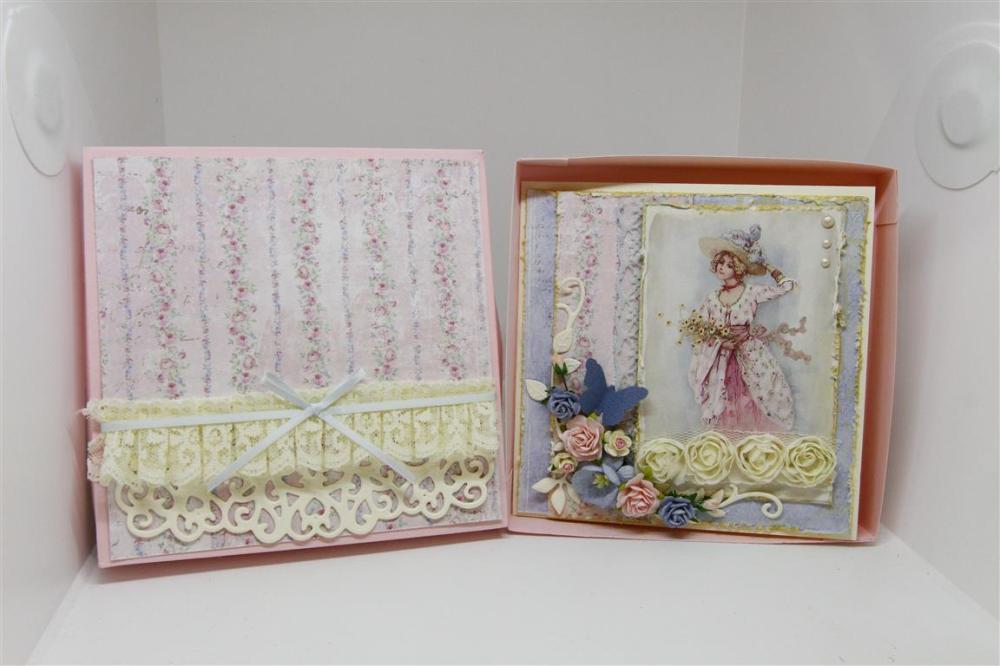 At paper Flourish we have discovered some new designer paper Companies, and Maja Design is one of them. This card and box is made from the Sofiero range. Their papers ( along with Pion designs, Lemoncraft, and Mintay ) are perfect for Shabby style and vintage and I have been having so much fun creating with them all! As I said todays card is made with Maja Designs Sofiero and I have layered papers, with distresses and inked edges onto a cream card base, and added lots and lots of gorgeous flowers along with a couple of die cut leaf flourishes , a punched butterfly, some lace and pearls. Once done I realised it would never survive an envelope so made a box and did a quick bit of decorating on the lid. I have since discovered the benefits of cutting an aperture in the lid and backing with Acetate, which I have shown you on a previous post. That’s it for today…I have a trip to the dentist later but I am going to take my mind off that in the meantime by heading into the craft room! Til tomorrow…..
Prima tales of you and Me …9 and 10
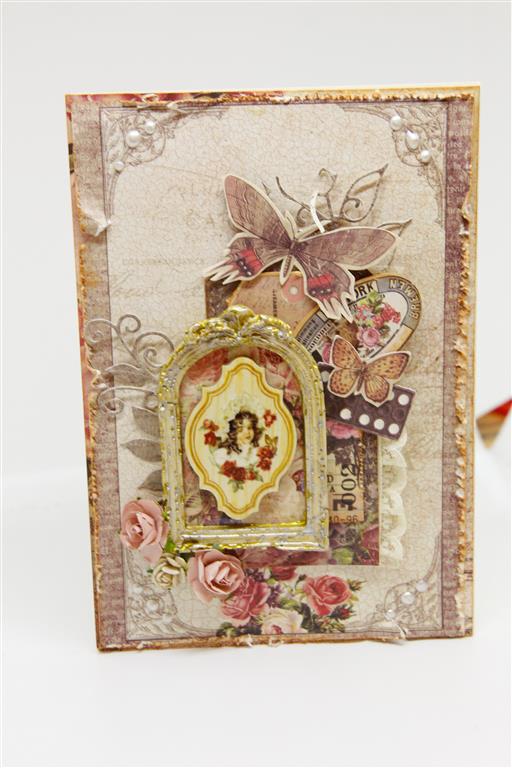
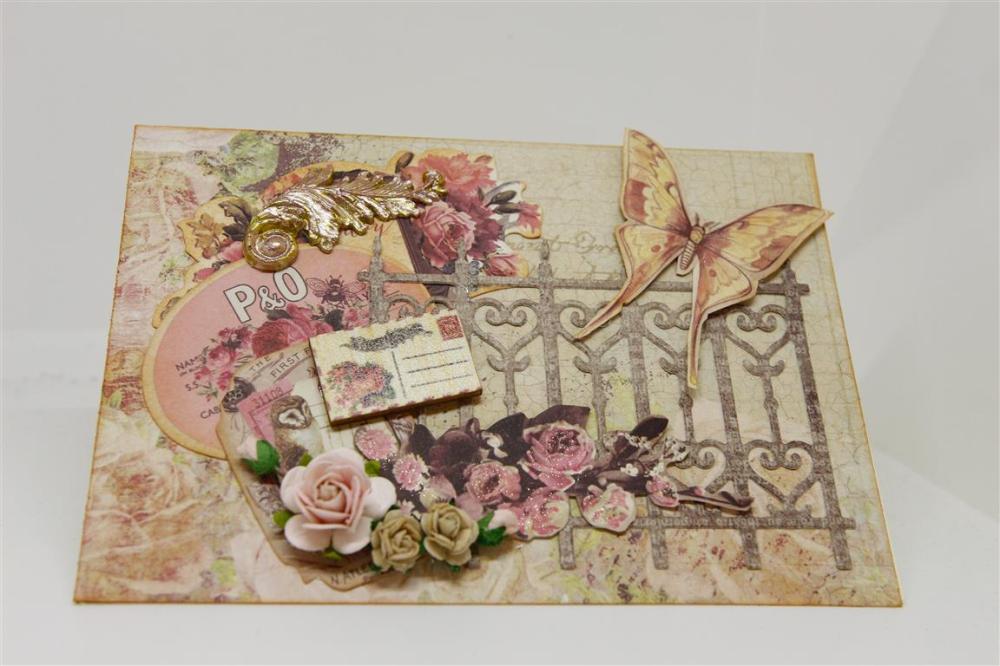 I made these two shabby chic style cards with an old Prima range that I found in the craft room,lots of layering of the matching empheria and a die cut gate…I think that was a stampin Up die, a few flowers and some of the frames and swirls that I made with silicone molds and No More Gaps ( from the local hardware shop!) I painted them with some Prima Alchemy paints. A day off today, so i have done my grocery shopping, planned what we are having for tea, and now time to think about some November lessons! Til tomorrow…..
Lemoncraft House of Roses…not so shabby!
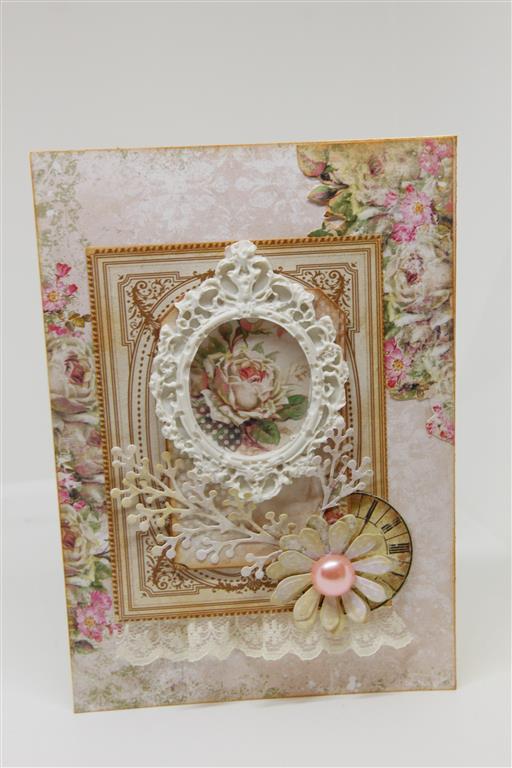 One of the classes I teach at paper Flourish is called Not So Shabby because although I love the shabby chic look I still haven’t mastered the genre and so have created my own take on it.I also need a fair bit of practise so that I can stay one step in front of my pupils so you will be seeing my progress here. This is a card I made with a paper collection called House of Roses by a company called Lemoncraft. lemoncraft have the most amazing shabby style papers and also A4 sheets full of fussy cutting options, both of which I have used on this card. I did a little die cutting ,fussy cutting, added some lace and the focal point on my card is the resin frame which I made with a silicone mold and No More gaps ( available at your local hardware store!). I didn’t paint this one , it is as it came out of the mold. It has been a busy morning full of housework, Roast is in the oven and after lunch I plan to relax in the craft room – can not wait!! Til tomorrow….
stamperia letters and flowers..
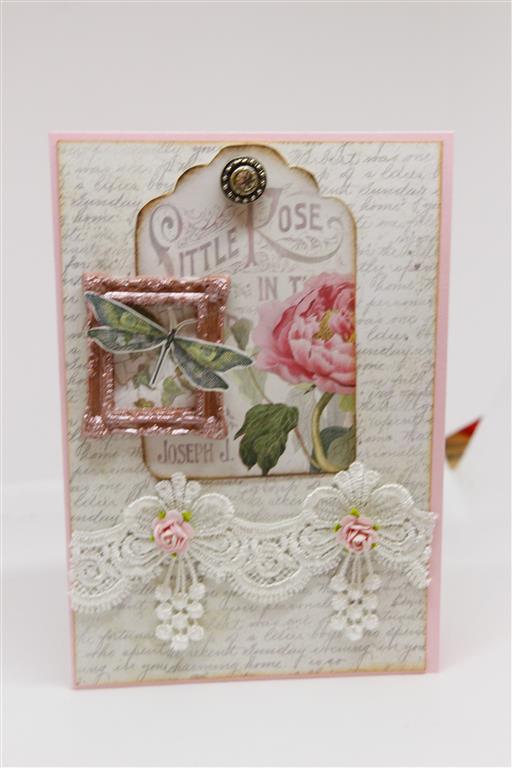 Another card today using the gorgeous Stamperia letters and Flowers papers,and some stunning lace! The frame which I painted with Prima Sparks acrylic paint is interesting because I made it with a silicone mold and some No more gaps from the hardware store! it takes a couple of days to dry in the mold but comes out beautifully! I have made a lot of these molded frames and flourishes so you will see them from time to time on my projects.For now though i have picked up my new kaisercraft papers and it is a Christmas range so I am all ready to start the Christmas makes! off I go… til tomorrow….
Book Cards..Shabby Chic style..
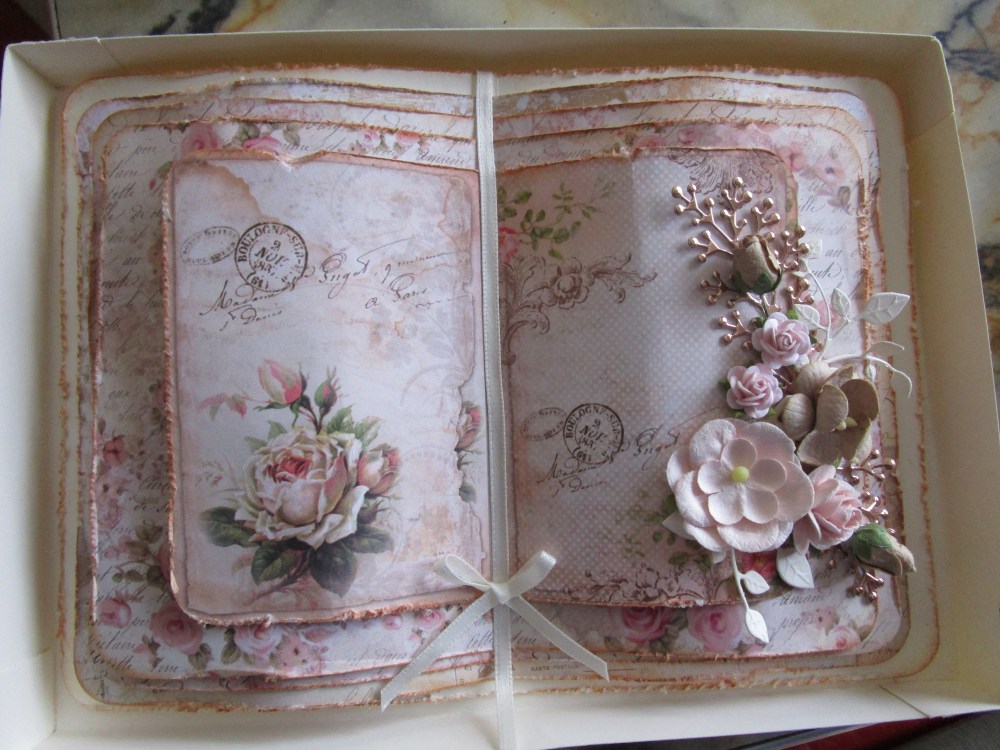
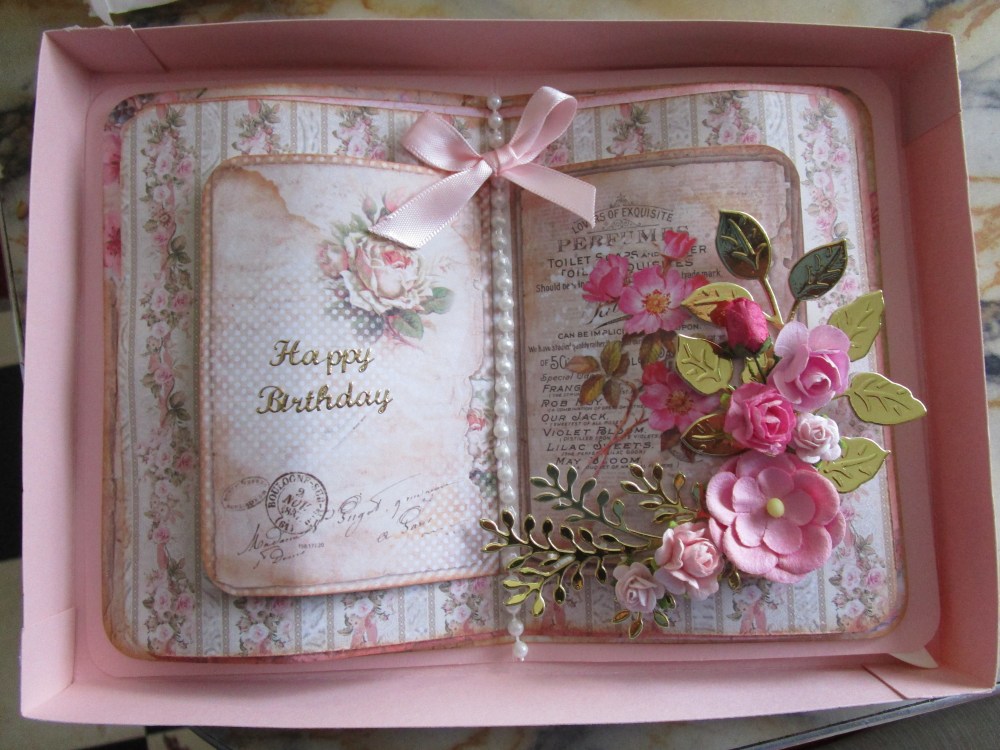
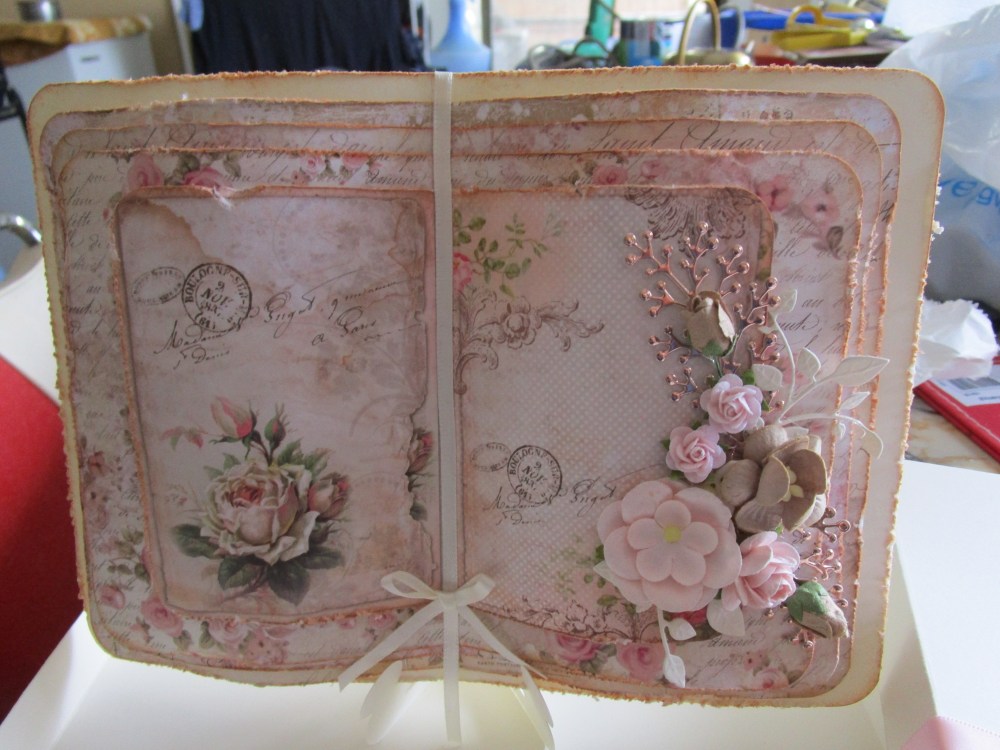 This week I have been making book cards. These are my new favourite thing to make ,but a word of warning …they use a lot of paper! I didn’t come up with this design, although I did modify it a little bit, one of our talented teachers at paper Flourish taught something similar this week to a group of ladies. I have also made boxes to pop the finished product in and decorated the box as well, and I have included in the box a die cut card stand to stand the book up on for display. now to the nitty gritty… there are 5 layers of card and paper, the bottom layer the card and then 4 layers of papers, getting smaller by a centimetre for each layer. I have done them in a shabby chic style so I distressed and inked all my edges with tea dye distress ink, once the papers are cut and inked I folded them in the centre and then bowed out the pages to curl them. I stuck the layers through the centre fold and put 3d mounting foam on the page edges . It was then just a matter of decoration with ribbon, flowers and various die cutting of leaves and flourishes!. The papers I have used here are from two companies – I have just discovered them and their papers are gorgeous so you will see more of them on my blog. they are Lemoncraft ( the papers here were from their range House of Roses, ) and Stamperia. The bottom photo gives you a better idea of the card upright. For now I am off to teach a retirement village calss, til tomorrow….
Kaisercraft Miss Betty double zigzag..
 Sorry I have been missing for a few days, I have been busy with work, creating classes and then the usual running of the household!As we speak there is a man on my roof restoring it, it is old and tired and had developed leaks….something some of us can commiserate with !The Two cards today are made with kaisercraft Miss Betty collection, I keep promising to make a you tube clip showing how to do this fold, and it will get done, Nathan has had a few problems with the cameras, but I think those kinks may be fixed so we shall see.. The sticker sheet that comes with the kaisercraft collections is perfect for doing these cards, they usually have long borders on them that I never know what to do with but they fit perfectly along the thinner zig zag strip. In other news I have taken the first step towards starting my Christmas cards.. I have been out to the shed and collected some christmas papers! I will take it over to mum and dads place today and sit and chat and craft with them.. til tomorrow….
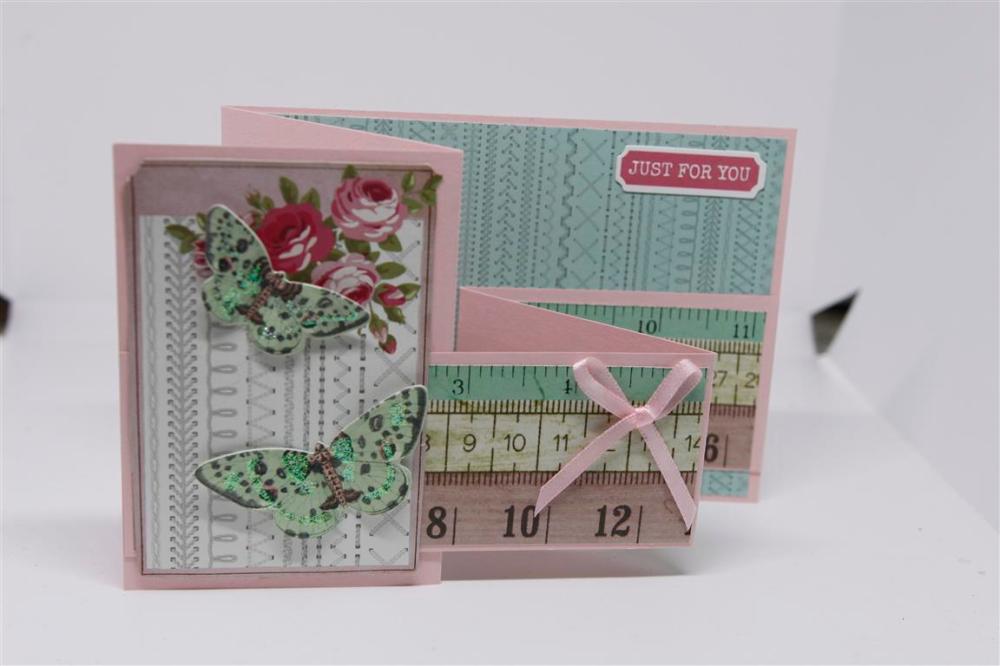
Kaisercraft memory lane…class cards..
 Todays cards are 3 cards my ladies made in a class I did at Paperflourish a couple of months ago, using Kaisercraft memory Lane papers. We did a little bit of die cutting with a seven paper dolls label die, a little layering of the lovely pastel mint papers and a lot of fussy cutting! We used Nuvo Crystal drops to add a little bit of shimmer. This one was a lovely relaxed class, with lots of chat time! This weekend I have been concentrating on finishing off my cruise class packs because it is time to start the Christmas cards and I am heading into the shed today to dig out my christmas dies and stamps! great fun… til tomorrow…..
Stash Tags!!
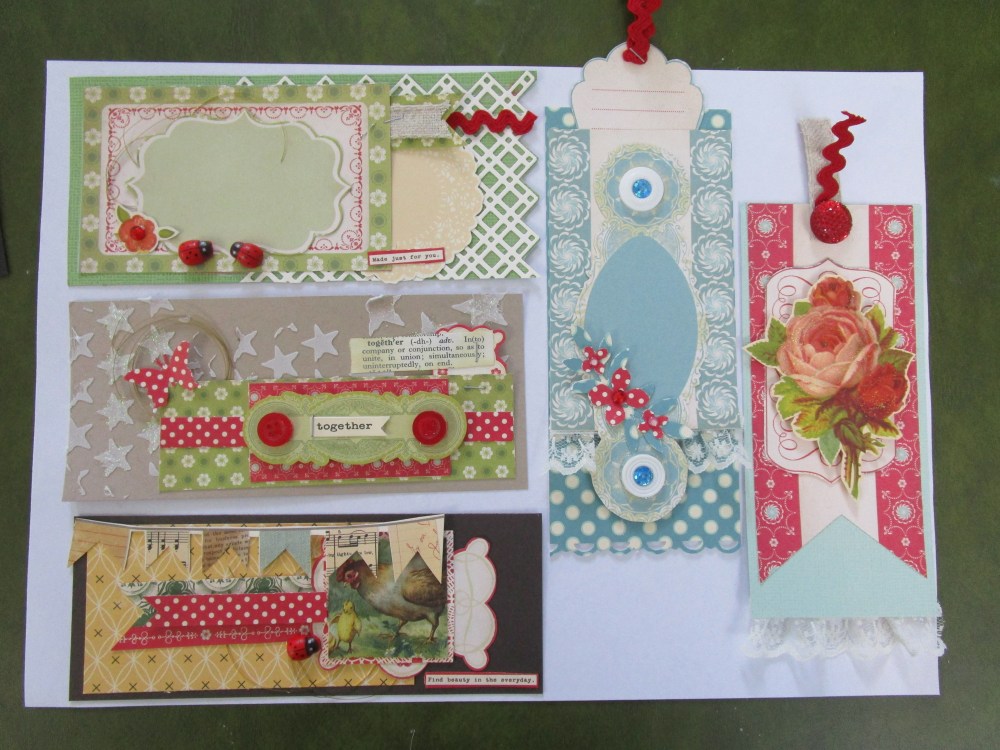
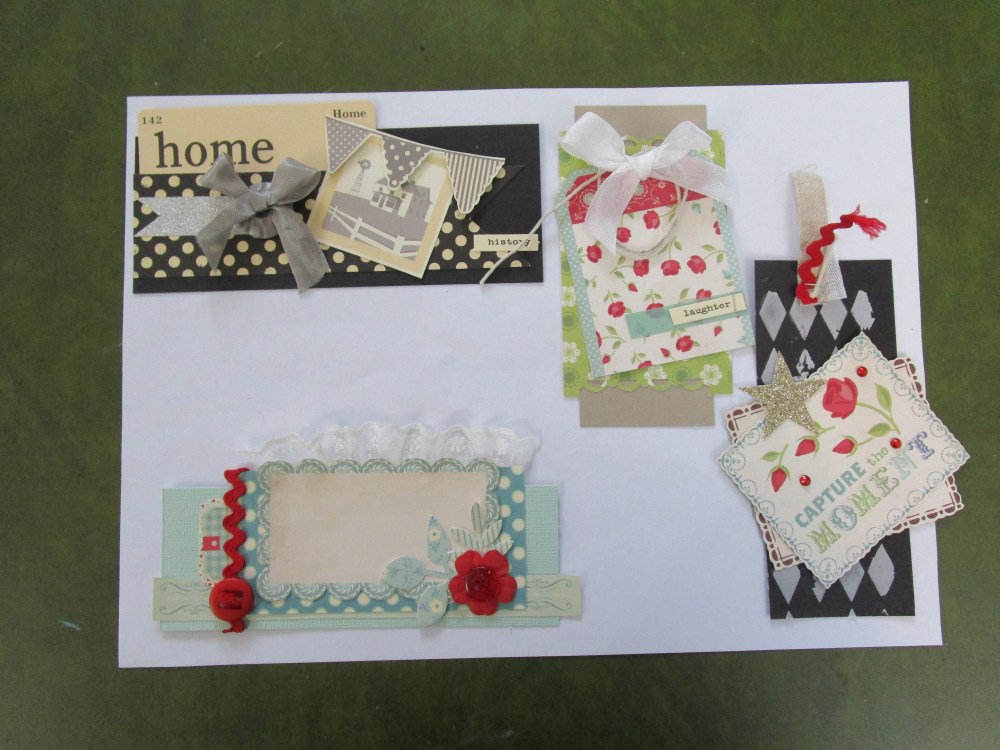 I know I said we would see the second shabby lesson card today, but I wanted to show you all something else I have been working on..something new!(We will get to the other shabby card tomorrow) . My workmate Lydell , who is a true artist, is running a class in August called Use your stash, and her ideas and samples are truly amazing and inspired me to grab all the bits and pieces ( die cuts, odds and ends of ribbon,buttons, flowers and papers) that were piled on my desk and turn them into what I am calling Stash Tags. These are made ready to pop on cards and scrapbook layouts and can be stored in one tidy box ready for when I need to make a quick card. Each time I finish creating I will whip up a couple of these to clear up my desk ( that’s the theory anyway!). These ones are actually going to America as a thankyou to a very lovely lady who sent me some beautiful things. I have a few more to make for her and a folder to file them in. I hope this inspires you all to use your stash! Til tomorrow….
Kaisercraft Limelight 5
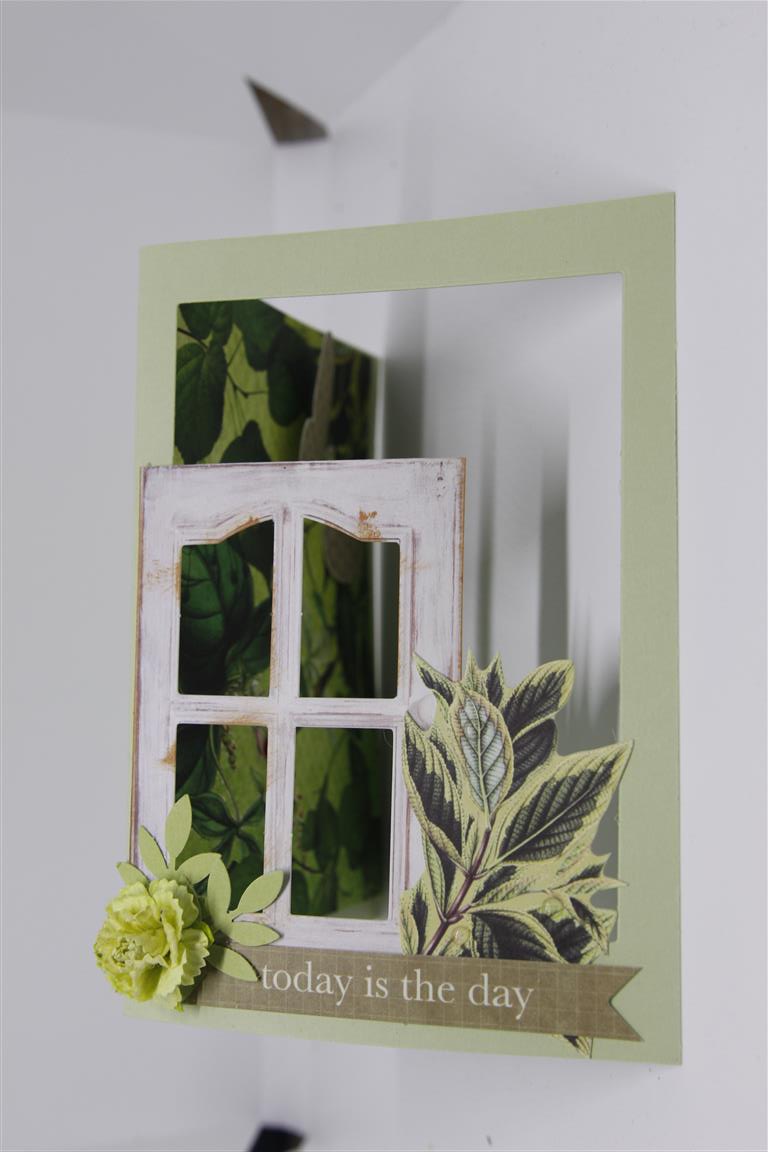
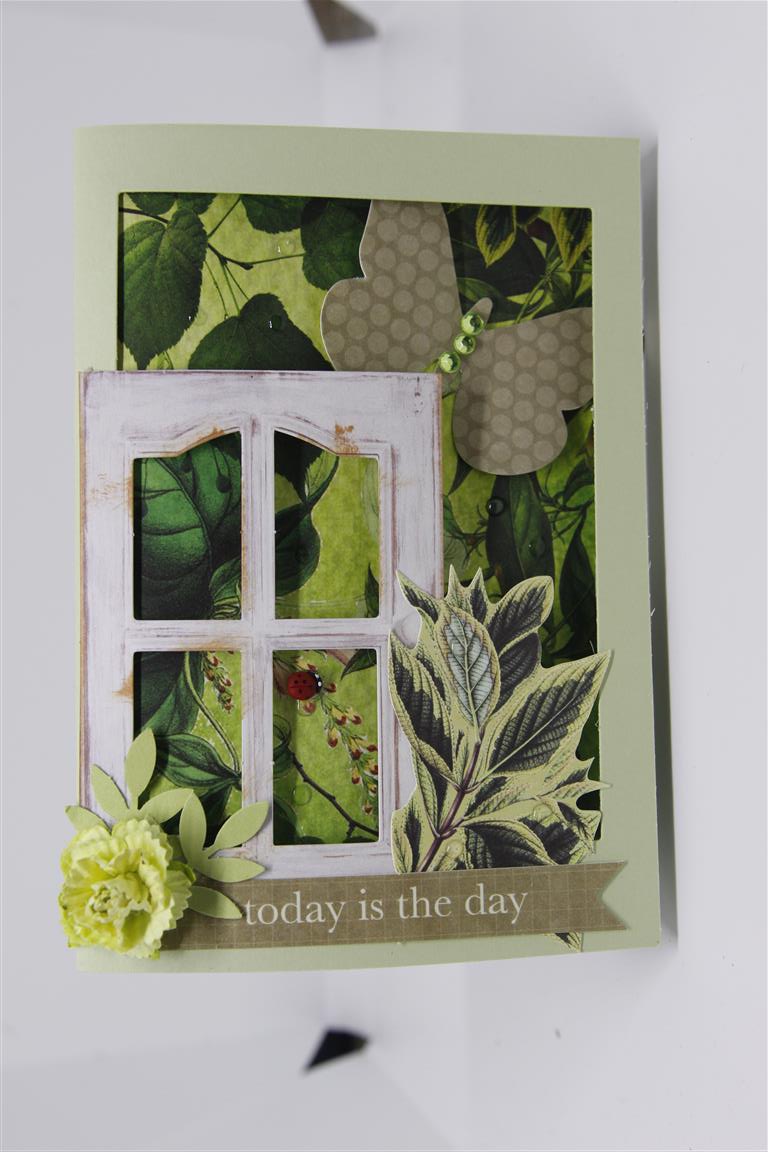 There are two photos of the same card today to show more closely the effect I achieved by die cutting a rectangle from the front of my card to create a window to the inside, so the top image is the open card and the lower image is the same card when closed. A lot of the bits and pieces on this card came from the collectables from the kaisercraft limelight collection, but I added a gorgeous pre- made carnation, some punched leaves,rhinestones and a cute little ladybird. Til tomorrow….
