
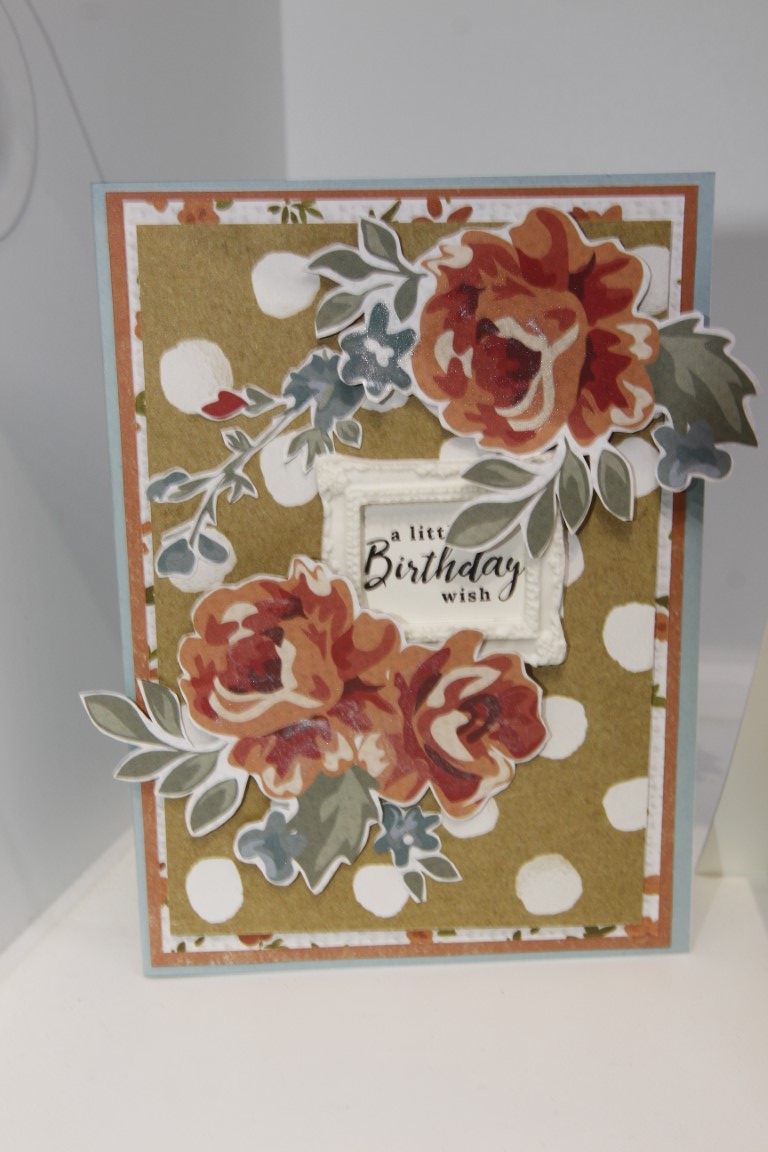
 During the great paper clean up I found just a scrap of a collection. It’s by Kaisercraft but I can’t remember the name of the collection, but I stopped my cleaning and made two quick cards just because I couldn’t bring myself to throw away the scraps. Lots of layers and a bit of fussy cutting, a handmade frame on the lower card and some perfect pearl drops on the top card. I hope you are all coping with isolation, I have had a cold this week so haven’t done very much. I’m feeling a bit better today, so I am heading into the kitchen to make a big pot of soup. Our local greengrocer is doing home deliveries and it’s the highlight of our week to get lovely fresh fruit and vegetables delivered to our door! Til next time, stay safe…..
Tag: flower
Uniquely Creative Urban Garden 3, 4 and 5….
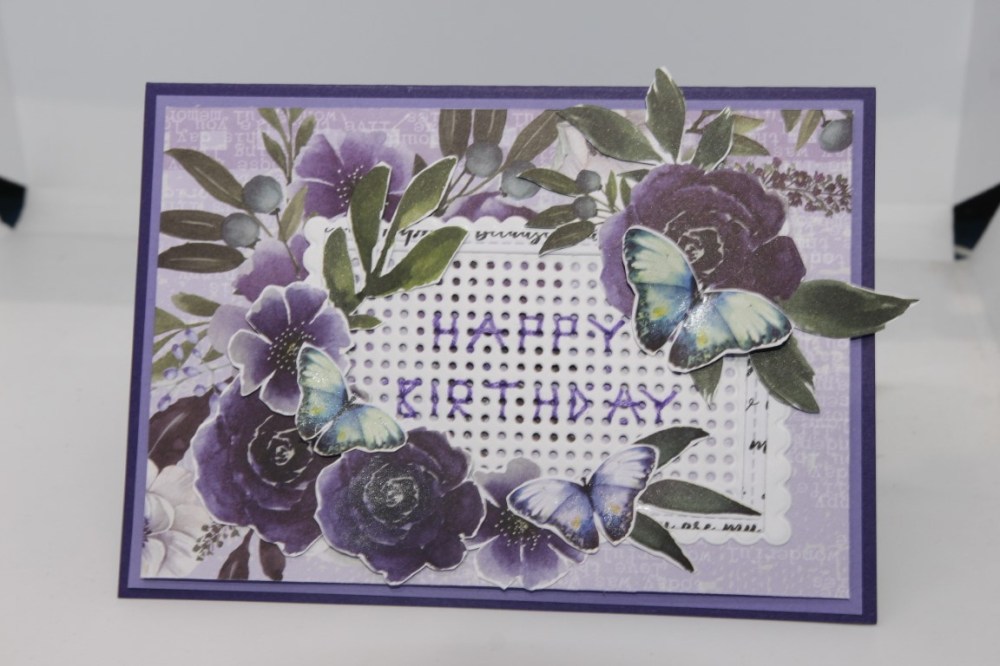
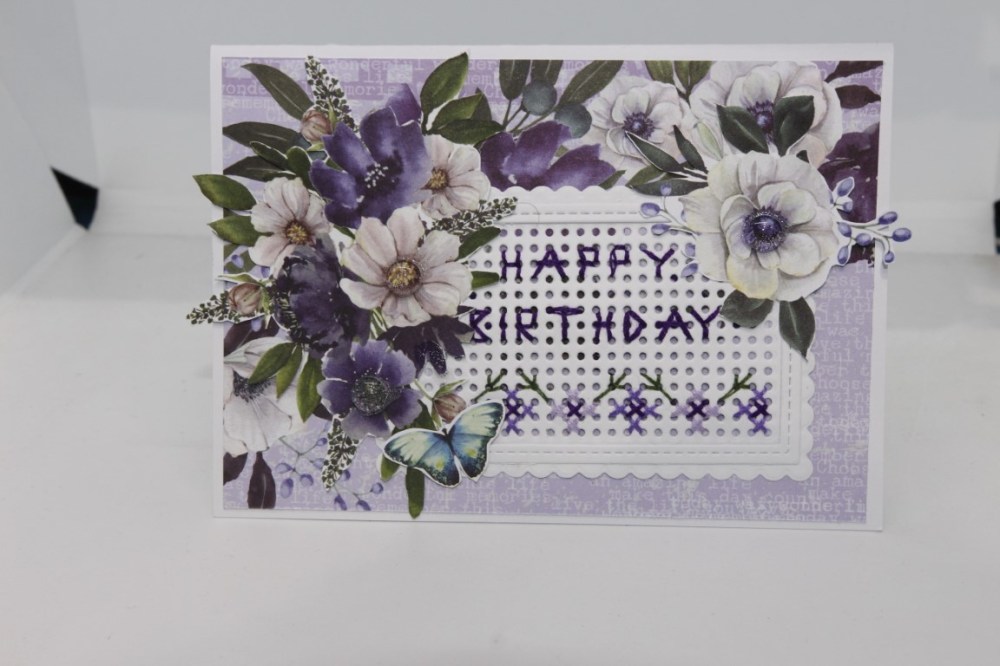
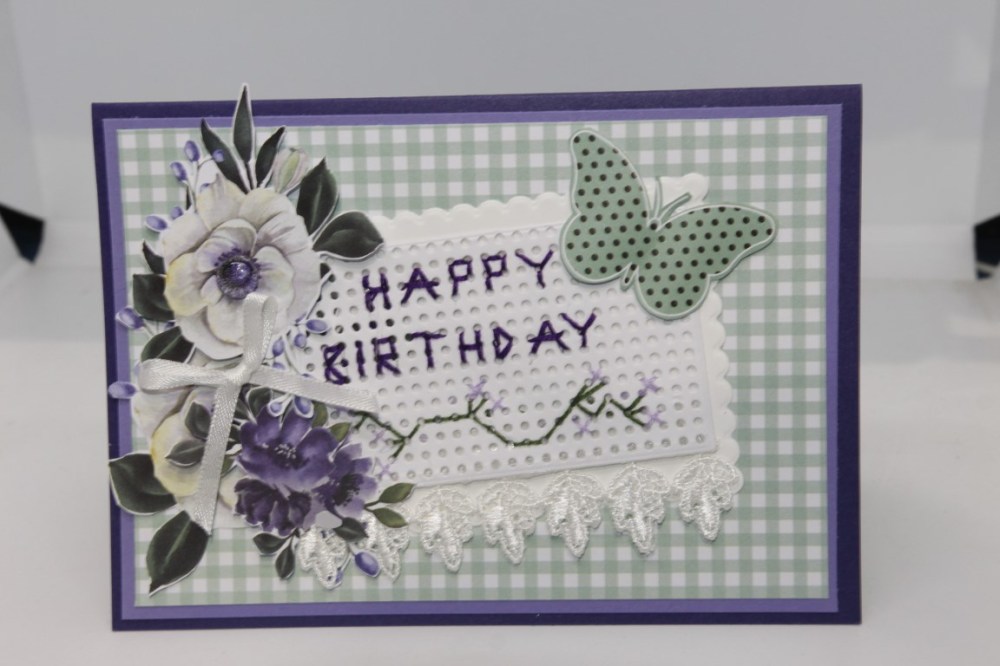 Today’s cards are thre more I made using Uniquely Creative Urban garden paper collection. There is a multitude of opportunities for fussy cutting with this collection and i took full advantage! I did a little layering with stampin up cardstock, and on the bottom card added a ribbon bow, some lace and a clear cabishon in the centre of the big flower. The die I used is a Uniquely Creative Stitching rectangle die, and I hand cross stitched the greetings on each card with some embroidery thread I had in my sewing box. I thoroughly enjoyed sitting sewing these as I watched tv, and will do that more often! The big clean up continues, in between organising our crafting get together and planning something big to share in a couple of months! Til next time…
More Graphic 45 Floral Shoppe..
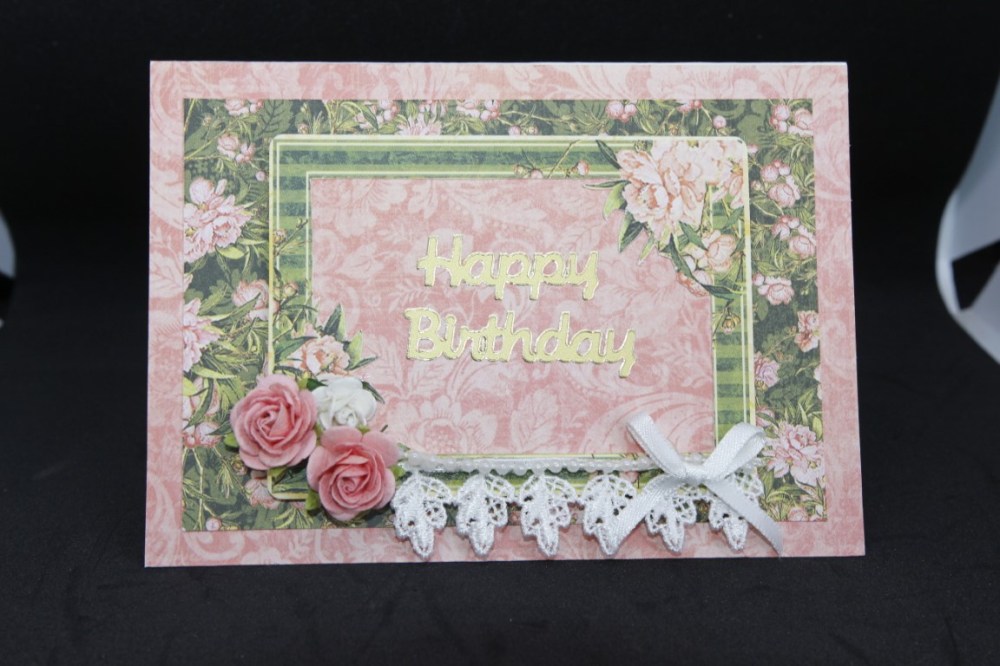
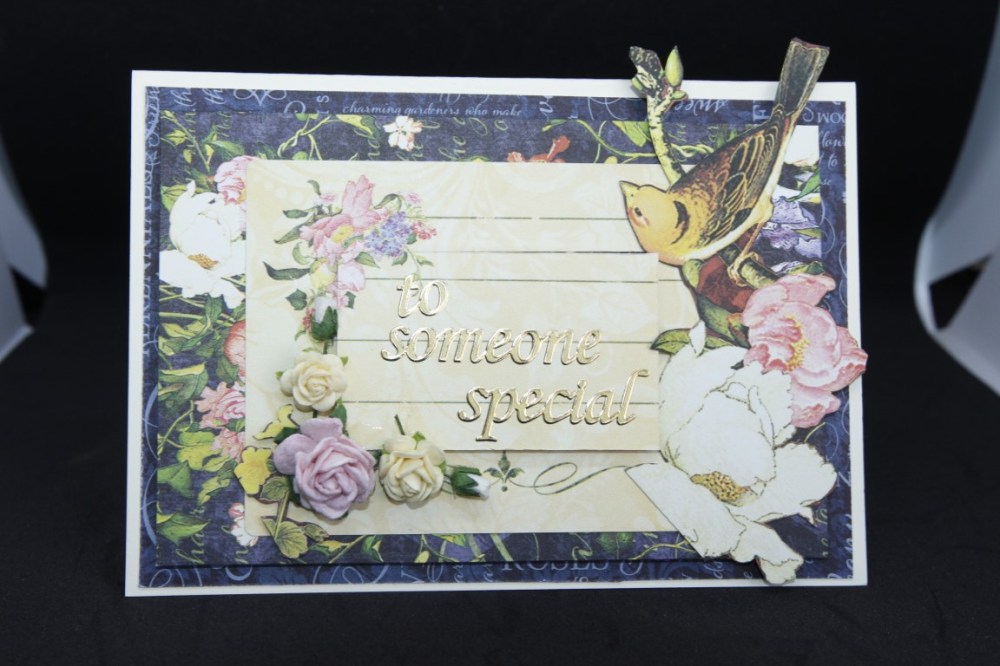 Two more pretty cards made with graphic 45 Floral shoppe, and the journalling cards that were brought out with this collection. I have done a little fussy cutting, some raising of elements with foam tape, and added lace, ribbon and flowers. This week has been a horrendously hot and humid week, no-one had energy for anything, so not a lot done in the way of crafting. The humidity gets into the paper and everything feels damp!This week is promising to be a little cooler so normal activities can resume!Til next time…..
Mintay Bloomville..final two…
 Here are my final two Mintay Bloomville cards ( for now anyway!). The top card is a very simple card that I taught to my retirement village ladies,and involves some embossing with a kaisercraft folder, and fussy cutting of assorted Mintay bloomville papers. The happy Birthday is a die. The second card is a double z fold card, with assorted Mintay Bloomville papers to decorate. This week the craft room clean up continues, with various stops along the way to play with unearthed treasures! Til next time…..
Uniquely creative Wise and Free..
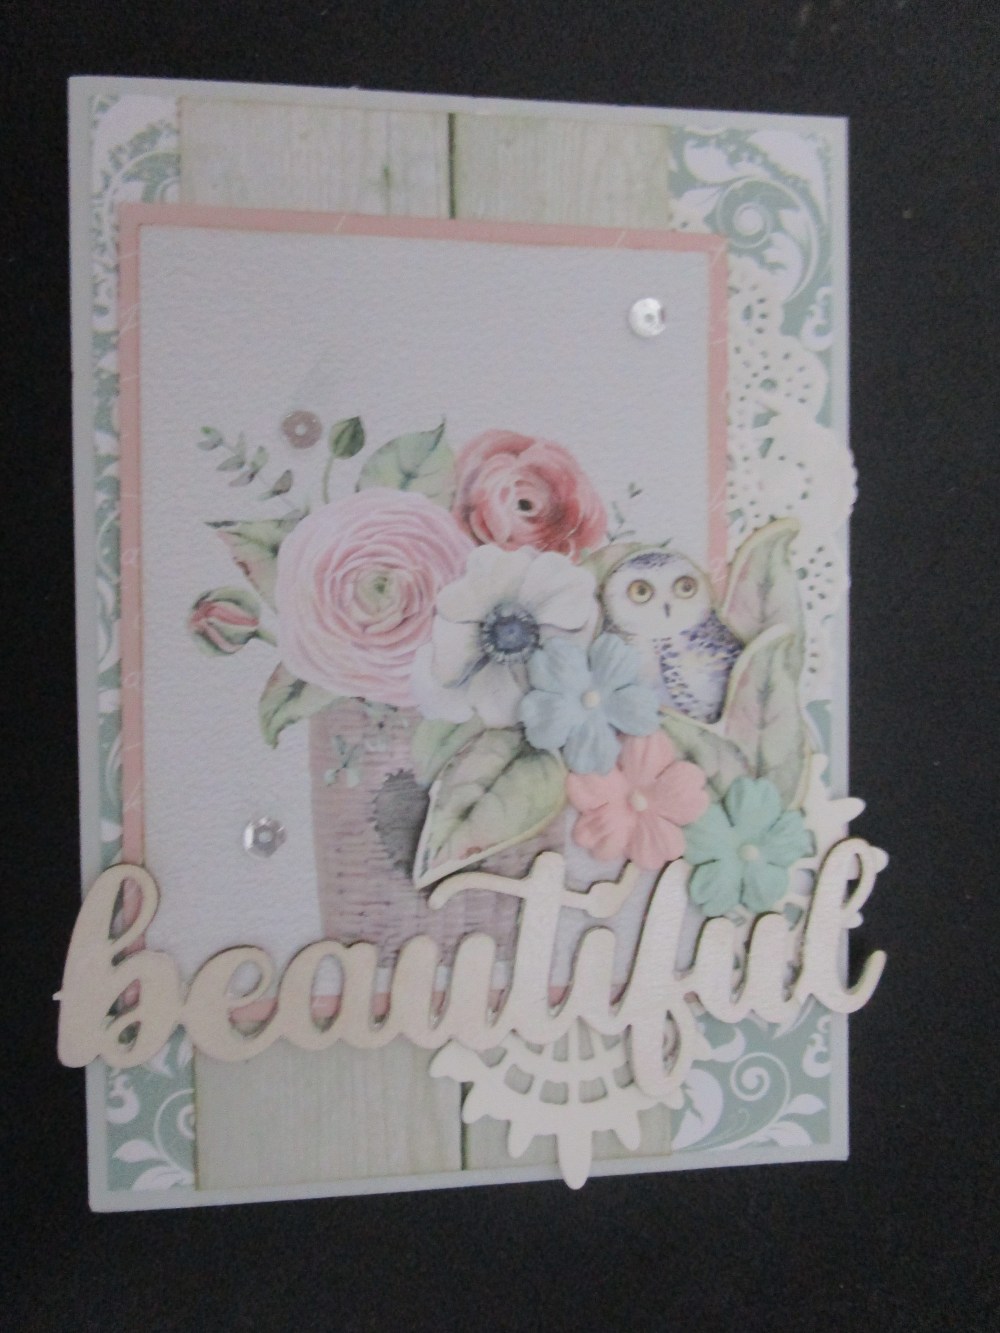
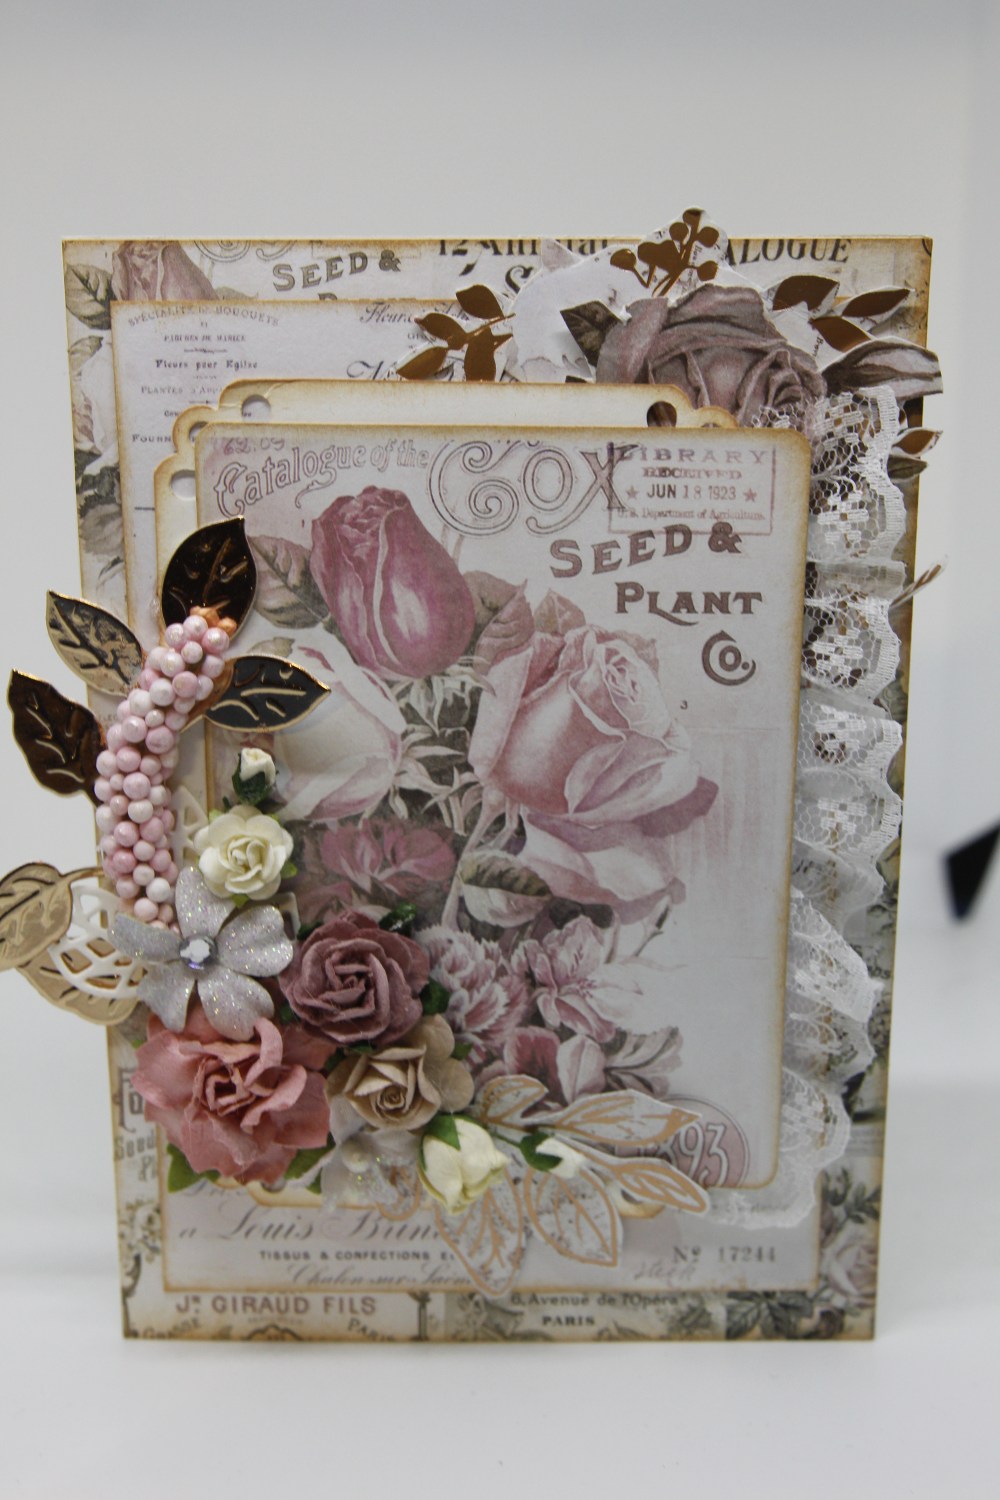
 Uniquely creative have been known for their dies and stamps, and now they are designing their own paper collections and they are amazing! This is their first one called Wise and Free. It is available as 12 x 12 papers, and there are matching Creative cuts which I used on these two cards. I added flowers, lace, ribbon, A uniquely Creative Doily Elements die, and actual doily, chipboard word and even sequins! Loved making these cards! I hope you all had a safe and happy Christmas, i had a lovely day with family, and am looking forward to relaxing today in the craft room until it gets too hot to be in there! Til next time….
Prima Georgia Blue
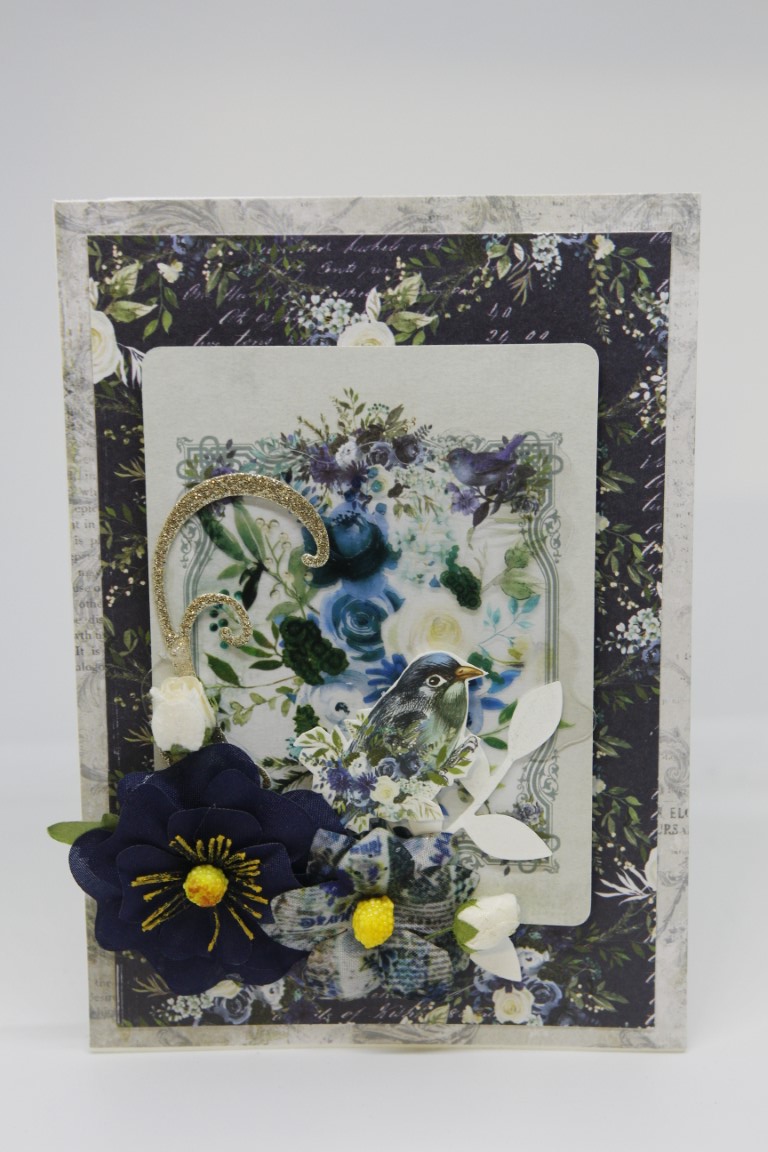 I quick post today, just to let you all know that I am still here! I have had a whirlwind of a couple of weeks, and I have finally retired! I have one more class next week, but essentially as from last weekend I am a lady who lunches! I have had so much fun spending my last two years working in the craft shop, but its time to concentrate on my own crafting. I am looking forward to creating more, and at the moment I am getting prepared for my stall at the local 3 day craft fair in June, and who knows I might be able to get back to more regular posts! On to today’s card… I bought all the Georgia Blue range from Prima, and this is one of the cards I have had time to create with it so far! I guess that will change now! The very bottom layer is actually some vellum that came in the flower packaging, and I have used a 3x 4 journalling card from the same range, along with emphemera, flowers, and a die cut glitter swirl. Til tomorrow…..
Stampin Up lovely Lattice..Watercolouring with re- inkers..
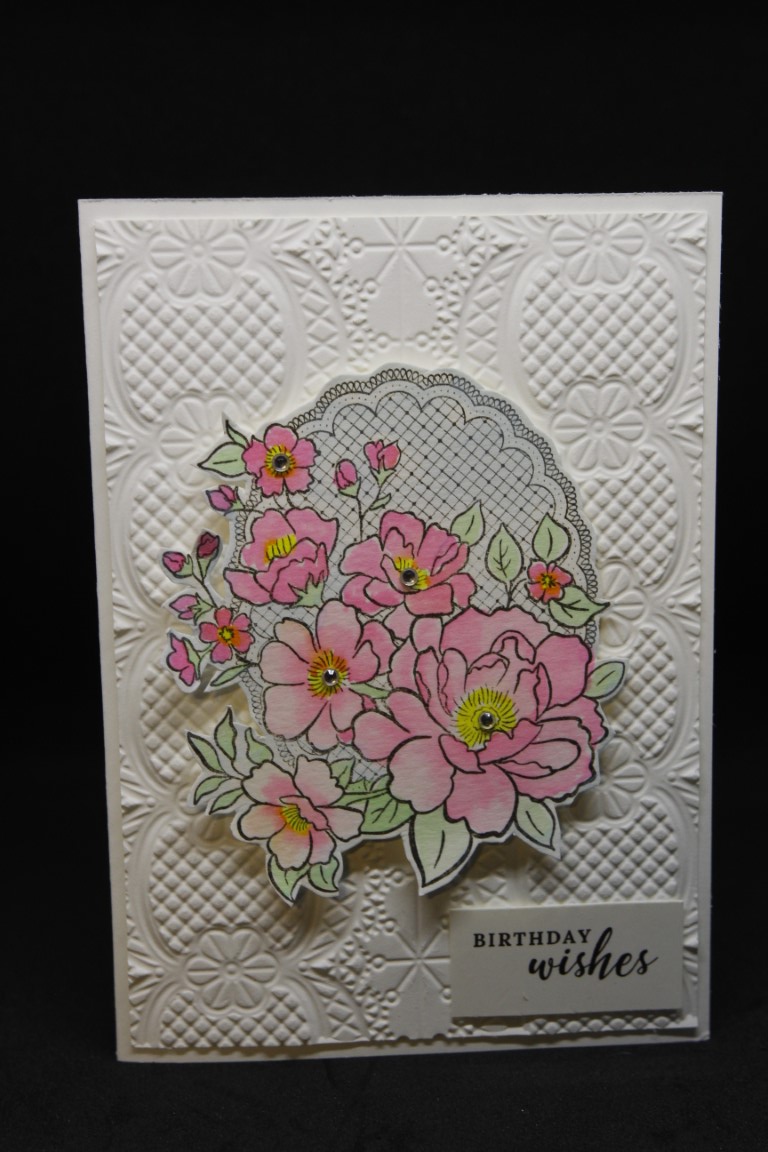
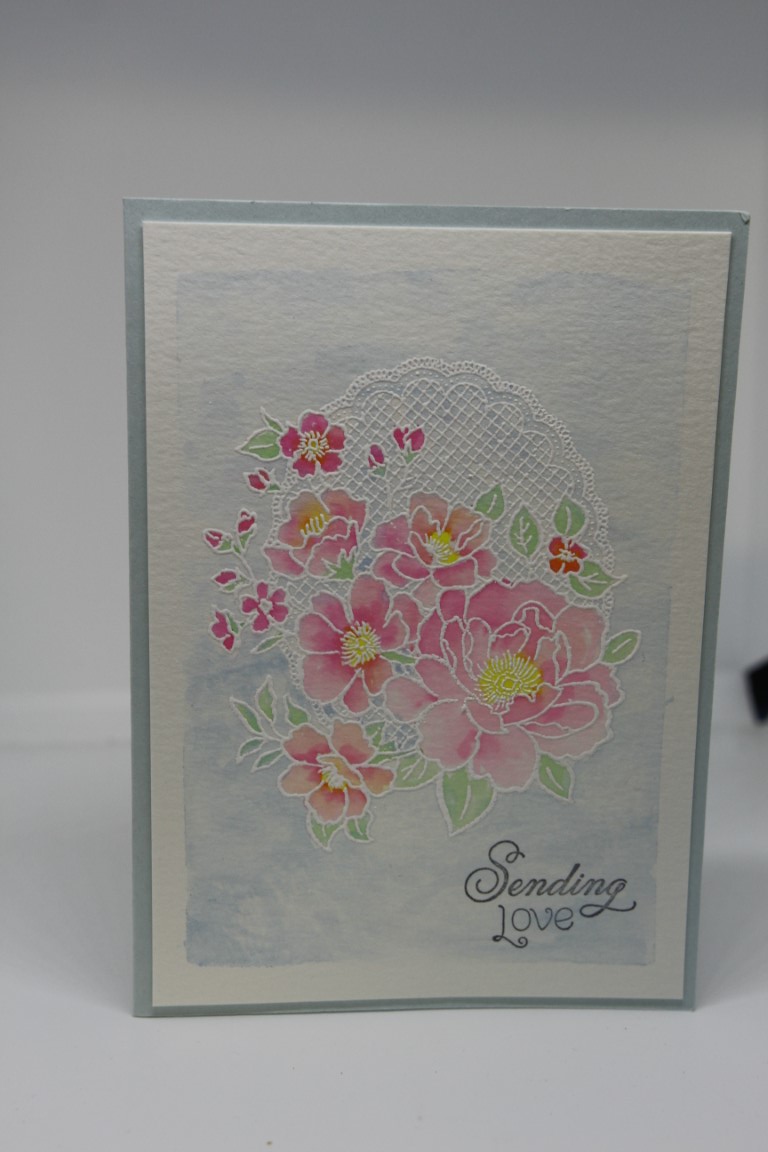 Today’s two cards focus on a stamp from Stampin Up called Lovely lattice. The top card has an embossed layer – the same Stampin up embossing folder as the card on the previous post ( Lace Dynamic Embossing folder) and I stamped the Lovely Lattice stamp on watercolour paper and coloured it with an aquabrush and re-inkers. For the lower card I stamped onto watercolour paper with versamark ink, and heat embossed with white embossing powder. Again I coloured with an aquabrush and re-inkers, also painting a very light wash over the background. If you want to know more about watercolouring with re-inkers check out my little clip on my you-tube channel – the link is over there on the right hand side of the page! I have been a bit time poor over the last couple of years, but I am retiring at the end of this week so will have more time to focus on my blog, and you-tube channel – exciting times!! til tomorrow…
Watercolouring with Ink..
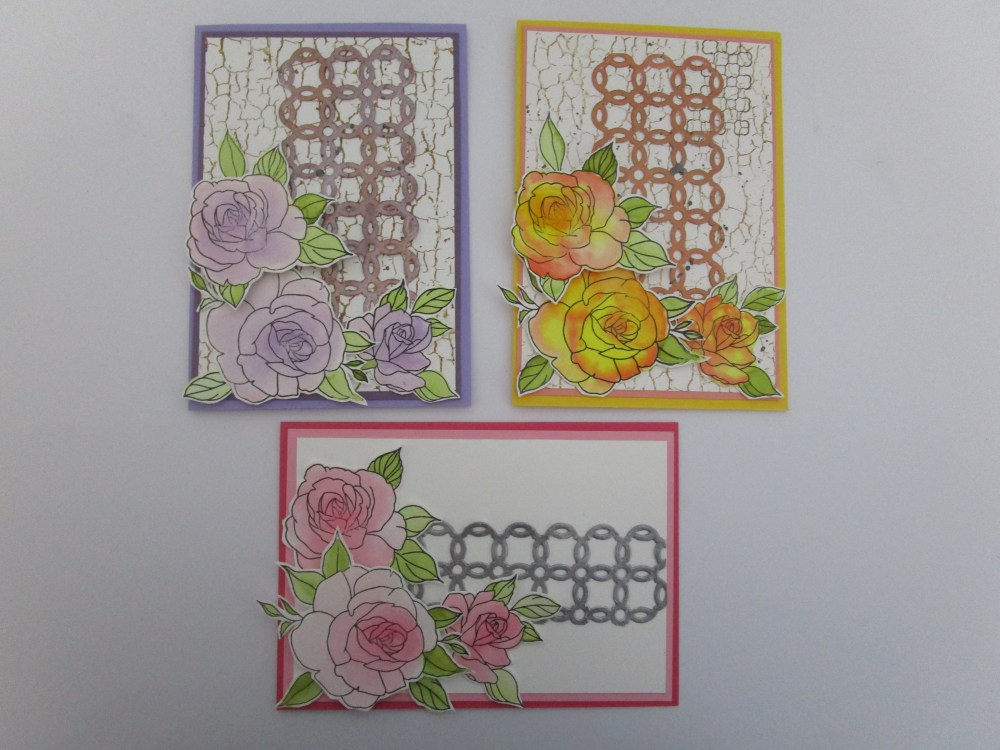 Last weekend after I had finished preparing all my May classes I had a little time to just create, and so I gathered my distress re-inkers, a pallette, paintbrush and my new stamp set ( Uniquely creative Flawed and fabulous),stamped out some images onto watercolour paper and just started painting. Of course it didn’t stop there . by the time I had coloured them all I knew exactly how these cards were going to go together! All my art work was fussy cut out, matching cardstock was found, and another new die and stamp ( both by stampin Up) were added to the table. The top two cards have the Stampin Up crackle background stamped in brown and I left the bottom card clean. The Stampin Up Trellis die was die cut with white cardstock and then I experimented. The bottom trellis is painted with prima alchemy silver paint, the top right is coloured with Nuvo mousse in rose gold, and the top left is coloured with Nuvo mousse bronze with a top smearing of platinum to lighten a little. The Nuvo mousse is best put on with your fingers! A great afternoon creating and I may even do something similar for a class.Til tomorrow….
Three more Prima Lavender Frost cards..
 Today I have three more cards made with the gorgeous lavender Frost paper collection from Prima. These were made with papers from the 6 x 6 pad, the 3 x 4 journaling cards, some of the matching flowers Prima released with this range,and few odd die cuts laying on my craft table.There is a metal finding on the lower card, some lace on the top card, and I did do a little fussy cutting from the papers! I love this paper, and as we speak I have some more cards in various stages on my craft desk waiting for finishing touches. I have also used it in a mega class I am doing in March at paper flourish. This week I picked up my Prima poetic rose paper collection, and have enjoyed some fussy cutting while watching TV in preparation for some cardmaking this afternoon. I am not sure if I will be back here before my cruise on thursday…depends how the packing goes, but if I don’t get back I will see you all in two weeks! Til then …..
Book Cards..Shabby Chic style..
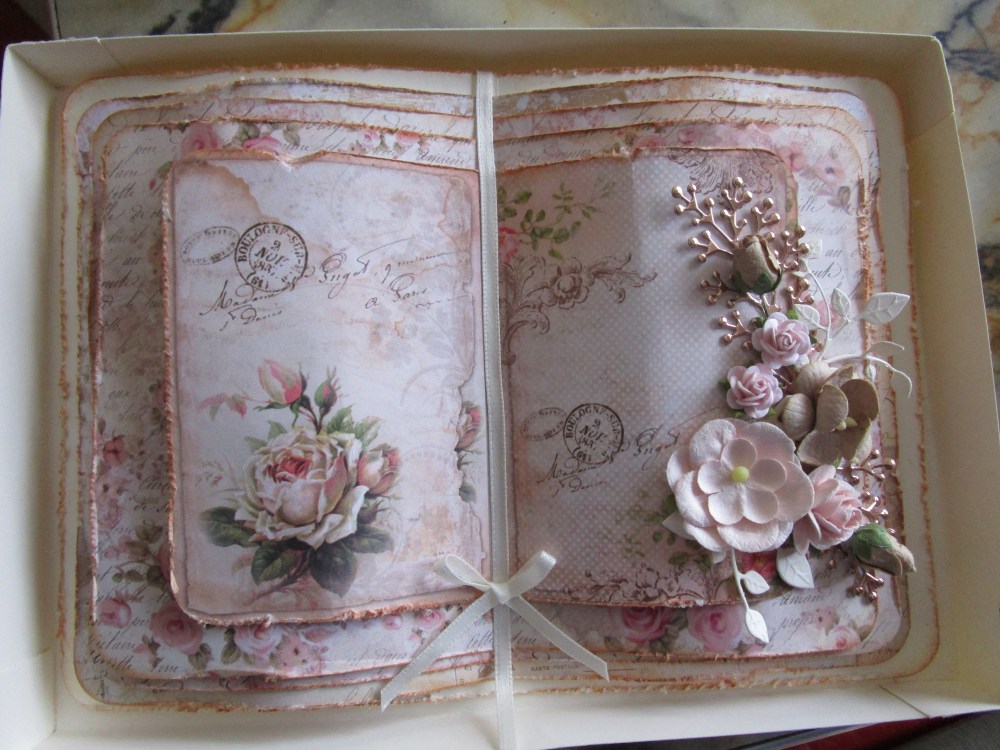
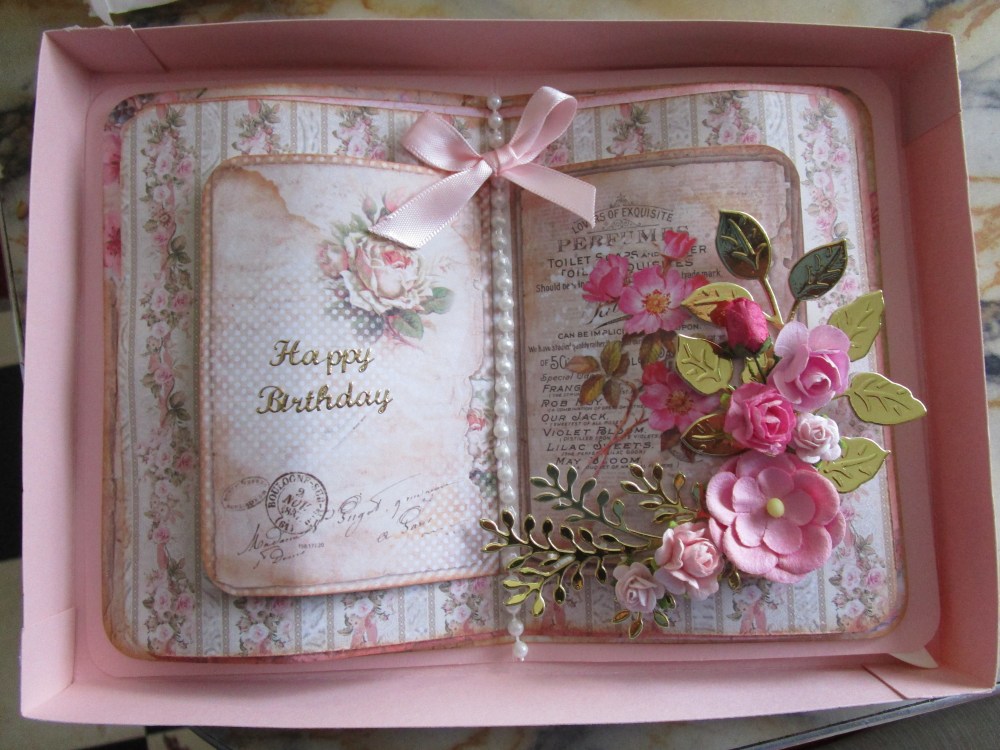
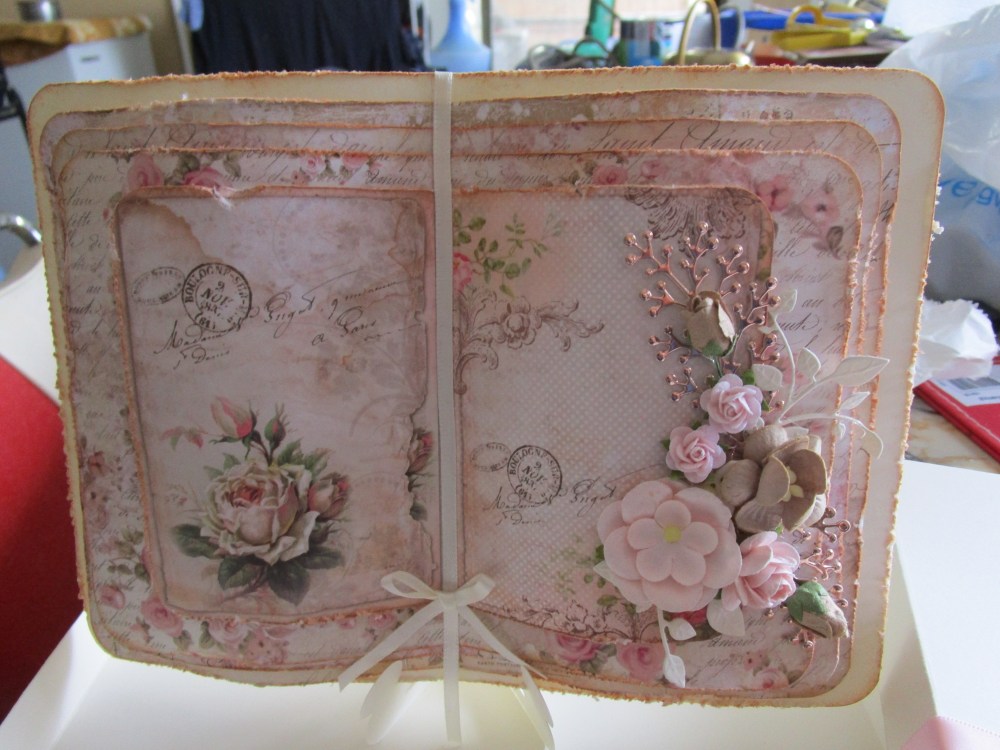 This week I have been making book cards. These are my new favourite thing to make ,but a word of warning …they use a lot of paper! I didn’t come up with this design, although I did modify it a little bit, one of our talented teachers at paper Flourish taught something similar this week to a group of ladies. I have also made boxes to pop the finished product in and decorated the box as well, and I have included in the box a die cut card stand to stand the book up on for display. now to the nitty gritty… there are 5 layers of card and paper, the bottom layer the card and then 4 layers of papers, getting smaller by a centimetre for each layer. I have done them in a shabby chic style so I distressed and inked all my edges with tea dye distress ink, once the papers are cut and inked I folded them in the centre and then bowed out the pages to curl them. I stuck the layers through the centre fold and put 3d mounting foam on the page edges . It was then just a matter of decoration with ribbon, flowers and various die cutting of leaves and flourishes!. The papers I have used here are from two companies – I have just discovered them and their papers are gorgeous so you will see more of them on my blog. they are Lemoncraft ( the papers here were from their range House of Roses, ) and Stamperia. The bottom photo gives you a better idea of the card upright. For now I am off to teach a retirement village calss, til tomorrow….
