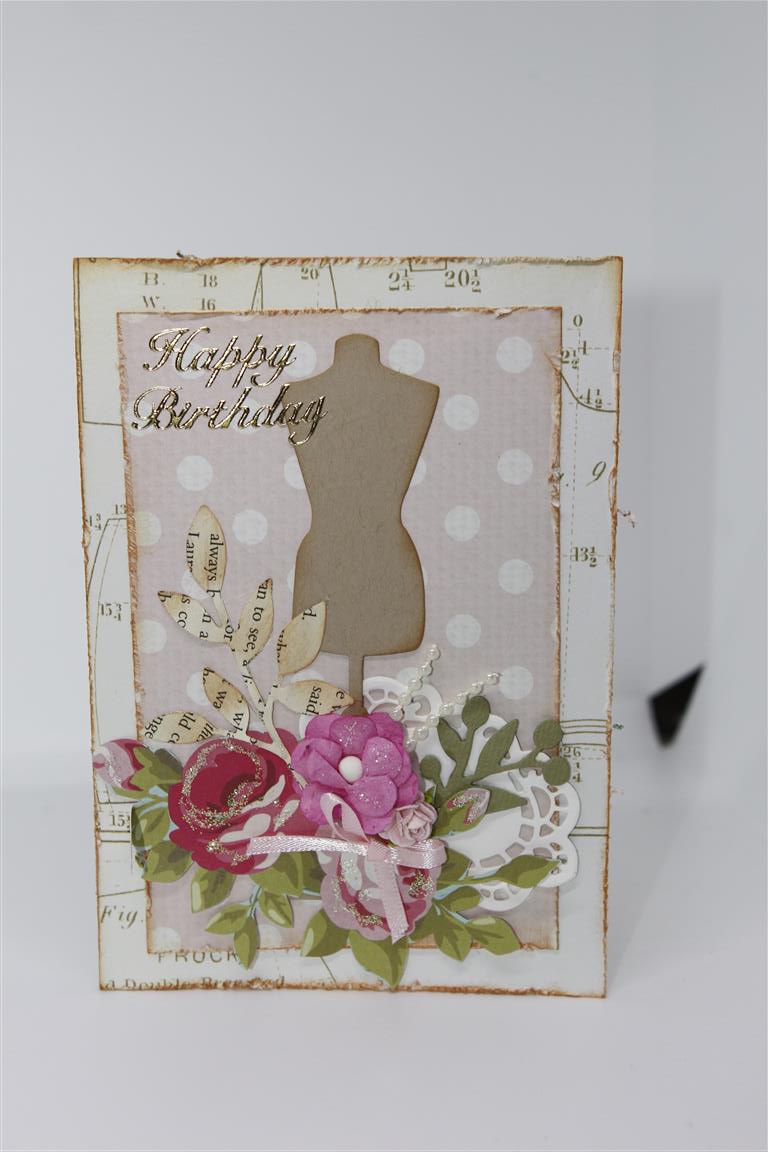
 I have managed to find a little time to play with Kaisercraft Miss Betty. This is my favourite kind of paper, it has a vintage shabby kind of look and I can go to town using my ribbons and lace! For todays card I distressed all of my edges ( 12 x 12 papers) and inked them with tea dye distress ink. I did some die cutting, including a lovely leaf die which I used on an old book page, and inked with more tea dye ink, and added some of the collectables from the same range , extra flowers, pearl strip, and a ribbon bow.Til tomorrow…..
Tag: shabby chic
Couture creations C’est la vie (3)
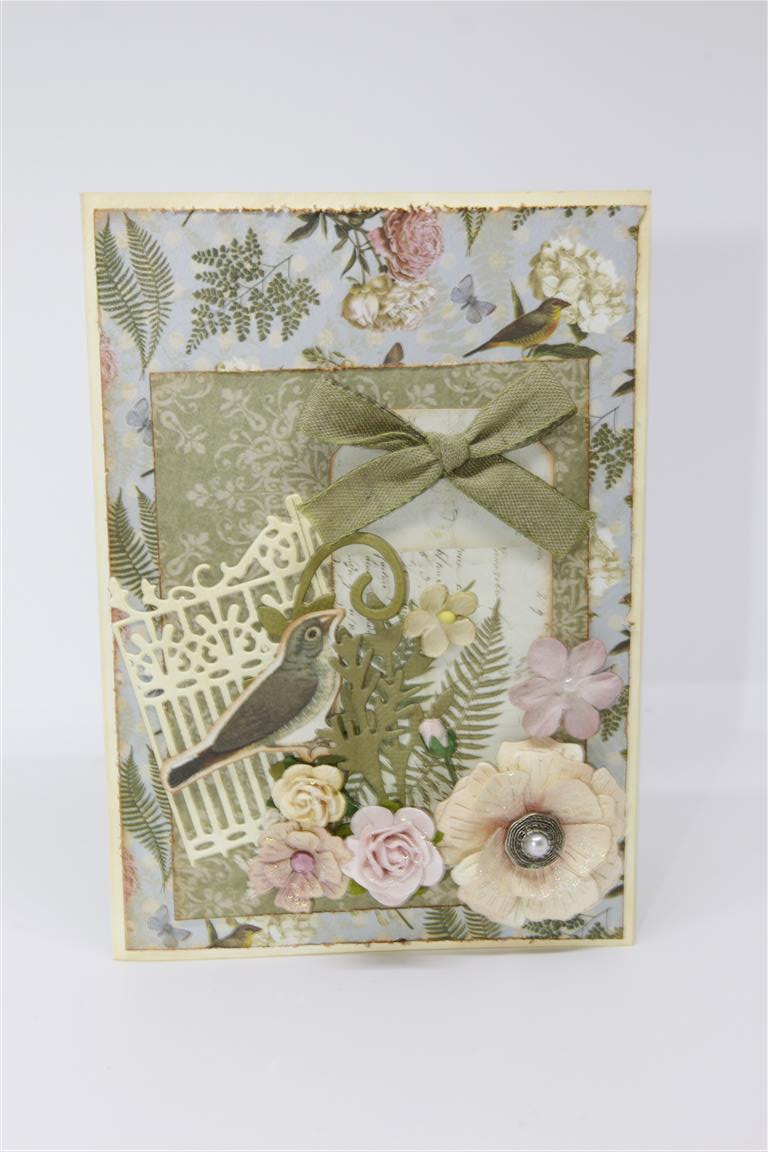 Today we are having a look at another card i made with Couture Creations paper collection, matching collectables and a couple of the dies from the same collection. I love the gate die which I tucked behind the tag, and the layered flower die is fantastic. I die cut it from cream cardstock and lightly coloured the layers with victorian velvet distress ink. the brad in the centre is a stampin up vintage brad. I have assorted greenery die cut with a kaisercraft die. I inked all my edges with Tea dye distress ink. Quick post today as I have just got home from work and have tea to organise! til tomorrow…..
Couture Creations C’est la Vie..(2)
 Along with the C’est la Vie paper collection, Couture creations brought out dies and embossing folders under the same collection.The handmade flower with the Stampin up brad in the centre on this card is made with one of these dies. I coloured it with distress inks and a sponge, and brushed it ( as well as the other flowers) with a little Nuvo glitter paste. The die cut greenery is done with a kaisercraft die,and I added ribbon, lace and a butterfly ( from the bits and pieces pack from the same range). All the papers are inked with tea dye distress ink. This morning i have set up in the dining room..I am experimenting with foamarin and my Go Press and foil machine to make my own foam flowers, which will translate into a technique lesson at paper flourish if all goes well! Til tomorrow…..
Kaisercraft Romantique 3 …Another Shabby!
 As you can see, the more I worked with this collection ( kaisercraft Romantique) the more I embraced the shabby! I distressed, ripped and rolled and enjoyed it so much …this card is going to be a lesson this month at Paper Flourish where I hope to inspire others to put down their scissors and use their fingers! All my edges are inked with Tea dye distress ink,and the top butterfly is from the collectables pack and the bottom butterfly is from the acetate sheet that kaisercraft brought out with the collection.Most of the flowers are by Prima, and all the leaves are various dies by Sue Wilson creative expressions. I used a flower tool die to encourage some lift and shape before inking them with my tea dye ink. Today is very very hot here and not good in the craft room.. my glue does not like this extreme heat so it is an ideal day to pack the cruise card classes suitcases and make sure I have everything I need. Finally I can say next month I am cruising! Til tomorrow…..
Kaisercraft Romantique number 2…
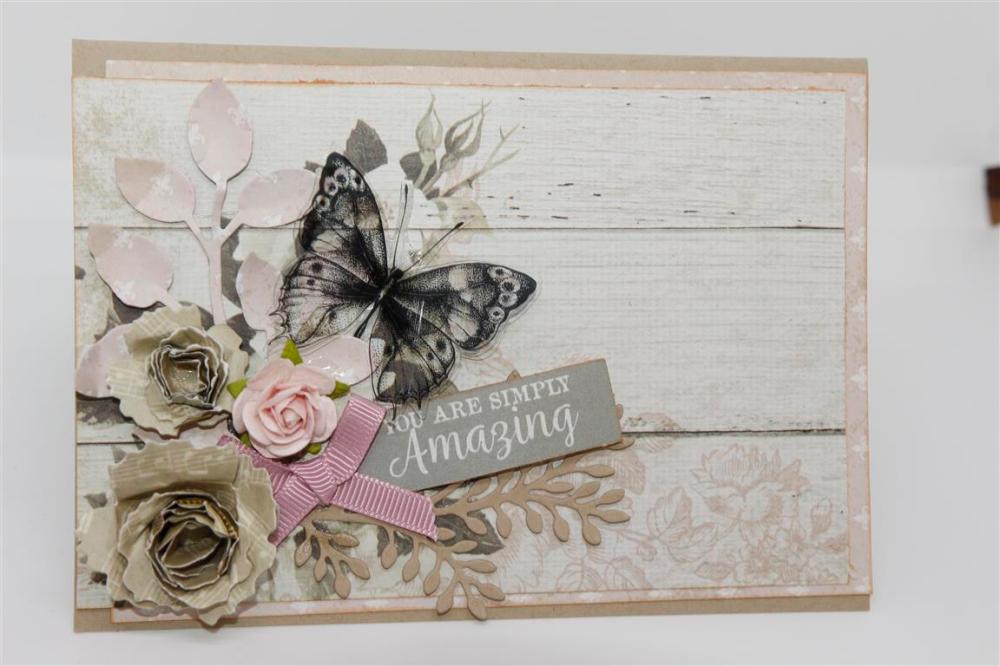 Kaisercraft Romantique paper collection again today, and this card and tomorrows card were the base beginnings of my class at at paper flourish this month which I have called (Not so) Shabby Chic. I have used a kraft base card, and layered some of the papers from the collection, and used a Uniquely creative rolled flower die, creative expressions leaf dies, a bought flower and a bow to decorate. the gorgeous acetate butterfly was fussy cut from a whole sheet of lovely butterflies that was brought out with this collection.The sentiment is from the matching 6″ pad. Happy and safe New Year to all my followers and visitors and I will see you all next year!!
Kaisercraft Romantique…shabby..
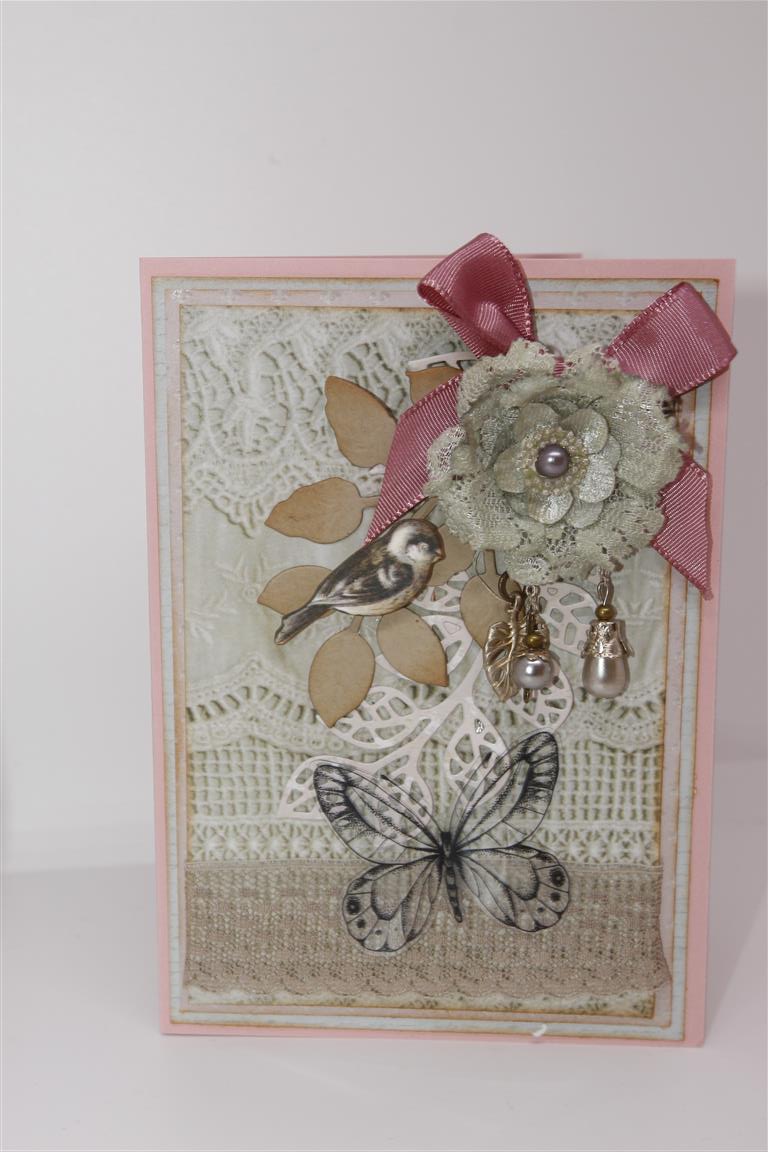 I really haven’t had the time to play with this collection, but I have made a few for you to see. It’s the Kaisercraft Romantique collection and it lends itself beautifully to the whole Shabby Chic style, a style I will embrace once I get over the whole ripping my paper hang up I have!Here, I have layered a few of the 12 x 12 patterned papers, and fussy cut an acetate butterfly – in this collection there is a whole sheet of these butterflies and I love them! The leaves are die cut with creative expressions dies, and I inked around every edge with Tea Dye distress ink. I tied a big bow and on top of that I glued a Prima flower with dangly bits that I have been holding onto for ages! The top layer of patterned paper has a lacey print but at the bottom of it I added my own lace in a taupe colour ( Stampin Up lace). I hope everyone had a lovely Christmas break, with family and friends, I can’t believe that’s Christmas over for another year! we still have our son home for another few days before he flys back to Sydney next week so the celebrations continue on here ! Til tomorrow….
Not so shabby….
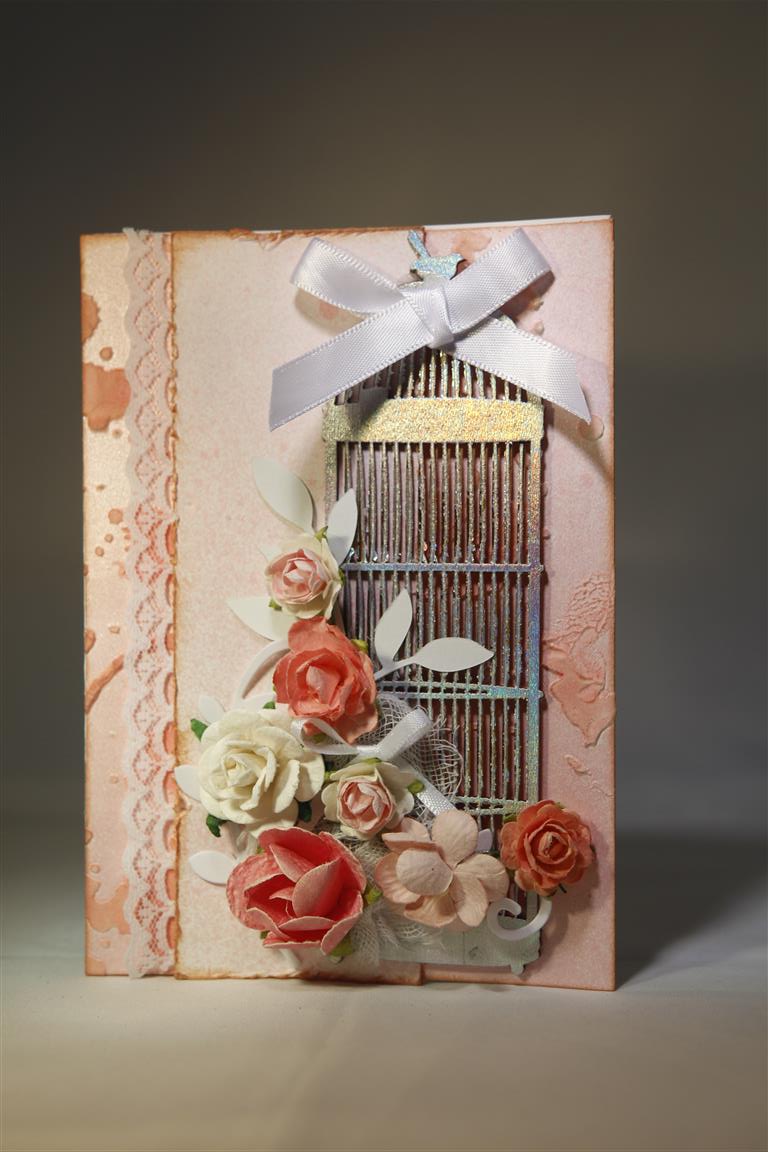
On the previous post I explained how I made the background paper, and I used an A4 piece of cardstock. This actually gave me enough shabby cardstock to make a second card. For this one I foiled a chipboard birdcage, layered a piece of lace under one of the layers, inked around everything with distress tea dye ink, and then just layered up the flowers, gauze ( from the chemist) die cut leaves ( memory box loralai leaf branch) and ribbon bows. The weather here has been lovely…we even saw some sunshine for a brief time but it has turned cold again today, so this afternoon I am s5taying put in the lounge room, sorting out my dies into a more manageable system of storage and ability to find! Til tomorrow….
Shabby Chic..Helen style!
 Before I start this morning I just want to let my American followers know I am thinking of them all, the ones in the East who are battling with Fire, and the ones down south who are battling with the aftermath of one Hurricane and bracing for more…my thoughts are with you all.
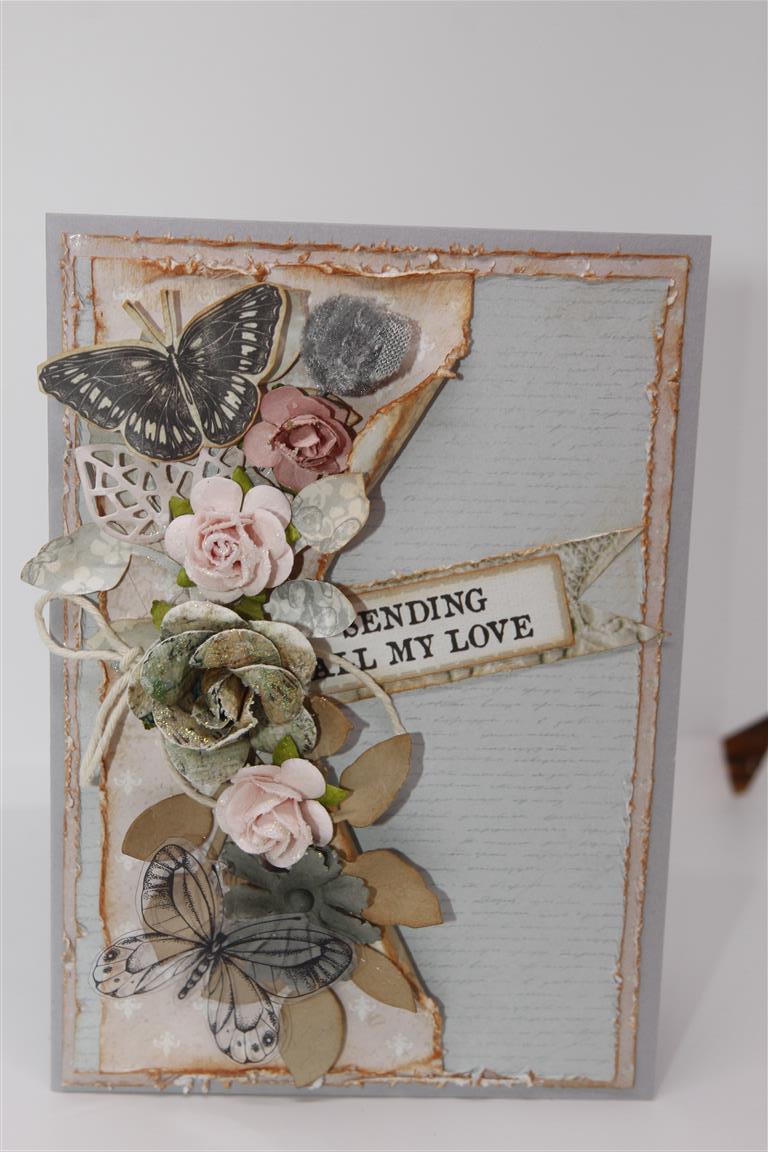
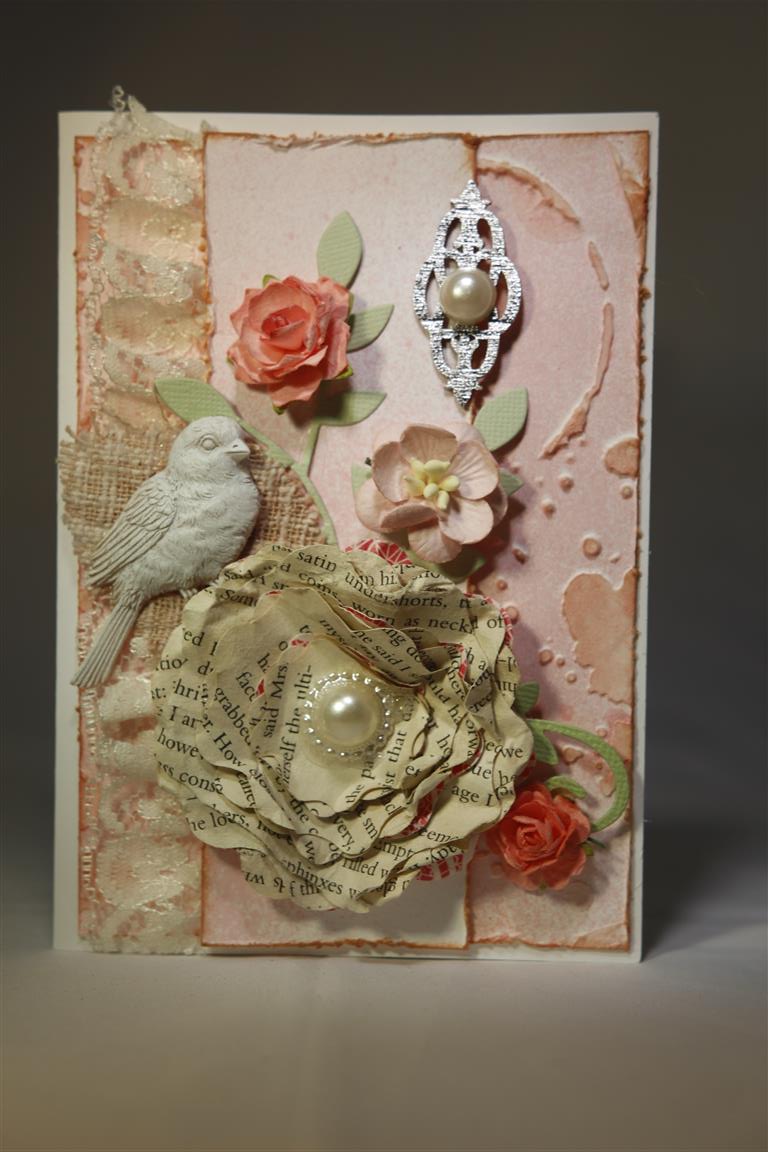
I am determined to master Shabby Chic. I love shabby, but I am struggling to get to the point where I can say I have succeeded, but I will continue to practise, and show you my progress. This card has a lot of product but a lot of it was put together with bits and pieces left on my work table from other projects so i didn’t prepare anything new for this project except for the background layer which was a piece of A4 white cardstock. I painted it with a light watered down layer of Gesso,and used a texture template to add some Liquitex Light modelling paste. When that was dry I tapped some tea dye distress ink over the raised bits and sprayed randomly over the whole piece with Prima Color Bloom Cotton candy spray mist. All that remained for this step was to cut to size, distress all the edges and ink with more tea dye distress ink and attach to the card front. decorating…. a strip of lace under one of the layers, a Prima Bird, a flower made with sizzix bigz 3d flower die and old book pages, memory box Lorelai leaves die,kaisercraft wooden flourish foiled in silver, pearls , Prima hessian leaf,and flowers. Til tomorrow…..
All is Bright 3 and 4
 A little bit vintage, a little bit shabby – My Minds Eye All is Bright paper and matching brad and stickers. I did these 6″ square because I couldn’t bear to cut down these gorgeous papers.I added some seam binding, bakers twine and a big flower I found in my “bits” box.The cardstock used was Stampin Up crumbcake and Cherry Cobbler.I spent a lovely morning at paper Flourish working on my November lessons, and this afternoon I have just been playing around with some new bits and pieces – not really making anything – just seeing what happens when I don’t have a plan – not a lot it seems! Til tomorrow….
