 Before I went on Holidays I had an order for 6 Great grand daughter cards, so I thought I would show you all 3 of them…the main embellishment on all of them are images from a 3d sheet which I fussy cut and layered up, and used corresponding colours to complete. All the papers used were just scraps from my stash, and I had to print out the great grand daughter on my printer as I have no stamps or stickers for great grand daughter! It’s a lovely day here, I have been sitting in the garden, but now I am off to the craft room to do some tidying up..til tomorrow….
Tag: ideas for female birthday cards
Another Pleating technique
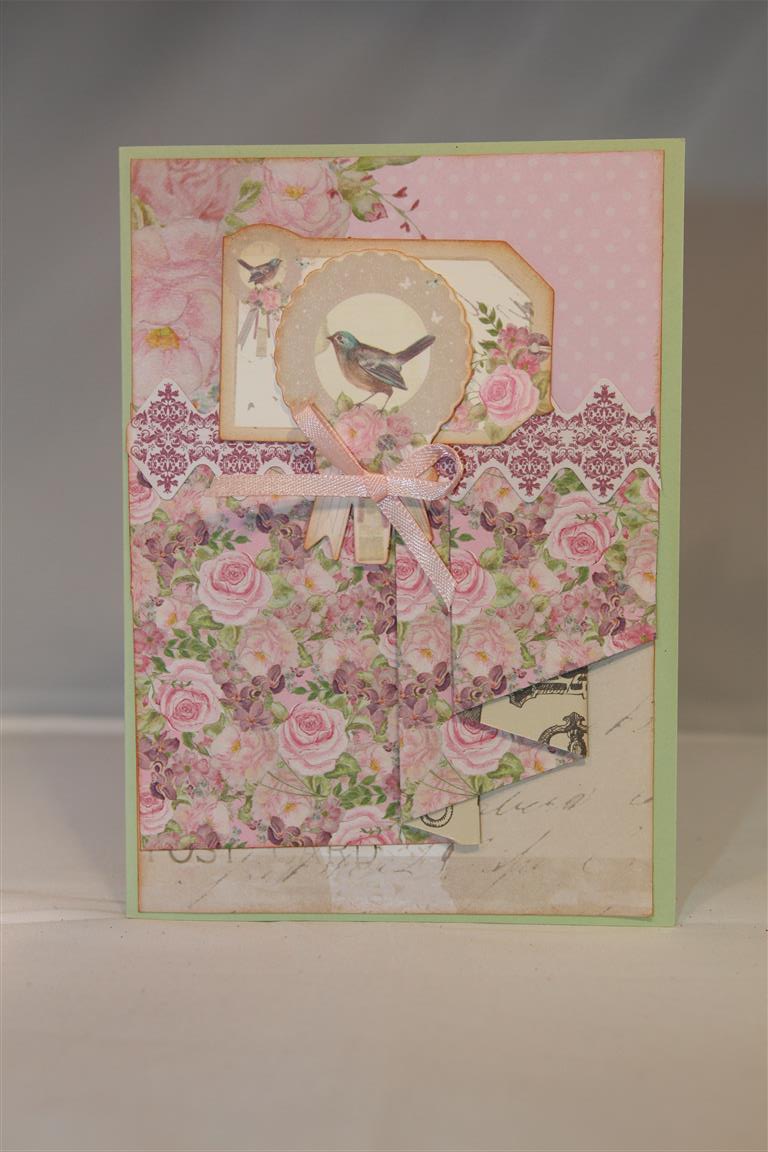
 After mastering the previous pleating technique, I stepped it up and tried aone that was a little more difficult. Lots of measuring on this one, but well worth the effort for the finished product.I am just hoping as I sit here that i have filed away the measurements! As the paper I used was so close to the background layer I inked the edges of the pleats to define it a little bit.The flowers I added were from Kaisercraft and i added a punched leaf and a ribbon bow to finish.The paper collection is Kaisercraft True Romance, and older release ,but one of my favourites.I have a really sore shoulder today, and not much use of my right arm, so I think the craft room is out of the question this weekend,looks like a reading weekend for relaxation! Til tomorrow…
Kaisercraft True Romance pleating fun..
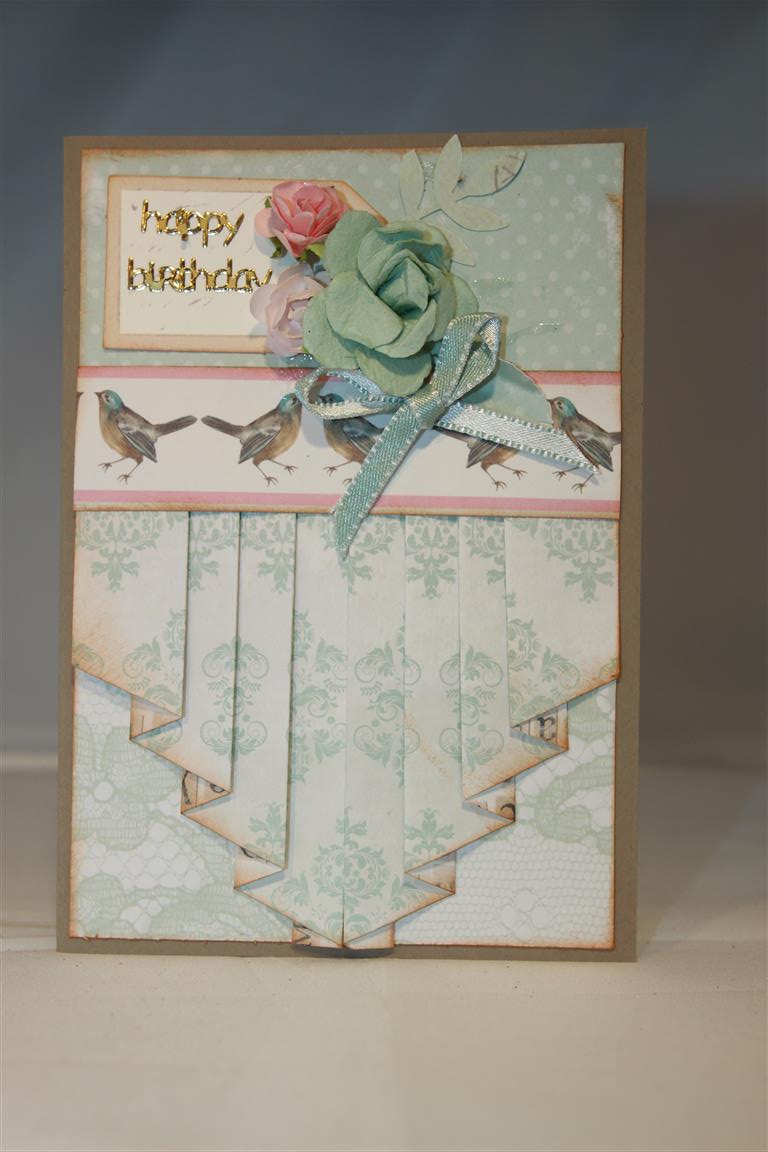
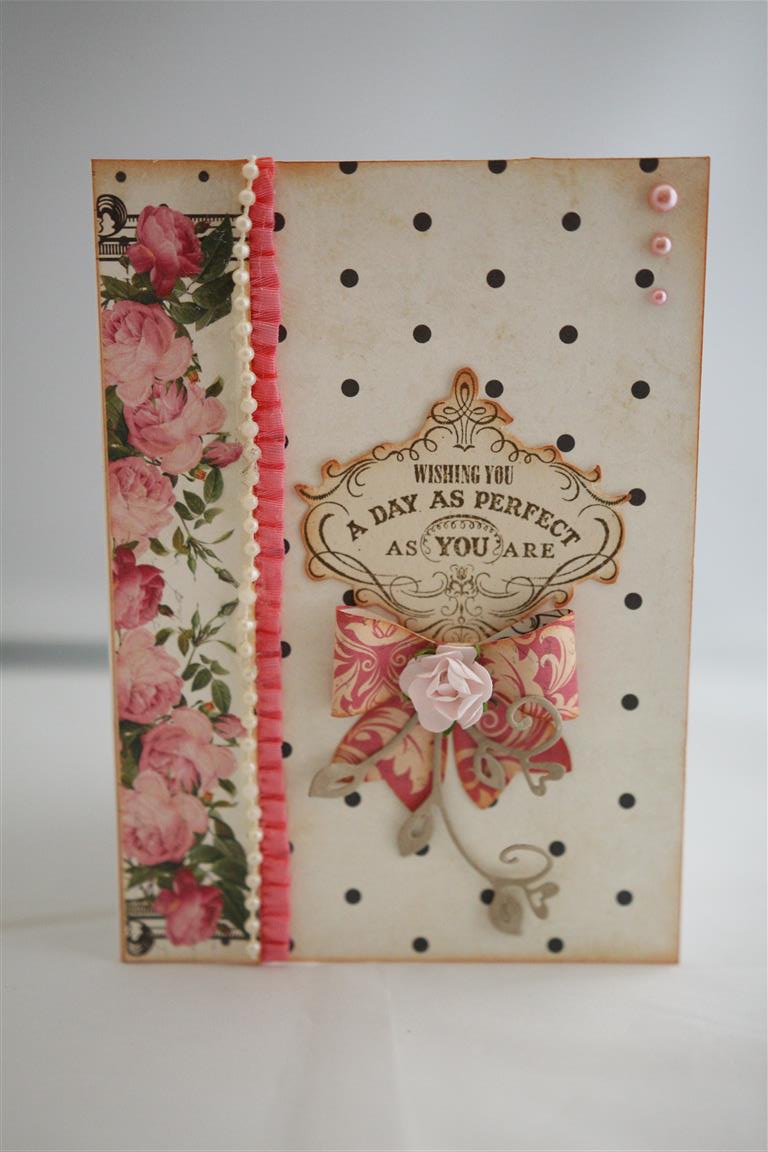
 I wanted to explore a little bit with pleating techniques, and Kaisercraft true Romance papers were perfect for this technique as the front and backs of the papers are so pretty!I started with a card base made with Stampin Up cardstock, layered two pieces of paper on top of that. A sticker from the same collection covered the join after i had added my pleated piece of paper. A bit of measuring was involved here, but now that i have worked out the measurements any more card I make like this will be easier. Use a piece of copy paper while you are experimenting to save your lovely papers!.A bow and tag finished todays card. Til tomorrow….
found another Belle Vie card!
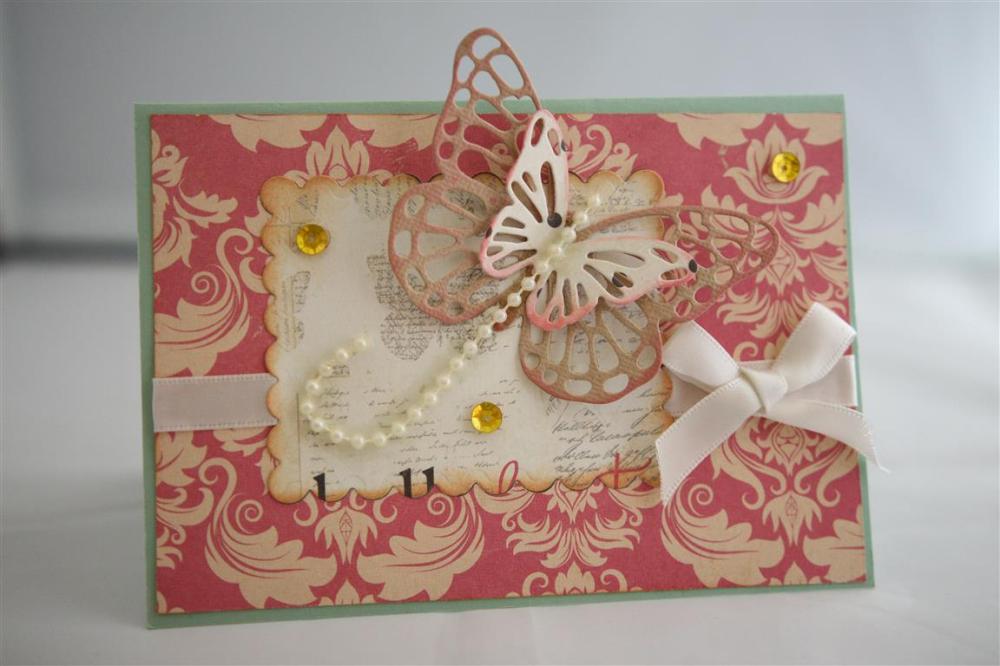 Oops! I was all ready to move on to some christmas cards when I found one more card made with Julie Nutting Belle Vie paper (I only purchased 2 papers from this collection)This actually was the last one I made using up the last of the paper.I die cut a scalloped rectangle , and 2 butterflies,inked everything,and added the last of my bead string ( I have bought some more – Kaisercraft make it now, but the length that I have been using came off the dress of a vintage doll)ribbon,bow and sequins to decorate.Early finish from work today, so a bit of time to put my feet up! til tomorrow….
The last three Belle Vie cards
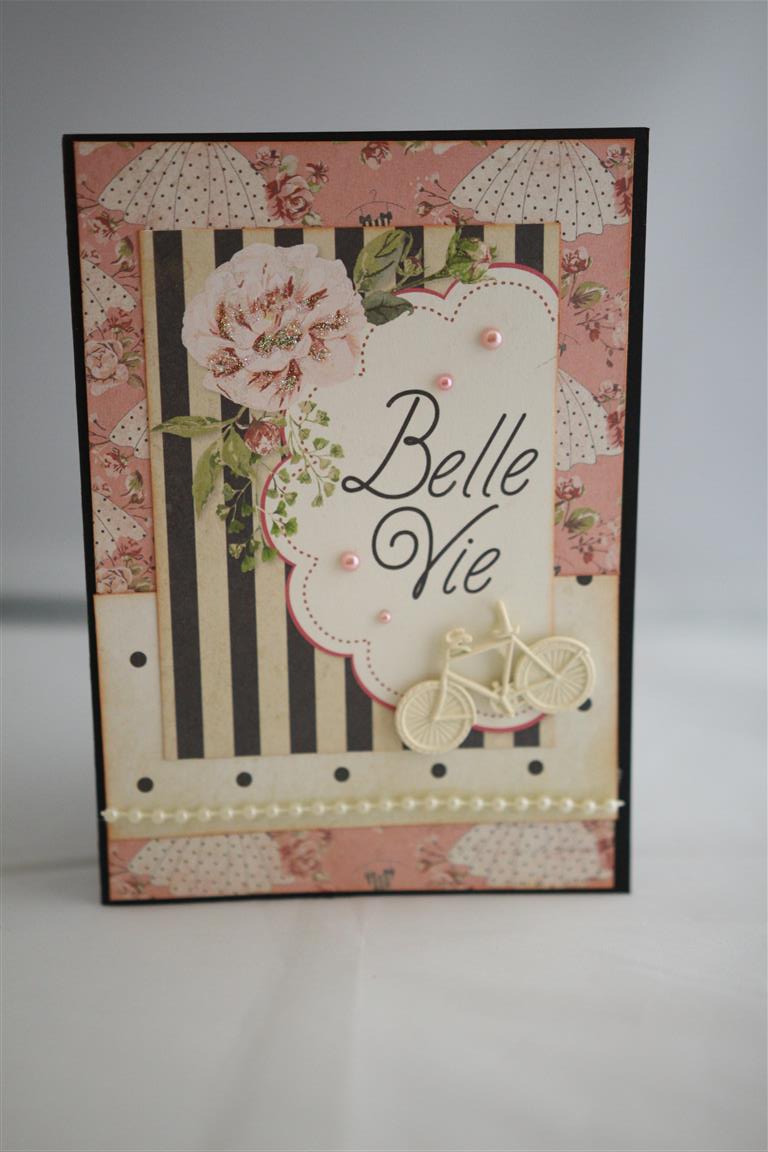
 Here are the last three cards I made with my 2 pieces of Julie Nutting Belle Vie paper.The bottom card ( which I have accidentally posted twice!)has a little fussy cutting on it and a metal charm as well,the second card has a paper bow made from a punch I bought from stampin up, and the top card has a little bicycle charm. I loved making this card series as I got to dig through forgotten boxes of bits and pieces to decorate them!I have a new plan – put one of those forgotten boxes on my desk and use them up that way!I have been busy today in the craft room fulfilling 3 orders, and working on a class which is coming together beautifully..til tomorrow…..
Kaisercraft True Romance
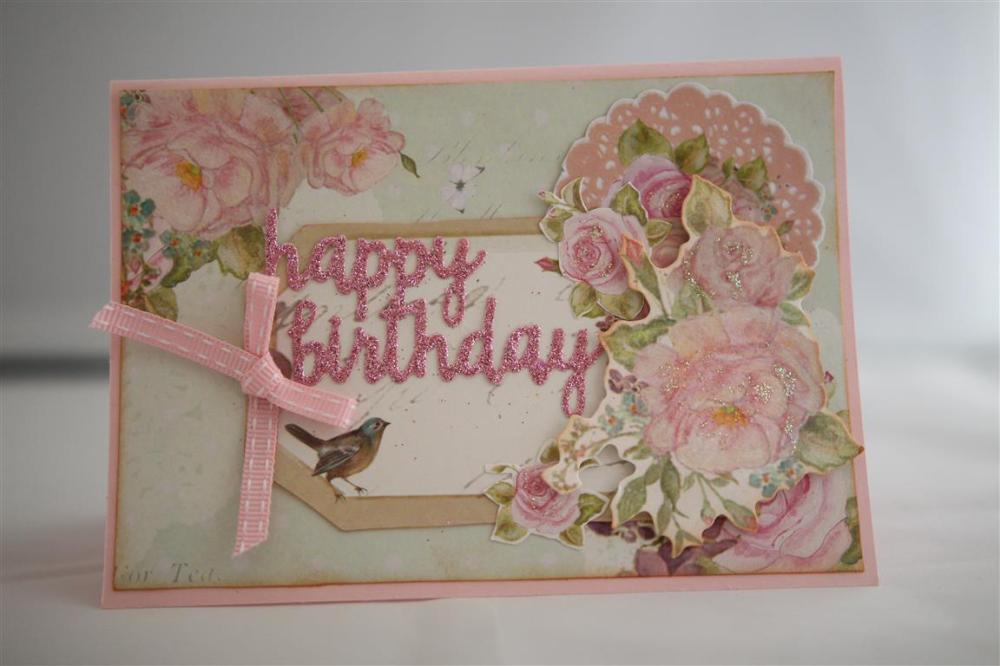 This is the last Kaisercraft True romance for a little while, next in the queue are some Christmas cards made with some new release papers.This card still relies heavily on layers, and inking each piece with tea Dye ink.There is some fussy cutting as well as a collectable from the range.The sentiment was die cut with Kaisercraft occasions Dies on glitter cardstock..(Also from Kaisercraft).Kaisercrafts glitter cardstock from this year doesn’t shed its glitter..which is fantastic!I purposely trimmed the paper background so that the flowers were in opposite corners. Til tomorrow…
Purple day today!
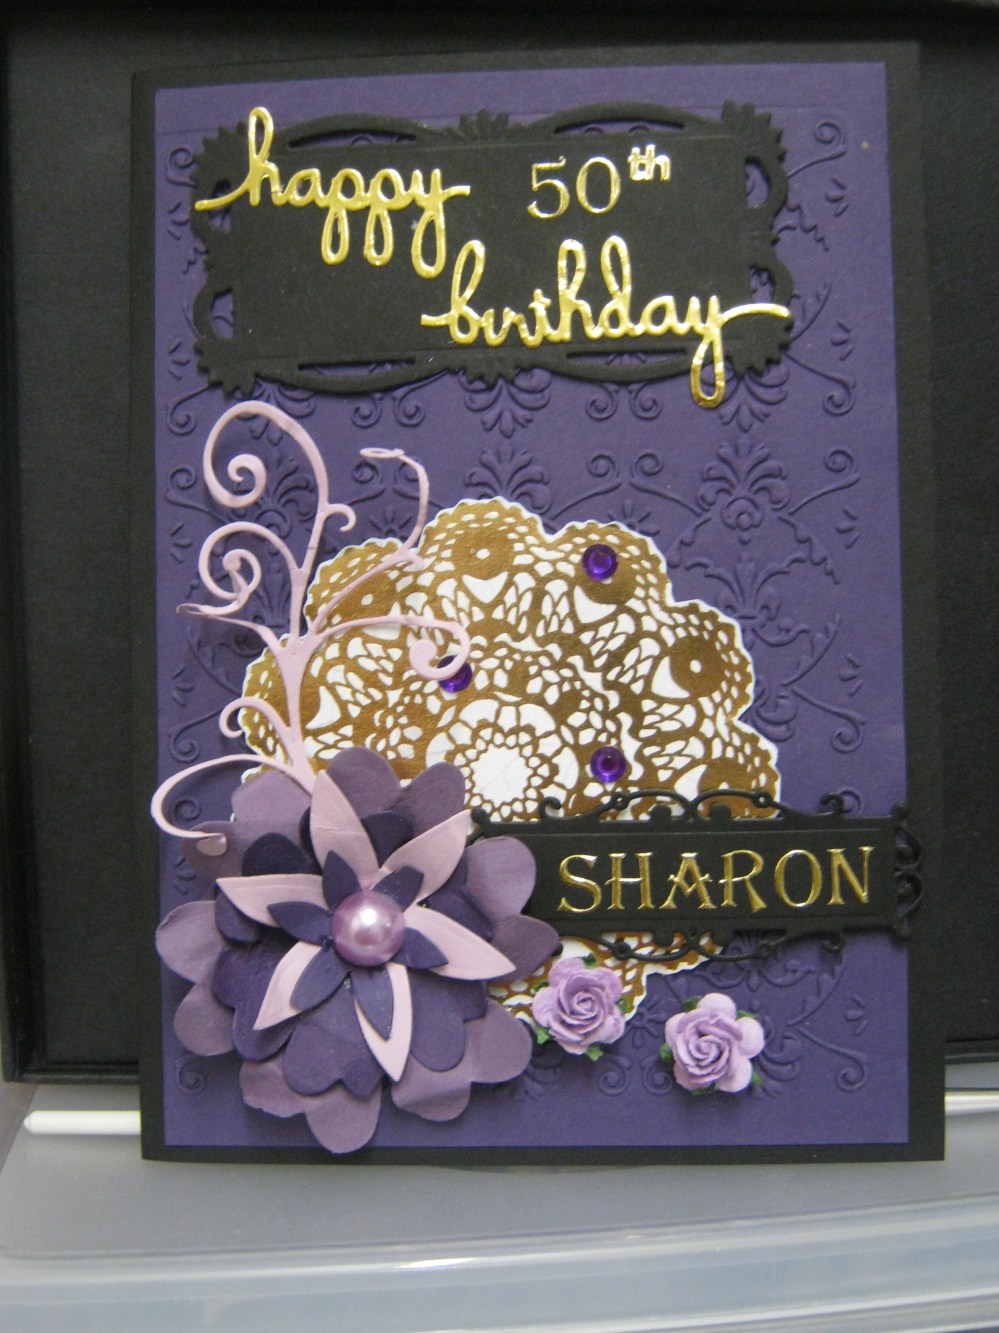 Recently I had an order for a purple birthday card, so I teamed it with black and gold , and got to work with the big shot and a variety of dies…kaisercraft layered flowers,magnolia flourish, and spellbinders for the sentiment and tags. The gold foiled doily was from a kaisercraft paper range,embossing folder was an older stampin up one, and the cardstock was also stampin up.I cheated and used gold letter stickers for the message.Til tomorrow….
Kaisercraft Mademoiselle
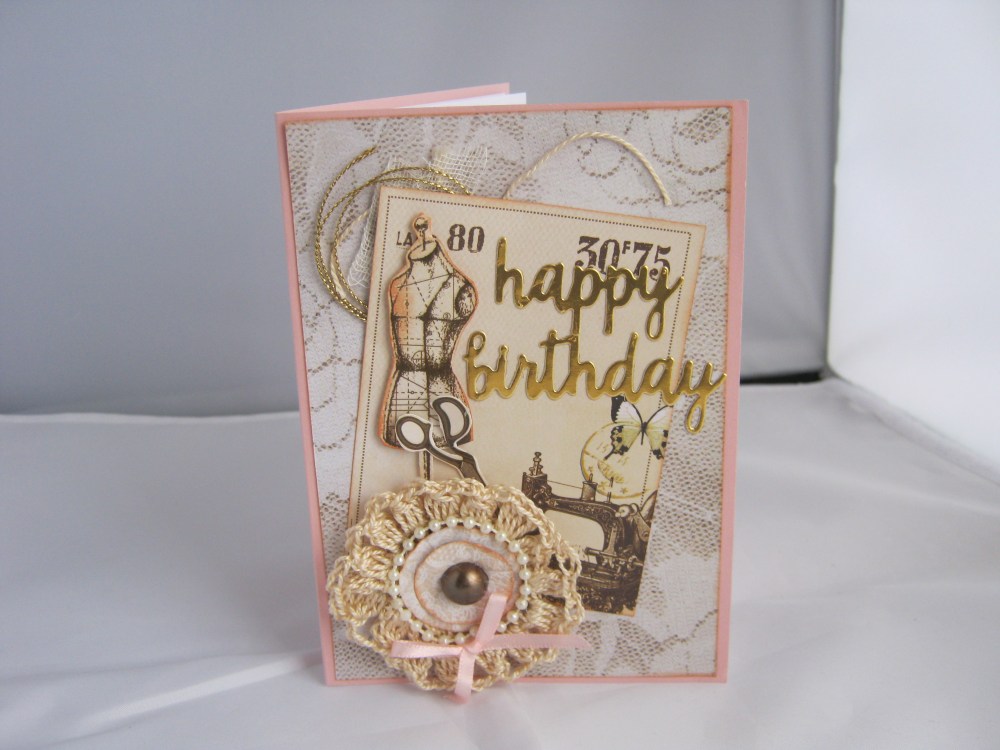 I found a Kaisercraft Mademoiselle card that I haven’t posted yet..I used 12 x 12 papers for this one, and some fussy cut pieces from more 12 x 12 paper. I used a kaisercraft occassions die to die cut the greeting in gold cardstock,added some gold thread behind, and hand crocheted a doily ( still practising !) and added some bead,and bling , ribbon bow , in the centre. The cardstock base is a piece of stampin up cardstock. Til tomorrow….
Back to the beginning….
 When I first started cardmaking I made 3D cards.This is before I discovered patterned paper! anyway, now and again I go back to my cardmaking roots and rediscover 3d sheets all over again. I love the act of sitting in front of the TV fussycutting the layers..the most relaxing thing ever,and it is always fun to try an old style with new tools such as the top card with the Kaisercraft Roses embossing folder and the bottom card with swipes of my clear wink of stella pen.I bought a few 3d sheets when I was at the craft fair for a very good price, so over the year you may see some more ideas from me as I create with them. Today i have plans to actually enjoy some quality time in the craft room – something that has been lacking in the past few weeks..til tomorrow….
Creating with Kays goodies..
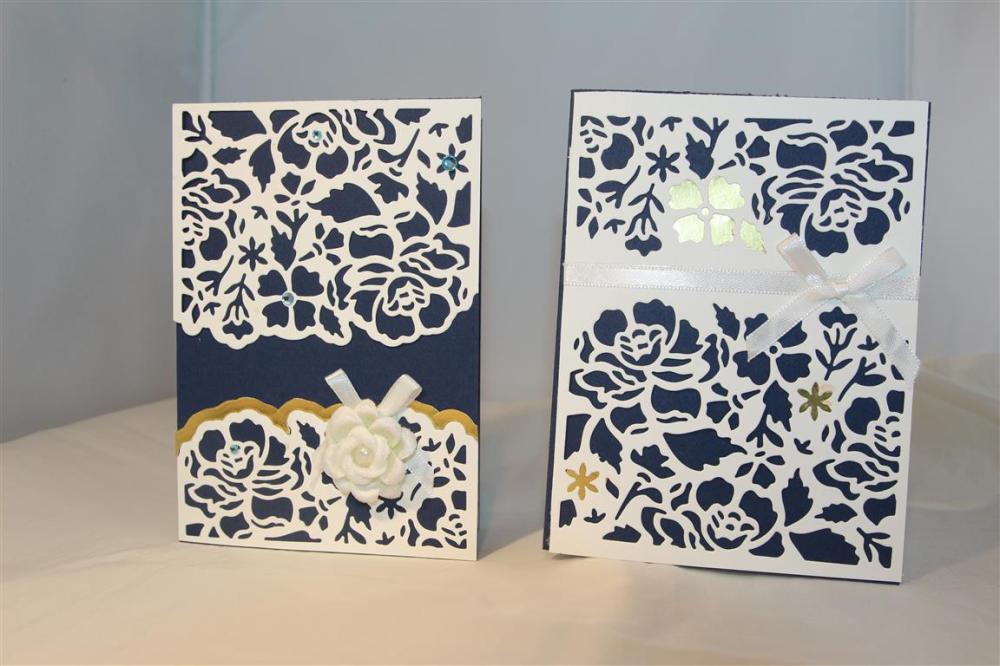 I always enjoy going over to my sister Kays craft room,because she has so much more goodies than I do! ( I know!!), and she often says play with this and see what you come up with. On this particular day it was a Stampin Up die called Detailed Floral thinlet,and these were two of my creations. I used Night of navy and whisper white cardstock, and popped some gold card behind some of the detail on the card on the right, and followed the shape of the die cut on the card on the left for a bit of a border effect, white ribbon,touch of bling and a rose flower to finish off these rather elegant cards! Today I have been over at mums showing Mum and Kay how to watercolour with inks..this was necessary beacause Kay will be accompanying me on my cruise,and I am relying on her to help me teach my classes so she must know what we are doing!Anyway we had great fun,and now I am looking forward to spending an hour or so in the craft room after tea where I have a couple of orders to put together…til tomorrow….
